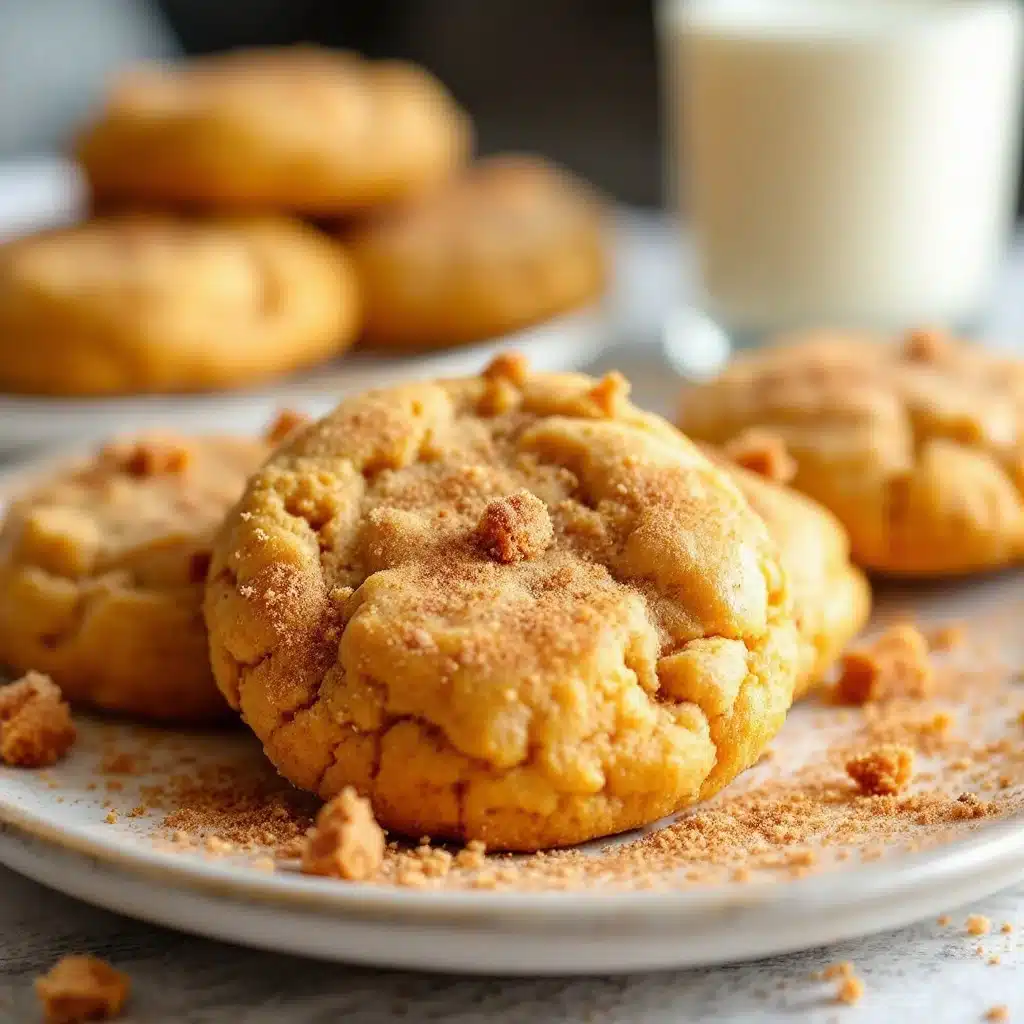
“These taste like fall in a single bite—what did you put in them?” My neighbor Cheryl said that through a mouthful of cookie, and honestly, I haven’t thought about pumpkin cookies the same way since. She wasn’t trying to be nice; she was genuinely confused about how a cookie could be this soft, this spiced, and this perfectly coated in cinnamon sugar without being cakey or dry. I just shrugged and said it was a little bit of pumpkin magic and a whole lot of trial and error.
But here’s the thing—it wasn’t always magic. My first batch came out of the oven looking like sad, flat discs that tasted more like pumpkin pie filling than a snickerdoodle. They were dense, they stuck to the pan, and they definitely didn’t have that signature crackly cinnamon sugar top. I almost gave up. But then I remembered why I started this whole recipe development thing in the first place: to make treats that feel special but don’t require a culinary degree.
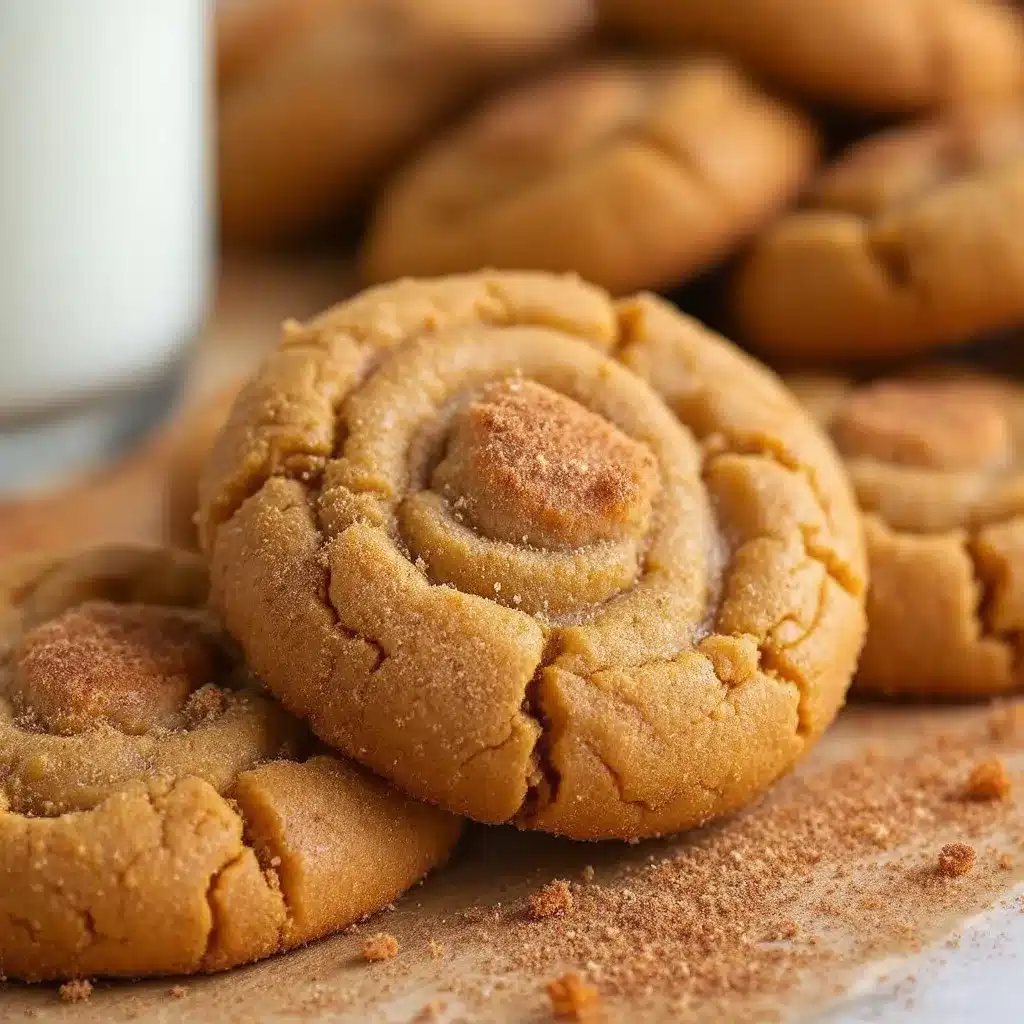
These Soft Baked Pumpkin Snickerdoodle Cookies with Cinnamon Sugar are the result of seven different test batches, countless sticky fingers, and one very patient family who didn’t mind being taste-testers. They’re not your average pumpkin cookie—they’re pillowy, almost cloud-like on the inside, with that classic snickerdoodle tang from the cream of tartar and a generous roll in cinnamon sugar that gives them that perfect crackled top. The pumpkin keeps them incredibly moist without making them taste like a muffin masquerading as a cookie.
I think what I love most about this recipe is that it doesn’t try to be anything it’s not. It’s not a healthy cookie, it’s not a low-carb cookie, and it’s definitely not one of those “you can’t tell it’s pumpkin” recipes. It’s proudly, unapologetically a soft, spiced, sugar-coated fall treat that makes your kitchen smell like a candle shop exploded (in the best way). And honestly? That’s exactly what I want in a cookie this time of year.
Why You’ll Love This Recipe
I’ve tested this recipe more times than I care to admit, and here’s what I’ve learned: not all pumpkin cookies are created equal. Some come out too cakey, some are flat as pancakes, and some just don’t have that snickerdoodle soul. This one hits all the right notes.
- Quick & Easy: From start to finish, these cookies are ready in about 25 minutes. No chilling required—just mix, roll, bake, and devour. Perfect for those “I need something sweet right now” moments.
- Simple Ingredients: You probably already have most of these in your pantry. Pumpkin puree, butter, sugar, flour, and spices—nothing fancy, nothing hard to find. I promise no trips to three different grocery stores.
- Perfect for Fall Gatherings: Whether it’s a Halloween party, Thanksgiving dessert table, or just a cozy Sunday afternoon, these cookies fit right in. They’re the kind of treat that disappears before the coffee’s even finished brewing.
- Crowd-Pleaser: Kids love the cinnamon sugar coating, adults love the soft texture, and everyone loves that they’re not too sweet. I’ve watched people eat three in a row without blinking.
- Unbelievably Delicious: The texture is what gets people. It’s soft without being doughy, tender without being fragile, and the cinnamon sugar crust gives just enough crunch to keep things interesting.
What sets this recipe apart is the technique. Most pumpkin cookie recipes end up tasting like little pumpkin breads—and don’t get me wrong, I love pumpkin bread—but these are different. The cream of tartar gives them that classic snickerdoodle tang, while the pumpkin puree keeps them incredibly moist. I also use a combination of butter and a touch of oil to get that perfect tender crumb. It’s not just another version of a pumpkin cookie; it’s the version I’d serve to anyone who says they don’t like pumpkin desserts.
These cookies are the kind that make you close your eyes after the first bite. They’re comfort food reimagined—faster than a pie, easier than a cake, and with the same soul-soothing satisfaction that only a good fall treat can bring. Perfect for impressing guests without stress, or turning a simple afternoon into something memorable.
What Ingredients You Will Need
This recipe uses simple, wholesome ingredients to deliver that perfect soft texture and bold fall flavor. Most of these are pantry staples, which means you can whip up a batch whenever the craving hits.
For the Cookies
- 1 ¾ cups (220g) all-purpose flour – Spoon and level for accuracy; too much flour makes dry cookies
- 1 teaspoon cream of tartar – This is the secret to that classic snickerdoodle tang and soft texture (don’t skip it!)
- ½ teaspoon baking soda – Helps the cookies spread just enough
- ½ teaspoon baking powder – Gives them a little lift without making them cakey
- 1 teaspoon ground cinnamon – For warmth and that fall flavor
- ½ teaspoon ground nutmeg – Freshly grated if you have it, but pre-ground works great
- ¼ teaspoon ground ginger – Adds a subtle kick that makes the pumpkin shine
- ¼ teaspoon ground cloves – Optional but recommended for depth
- ½ teaspoon salt – Balances the sweetness and enhances the spices
- ½ cup (113g) unsalted butter – Softened to room temperature (not melted!)
- ¼ cup (50g) granulated sugar – For sweetness and structure
- ½ cup (100g) packed light brown sugar – Adds moisture and a hint of molasses flavor
- 1 large egg yolk – Just the yolk, not the whole egg—this keeps them tender
- ½ cup (120g) pumpkin puree – Make sure it’s 100% pumpkin, not pumpkin pie filling (I prefer Libby’s for consistent results)
- 1 teaspoon vanilla extract – Pure, not imitation, if you can swing it
- 2 tablespoons vegetable oil – This is my trick for extra-soft cookies that stay moist for days
For the Cinnamon Sugar Coating
- ¼ cup (50g) granulated sugar
- 1 tablespoon ground cinnamon
Ingredient Tips: I’ve tested this with both canned and homemade pumpkin puree, and canned actually works better here. Homemade puree tends to be more watery, which can throw off the texture. If you’re using homemade, try draining it through a cheesecloth or paper towel for about 30 minutes first. For the butter, I recommend a good quality unsalted brand like Kerrygold or Land O’Lakes—it really does make a difference in flavor. And if you don’t have cream of tartar, you can substitute with 1 teaspoon of lemon juice or white vinegar, but honestly, the texture won’t be quite the same. I always keep cream of tartar on hand just for these cookies.
Equipment Needed
You don’t need a fancy bakery setup for these cookies, which is part of what makes them so great. Here’s what you’ll need:
- Large mixing bowl – Any bowl will do, but a wide one makes mixing easier
- Medium mixing bowl – For combining dry ingredients
- Electric hand mixer or stand mixer – You can do this by hand, but a mixer makes creaming the butter and sugar much easier (and faster)
- Rubber spatula – For scraping down the sides and folding in the flour
- Measuring cups and spoons – Accuracy matters, especially with flour
- Kitchen scale (optional but recommended) – Weighing ingredients gives the most consistent results
- Baking sheets – I use light-colored aluminum sheets; dark ones can cause over-browning
- Parchment paper or silicone baking mat – Non-stick is essential for these soft cookies
- Cooling rack – Lets the cookies cool evenly without getting soggy bottoms
- Small shallow bowl – For the cinnamon sugar coating
- Cookie scoop (1.5 tablespoon size) – Ensures evenly sized cookies that bake uniformly
I’ve made these cookies with a $10 hand mixer from the grocery store and they turned out perfectly. No need for a stand mixer if you don’t have one—just a little elbow grease. If you don’t have a cookie scoop, you can use two spoons, but the scoop really does give you more even results. And please don’t skip the parchment paper. I learned that lesson the hard way when my first batch stuck to the pan like glue. A silicone baking mat is even better if you have one.
Preparation Method
Let me walk you through this step by step. I’ve included all the little details I wish someone had told me when I first started making these.
Step 1: Preheat and Prep
Preheat your oven to 350°F (175°C). Line two baking sheets with parchment paper or silicone mats. This is non-negotiable—these cookies are soft and will stick to unlined pans. While the oven heats, grab your ingredients and let that butter come to room temperature if you haven’t already. Cold butter won’t cream properly and will give you dense cookies.
Step 2: Mix the Dry Ingredients
In a medium bowl, whisk together the flour, cream of tartar, baking soda, baking powder, cinnamon, nutmeg, ginger, cloves, and salt. Whisking aerates the flour and ensures the leaveners are evenly distributed. Set this aside. I like to give it an extra whisk right before I add it to the wet ingredients, just in case anything settled.
Step 3: Make the Cinnamon Sugar Coating
In a small shallow bowl, mix the ¼ cup granulated sugar with 1 tablespoon cinnamon. Set aside. You’ll use this for rolling the dough balls right before baking. Make sure it’s well combined—I use a fork to break up any clumps.
Step 4: Cream the Butter and Sugars
In a large bowl, beat the softened butter, granulated sugar, and brown sugar together with an electric mixer on medium speed until light and fluffy, about 2-3 minutes. Scrape down the sides and bottom of the bowl with a rubber spatula. You’re looking for a pale, creamy mixture that looks almost like frosting. This step is crucial—proper creaming incorporates air that helps the cookies rise just a bit.
Step 5: Add the Wet Ingredients
Add the egg yolk, pumpkin puree, vanilla extract, and vegetable oil to the butter mixture. Beat on low speed until just combined. The mixture will look a little curdled or separated at this point—that’s totally normal. Don’t overmix. Scrape down the bowl again. I once made the mistake of adding the whole egg instead of just the yolk, and the cookies came out more like cake. Stick with just the yolk for that soft, tender texture.
Step 6: Combine Wet and Dry
Add the dry ingredients to the wet mixture in two additions, mixing on low speed after each until just incorporated. You want to see a few streaks of flour remaining—then finish mixing by hand with a rubber spatula. Overmixing at this stage will develop gluten and make the cookies tough. The dough will be soft and slightly sticky, almost like a thick batter. Don’t worry, that’s exactly how it should look.
Step 7: Scoop and Roll
Using a 1.5-tablespoon cookie scoop (or two spoons), scoop the dough into balls. They should be about 1.5 inches in diameter. Drop each dough ball into the cinnamon sugar mixture and roll to coat generously. Place them on the prepared baking sheets, spacing them about 2 inches apart. The dough will be soft, so handle it gently. I usually get about 18-20 cookies from this recipe.
Step 8: Bake
Bake one sheet at a time in the preheated oven for 10-12 minutes. The cookies should look puffed, slightly cracked on top, and the edges should be set but the centers will still look soft and slightly underdone. That’s what you want! They’ll continue to set as they cool. For softer cookies, bake closer to 10 minutes; for slightly firmer cookies, go with 12. I usually check mine at 10 minutes and go from there.
Step 9: Cool
Let the cookies cool on the baking sheet for 5 minutes. This is important—they’re too soft to move right away. After 5 minutes, transfer them to a wire cooling rack to cool completely. The centers will sink slightly and develop that beautiful crinkly top. If you try to move them too soon, they’ll fall apart. Trust me, I’ve lost a few cookies to impatience.
Cooking Tips & Techniques
After making these cookies more times than I can count, here are the things I wish I’d known from the start:
Don’t overmix the dough. I cannot stress this enough. The more you mix, the more gluten develops, and the tougher your cookies will be. Mix until the flour just disappears, then stop. A few streaks of flour are better than overmixed dough.
Use room temperature ingredients. Cold butter won’t cream properly, and cold pumpkin puree can cause the butter to seize up. Let everything sit out for about 30 minutes before you start. Your cookies will thank you.
Measure your flour correctly. The number one mistake people make with these cookies is using too much flour. Spoon the flour into your measuring cup and level it off with a knife. Don’t scoop directly from the bag—that packs the flour and gives you way more than you need. If you have a kitchen scale, use it. 220 grams is the sweet spot.
Don’t skip the cream of tartar. I know it’s a weird ingredient that most people don’t have on hand, but it’s what gives snickerdoodles their signature tang and soft texture. Without it, these are just pumpkin sugar cookies. Still good, but not the same.
Bake one sheet at a time. Your oven needs airflow to bake evenly, and two sheets at once can cause uneven baking. If you’re in a hurry, you can try it, but rotate the sheets halfway through and expect slightly different results on each tray.
Let them cool properly. Those 5 minutes on the baking sheet are crucial. The cookies are still setting up, and moving them too soon will ruin their texture. I learned this the hard way when I tried to transfer a batch immediately and ended up with a pile of pumpkin crumbs.
Use parchment paper, not cooking spray. Cooking spray can cause the cookies to spread too much and get greasy on the bottom. Parchment paper or a silicone mat gives you the best results every time.
Variations & Adaptations
One of the best things about this recipe is how adaptable it is. Here are some variations I’ve tried and loved:
Gluten-Free Version: Substitute the all-purpose flour with a 1:1 gluten-free baking blend (I like Bob’s Red Mill). The texture will be slightly more delicate, so handle the dough gently. Add an extra tablespoon of flour if the dough seems too sticky.
Dairy-Free Version: Use vegan butter (I recommend Earth Balance) in place of regular butter. The cookies will spread a bit more, so chill the dough for 15 minutes before baking. They’re still incredibly soft and delicious.
Pumpkin Spice Lovers: Add an extra ½ teaspoon of pumpkin pie spice to the dry ingredients and mix a pinch of nutmeg into the cinnamon sugar coating. It’s like a pumpkin spice latte in cookie form.
Chocolate Chip Addition: Fold in ½ cup of white chocolate chips or semi-sweet chocolate chips after mixing the dough. The chocolate adds a nice contrast to the warm spices. I’ve done this for holiday parties and they disappear fast.
Maple Glaze: Drizzle the cooled cookies with a simple glaze made from 1 cup powdered sugar, 2 tablespoons maple syrup, and 1 tablespoon milk. It takes them from delicious to absolutely decadent.
Spiced Sugar Coating: Add a pinch of nutmeg, ginger, and cardamom to the cinnamon sugar mixture for a more complex flavor profile. This is my personal favorite variation for Thanksgiving.
Serving & Storage Suggestions
These cookies are best served slightly warm, when the centers are still soft and the cinnamon sugar coating is perfectly crunchy. I like to pop them in the microwave for about 10 seconds if they’ve been sitting out for a while.
For serving, I love pairing them with a hot cup of chai tea, a pumpkin spice latte, or even a cold glass of milk. They’re also fantastic crumbled over vanilla ice cream for an easy fall dessert. If you’re hosting a gathering, arrange them on a rustic wooden board with some apple slices and a small bowl of caramel sauce for dipping.
Storage: Store these cookies in an airtight container at room temperature for up to 5 days. I like to put a slice of bread in the container—it absorbs excess moisture and keeps the cookies soft. Change the bread every couple of days if you’re storing them for longer.
Freezing: These cookies freeze beautifully. You can freeze the baked cookies in a single layer on a baking sheet, then transfer them to a freezer bag for up to 3 months. Thaw at room temperature for about 30 minutes. You can also freeze the unbaked dough balls—just roll them in cinnamon sugar, place them on a baking sheet, freeze until solid, then transfer to a freezer bag. Bake from frozen, adding 2-3 minutes to the baking time.
The flavors actually develop and deepen over time. I think these cookies taste even better on day two, when the spices have had time to meld together. Just make sure they’re stored properly so they don’t dry out.
Nutritional Information & Benefits
Let’s be real—these are cookies, not health food. But they do have some redeeming qualities. Here’s the estimated nutritional breakdown per cookie (based on 20 cookies):
- Calories: 145
- Total Fat: 7g
- Saturated Fat: 4g
- Cholesterol: 25mg
- Sodium: 95mg
- Total Carbohydrates: 20g
- Dietary Fiber: 1g
- Sugars: 12g
- Protein: 2g
Pumpkin is actually a nutritional powerhouse—it’s packed with vitamin A, fiber, and antioxidants. It’s also naturally low in calories and fat, which means these cookies aren’t as indulgent as they taste. The cinnamon and other spices have anti-inflammatory properties and can help regulate blood sugar. Of course, the butter and sugar balance out the health benefits, but hey, it’s a cookie. Everything in moderation, right?
These cookies are vegetarian and can easily be made gluten-free or dairy-free with the substitutions mentioned above. They contain wheat, dairy, and eggs, so keep that in mind if you’re baking for someone with allergies.
Conclusion
These Soft Baked Pumpkin Snickerdoodle Cookies with Cinnamon Sugar have become my go-to fall treat for a reason. They’re simple enough for a Tuesday afternoon baking session but special enough for holiday gatherings. The combination of warm pumpkin spices, that classic snickerdoodle tang, and the crunchy cinnamon sugar coating is just unbeatable.
I love that this recipe doesn’t require any fancy techniques or hard-to-find ingredients. It’s just good, honest baking that makes your kitchen smell amazing and your family happy. Whether you’re a seasoned baker or someone who’s never made cookies from scratch before, I promise you can nail these.
If you love this recipe, you might also enjoy my No-Bake Pumpkin Cheesecake for another easy fall dessert, or try my Sweet Potato Pie for a classic holiday staple. And if you’re in the mood for more cookies, my Thumbprint Cookies with Jam are always a hit.
I’d love to hear how these turn out for you! Drop a comment below and let me know if you tried any variations, or tag me in your photos on social media. Happy baking, friends—and may your kitchen always smell like cinnamon and pumpkin.
Frequently Asked Questions
Can I use pumpkin pie filling instead of pumpkin puree?
No, please don’t! Pumpkin pie filling is pre-sweetened and spiced, which will throw off the sugar and spice balance in this recipe. Stick with 100% pure pumpkin puree for the best results. If you accidentally buy pie filling, you can still use it, but reduce the sugar by about half and skip the added spices.
Why are my cookies flat and spreading too much?
This usually happens for a few reasons: your butter was too soft or melted, you didn’t measure the flour correctly (too little flour), or your baking sheet was too warm when you put the dough on it. Make sure your butter is softened but not melted, measure your flour by spooning and leveling, and let your baking sheet cool between batches.
Can I make the dough ahead of time?
Absolutely! You can refrigerate the dough for up to 3 days. Just scoop it into balls, roll in cinnamon sugar, and bake straight from the fridge—you might need to add 1-2 minutes to the baking time. The dough can also be frozen for up to 3 months.
Do I really need cream of tartar?
Yes, if you want that classic snickerdoodle flavor and texture. Cream of tartar gives the cookies a subtle tanginess and helps activate the baking soda for a softer texture. If you absolutely don’t have it, you can substitute with 1 teaspoon of lemon juice or white vinegar, but the cookies won’t have quite the same signature flavor.
How do I know when the cookies are done baking?
Look for puffed cookies with cracked tops and set edges. The centers should still look soft and slightly underdone—they’ll continue to set as they cool on the baking sheet. If the edges are brown, you’ve baked them too long. For soft cookies, aim for 10-11 minutes; for slightly firmer cookies, go with 12 minutes.
Pin This Recipe!
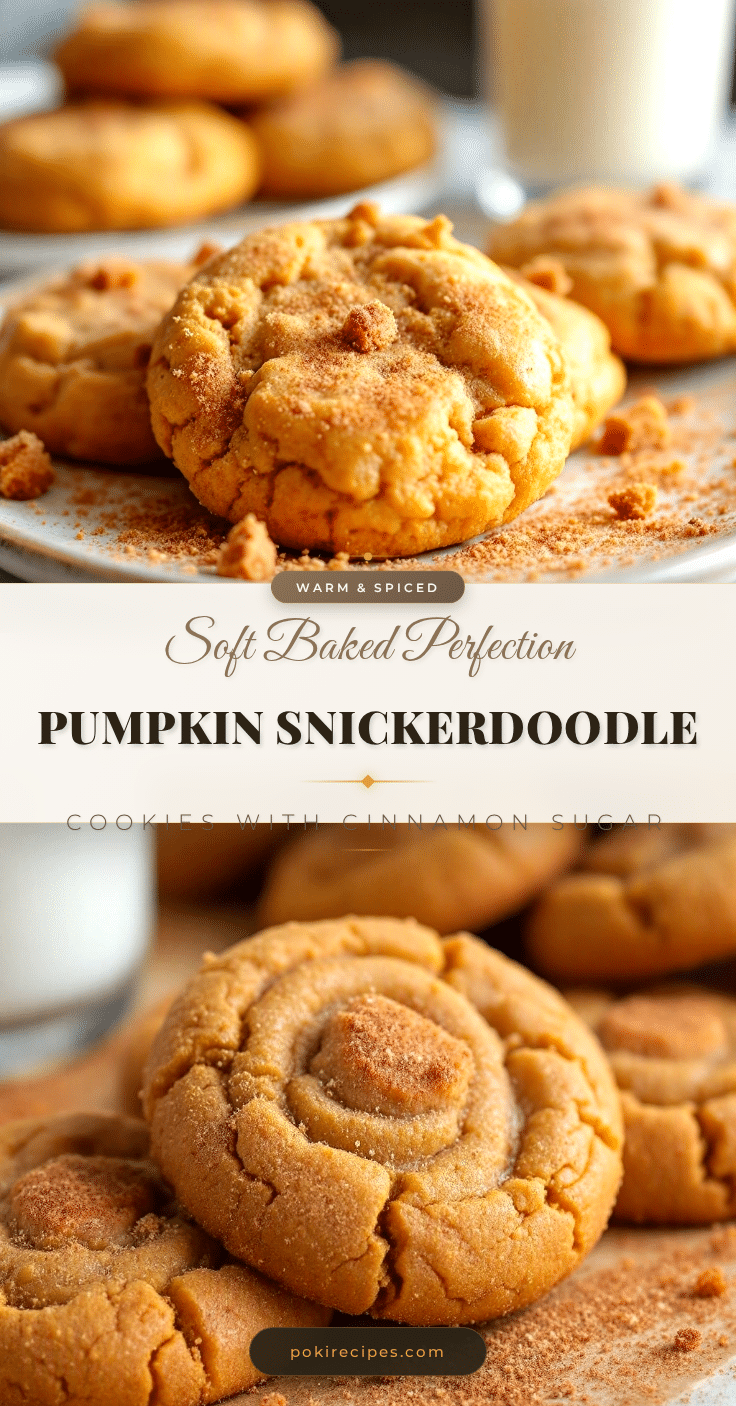
Soft Baked Pumpkin Snickerdoodle Cookies: Easy Fall Recipe

These Soft Baked Pumpkin Snickerdoodle Cookies are pillowy, cloud-like on the inside with a classic snickerdoodle tang from cream of tartar and a generous roll in cinnamon sugar that gives them a perfect crackled top. They’re the ultimate fall treat that makes your kitchen smell amazing.
- Prep Time: 15 minutes
- Cook Time: 12 minutes
- Total Time: 27 minutes
- Yield: 20 cookies 1x
- Category: Dessert
- Cuisine: American
Ingredients
- 1 ¾ cups (220g) all-purpose flour
- 1 teaspoon cream of tartar
- ½ teaspoon baking soda
- ½ teaspoon baking powder
- 1 teaspoon ground cinnamon
- ½ teaspoon ground nutmeg
- ¼ teaspoon ground ginger
- ¼ teaspoon ground cloves
- ½ teaspoon salt
- ½ cup (113g) unsalted butter, softened
- ¼ cup (50g) granulated sugar
- ½ cup (100g) packed light brown sugar
- 1 large egg yolk
- ½ cup (120g) pumpkin puree (100% pumpkin, not pie filling)
- 1 teaspoon vanilla extract
- 2 tablespoons vegetable oil
- ¼ cup (50g) granulated sugar (for coating)
- 1 tablespoon ground cinnamon (for coating)
Instructions
- Preheat oven to 350°F (175°C). Line two baking sheets with parchment paper or silicone mats.
- In a medium bowl, whisk together flour, cream of tartar, baking soda, baking powder, cinnamon, nutmeg, ginger, cloves, and salt. Set aside.
- In a small shallow bowl, mix ¼ cup granulated sugar with 1 tablespoon cinnamon for the coating. Set aside.
- In a large bowl, beat softened butter, ¼ cup granulated sugar, and brown sugar with an electric mixer on medium speed until light and fluffy, about 2-3 minutes. Scrape down sides.
- Add egg yolk, pumpkin puree, vanilla extract, and vegetable oil. Beat on low speed until just combined. Mixture may look curdled; that’s normal. Scrape down bowl.
- Add dry ingredients in two additions, mixing on low speed after each until just incorporated. Finish mixing by hand with a rubber spatula. Dough will be soft and slightly sticky.
- Using a 1.5-tablespoon cookie scoop, scoop dough into balls (about 1.5 inches in diameter). Roll each ball in cinnamon sugar mixture to coat generously. Place on prepared baking sheets, spacing 2 inches apart.
- Bake one sheet at a time for 10-12 minutes. Cookies should look puffed, slightly cracked on top, with edges set but centers still soft.
- Let cookies cool on baking sheet for 5 minutes, then transfer to a wire cooling rack to cool completely.
Notes
Don’t overmix the dough. Use room temperature ingredients. Measure flour correctly by spooning and leveling. Don’t skip the cream of tartar. Bake one sheet at a time. Let cookies cool properly on the baking sheet for 5 minutes. Use parchment paper, not cooking spray.
Nutrition
- Serving Size: 1 cookie
- Calories: 145
- Sugar: 12
- Sodium: 95
- Fat: 7
- Saturated Fat: 4
- Carbohydrates: 20
- Fiber: 1
- Protein: 2
Keywords: pumpkin snickerdoodle cookies, soft baked pumpkin cookies, fall cookies, cinnamon sugar cookies, easy pumpkin recipe