For a while, I just accepted that game day snacks meant a sad spread of store-bought dips, a bag of tortilla chips that was half crumbs by halftime, and maybe some wings that took over the oven for an hour. It worked, sure, but it never felt like an event. You’d spend the whole first quarter running back and forth to the kitchen, and by the time the food was actually ready, everyone had already filled up on whatever was within arm’s reach. There had to be a better way to feed a crowd without turning the whole afternoon into a cooking marathon.
The idea for a loaded football charcuterie board hit me during a particularly chaotic playoff game a few years back. I was tired of missing the big plays because I was stuck plating things. So I started thinking about what if I just put everything on one giant board? Not just cheese and crackers, but the full game day experience. Meats, cheeses, dips, crunchy things, salty things, maybe even something sweet. All of it, laid out in a way that looked impressive but took almost no last-minute effort. Honestly, the first version was a little messy—I used a cutting board that was way too small and everything kept sliding off. But the concept worked. People grazed all game, I actually got to sit down, and the cleanup was almost nothing.
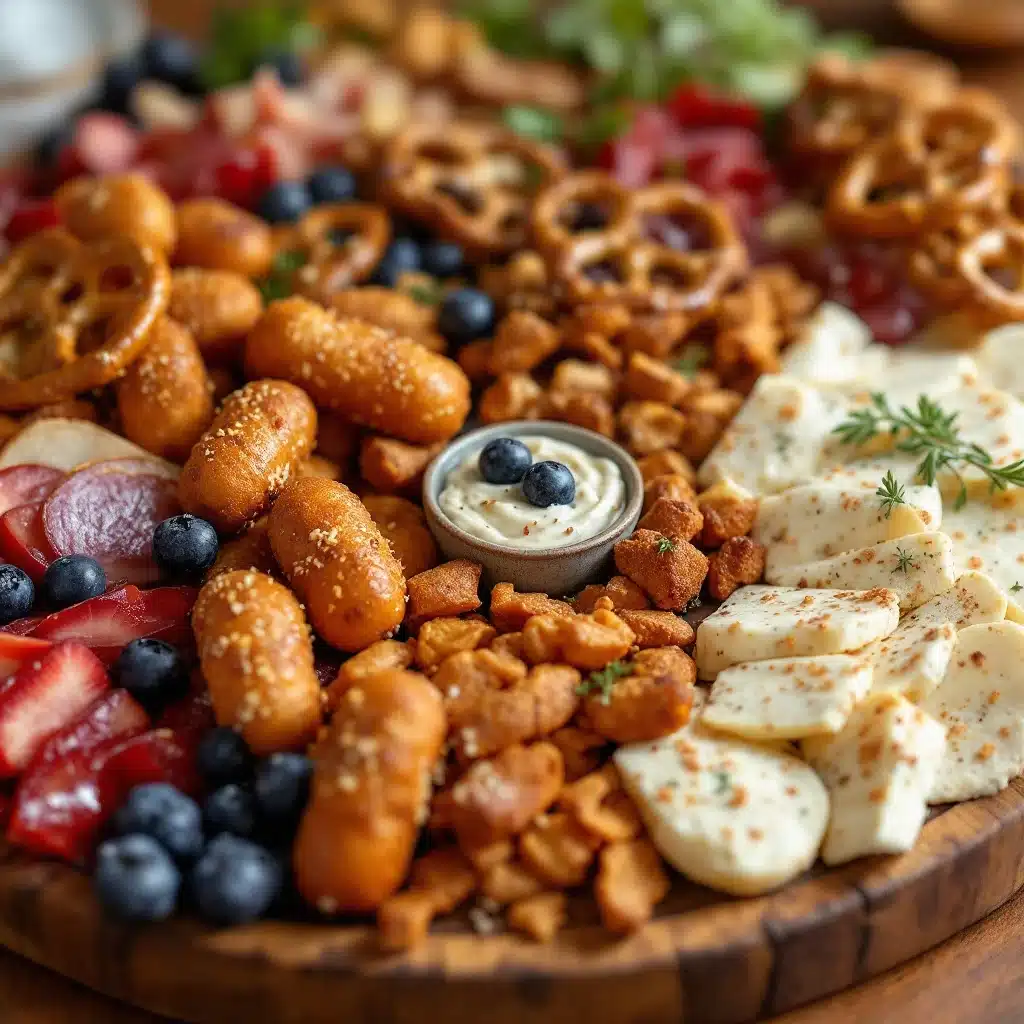
This Perfect Game Day Loaded Football Charcuterie Board is the refined version of that first messy attempt. It’s designed to feed a hungry crowd, look like you spent hours on it, and come together in about 30 minutes of active time. No one will ever guess you basically just arranged things beautifully. And that’s the secret—it’s more about smart shopping and clever arranging than actual cooking. Once you see how easy it is, you’ll wonder why you ever did game day any other way.
Why You’ll Love This Recipe
This isn’t just another snack board. This is a touchdown of a spread that solves real game day problems. Here’s why it works so well:
- Comes Together in 30 Minutes : No complicated recipes, no multiple dishes in the oven. Just smart shopping and a little arranging. You’ll be done before the pre-game show ends.
- No Cooking Required : Seriously. The only “cooking” is maybe warming up a dip or two. This board is all about assembly, which means zero stress and zero kitchen mess.
- Feeds a Crowd Effortlessly : This board is designed to serve 8-10 people easily. It’s perfect for parties where everyone wants to eat at their own pace without formal plates or utensils.
- Endlessly Customizable : Don’t like salami? Swap it. Allergic to nuts? Leave them out. This board is a template, not a rigid recipe. You can make it your own every single time.
- Stunning Presentation with Zero Effort : The visual impact of a loaded charcuterie board is undeniable. It looks impressive, festive, and completely intentional. Your guests will think you hired a caterer.
- Perfect for Any Gathering : While it’s called a “football” board, this spread works for movie nights, birthday parties, holiday gatherings, or just a fancy Tuesday night dinner. It’s a crowd-pleaser in any setting.
What makes this board different from the typical cheese platter is the “loaded” aspect. We’re not just throwing some cubes of cheddar and a box of crackers on a plate. This board is a curated experience with multiple textures, flavors, and temperature contrasts. Think creamy dips next to crunchy crackers, salty cured meats next to sweet fruit, and tangy pickles cutting through rich cheese. Every bite can be different. It’s the kind of spread that makes people stand around it, chatting and eating, for the entire game. And honestly, that’s the best kind of party food—the kind that brings people together.
What Ingredients You Will Need
This board is built on a simple framework of components. The beauty is that you can mix and match based on what you like and what’s available. Here’s the breakdown of what I used for my perfect loaded football charcuterie board:
The Meats (The Heavy Hitters)
- 8 oz thinly sliced prosciutto (I like the salty, delicate texture)
- 8 oz thinly sliced Genoa salami (the classic, always a hit)
- 6 oz soppressata or spicy capicola (for a little heat)
- 6 oz sliced pepperoni (non-negotiable for a football board, in my opinion)
The Cheeses (The Foundation)
- 8 oz sharp cheddar, cut into cubes and thin slices (a familiar, reliable choice)
- 8 oz aged gouda or manchego, sliced (adds a nutty, sophisticated note)
- 6 oz soft goat cheese log or brie (for a creamy, spreadable element)
- 4 oz blue cheese crumbles (for the bold, tangy contrast)
The Dips & Spreads (The MVP)
- 1 cup your favorite salsa (chunky or smooth, your call)
- 1 cup queso dip (I use a store-bought one I love, or you can make a quick dump-style queso in the slow cooker)
- 1/2 cup honey (for drizzling over the goat cheese or brie—trust me on this)
- 1/2 cup whole-grain mustard or Dijon (a sharp counterpoint to the rich meats)
The Crunchy & Salty Elements (The Snack Factor)
- 1 box (about 10 oz) good-quality crackers (water crackers, buttery rounds, or seeded crackers all work)
- 1 bag (about 8 oz) sturdy tortilla chips (for the queso and salsa)
- 1 cup mixed olives (green and kalamata, drained)
- 1/2 cup cornichons or small pickles (for that acidic pop)
- 1/2 cup roasted, salted almonds or mixed nuts
The Fresh & Sweet Elements (The Balance)
- 1 cup red or green seedless grapes, washed and left in small clusters
- 1 large apple or pear, sliced thin (toss with a little lemon juice to prevent browning)
- 1/2 cup dried apricots or figs (adds a chewy sweetness)
- A few sprigs of fresh rosemary or thyme (for garnish, completely optional but pretty)
Ingredient Selection Tips: I always recommend buying good-quality cured meats from the deli counter rather than the pre-packaged stuff. The texture and flavor are noticeably better. For the cheese, don’t be afraid to ask for a sample at the cheese counter. For the dips, anything goes. I’ve used a creamy pesto as a dip before, and it was a huge hit. The key is variety—something creamy, something tangy, something spicy.
Equipment Needed
You don’t need anything fancy to build this board. Here’s what you’ll need:
- A Large Board or Platter : The bigger, the better. A wooden cutting board, a marble slab, a large baking sheet (flip it over for a clean look), or even a clean countertop covered in parchment paper will work. I use a 20×14 inch wooden board.
- Small Bowls and Ramekins : For the dips, olives, honey, and mustard. Use 4-6 small bowls in different sizes. This keeps the wet ingredients from making everything soggy.
- Cheese Knives : At least two small knives for spreading and slicing. A small spreader for the soft cheese and a paring knife for the hard cheese is perfect.
- Tongs or Small Spoons : For serving the olives, pickles, and nuts. This keeps things tidy.
- Parchment Paper (Optional) : If you’re worried about the board getting stained or you want super easy cleanup, line it with parchment paper first. It still looks rustic and nice.
Personal Note on Boards: I’ve used everything from a cheap cutting board from IKEA to a fancy slate board. Honestly, the best one is the biggest one you own. Don’t overthink it. A baking sheet lined with a clean kitchen towel works in a pinch. The food is the star, not the board.
Preparation Method
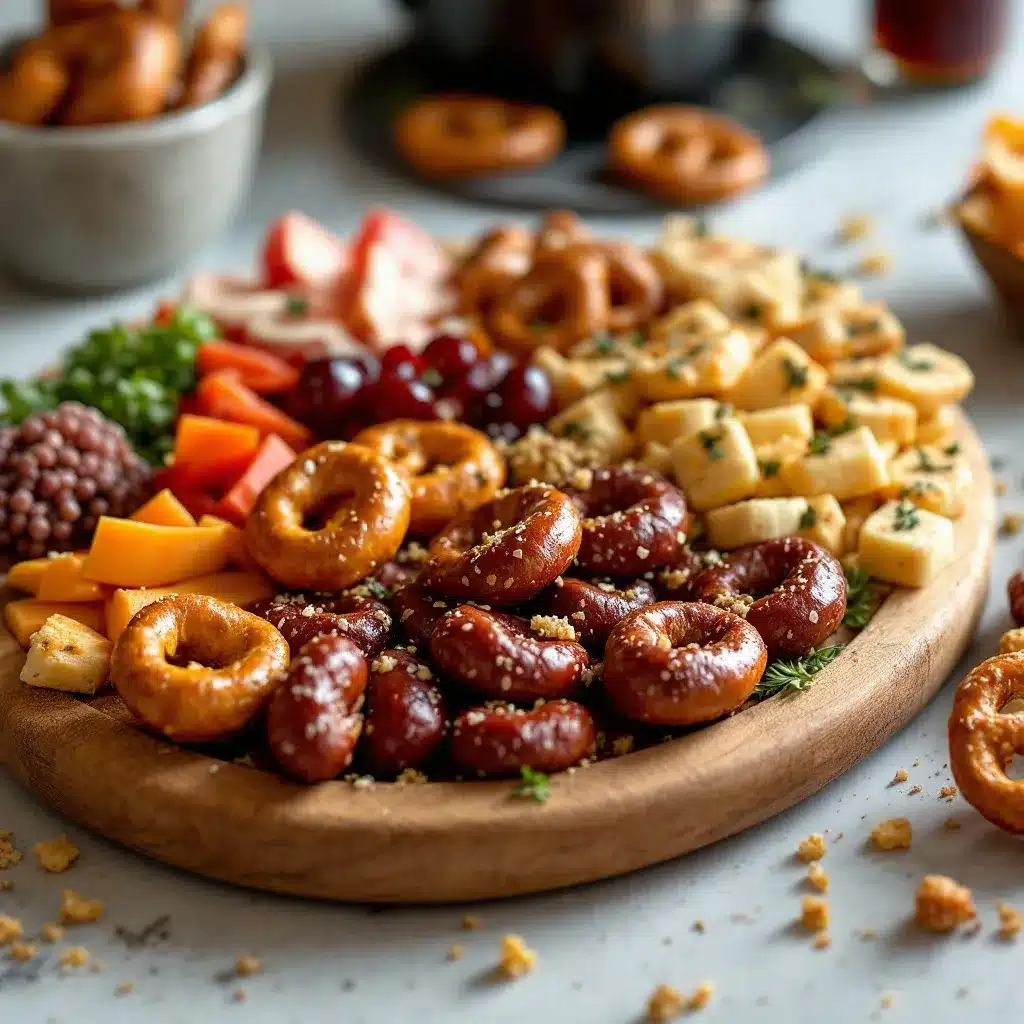
This is where the magic happens. The key to a beautiful board is layering and arranging with intention. Don’t just dump things on. Take your time. It will take about 15-20 minutes of actual work.
- Place Your Bowls First (The Anchor Points) : Put your small bowls for dips, olives, and honey on the board first. Spread them out so they create a visual structure. I usually put one bowl of queso in the center, a bowl of salsa on one side, and the honey near the cheese. The olives and mustard go in the corners. This creates “anchors” for the rest of the food to flow around.
- Add the Cheese (The Building Blocks) : Arrange your cheeses around the bowls. Don’t just pile them in one spot. Space them out so different cheeses are in different areas of the board. Fan out the sliced gouda or cheddar in a line. Place the wedge of brie or the log of goat cheese whole, and put a knife next to it. Crumble the blue cheese in a small pile near the grapes. The goal is to create visual variety and make it easy for people to grab different cheeses from different spots.
- Layer the Meats (The Filler and the Focal Point) : This is where you add volume and texture. Don’t just lay the slices flat. Fold them. For the prosciutto, gently fold each slice into a loose ribbon or a small rose. For the salami and soppressata, fold them in half, then in half again, and stand them up on their edges so they look like little waves or a fan. Place these folded meat piles in the gaps between the cheese and the bowls. The pepperoni can be laid out in a single layer in a small cluster.
- Fill the Gaps with Crunchy Things (The Texture Layer) : Now, take your crackers and chips and start filling in the empty spaces. Don’t just pile them all in one corner. Distribute them around the board, near the different cheeses and dips. I like to create little “cracker zones” near the brie and the cheddar. The tortilla chips should go right next to the queso and salsa bowls. This makes it easy for guests to grab a cracker and a piece of cheese in one motion.
- Add the Fresh and Sweet Elements (The Color and Contrast) : Place small clusters of grapes in a couple of spots. Fan out the apple or pear slices in a line. Scatter the dried apricots or figs in a few places. The bright colors of the fruit will really pop against the browns and reds of the meats and cheeses. This is also where you add the fresh herbs for garnish, if using.
- Finish with the Small Bits (The Details) : Finally, sprinkle the nuts and cornichons into any remaining empty spaces. Drizzle a little honey over the goat cheese or brie wedge. Add a small spoon to the honey bowl and the mustard bowl. Make sure every bowl has its own serving utensil. Step back and look at the board. If you see a big empty space, add a few more crackers or a small handful of nuts. The board should look abundant and full.
Sensory Cues: At the end, the board should look like a landscape. It should be colorful, varied, and overflowing. The aroma should be a mix of savory cured meats, pungent cheese, and sweet fruit. It should look so good that people want to take a picture before they dig in.
Cooking Tips & Techniques
This board is all about assembly, but there are a few tricks I’ve learned to make it even better. Here are some hard-won lessons from my own charcuterie board failures:
- Room Temperature is the Secret : Take your cheeses out of the refrigerator 30-45 minutes before you start assembling the board. Cheese tastes so much better at room temperature. The flavors are more pronounced and the texture is creamier. Cold cheese is flavorless cheese.
- Don’t Overcrowd the Board : It’s tempting to pile everything on, but a crowded board is hard to eat from. You want people to be able to easily grab things without knocking over a bowl or sending a cracker flying. Leave a little bit of breathing room around each element.
- Think About Traffic Flow : Place the most popular items (like the queso and the pepperoni) in the center or on the ends where people will be standing. Don’t put the only bowl of salsa in a corner that’s hard to reach. Imagine people walking around the board and make sure everything is accessible.
- Use the “Pinwheel” Method for Meats : For a really elegant look, take a slice of salami, fold it in half, then in half again. Place it on its edge. Repeat with the next slice, slightly overlapping the first one. Continue in a circle until you have a beautiful pinwheel of meat. It looks like a flower and it’s incredibly easy to grab.
- Prep Everything Before You Start : This is the most important tip. Wash your grapes. Slice your apple. Cube your cheese. Open your packages. Have everything ready to go in bowls on your counter before you touch the board. Once you start arranging, you don’t want to stop to wash a grape. It breaks the flow.
A Personal Failure: I once made a board for a big party and forgot to put out any serving utensils for the dips. People were using cracker corners to scoop queso, which was fine, but it got messy fast. Now, I always do a final check to make sure every bowl has a spoon, a knife, or a small pair of tongs. It’s a small detail that makes a huge difference in the guest experience.
Variations & Adaptations
This board is a template, not a prison. Feel free to make it your own. Here are a few ways I’ve adapted it over the years:
- The Vegetarian Board : Skip the meats entirely. Double up on the cheeses, add more dips (hummus, baba ghanoush, a roasted red pepper dip), and load up on fresh vegetables like bell pepper strips, cucumber rounds, and cherry tomatoes. You can also add marinated artichoke hearts and roasted red peppers for extra flavor.
- The Spicy Game Day Board : For a crowd that loves heat, swap the mild meats for spicy soppressata and pepperoni with chili flakes. Use a spicy jalapeño queso, add pickled jalapeños to the board, and include a spicy salsa. You can also add some sliced fresh habanero or serrano peppers for the brave.
- The Sweet & Savory Board : Balance the savory with more sweet elements. Add a small bowl of dark chocolate chips or a few squares of high-quality dark chocolate. Include fresh figs when in season, or add a dollop of fig jam next to the brie. The combination of salty cheese and sweet jam is incredible.
- The Low-Carb/Keto Board : Skip the crackers and chips entirely. Replace them with cucumber slices, bell pepper strips, celery sticks, and pork rinds. Load up on the meats and high-fat cheeses like brie, gouda, and blue cheese. Add some macadamia nuts or pecans for extra healthy fats.
- The “Breakfast” Charcuterie Board : Believe it or not, this works for a brunch party. Swap the meats for bacon and breakfast sausage links. Use cheese like cheddar and cream cheese. Add fresh fruit like berries and melon. Include some egg muffins or soft scrambled eggs in a bowl on the side. It’s a fun and unexpected twist.
My Personal Favorite Variation: I love making a “Loaded Potato Skin” inspired board. I include the crispy loaded potato skins as one of the main components, and then build the rest of the board around them with sour cream, chives, shredded cheddar, and bacon bits. It’s a little unconventional, but it’s always the first thing to disappear.
Serving & Storage Suggestions
This board is best served immediately after assembling, but there are a few things you can do to keep it fresh and make it last.
Serving: Serve the board at room temperature. This is crucial for the cheese and meats to taste their best. Place the board on a large table or counter where people can gather around it. Make sure there are plenty of small plates and napkins nearby. Forks are optional—most of this is finger food. I like to put out a stack of small cocktail napkins and a few small plates for the dips.
Storage: This board is not designed for long-term storage. The crackers will get soft, the fruit will oxidize, and the dips will dry out. However, you can easily save components. After the party, separate the elements. Put the leftover meats and cheeses in separate airtight containers in the refrigerator. The dips can be stored in their original containers. The crackers and chips should be sealed in a zip-top bag. The fruit is best eaten fresh, but you can store leftover grapes and apple slices in the fridge for a day or two.
Reheating: You don’t really “reheat” a charcuterie board. If you have leftover queso or a dip that was warmed, you can reheat it in the microwave or on the stovetop. The cheese is best eaten cold or at room temperature. Don’t try to reheat the entire board.
How Flavors Develop: Interestingly, some of the flavors actually get better after a few hours. The cured meats and cheeses will continue to develop their flavors at room temperature. The honey will soak into the brie a little bit. The olives will release a little brine. It’s all good. The board is a living thing, and it will change over the course of the party.
Nutritional Information & Benefits
Let’s be real—this is game day food. It’s indulgent, and that’s the point. But there are some surprising benefits to this spread. It’s not all empty calories.
- Estimated Nutritional Values (per serving, based on 8 servings): Calories: 450-550, Fat: 35g, Protein: 20g, Carbs: 20g, Fiber: 3g. These are rough estimates and will vary wildly based on your specific ingredients.
- Health Benefits of Key Ingredients: The cheese provides calcium and protein. The nuts offer healthy fats and vitamin E. The olives are a good source of healthy monounsaturated fats and antioxidants. The fruit provides fiber and vitamins. It’s actually a fairly balanced snack if you don’t go overboard on the crackers and chips.
- Dietary Considerations: This board is naturally gluten-free if you use gluten-free crackers and chips. It’s also easy to make it low-carb by skipping the crackers. It is high in fat and sodium, so it’s not an everyday meal, but it’s perfect for a special occasion.
- Potential Allergens: This board contains dairy (cheese), nuts (almonds), and gluten (crackers). Be sure to label any allergens clearly if you are serving guests with dietary restrictions. You can easily make a nut-free version by skipping the almonds.
- Personal Wellness Perspective: I believe in balance. This board is a celebration food. It’s meant to be enjoyed with friends and family, not eaten alone in front of the TV every night. Don’t stress about the calories. Enjoy the game, enjoy the company, and enjoy the food. One indulgent meal isn’t going to derail your health goals.
Conclusion
This Perfect Game Day Loaded Football Charcuterie Board is more than just a snack. It’s a centerpiece. It’s a conversation starter. It’s the reason people will linger around your kitchen island instead of just watching the game from the couch. It’s designed to be easy, impressive, and completely customizable to whatever your crowd loves. You don’t need to be a chef to pull this off. You just need a big board and a little bit of planning.
I love this board because it takes the pressure off. You’re not a short-order cook for the afternoon. You’re a host, and you get to enjoy the party too. The best part is watching people discover their favorite combination—a cracker with some brie, a drizzle of honey, and a slice of prosciutto. That’s the magic of a good charcuterie board.
So go ahead and give it a try. Customize it, make it your own, and don’t be afraid to get a little messy. And when you do, I’d love to hear about it. Leave a comment below and tell me what your favorite combination on the board was. Did you add something unexpected? Did you swap out a cheese? Share your creation! And if you loved this recipe, please share it with your friends. Happy game day, and happy eating!
Frequently Asked Questions
How far in advance can I assemble the charcuterie board?
You can assemble the board up to 2 hours before serving. If you need to do it earlier, prepare all the components (slice cheese, fold meats, wash fruit) and store them separately in the refrigerator. Assemble the board about 30-45 minutes before guests arrive so the cheese can come to room temperature.
How do I keep the crackers from getting soggy?
The key is to keep the crackers away from the wet ingredients. Place the dips and olives in separate bowls so their moisture doesn’t seep into the crackers. Also, don’t add the crackers to the board until you are ready to serve, or add them in small batches throughout the party.
What if I don’t have a large board?
No problem! You can use a large baking sheet, a clean countertop covered in parchment paper, or even a few smaller cutting boards placed side-by-side. The most important thing is that the surface is clean and large enough to hold everything without being overcrowded.
Can I make this board for a smaller crowd?
Absolutely. Simply scale down the quantities of each ingredient. For 4 people, use about half of each component. You can also choose a smaller selection of cheeses and meats. Use a smaller board so it still looks full and abundant.
What are the best cheeses for a beginner?
Start with a crowd-pleasing trio: a sharp cheddar (familiar and loved), a creamy brie (soft and elegant), and a crumbly blue cheese (for the adventurous). These three offer a great range of flavors and textures without being too intimidating. Add a fourth cheese like gouda or manchego if you want more variety.
Pin This Recipe!
Perfect Game Day Loaded Football Charcuterie Board

This loaded football charcuterie board is designed to feed a hungry crowd, look like you spent hours on it, and come together in about 30 minutes of active time. It’s a curated experience with multiple textures, flavors, and temperature contrasts, perfect for game day or any gathering.
- Prep Time: 15 minutes
- Cook Time: 0 minutes
- Total Time: 15 minutes
- Yield: 8-10 servings 1x
- Category: Appetizer
- Cuisine: American
Ingredients
- 8 oz thinly sliced prosciutto
- 8 oz thinly sliced Genoa salami
- 6 oz soppressata or spicy capicola
- 6 oz sliced pepperoni
- 8 oz sharp cheddar, cut into cubes and thin slices
- 8 oz aged gouda or manchego, sliced
- 6 oz soft goat cheese log or brie
- 4 oz blue cheese crumbles
- 1 cup your favorite salsa
- 1 cup queso dip
- 1/2 cup honey
- 1/2 cup whole-grain mustard or Dijon
- 1 box (about 10 oz) good-quality crackers
- 1 bag (about 8 oz) sturdy tortilla chips
- 1 cup mixed olives (green and kalamata, drained)
- 1/2 cup cornichons or small pickles
- 1/2 cup roasted, salted almonds or mixed nuts
- 1 cup red or green seedless grapes, washed and left in small clusters
- 1 large apple or pear, sliced thin (toss with a little lemon juice to prevent browning)
- 1/2 cup dried apricots or figs
- A few sprigs of fresh rosemary or thyme (for garnish, optional)
Instructions
- Place your small bowls for dips, olives, and honey on the board first. Spread them out to create a visual structure. Put one bowl of queso in the center, a bowl of salsa on one side, and the honey near the cheese. The olives and mustard go in the corners.
- Arrange your cheeses around the bowls. Space them out so different cheeses are in different areas of the board. Fan out the sliced gouda or cheddar in a line. Place the wedge of brie or the log of goat cheese whole, and put a knife next to it. Crumble the blue cheese in a small pile near the grapes.
- Layer the meats. For the prosciutto, gently fold each slice into a loose ribbon or a small rose. For the salami and soppressata, fold them in half, then in half again, and stand them up on their edges so they look like little waves or a fan. Place these folded meat piles in the gaps between the cheese and the bowls. The pepperoni can be laid out in a single layer in a small cluster.
- Fill the gaps with crunchy things. Distribute crackers and chips around the board, near the different cheeses and dips. Create little ‘cracker zones’ near the brie and the cheddar. Place tortilla chips right next to the queso and salsa bowls.
- Add the fresh and sweet elements. Place small clusters of grapes in a couple of spots. Fan out the apple or pear slices in a line. Scatter the dried apricots or figs in a few places. Add fresh herbs for garnish, if using.
- Finish with the small bits. Sprinkle the nuts and cornichons into any remaining empty spaces. Drizzle a little honey over the goat cheese or brie wedge. Add a small spoon to the honey bowl and the mustard bowl. Make sure every bowl has its own serving utensil. Step back and look at the board. If you see a big empty space, add a few more crackers or a small handful of nuts.
Notes
Take cheeses out of refrigerator 30-45 minutes before assembling for best flavor. Prep all ingredients before starting assembly. Keep crackers away from wet ingredients to prevent sogginess. The board can be assembled up to 2 hours before serving.
Nutrition
- Serving Size: 1 serving (based on
- Calories: 450550
- Sugar: 10
- Sodium: 1200
- Fat: 35
- Saturated Fat: 15
- Carbohydrates: 20
- Fiber: 3
- Protein: 20
Keywords: charcuterie board, game day snack, football party, loaded board, easy appetizer, no-cook recipe, party platter