One chilly Sunday morning, I found myself staring at an empty bread box and a stubborn craving for something warm, crusty, and homemade. I’d watched countless videos of artisan loaves with crackling crusts and chewy interiors, but the thought of kneading dough for hours? No thanks. Honestly, I was ready to give up on homemade bread altogether—until I stumbled on this no knead bread crusty recipe that completely changed the game. After testing it over 15 times, tweaking the timing and oven tricks, I finally nailed the perfect easy crispy artisan loaf at home.
This no knead bread crusty recipe for beginners is a total lifesaver for anyone who wants bakery-quality bread with minimal fuss. It’s the kind of recipe that doesn’t require fancy equipment or endless kneading sessions. Plus, it works beautifully with simple pantry staples. I love it because it’s forgiving, ridiculously easy, and makes the house smell like a cozy bakery. If you’ve ever been intimidated by bread baking, trust me, this is your gateway loaf.
What makes this no knead bread crusty recipe easy crispy artisan loaf at home so special? It’s all about letting time do the heavy lifting, and a few oven tricks that give you that crackling, golden crust without standing over the dough all day. I’ll walk you through every step so you don’t have to guess or stress.
Why You’ll Love This Recipe
This recipe has completely changed how I handle homemade bread. I’ve served this loaf to everyone from picky kids to dinner guests who usually eye my baking skeptically—and they always ask for seconds.
- Hands-Off Prep — No kneading, no fancy mixers. Just stir, wait, and bake. I’ve made this while juggling my kids’ homework and dinner prep.
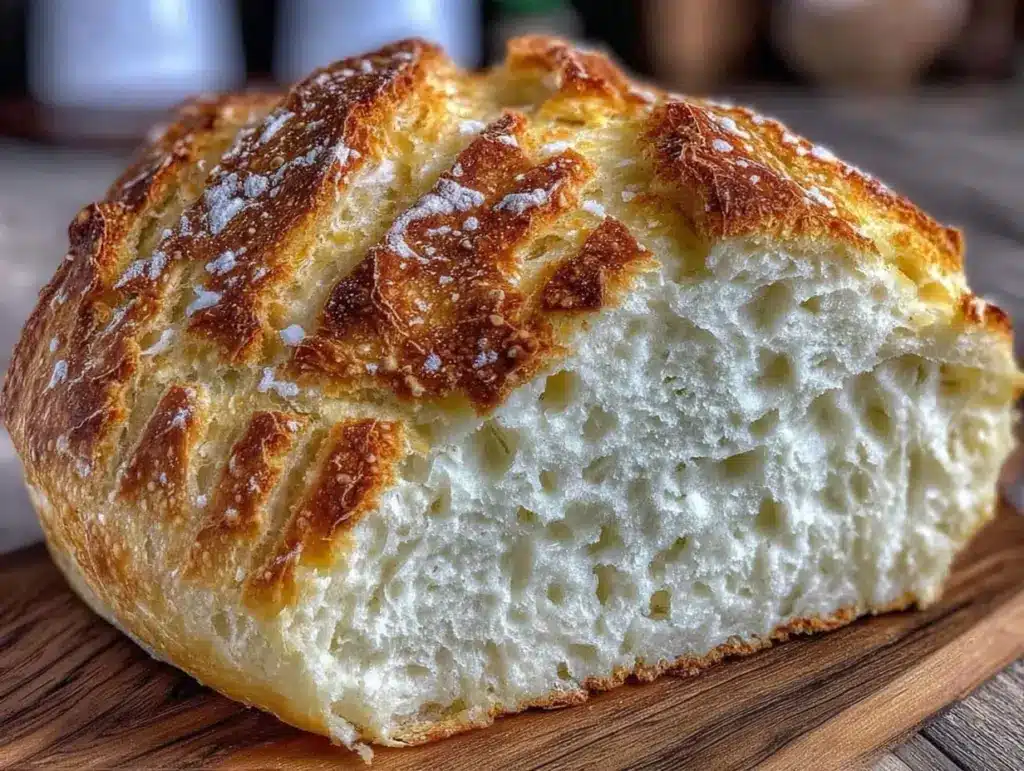
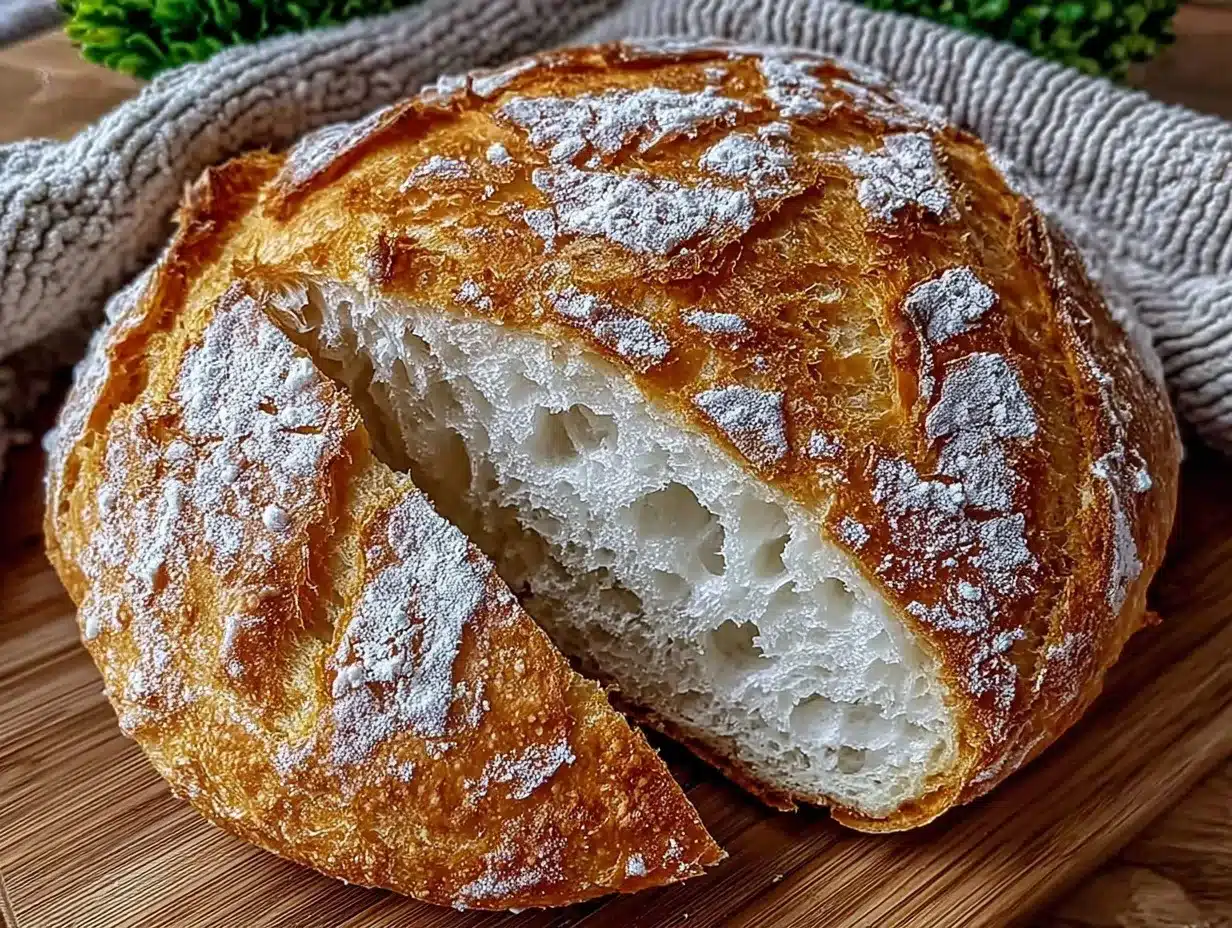
- Crusty, Crispy Perfection — The crust is golden, crackly, and just the right thickness. My husband swears it’s better than any bakery’s.
- Minimal Ingredients — Flour, water, yeast, salt. That’s it. You probably already have everything on hand for this easy crispy artisan loaf.
- Great for Beginners — I’ve walked several friends through this recipe, and they all nailed it on the first try. No bread-making experience needed.
- Perfect for Cozy Sunday Mornings or Weeknight Dinners — Whether you want to impress guests at a dinner party or just enjoy fresh bread with soup, this loaf fits the bill.
This is my go-to for lazy weekends and simple dinners. No complicated techniques, no weird ingredients—just honest bread-making that works every time.
Ingredients
Here’s the best part: you probably have most of these ingredients already. I’m pretty picky about the yeast and flour I use, so I’ll explain why each one matters.
- All-purpose flour (3 cups / 360g) — This is the base of your dough. I use King Arthur flour because it’s consistent, but any unbleached all-purpose flour will work.
- Instant yeast (1/4 teaspoon) — Yes, just a tiny pinch. Instant yeast works better here than active dry; no proofing needed, and it gives a nice rise without overpowering flavor.
- Salt (1 1/4 teaspoons) — Essential for flavor and crust development. I always use kosher salt for even seasoning.
- Lukewarm water (1 1/2 cups / 360ml) — Just around 75°F (24°C). Too hot and you’ll kill the yeast; too cold and it won’t activate properly.
Equipment Needed
You don’t need anything fancy for this. Here’s what I actually use:
- Large mixing bowl — I like a 5-quart stainless steel bowl. It’s big enough to let the dough rise without spilling over.
- Dutch oven or heavy oven-safe pot with lid — This is the secret to the crust. The lid traps steam, creating that crispy outside. Don’t have a Dutch oven? A deep roasting pan with a lid or even a cast iron skillet covered with foil works.
- Parchment paper — Makes transferring the dough in and out of the hot pot way easier.
- Kitchen scale (optional) — For precise flour measurement, but cups work fine if you’re comfortable.
- Cooling rack — To let the bread rest and avoid sogginess after baking.
How to Make No Knead Bread Crusty for Beginners: Step by Step
Alright, let’s get into it. I’ll walk you through exactly how I make this, including the small tricks that actually make a difference.
- Step 1: Mix the Dough (5 minutes)
In your large bowl, stir together the flour, instant yeast, and salt until evenly combined. Add the lukewarm water and mix with a wooden spoon or your hand until a shaggy, sticky dough forms. No kneading needed here—just get everything combined. The dough will look rough and a bit loose, but that’s perfect. - Step 2: Let it Rise (12-18 hours)
Cover your bowl tightly with plastic wrap or a clean kitchen towel. Leave it on the counter overnight or for about 12 to 18 hours. The dough will bubble and double in size, smelling yeasty and slightly tangy. This slow rise is what develops flavor and texture. Resist the urge to rush this step. - Step 3: Shape the Dough (5 minutes)
After the long rise, flour your work surface and gently scrape out the dough. It’ll be sticky but don’t panic. Fold the dough over itself a couple of times to form a rough ball. No precision needed. Place it seam-side down on a piece of parchment paper. Cover with a towel and let it rest for 30 to 60 minutes while the oven preheats. - Step 4: Preheat Your Dutch Oven (30 minutes)
Place your Dutch oven with its lid inside your oven and preheat to 450°F (230°C). This ensures the pot is scorching hot and ready for baking, which is key to a crispy crust. - Step 5: Bake the Bread (45 minutes)
Using oven mitts, carefully remove the hot Dutch oven. Lift the parchment paper with the dough and place it inside the pot. Cover with the lid and bake for 30 minutes. The trapped steam helps develop that crackly crust. - Step 6: Finish Baking Uncovered (15 minutes)
Remove the lid and bake for another 15 minutes or until the crust is deep golden brown and crackly. The bread should sound hollow when tapped on the bottom — that’s your doneness test. - Step 7: Cool Completely (At least 1 hour)
Transfer the bread to a cooling rack and let it rest. Cutting too early will make the crumb gummy. I know it’s hard to wait, but trust me, it’s worth it.
Total time: about 14-19 hours, but only 20 minutes active. Most of that is waiting—and that’s the magic behind the crusty artisan loaf.
Expert Tips & Tricks
Here’s everything I’ve figured out from making this recipe dozens of times. These tips will save you from the mistakes I already made.
- Use a Dutch Oven or Heavy Pot — The steam trapped inside creates that perfect crust. I tried baking on a sheet pan, and the crust was good but nowhere near as amazing.
- Don’t Skip the Long Rise — Patience is your best friend. This slow fermentation develops flavor and texture. I once tried a shorter rise, and the bread was dense and bland.
- Handle the Dough Gently — The dough is sticky and delicate. Resist the urge to overwork it. Fold it softly to keep the air bubbles intact for a light crumb.
- Temperature Matters — If your kitchen is cold, your dough might take longer to rise. I usually let it go a full 18 hours in winter. Also, make sure your water isn’t too hot or cold to activate the yeast properly.
- Cool Before Slicing — I burned my mouth and ruined the crumb by slicing too soon more than once. Waiting lets the steam finish its work inside.
Common mistake: Dense or doughy bread. Fix: Make sure your yeast is fresh and give the dough enough rise time. Also, don’t skimp on the preheated Dutch oven step.
Variations & Substitutions
Once you’ve got the base version down, here’s how I mix it up. I’ve actually tried all of these.
- Whole Wheat Blend — Swap 1 cup of all-purpose flour for whole wheat. It adds a nutty flavor and a bit more texture. Great for a hearty weeknight family meal.
- Garlic & Herb — Add 2 teaspoons of dried Italian herbs and 2 minced garlic cloves to the flour mixture. It’s fantastic paired with soup or for a cozy holiday side dish.
- Cheesy Crust — Sprinkle shredded Parmesan or cheddar on top before baking uncovered. My kids love this twist for weekend breakfasts.
- Gluten-Free — Use a gluten-free bread flour blend and increase xanthan gum if needed. The texture won’t be exactly the same, but the crusty effect still works surprisingly well.
- Sourdough Starter Version — If you have a sourdough starter, you can substitute part of the yeast and water with your starter for extra tang and depth. I keep a batch of sourdough discard handy for sourdough cinnamon rolls and it’s a fun twist.
Serving & Storage
I usually serve this bread straight from the cooling rack, sliced thick with softened butter. It looks rustic, stays warm, and tastes like you just came from a bakery.
For sides, garlic bread lovers will appreciate it plain or toasted. It also pairs beautifully with soups and stews—I sometimes serve it alongside my creamy lemon chicken piccata pasta for a comforting dinner.
Storage:
- Fridge: Store in an airtight container or wrapped tightly in foil for up to 4 days. The crust softens but toasting revives it.
- Reheating: Best reheated in a 350°F (175°C) oven for 10 minutes wrapped in foil, or toast slices directly. Avoid microwaving—it makes the crust chewy and the crumb gummy.
- Freezing: Wrap well in plastic and foil and freeze for up to 3 months. Thaw at room temperature and reheat in the oven for best texture.
Nutrition Information
I’m not a nutritionist, but here’s the breakdown if you’re keeping track. This is for one serving, assuming 12 slices from the loaf.
| Calories | Protein | Carbs | Fiber | Sugar | Fat | Saturated Fat | Sodium |
|---|---|---|---|---|---|---|---|
| 160 | 5g | 33g | 1g | 0g | 1g | 0g | 230mg |
Look—this is honest, simple bread made with flour, water, salt, and yeast. It’s not a diet food, and I’m not pretending it is. But it’s way better than store-bought, costs less, and you know exactly what’s in it. When I want something lighter, I serve thinner slices with lots of fresh veggies or a hearty soup.
Final Thoughts
Remember that chilly Sunday morning when I started this journey? Now, I can whip up this no knead bread crusty recipe easy crispy artisan loaf at home whenever I want, and it always impresses. The best part? Making it yours. More salt, a sprinkle of herbs, or even a handful of seeds on top. This loaf is forgiving and fun.
If you make this, drop a comment and tell me how it went. And if something goes wrong, tell me that too—I genuinely want to help troubleshoot. That’s what the comments are for.
Happy baking—I hope your kitchen smells amazing.
Frequently Asked Questions
Q: Can I make this no knead bread crusty recipe easy crispy artisan loaf without a Dutch oven?
A: Yes, you can, but the crust won’t be quite as crisp and crackly. I’ve tried using a heavy roasting pan with a lid or covering the dough loosely with foil to trap steam, and it works okay. If you don’t have either, baking on a preheated baking stone or steel helps a bit, but the steam is key for that bakery crust.
Q: Why did my bread crust turn out soft or soggy instead of crispy?
A: This usually happens if you don’t bake the bread in a covered pot or if the oven temperature is too low. The steam trapped in the Dutch oven helps form the crust. Also, make sure to finish baking uncovered to brown and crisp the crust. I burned this step once and ended up with a sad, soft loaf.
Q: Can I make this no knead bread crusty recipe ahead for a holiday dinner?
A: Absolutely! You can prepare the dough the day before, let it rise slowly in the fridge overnight, then bake it fresh the next day. This slow cold fermentation actually improves flavor. Just remember to bring the dough to room temperature before baking.
Q: Is this recipe gluten-free or can it be adapted for gluten-free diets?
A: The traditional recipe isn’t gluten-free, but I’ve adapted it with a gluten-free bread flour blend with good results. The texture is a bit different (less chewy and airy), but still tasty. You might need to add xanthan gum if your blend doesn’t have it. I recommend experimenting with small batches first.
Q: Can I double or halve this no knead bread crusty recipe easy crispy artisan loaf?
A: Yes, you can double or halve it easily. If doubling, use a larger Dutch oven or bake two loaves separately because a crowded pot won’t bake evenly. Halving works great for smaller households or if you want to test the recipe.
Q: My bread came out dense and heavy. What did I do wrong?
A: Dense bread usually means the dough didn’t rise enough. Check your yeast freshness and let the dough rise longer if needed. Also, make sure your water isn’t too hot or cold, as that can affect yeast activity. I once used old yeast and spent hours wondering why my loaf looked like a brick.
Q: Can I add mix-ins like olives, nuts, or seeds to this recipe?
A: Yes! After the initial mix, gently fold in your additions before the long rise. I love adding rosemary and sea salt or sunflower seeds for a twist. Just be careful not to over-handle the dough.
Pin This Recipe!
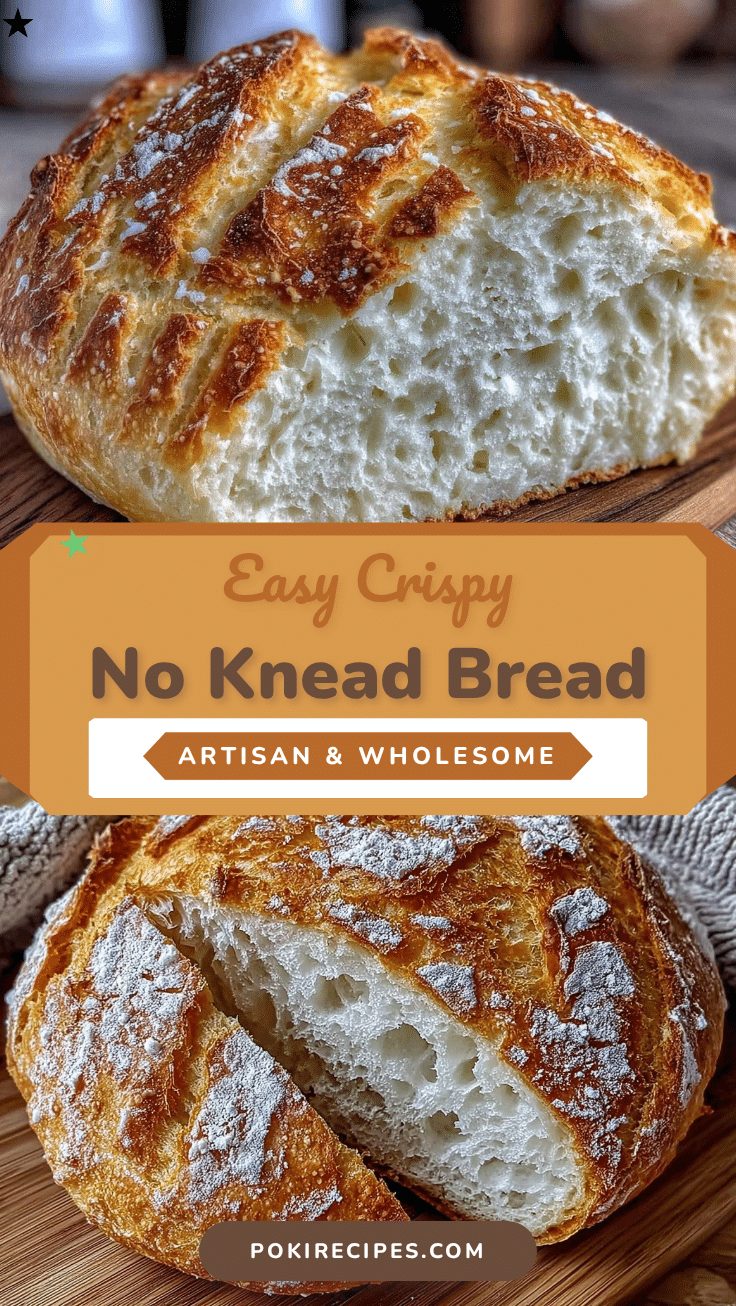
No Knead Bread Crusty Recipe Easy Crispy Artisan Loaf for Beginners

An easy no knead bread recipe that yields a crusty, crispy artisan loaf perfect for beginners. Minimal ingredients and hands-off prep make it ideal for cozy mornings or simple dinners.
- Prep Time: 10 minutes
- Cook Time: 45 minutes
- Total Time: 12-18 hours 55 minutes
- Yield: 12 slices 1x
- Category: Main Course
- Cuisine: American
Ingredients
- 3 cups (360g) all-purpose flour
- 1/4 teaspoon instant yeast
- 1 1/4 teaspoons kosher salt
- 1 1/2 cups (360ml) lukewarm water (around 75°F / 24°C)
Instructions
- Mix the flour, instant yeast, and salt in a large bowl until evenly combined. Add lukewarm water and stir until a shaggy, sticky dough forms. No kneading needed.
- Cover the bowl tightly with plastic wrap or a clean kitchen towel. Let the dough rise at room temperature for 12 to 18 hours until doubled in size and bubbly.
- Flour your work surface and gently scrape out the dough. Fold it over itself a couple of times to form a rough ball. Place seam-side down on parchment paper. Cover and let rest for 30 to 60 minutes while preheating the oven.
- Preheat a Dutch oven with its lid inside your oven to 450°F (230°C) for 30 minutes.
- Carefully remove the hot Dutch oven. Lift the parchment paper with the dough and place it inside the pot. Cover with the lid and bake for 30 minutes.
- Remove the lid and bake uncovered for another 15 minutes until the crust is deep golden brown and crackly.
- Transfer the bread to a cooling rack and let it cool completely for at least 1 hour before slicing.
Notes
Use a Dutch oven or heavy pot to trap steam for a crispy crust. Do not skip the long rise for flavor and texture. Handle dough gently to keep air bubbles intact. Cool bread completely before slicing to avoid gummy crumb. Reheat in oven or toast to revive crust.
Nutrition
- Serving Size: 1 slice (1/12th of l
- Calories: 160
- Sodium: 230
- Fat: 1
- Carbohydrates: 33
- Fiber: 1
- Protein: 5
Keywords: no knead bread, crusty bread, artisan loaf, easy bread recipe, beginner bread baking, crispy bread, homemade bread


