“Are you seriously telling me that’s just three things?” I remember my buddy giving me that skeptical look as I pulled out the ingredients for this creamy protein ice cream. Honestly, I was half-expecting it to turn into a grainy mess or something more like a frozen smoothie than actual ice cream. But after the first bite, the disbelief melted away faster than the ice cream on a summer day.
This recipe came about one hectic afternoon when I was juggling work calls and trying to keep dinner simple—yet satisfying. I needed a treat that wouldn’t just be empty calories but something a bit more nourishing. The kitchen was a mess, but I tossed just three ingredients into the blender, hoping for the best. What I got was this dreamy, velvety ice cream that I ended up making three times that week (no exaggeration). It’s the kind of recipe that sneaks up on you, turning a busy day around with its cool, creamy comfort.
The best part? It’s so straightforward that even if you’re not usually a “homemade dessert” type, you’ll find this an easy win. No complicated gadgets, no long ingredient lists. Just simple, wholesome stuff that you probably already have on hand. I’m still surprised how something so minimal can taste so indulgent.
After a few tweaks, I realized this wasn’t just a quick fix but a recipe I’d come back to again and again—whether it’s for a late-night snack or a refreshing post-workout reward. It’s creamy, it’s protein-packed, and it’s honestly the kind of frozen treat that feels like a little hug in a bowl.
So here’s the story behind this creamy protein ice cream with three simple ingredients—a small experiment that became a lasting favorite. If you’re curious about easy homemade desserts that don’t sacrifice on taste or nutrition, this might just be your next go-to.
Why You’ll Love This Recipe
This creamy protein ice cream isn’t just delicious—it’s backed by plenty of trial, error, and happy taste testers. I’ve fine-tuned it to hit that perfect balance of texture, flavor, and nutrition, so you can enjoy a treat without the guilt or fuss. Here’s why it stands out:
- Quick & Easy: Ready in under 10 minutes, it’s perfect for when cravings hit hard or you need a fast, healthy dessert.
- Simple Ingredients: Uses just three pantry staples—no special trips or exotic components required.
- Perfect for Any Occasion: Whether it’s a post-workout snack, a family-friendly dessert, or a cool treat on a hot day, it fits right in.
- Crowd-Pleaser: I’ve watched kids and adults alike devour this ice cream, often requesting seconds (and thirds).
- Unbelievably Delicious: Creamy, smooth, and satisfying with a natural sweetness and protein boost that sets it apart from ice cream alternatives.
What makes this recipe different? I’ve used a special technique to blend cottage cheese until ultra-smooth, creating a rich base that mimics traditional ice cream texture without all the extra sugar or fat. The protein powder adds a subtle flavor and keeps you full longer, while a touch of natural sweetener rounds everything out perfectly. It’s comfort food reimagined—simple, wholesome, and exactly what you want when you need a little indulgence without the guilt.
This recipe isn’t just about taste; it’s a little reward you can feel good about. And honestly, that’s what kept me making it over and over again. It’s the kind of treat that helps you pause and enjoy a moment, even on the busiest days.
What Ingredients You Will Need
For this creamy protein ice cream with three simple ingredients, the magic happens with just a few basics you might already have hanging out in your fridge and pantry. Each ingredient plays an important role: the cottage cheese creates a rich, creamy base, the protein powder adds muscle-supporting nutrition, and the sweetener brings just enough sweetness without overpowering.
- Cottage Cheese: About 1 cup (225g), full-fat or low-fat depending on your preference. I recommend choosing a small-curd variety for the smoothest texture. Brands like Friendship or Good Culture work well.
- Protein Powder: 1/2 cup (about 50g). Vanilla whey protein is my go-to for its creamy flavor, but plant-based powders work just as well. If you want a chocolate twist, swap vanilla for chocolate protein powder.
- Natural Sweetener: 2 tablespoons. I usually use pure maple syrup or honey, which blend beautifully. You can adjust sweetness to taste or use a sugar substitute like stevia if you prefer.
Optional add-ins or swaps:
- Add a splash of vanilla extract (1 teaspoon) for an extra flavor boost.
- For a dairy-free version, replace cottage cheese with a thick coconut yogurt and use a vegan protein powder.
- Try mixing in fresh or frozen berries for a fruity twist, especially delightful in summer.
These ingredients are straightforward and easy to source, making this a recipe you can pull together anytime. If you’re curious about protein-packed breakfasts, you might also enjoy my fluffy cottage cheese protein pancakes, which use similar wholesome elements.
Equipment Needed
- High-Speed Blender or Food Processor: Essential for getting that ultra-smooth, creamy texture. I have a Vitamix, but a Ninja or any good-quality blender works fine.
- Mixing Bowl: For combining ingredients if you prefer to mix before blending.
- Measuring Cups and Spoons: To ensure precise ingredient amounts—important for consistent texture.
- Freezer-Safe Container: For storing your creamy protein ice cream while it chills.
If you don’t have a blender, you can use a sturdy food processor or even an immersion blender with a tall container. Just make sure to blend long enough to break down the cottage cheese completely — lumps are the enemy here. I’ve tried both, and a high-speed blender definitely makes the process quicker and smoother.
Preparation Method
- Measure Ingredients: Start by gathering 1 cup (225g) of cottage cheese, 1/2 cup (50g) protein powder, and 2 tablespoons of your sweetener. Having everything ready makes the process smooth and quick.
- Blend the Base: Add the cottage cheese to your blender first. Blend on medium speed for about 30 seconds to start breaking it down. You want it smooth but not watery.
- Add Protein Powder and Sweetener: Toss in the protein powder and sweetener. Blend again for 1 to 2 minutes, scraping down the sides if needed. The mixture should become creamy and thick—think of a soft-serve consistency.
- Check Texture and Sweetness: Give it a quick taste. If you want it sweeter, add a bit more sweetener and pulse again. For thicker ice cream, you can add a few ice cubes or freeze the mixture for 30 minutes before serving.
- Freeze for Firmness: Pour the mixture into a freezer-safe container, cover it tightly, and freeze for at least 2 hours. Stir every 30 minutes if you want a smoother texture without ice crystals.
- Serve: When ready, scoop into bowls or cones. Let it sit for 5 minutes at room temperature if it’s too hard to scoop.
Pro tip: If your blender struggles with cottage cheese lumps, blend the cottage cheese alone first until smooth before adding other ingredients. And don’t rush the freezing stage—that’s when the creamy texture really develops.
Cooking Tips & Techniques
Getting creamy protein ice cream just right can seem tricky, but a few insider tips make all the difference. First, always use a high-quality protein powder with a mild flavor. Some powders can taste chalky, which messes with the final taste.
When blending, patience is key. Give yourself time to blend the cottage cheese well—it’s the base of the creaminess. If you skip this step or blend too briefly, you might end up with a gritty or uneven texture.
Freezing is where many homemade ice creams fall flat. To avoid icy crystals, I recommend stirring the mixture every 30 minutes during the first two hours of freezing. It breaks up ice and keeps things smooth, similar to churning.
Also, don’t freeze the mixture too long without stirring—it can get rock solid. If you forget and it’s frozen hard, just let it thaw for a few minutes before scooping. A quick pulse in the blender after thawing can also help restore creaminess.
One of my early failures was trying to add fruit directly to the blend. It made the texture grainy. Instead, fold in chopped berries just before freezing or serve as a topping for fresh bursts of flavor.
Lastly, multitask by prepping this while cooking dinner, maybe alongside a comforting dish like French onion chicken bake. You’ll have dessert ready by the time the main is done.
Variations & Adaptations
This recipe is a fantastic base for creativity. Here are some ways to switch things up to suit your mood or dietary needs:
- Chocolate Lover’s Edition: Use chocolate protein powder and add a tablespoon of unsweetened cocoa powder to amp up the chocolate flavor. You can also swirl in sugar-free chocolate chips before freezing.
- Berry Burst: Fold in fresh or frozen raspberries or blueberries after blending for a refreshing fruity twist. It adds a nice pop of color and antioxidants.
- Dairy-Free Option: Swap the cottage cheese with thick coconut yogurt and use a plant-based protein powder. The texture changes a bit but still creamy and satisfying.
- Nutty Delight: Add a tablespoon of almond butter or peanut butter for richness and a subtle nut flavor. This pairs wonderfully with vanilla protein powder.
- Low-Sugar Version: Use a natural low-calorie sweetener like monk fruit or stevia and unsweetened protein powder to keep sugar minimal without sacrificing taste.
I once tried blending in a spoonful of instant espresso powder for a coffee-flavored surprise, which turned out to be an excellent pick-me-up dessert. Feel free to experiment and find your favorite twist.
Serving & Storage Suggestions
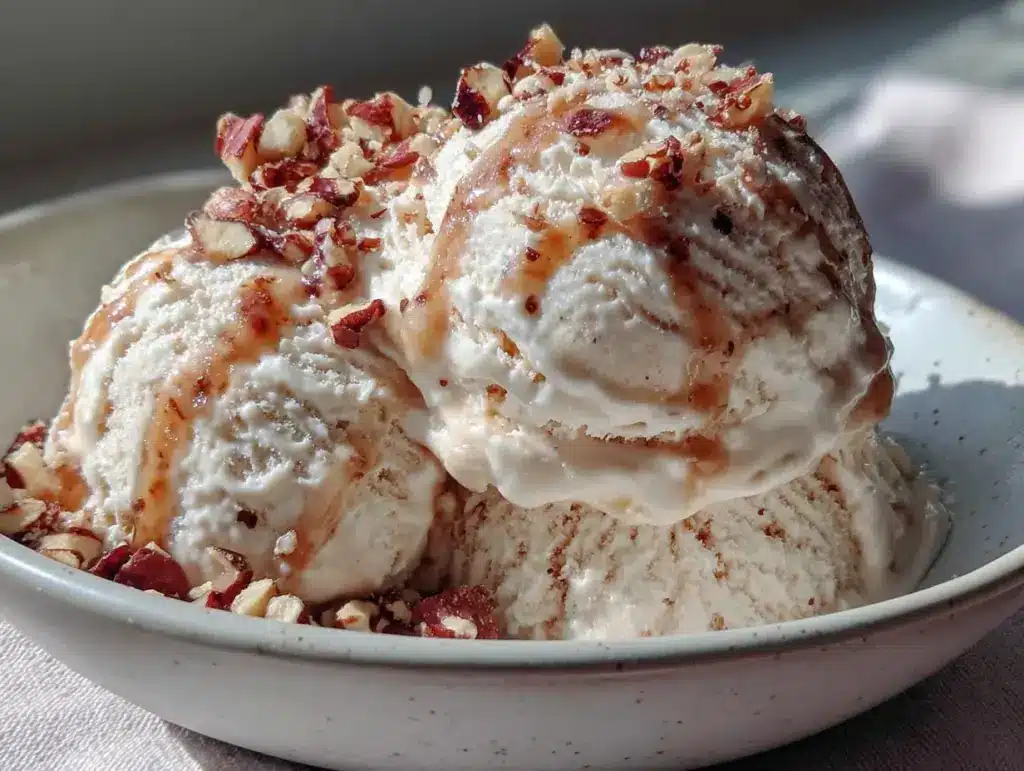
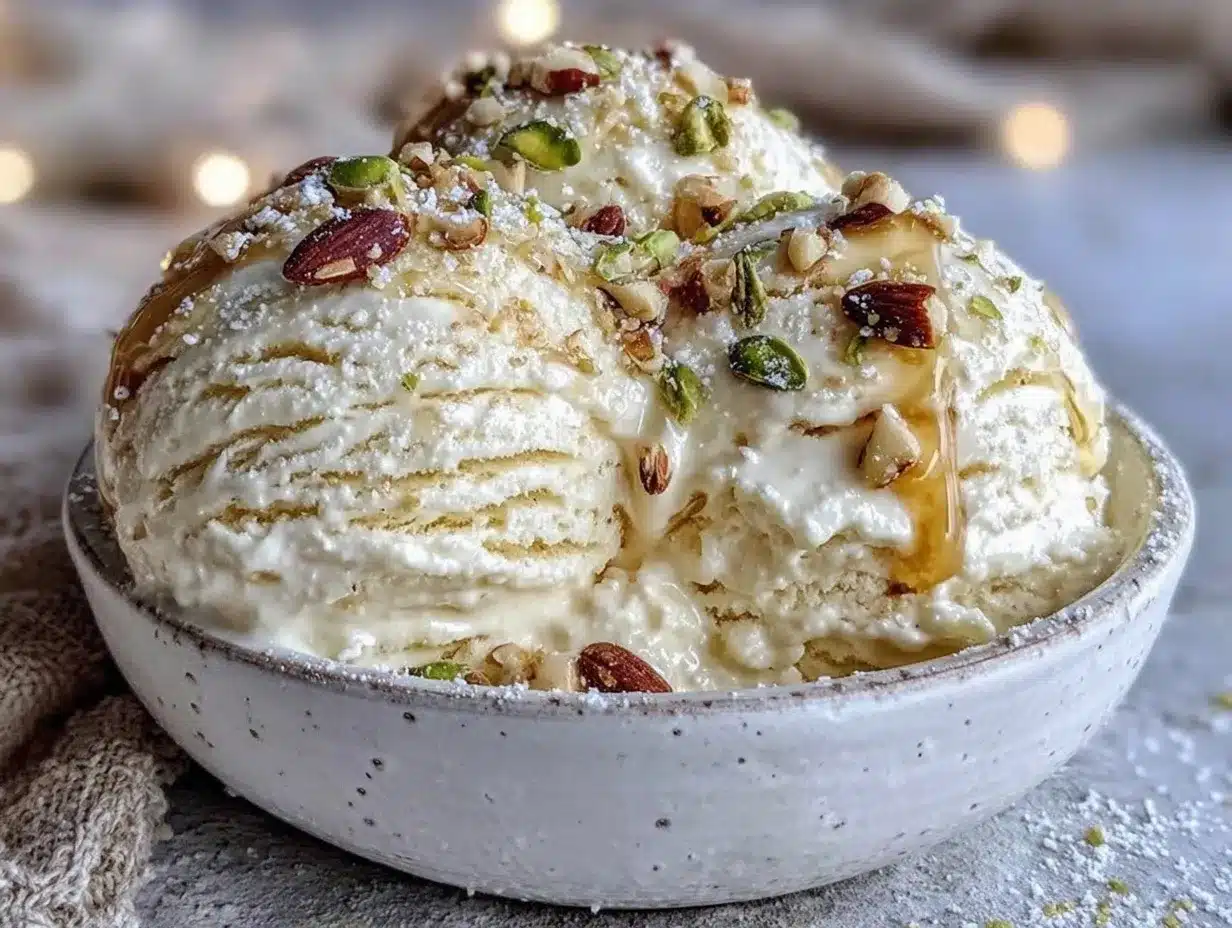
Serve your creamy protein ice cream straight from the freezer for that perfect scoopable texture. If it’s too firm, let it soften at room temperature for 5 minutes. Garnish with fresh berries, a drizzle of honey, or a sprinkle of chopped nuts for a nice crunch.
This ice cream pairs nicely with simple desserts or fruit salads. For a fun combo, try it alongside warm dishes like the marry me salmon dinner for a contrasting cool finish.
Store leftovers in an airtight container in the freezer for up to 5 days. Avoid repeated thawing and refreezing to maintain texture. When reheating, thaw briefly and stir or blend to restore that creamy consistency.
Flavors often deepen after a day or two in the freezer, so sometimes I make it ahead and let it sit overnight before serving. It’s a nice time-saver for busy days.
Nutritional Information & Benefits
This creamy protein ice cream packs a nutritional punch in every scoop. With roughly 150-200 calories per serving (about 1/2 cup or 120g), it provides approximately 15-20 grams of protein, depending on your powder choice.
The cottage cheese offers a good source of calcium and probiotics, supporting bone health and digestion. Protein powder helps with muscle repair and satiety, making this a great post-workout snack or a balanced dessert option.
Low in added sugars (you control the sweetener), this recipe fits well into low-carb or moderate-carb plans. It’s gluten-free, and by choosing dairy-free alternatives, you can make it suitable for lactose intolerance or vegan diets.
Personally, I love how this recipe satisfies my sweet tooth without the crash or guilt. It’s a reminder that nourishing food can be indulgent too.
Conclusion
In the end, this creamy protein ice cream with three simple ingredients has become a quiet favorite for good reason. It’s quick, nourishing, and honestly delicious—perfect for anyone who wants a sweet treat without fuss or excess sugar.
Feel free to tweak the flavors, swap ingredients, or add your favorite mix-ins. The simplicity of this recipe makes it a great canvas for your own creativity.
For me, it’s that little homemade reward that fits into busy days and satisfies cravings without the usual guilt. I hope it brings you the same easy pleasure it’s given me.
If you try it, I’d love to hear how you customize your creamy protein ice cream or what your favorite flavor combo turns out to be. Sharing those tasty twists always makes the kitchen feel a little smaller and friendlier.
Frequently Asked Questions
Can I use flavored protein powder for this recipe?
Absolutely! Vanilla is a classic choice, but chocolate, strawberry, or other flavors can work well. Just keep in mind the sweetness level and adjust your sweetener accordingly.
What if I don’t have a blender?
A food processor or immersion blender can work in a pinch. The key is to blend long enough to get the cottage cheese smooth. If lumps remain, the texture won’t be as creamy.
How can I make this recipe vegan or dairy-free?
Swap cottage cheese for thick coconut or almond yogurt and use a plant-based protein powder. The texture changes a bit but stays creamy and tasty.
Is it possible to make this recipe without protein powder?
You can omit the protein powder, but the ice cream will be less protein-rich and might have a different texture. Adding a little extra cottage cheese or yogurt can help keep it creamy.
How long can I store creamy protein ice cream in the freezer?
Store it in an airtight container for up to 5 days. For best texture, avoid thawing and refreezing multiple times.
Pin This Recipe!
Creamy Protein Ice Cream Recipe Easy 3-Ingredient Homemade Treat

A quick and easy homemade protein ice cream made with just three simple ingredients, offering a creamy, protein-packed, and guilt-free frozen treat.
- Prep Time: 5 minutes
- Cook Time: 2 hours (freezing time)
- Total Time: 2 hours 5 minutes
- Yield: 4 servings 1x
- Category: Dessert
- Cuisine: American
Ingredients
- 1 cup (225g) cottage cheese, full-fat or low-fat, small-curd variety recommended
- 1/2 cup (50g) vanilla whey protein powder (or plant-based protein powder)
- 2 tablespoons natural sweetener (pure maple syrup, honey, or sugar substitute like stevia)
- Optional: 1 teaspoon vanilla extract
- Optional: fresh or frozen berries
- Optional: 1 tablespoon unsweetened cocoa powder (for chocolate version)
- Optional: 1 tablespoon almond butter or peanut butter
Instructions
- Measure 1 cup (225g) cottage cheese, 1/2 cup (50g) protein powder, and 2 tablespoons sweetener.
- Add cottage cheese to blender and blend on medium speed for about 30 seconds until smooth but not watery.
- Add protein powder and sweetener, then blend for 1 to 2 minutes until creamy and thick, scraping down sides as needed.
- Taste and adjust sweetness if desired; add a few ice cubes or freeze mixture for 30 minutes for thicker texture.
- Pour mixture into a freezer-safe container, cover tightly, and freeze for at least 2 hours, stirring every 30 minutes to prevent ice crystals.
- When ready to serve, scoop into bowls or cones; let sit 5 minutes at room temperature if too hard to scoop.
Notes
Blend cottage cheese alone first if lumps remain. Stir mixture every 30 minutes during freezing to avoid ice crystals. Let soften 5 minutes before serving if too hard. Can substitute cottage cheese with thick coconut yogurt and use plant-based protein powder for dairy-free version.
Nutrition
- Serving Size: 1/2 cup (120g)
- Calories: 150200
- Sugar: 58
- Sodium: 150250
- Fat: 46
- Saturated Fat: 1.53
- Carbohydrates: 812
- Fiber: 1
- Protein: 1520
Keywords: protein ice cream, homemade ice cream, healthy dessert, easy recipe, 3-ingredient dessert, protein-packed treat, low sugar ice cream, dairy-free option


