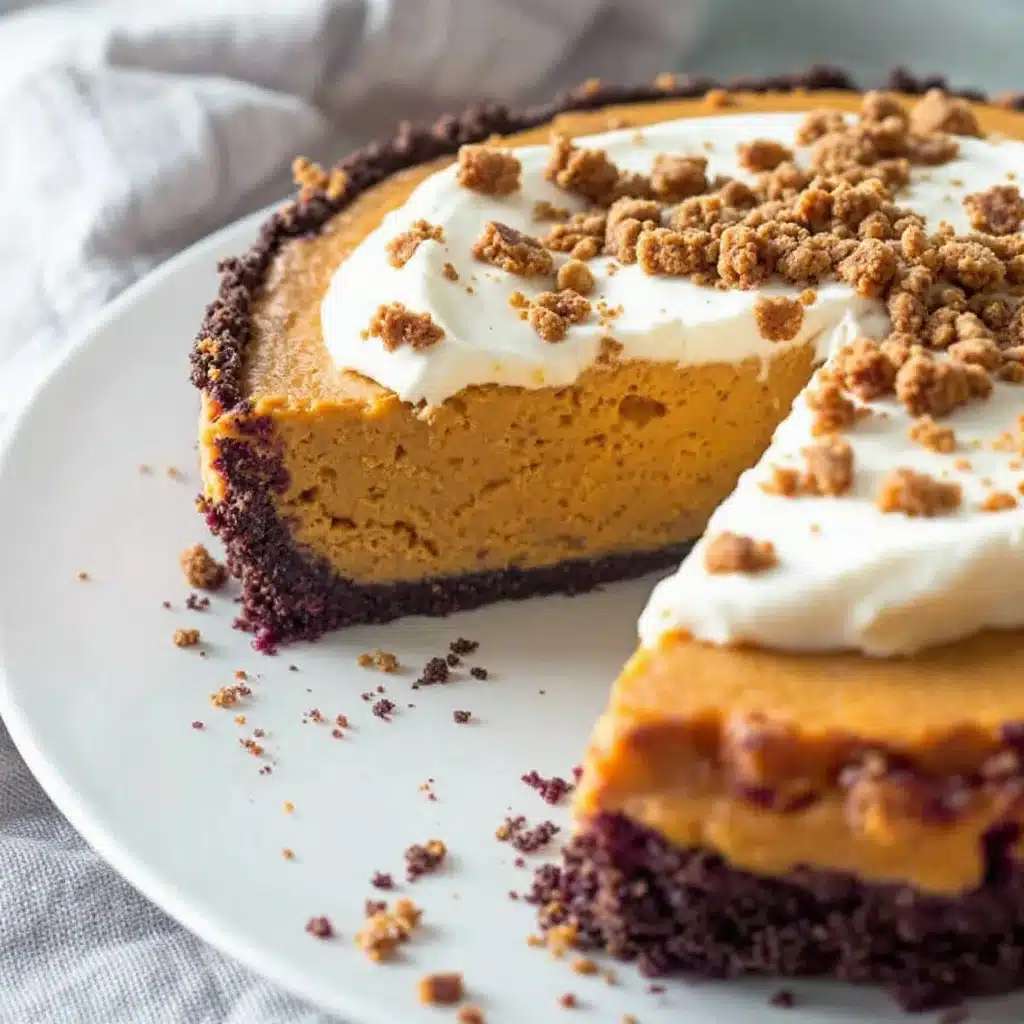
That first cool snap in the air — the kind that makes you reach for a sweater before the leaves have even fully turned — and suddenly I’m standing in my grandmother’s kitchen, watching her pull a graham cracker crust from the fridge. She didn’t bake much, honestly. But this creamy no-bake pumpkin cheesecake pie? That was her signature, the dessert she brought to every autumn gathering without fail. I remember the way the filling would shiver just slightly when you set it on the table, and how she’d always say, “No oven needed, so no excuses.”
For years, I thought that was just her way of getting out of turning on the appliance. But now I get it. There’s something almost rebellious about a dessert this luxurious that doesn’t require a single degree of heat. This creamy no-bake pumpkin cheesecake pie is the kind of recipe that feels like cheating — until you take a bite and realize it’s pure, honest comfort. It’s the dessert you make when you want the flavors of fall without the fuss of a traditional bake.
I tweaked her original recipe over time, adding a bit more spice, a touch more cream cheese, and a secret ingredient that makes the texture impossibly silky. The result is a pie that’s rich but not heavy, spiced but not overwhelming, and so easy you’ll wonder why you ever bothered with a traditional pumpkin cheesecake. Trust me on this one — it’s going to become your new fall favorite.
Why You’ll Love This Recipe
Let me tell you why this creamy no-bake pumpkin cheesecake pie is about to become your most-requested dessert this season. I’ve tested this recipe more times than I can count, and every single time, it delivers that perfect balance of creamy, spiced, and satisfying.
- No Oven Required: Seriously, zero baking. Your oven can take the day off while you whip up something spectacular in minutes.
- Simple Pantry Ingredients: You probably already have most of these in your kitchen. No hunting down obscure spices or specialty items.
- Perfect for Fall Gatherings: Whether it’s Thanksgiving, a Friendsgiving, or just a cozy Sunday dinner, this pie fits right in.
- Crowd-Pleaser: I’ve served this to everyone from picky kids to serious foodie friends, and it disappears every time.
- Unbelievably Creamy Texture: The secret is in how we handle the cream cheese and pumpkin — no lumps, no graininess, just pure silkiness.
What makes this recipe different from all the other no-bake pumpkin desserts out there? It’s the technique. Most recipes just dump everything together and hope for the best. But I spent weeks perfecting the ratios and the method — blending the cream cheese until it’s truly fluffy, folding the pumpkin in gently, and letting it set just long enough to slice cleanly without being too firm. The result is a pie that tastes like it took hours of effort, when really, it’s about 15 minutes of actual work.
This isn’t just another pumpkin dessert. It’s the one that makes people close their eyes after the first bite. It’s comfort food reimagined — faster, easier, but with the same soul-soothing satisfaction that makes fall desserts so special. And honestly? It’s perfect for impressing guests without any of the stress.
What Ingredients You Will Need
This creamy no-bake pumpkin cheesecake pie uses simple, wholesome ingredients to deliver that bold pumpkin flavor and velvety texture without any fuss. Most of these are pantry staples, especially if you’ve done any fall baking before.
For the Crust:
- 1 ½ cups graham cracker crumbs (about 12 full sheets, crushed finely — I prefer using a food processor for even crumbs)
- ¼ cup granulated sugar (just enough to sweeten the crust without overpowering the filling)
- 6 tablespoons unsalted butter, melted (use salted butter if that’s all you have, just reduce the added salt elsewhere)
- Pinch of salt (balances the sweetness and enhances the graham flavor)
For the Filling:
- 16 ounces cream cheese, softened to room temperature (this is crucial — cold cream cheese will leave you with lumps. I recommend Philadelphia brand for consistent results)
- 1 cup pumpkin puree (not pumpkin pie filling! Make sure you grab 100% pure pumpkin. Libby’s is my go-to)
- ¾ cup packed light brown sugar (dark brown sugar works too, for a deeper molasses flavor)
- 1 teaspoon vanilla extract (pure vanilla, not imitation, if you can swing it)
- 1 ½ teaspoons pumpkin pie spice (or make your own: ½ tsp cinnamon, ¼ tsp ginger, ¼ tsp nutmeg, ⅛ tsp cloves, ⅛ tsp allspice)
- ½ teaspoon ground cinnamon (because you can never have too much cinnamon in a pumpkin dessert)
- 1 cup heavy cream, cold (this gets whipped into stiff peaks for that airy, mousse-like texture)
- ¼ cup powdered sugar (helps stabilize the whipped cream and adds a touch of sweetness)
For the Topping (optional but recommended):
- ½ cup heavy cream, cold (for the whipped cream topping)
- 2 tablespoons powdered sugar
- ½ teaspoon vanilla extract
- Ground cinnamon or pumpkin pie spice, for dusting
A few notes on ingredients: If you’re dairy-sensitive, you can use dairy-free cream cheese and coconut cream instead of heavy cream — just know the texture will be slightly different but still delicious. For a gluten-free version, use gluten-free graham crackers or crushed gluten-free cookies. And if you’re feeling adventurous, try using homemade pumpkin puree from a sugar pumpkin. It’s a bit more work, but the flavor is incredible.
Equipment Needed
You don’t need a fancy kitchen to make this creamy no-bake pumpkin cheesecake pie. Here’s what you’ll need:
- 9-inch pie dish (a standard metal or glass pie plate works perfectly. I prefer glass so I can see if the crust is evenly pressed)
- Electric hand mixer or stand mixer (you can whisk by hand, but your arm will thank you for using a mixer)
- Mixing bowls (at least two — one for the cream cheese mixture, one for the whipped cream)
- Spatula (a rubber spatula for folding the whipped cream into the cream cheese mixture gently)
- Measuring cups and spoons
- Food processor or zip-top bag and rolling pin (for crushing graham crackers. The bag-and-rolling-pin method is surprisingly satisfying)
- Plastic wrap (for covering the pie while it chills)
If you don’t have a pie dish, you can use a 9-inch springform pan for a taller, more dramatic presentation. Just make sure it’s well-greased. And if you’re short on time, a store-bought graham cracker crust works in a pinch — though the homemade version is so much better, and it only takes five minutes to make.
Preparation Method
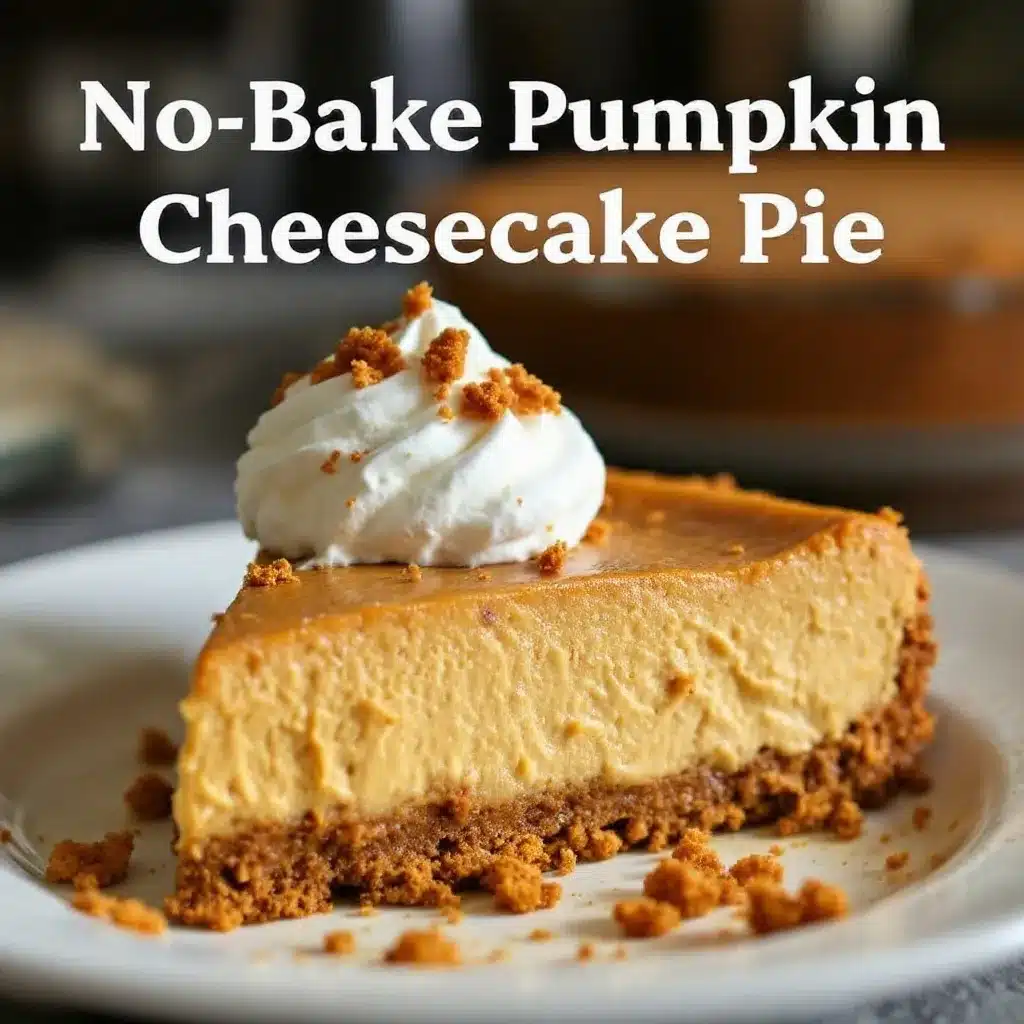
Let’s make this creamy no-bake pumpkin cheesecake pie step by step. Trust the process, and you’ll have a dessert that looks like it came from a bakery.
- Make the crust: In a medium bowl, combine the graham cracker crumbs, ¼ cup granulated sugar, and a pinch of salt. Pour in the melted butter and stir until the mixture looks like wet sand and holds together when pressed. Press the mixture firmly into the bottom and up the sides of your 9-inch pie dish. Use the bottom of a measuring cup to really pack it down — a loose crust will crumble when you slice. Pop it in the fridge to set while you make the filling, about 15 minutes.
- Whip the cream: In a chilled bowl (pop it in the freezer for 5 minutes beforehand), pour in 1 cup cold heavy cream. Add ¼ cup powdered sugar and beat with an electric mixer on medium-high speed until stiff peaks form. You’re looking for peaks that hold their shape when you lift the beaters — not soft and droopy, but not butter either. This usually takes about 3-4 minutes. Set the whipped cream aside in the fridge while you work on the cream cheese mixture.
- Beat the cream cheese: In a large bowl, beat the softened cream cheese with an electric mixer on medium speed until it’s completely smooth and fluffy — about 2 minutes. Scrape down the sides and bottom of the bowl with a spatula. This step is non-negotiable. If the cream cheese isn’t perfectly smooth, you’ll have lumps in your final pie, and nobody wants that.
- Add the pumpkin and spices: Add the pumpkin puree, brown sugar, vanilla extract, pumpkin pie spice, and cinnamon to the cream cheese. Beat on medium speed until everything is combined and smooth. Again, scrape down the bowl. The mixture should be a beautiful deep orange color and smell like autumn in a bowl. Don’t overmix at this stage — just until combined.
- Fold in the whipped cream: This is where the magic happens. Add about one-third of the whipped cream to the pumpkin-cream cheese mixture and fold it in gently with a spatula. Once it’s mostly incorporated, add the rest of the whipped cream and fold until no white streaks remain. The key word here is “fold” — you want to preserve as much air as possible from the whipped cream. Be gentle, but thorough.
- Fill the crust: Spoon the filling into the chilled crust and spread it evenly with a spatula. Give the pie dish a few gentle taps on the counter to settle the filling and eliminate any air pockets. Smooth the top as best you can — it doesn’t have to be perfect because we’ll cover it with whipped cream later.
- Chill: Cover the pie loosely with plastic wrap and refrigerate for at least 6 hours, but overnight is better. I know it’s hard to wait, but this is where the pie sets up properly. If you try to slice it too soon, you’ll end up with a delicious but messy puddle on your plate. Patience, my friend.
- Make the topping: Just before serving, make the whipped cream topping. In a chilled bowl, beat ½ cup heavy cream, 2 tablespoons powdered sugar, and ½ teaspoon vanilla extract until stiff peaks form. Spread or pipe the whipped cream over the chilled pie. Dust with a little cinnamon or pumpkin pie spice for that finishing touch.
Cooking Tips & Techniques
After making this creamy no-bake pumpkin cheesecake pie about a dozen times (seriously, my family was getting worried), I’ve learned a few things the hard way. Let me save you from my mistakes.
The cream cheese must be room temperature. I cannot stress this enough. Cold cream cheese will give you lumps that no amount of beating can fix. Take it out of the fridge at least an hour before you start, or if you’re in a hurry, cut it into small cubes and let it sit for 20 minutes. I once tried to speed things up by microwaving it — big mistake. It melted unevenly and left me with a grainy texture that ruined the whole pie.
Don’t overwhip the cream. Stiff peaks are what you’re after, but if you keep going, you’ll end up with butter. Stop the mixer as soon as the peaks hold their shape. If you’re nervous, err on the side of slightly under-whipped — it’s better than over-whipped. I’ve made butter by accident more times than I care to admit, and let me tell you, it’s not fun to start over.
Fold, don’t stir. When combining the whipped cream with the pumpkin mixture, use a gentle folding motion. Stirring vigorously will deflate all that air you worked so hard to create, and your pie will be dense instead of light and mousse-like. Think of it like you’re wrapping the whipped cream around the pumpkin mixture, not mixing them together aggressively.
Patience with chilling. I know it’s tempting to pop this in the freezer for an hour and call it done. Don’t. The texture won’t be right — it’ll be icy and grainy instead of creamy and smooth. Give it the full 6 hours minimum in the refrigerator. Overnight is truly best. I usually make this the day before I need it, and it’s always perfect.
For clean slices, use a hot knife. Run your knife under hot water, dry it off, then slice. Wipe the blade clean between each cut. This gives you those gorgeous, Instagram-worthy slices. If you’re serving this at a gathering, this little trick makes a big difference in presentation.
Variations & Adaptations
One of the best things about this creamy no-bake pumpkin cheesecake pie is how easy it is to adapt. Here are some of my favorite variations:
Gluten-Free Version: Simply use gluten-free graham crackers or crushed gluten-free cookies for the crust. The filling is naturally gluten-free, so you’re just one swap away from a dessert everyone can enjoy. I’ve used gluten-free ginger snaps before, and the spicy kick was incredible.
Dairy-Free Version: Use dairy-free cream cheese (I like the brand Kite Hill) and full-fat coconut cream instead of heavy cream. Chill the coconut cream overnight and scoop out the solid part, then whip it just like regular cream. The texture is slightly different — a bit more dense — but the flavor is still fantastic.
Chocolate-Pumpkin Swirl: Melt ½ cup of dark chocolate chips and let it cool slightly. After you’ve filled the crust, drop spoonfuls of melted chocolate on top and swirl it through with a knife. The chocolate and pumpkin combination is heavenly, and it looks gorgeous on the plate.
Maple Pecan Twist: Add 2 tablespoons of pure maple syrup to the filling along with the brown sugar, and top the finished pie with candied pecans. The maple flavor complements the pumpkin beautifully, and the crunch from the pecans adds a lovely textural contrast.
Individual Servings: Instead of a pie dish, use 6-8 small mason jars or ramekins. Layer the crust and filling for a parfait-style dessert that’s perfect for parties. No slicing required, and everyone gets their own personal portion.
I once made a version with a gingersnap crust and a dollop of cranberry compote on top for a Thanksgiving gathering. It was a hit, and honestly, I might never go back to plain graham cracker crust again. Don’t be afraid to experiment — that’s half the fun of cooking.
Serving & Storage Suggestions
This creamy no-bake pumpkin cheesecake pie is best served cold, straight from the refrigerator. I like to let it sit at room temperature for about 10 minutes before slicing — just enough to take the chill off without losing the structure. The texture is perfect at this temperature: creamy, silky, and just firm enough to hold its shape.
For presentation, I pile the whipped cream high on top and finish with a generous dusting of cinnamon or pumpkin pie spice. A few fresh cranberries or a sprig of rosemary add a beautiful holiday touch. If you’re feeling extra fancy, drizzle some caramel sauce over each slice before serving. It’s not traditional, but it is delicious.
This pie pairs beautifully with a hot cup of coffee or a spiced chai latte. For a boozy pairing, try a glass of bourbon or a dark rum cocktail — the warm, oaky notes complement the pumpkin and spices perfectly. If you’re serving this after a big meal, keep the portions modest. It’s rich, and a little goes a long way.
Storage: Cover the pie tightly with plastic wrap or aluminum foil and store it in the refrigerator for up to 5 days. The texture actually improves after the first day as the flavors meld together. I do not recommend freezing this pie — the cream cheese and whipped cream don’t thaw well, and the texture becomes watery and grainy.
Reheating: This is a no-bake dessert, so there’s no reheating involved. But if you prefer your pie slightly less cold, let a slice sit at room temperature for 15-20 minutes before eating. The flavors open up beautifully as it warms just a bit.
One thing I love about this recipe is how the spices develop over time. The first day, the pumpkin flavor is forward and bright. By day three, the cinnamon, nutmeg, and ginger have deepened and mellowed, creating a more complex, rounded flavor. It’s like the pie gets better as it sits — if it lasts that long in your house.
Nutritional Information & Benefits
While this creamy no-bake pumpkin cheesecake pie is definitely a treat, it does have some nutritional bright spots. Here’s an approximate breakdown per slice (based on 8 servings):
| Nutrient | Amount per Slice |
|---|---|
| Calories | ~420 |
| Total Fat | 28g |
| Saturated Fat | 16g |
| Cholesterol | 85mg |
| Sodium | 320mg |
| Total Carbohydrates | 38g |
| Dietary Fiber | 2g |
| Sugars | 28g |
| Protein | 5g |
| Vitamin A | 180% DV |
Pumpkin is packed with vitamin A, which supports eye health and immune function. It’s also a good source of fiber and antioxidants. The cream cheese and heavy cream add calcium and protein, though they’re also the main source of calories and fat. If you’re watching your sugar intake, you can reduce the brown sugar to ½ cup without sacrificing too much sweetness.
This recipe contains dairy and gluten (from the graham crackers), so it’s not suitable for those with allergies to those ingredients. But with the substitutions I mentioned earlier, you can easily adapt it to fit most dietary needs. I personally love that this dessert feels indulgent but still has some redeeming qualities — it’s not just empty calories.
Conclusion
This creamy no-bake pumpkin cheesecake pie is everything I want in a fall dessert: easy, beautiful, and absolutely delicious. It’s the kind of recipe that makes you look like a hero with almost no effort. No oven required, no complicated techniques, just pure, creamy, spiced perfection in every bite.
I hope you make this your own. Add your favorite toppings, try different crusts, experiment with the spices. That’s the beauty of a simple recipe — it leaves room for your creativity. And if you do try it, I’d love to hear how it turned out. Drop a comment below and let me know what variations you tried, or tag me in your photos. There’s nothing that makes me happier than seeing someone else fall in love with a recipe I’ve shared.
So go ahead — grab a can of pumpkin, soften that cream cheese, and make yourself a pie. You deserve something sweet and simple this season. Happy fall baking, friends!
Frequently Asked Questions
Can I use pumpkin pie filling instead of pure pumpkin puree?
No, I wouldn’t recommend it. Pumpkin pie filling already has sugar and spices added, which will throw off the sweetness and spice balance of this recipe. Stick with 100% pure pumpkin puree for the best results. If you accidentally grab the wrong can, just reduce the brown sugar and spices in the recipe to compensate.
How long does this pie need to set in the fridge?
At least 6 hours, but overnight is ideal. The filling needs time to firm up so you can slice it cleanly. If you’re in a real hurry, you can chill it for 4 hours, but the texture won’t be as firm. I always recommend making this the day before you plan to serve it.
Can I freeze this no-bake pumpkin cheesecake pie?
I don’t recommend freezing it. The cream cheese and whipped cream don’t thaw well, and the texture becomes watery and grainy. This pie is best enjoyed fresh from the refrigerator within 5 days of making it. If you have leftovers, just cover and refrigerate.
Can I use a store-bought crust to save time?
Absolutely! A store-bought graham cracker crust works perfectly in a pinch. Just skip the crust-making steps and fill the pre-made crust directly. The homemade crust is better, but the store-bought version saves you about 10 minutes. No judgment here — we all need shortcuts sometimes.
Why did my pie turn out runny?
A runny pie usually means one of three things: the cream wasn’t whipped to stiff peaks, the pie didn’t chill long enough, or the cream cheese wasn’t at room temperature. Make sure your cream is cold when you whip it, and don’t rush the chilling time. If your pie still turns out runny, you can try folding in a tablespoon of cornstarch next time to help stabilize the filling.
Pin This Recipe!
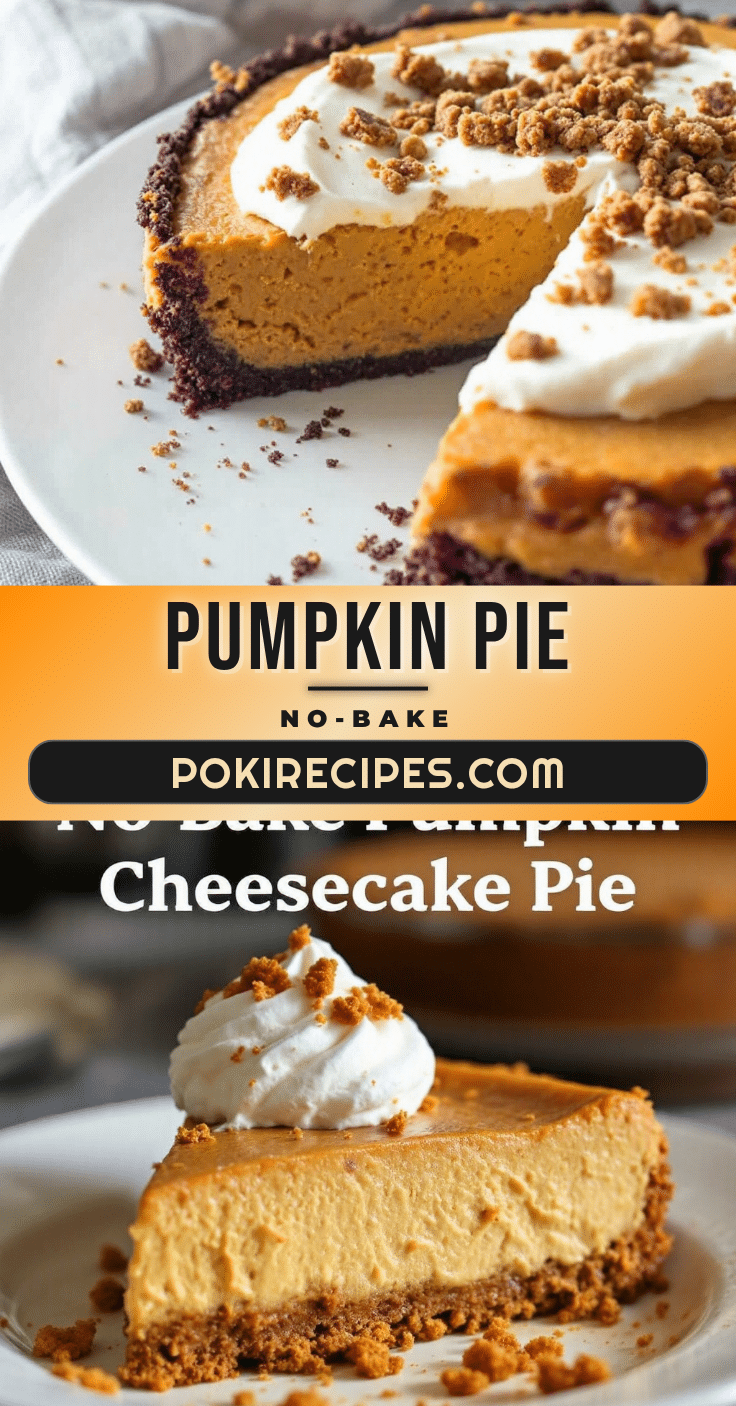
Creamy No-Bake Pumpkin Cheesecake Pie

A luxurious no-bake pumpkin cheesecake pie that’s creamy, spiced, and incredibly easy to make. Perfect for fall gatherings, this dessert requires no oven and delivers pure comfort in every bite.
- Prep Time: 15 minutes
- Cook Time: 0 minutes
- Total Time: 6 hours 15 minutes (includes chilling)
- Yield: 8 servings 1x
- Category: Dessert
- Cuisine: American
Ingredients
- 1 ½ cups graham cracker crumbs (about 12 full sheets)
- ¼ cup granulated sugar
- 6 tablespoons unsalted butter, melted
- Pinch of salt
- 16 ounces cream cheese, softened to room temperature
- 1 cup pumpkin puree (not pumpkin pie filling)
- ¾ cup packed light brown sugar
- 1 teaspoon vanilla extract
- 1 ½ teaspoons pumpkin pie spice
- ½ teaspoon ground cinnamon
- 1 cup heavy cream, cold
- ¼ cup powdered sugar
- ½ cup heavy cream, cold (for topping)
- 2 tablespoons powdered sugar (for topping)
- ½ teaspoon vanilla extract (for topping)
- Ground cinnamon or pumpkin pie spice, for dusting
Instructions
- Make the crust: In a medium bowl, combine graham cracker crumbs, ¼ cup granulated sugar, and a pinch of salt. Pour in melted butter and stir until mixture looks like wet sand and holds together when pressed. Press firmly into bottom and up sides of a 9-inch pie dish. Refrigerate for 15 minutes.
- Whip the cream: In a chilled bowl, pour 1 cup cold heavy cream and add ¼ cup powdered sugar. Beat with an electric mixer on medium-high speed until stiff peaks form, about 3-4 minutes. Set aside in the fridge.
- Beat the cream cheese: In a large bowl, beat softened cream cheese on medium speed until smooth and fluffy, about 2 minutes. Scrape down sides and bottom of bowl.
- Add pumpkin and spices: Add pumpkin puree, brown sugar, vanilla extract, pumpkin pie spice, and cinnamon to cream cheese. Beat on medium speed until combined and smooth. Do not overmix.
- Fold in whipped cream: Add one-third of the whipped cream to the pumpkin-cream cheese mixture and fold gently with a spatula. Add remaining whipped cream and fold until no white streaks remain.
- Fill the crust: Spoon filling into chilled crust and spread evenly. Tap pie dish gently on counter to settle filling and eliminate air pockets. Smooth top.
- Chill: Cover loosely with plastic wrap and refrigerate for at least 6 hours, preferably overnight.
- Make the topping: Just before serving, beat ½ cup heavy cream, 2 tablespoons powdered sugar, and ½ teaspoon vanilla extract until stiff peaks form. Spread or pipe over chilled pie. Dust with cinnamon or pumpkin pie spice.
Notes
Cream cheese must be at room temperature to avoid lumps. Do not overwhip the cream; stop at stiff peaks. Fold whipped cream gently to preserve airiness. Chill for at least 6 hours, preferably overnight. For clean slices, use a hot knife. Store covered in refrigerator for up to 5 days. Do not freeze.
Nutrition
- Serving Size: 1 slice
- Calories: 420
- Sugar: 28
- Sodium: 320
- Fat: 28
- Saturated Fat: 16
- Carbohydrates: 38
- Fiber: 2
- Protein: 5
Keywords: no-bake pumpkin cheesecake, pumpkin pie, fall dessert, easy dessert, no-bake dessert, pumpkin cheesecake pie, Thanksgiving dessert