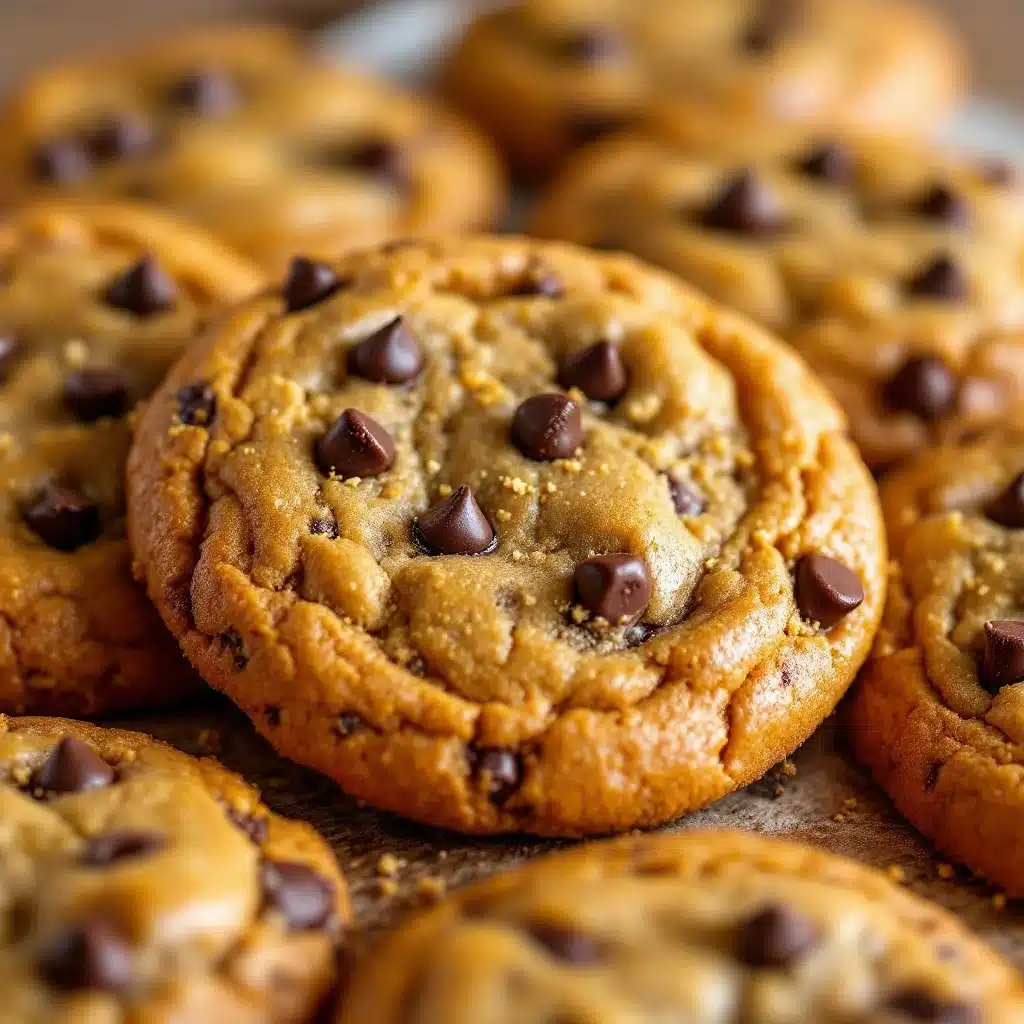
The way the edges of these brown butter pumpkin chocolate chip cookies catch the light—like stained glass made of caramel and butterfat—is what I made them for. Everything else is secondary. That first crackle of crystallized sugar on top, the way the pumpkin keeps the centers so soft they almost resist being picked up, the little pools of melted chocolate that cool into dark, glossy freckles across the surface. I didn’t set out to make a cookie that looked like this. I set out to use up half a can of pumpkin puree that had been staring at me from the fridge for three days, and somewhere between browning the butter and realizing I was out of regular chocolate chips (I used a chopped dark chocolate bar instead, which, honestly, was a happy accident), this thing happened.
I know what you’re thinking. Pumpkin cookies can be a lot. They’re often cakey in a way that feels more like a muffin top that lost its way, or they’re so spiced you forget you’re even eating a cookie. These are not those. The brown butter does this thing where it adds a nutty, almost toffee-like depth that keeps the pumpkin from being too sweet or one-note. And the chocolate? It’s not an afterthought. It’s a deliberate, slightly bitter counterpoint to all that warm, squash-y sweetness. Every bite has that little tug of chocolate, that soft, almost fudgy center, and those craggy, caramelized edges.
This recipe stuck because it solved a problem I didn’t know I had: how to make a fall cookie that actually tastes like a cookie, not a pastry. It’s the kind you reach for without thinking, the one that disappears from the cooling rack before you’ve even finished cleaning up. And that’s really the only test that matters.
Why You’ll Love This Recipe
Let’s be honest—there are about a million pumpkin cookie recipes out there. But this one is different. I’ve tested this recipe six times to get the balance just right, and I can tell you with confidence: this is the one you’ll make again and again.
- Brown Butter Magic: Toasting the butter until it’s nutty and golden adds a layer of flavor you just can’t get from regular melted butter. It makes the pumpkin taste deeper, almost caramelized.
- Perfect Texture: These cookies have those crispy, lacy edges everyone fights over, but the centers stay incredibly soft and tender. It’s the best of both worlds.
- Real Pumpkin Flavor: We’re not hiding the pumpkin here. It’s front and center, made even better by warm spices and that nutty brown butter.
- Simple Ingredients: You probably have most of these in your pantry right now. No weird extracts or hard-to-find flours.
- Make-Ahead Friendly: The dough actually tastes better after a chill in the fridge, so you can prep it the night before and bake fresh cookies whenever you want.
- Crowd-Pleaser: I brought these to a potluck last week, and someone actually asked me if they could take the leftovers home. That never happens.
This isn’t just another pumpkin cookie. It’s the one that makes you close your eyes after the first bite. It’s comfort food reimagined—familiar, but somehow better than you remembered.
What Ingredients You Will Need
This recipe uses simple, wholesome ingredients to deliver that bold, nutty flavor and soft-yet-crispy texture. Most of these are pantry staples, which makes these cookies dangerously easy to whip up on a whim.
For the Brown Butter
- Unsalted butter, 1 cup (2 sticks / 226g): This is the star of the show. I prefer using European-style butter like Kerrygold for browning because it has a higher fat content and less water, which means it browns more evenly and develops a richer flavor. But regular unsalted butter works perfectly too.
For the Cookie Dough
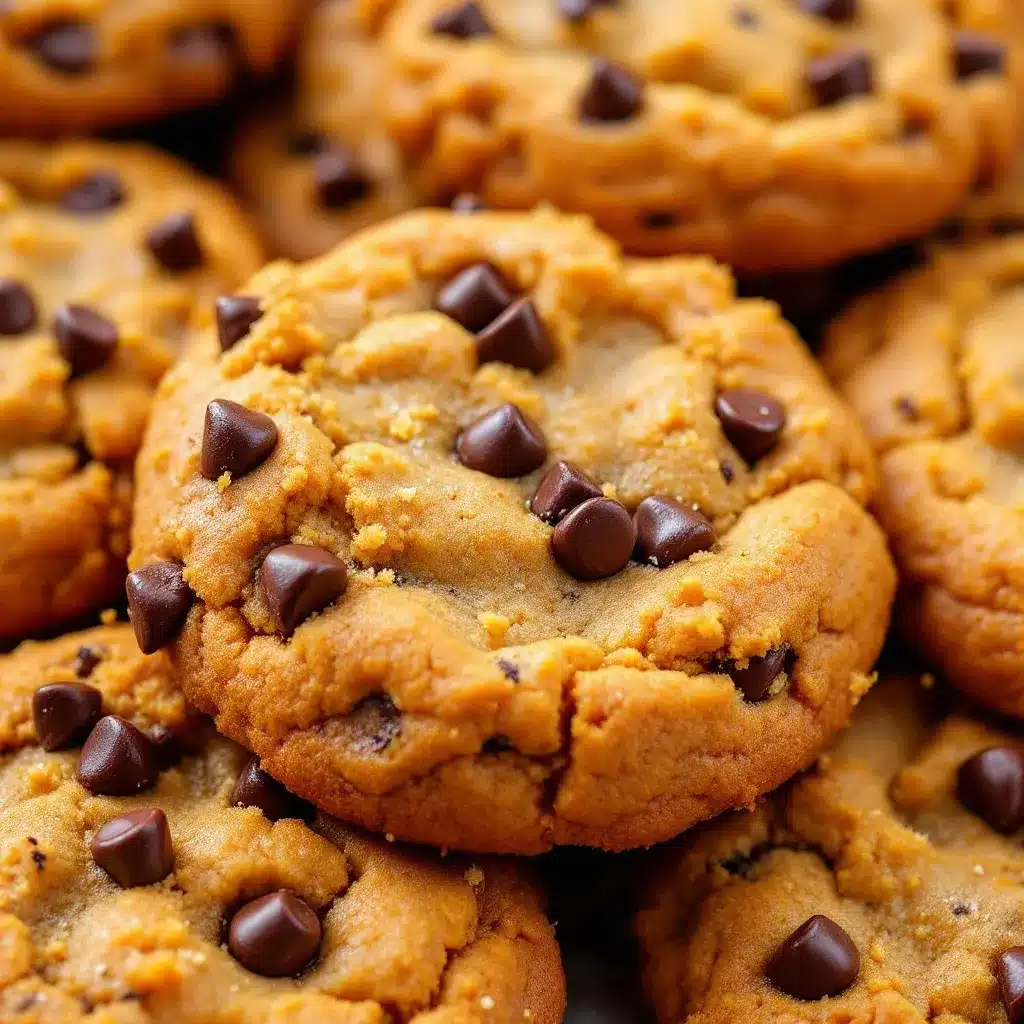
- Brown butter, cooled to room temperature: Don’t skip this step. If the butter is too warm, it’ll melt the sugar too quickly and your cookies will spread into flat puddles.
- Light brown sugar, 1 cup (200g), packed: The molasses in brown sugar adds moisture and that deep, caramel-like flavor that pairs so well with pumpkin and brown butter.
- Granulated sugar, 1/2 cup (100g): This helps the cookies spread just enough and gives those crispy edges.
- Pumpkin puree, 1/2 cup (120g): Make sure you’re using 100% pure pumpkin puree, not pumpkin pie filling. The pie filling has added sugar and spices that will throw off the balance. I usually go with Libby’s, but any brand works as long as it’s pure pumpkin.
- Large egg, 1, at room temperature: Room temperature eggs incorporate more easily into the batter, creating a smoother dough.
- Vanilla extract, 2 teaspoons: Pure vanilla extract is worth it here. It rounds out the nutty, spicy flavors beautifully.
- All-purpose flour, 2 cups (250g): Spoon and level your flour—don’t scoop directly from the bag, or you’ll end up with dry, dense cookies.
- Baking soda, 1 teaspoon: This helps the cookies spread and get those lovely craggy tops.
- Baking powder, 1/2 teaspoon: A little lift to keep the centers soft without making them cakey.
- Salt, 1 teaspoon: I use fine sea salt. Don’t skip it—salt makes the brown butter and chocolate sing.
- Pumpkin pie spice, 1 1/2 teaspoons: You can use store-bought or make your own with cinnamon, nutmeg, ginger, and cloves. I actually prefer homemade because I like a little extra cinnamon.
- Cinnamon, 1/2 teaspoon: Because you can never have too much cinnamon in a pumpkin cookie.
- Semi-sweet chocolate chips, 1 1/2 cups (270g): I like to use a mix of chocolate chips and chopped dark chocolate (about 60-70% cacao) for texture. The chips hold their shape, while the chopped chocolate melts into little puddles. Ghirardelli or Guittard are my go-to brands.
Equipment Needed
You don’t need a fancy kitchen to make these cookies, but a few specific tools make the process much smoother.
- Light-colored saucepan or skillet: A light-colored pan is crucial for browning butter because you can actually see the milk solids turn golden. Dark pans make it nearly impossible to judge the color, and you’ll end up with burnt butter. I use a stainless steel saucepan.
- Stand mixer or hand mixer: A stand mixer with the paddle attachment is ideal, but a hand mixer works just fine. You could even mix by hand with a sturdy spatula if you’re patient.
- Baking sheets: I recommend light-colored, rimmed baking sheets. Dark sheets absorb more heat and can cause the bottoms of your cookies to brown too quickly.
- Parchment paper or silicone baking mats: Parchment paper is non-negotiable here. It prevents sticking and helps the cookies spread evenly. Silicone mats work too, but they can sometimes inhibit spreading, so you might need to flatten the dough balls slightly.
- Medium cookie scoop (about 1.5 tablespoons): This ensures all your cookies are the same size and bake evenly. A 1.5-tablespoon scoop is perfect for a standard-sized cookie.
- Cooling rack: Essential for letting the cookies cool properly. If you leave them on the hot baking sheet, they’ll continue to cook and can become overdone.
Preparation Method
Alright, let’s get to it. This recipe has a few steps, but I promise each one is worth the extra minute.
- Brown the butter: Place the butter in a light-colored saucepan over medium heat. Let it melt completely, then stir occasionally with a rubber spatula. After a few minutes, it’ll start to foam and sputter—that’s normal. Keep stirring and watching. You’ll see little brown specks start to form at the bottom of the pan. The butter will smell nutty and toasty, like toasted hazelnuts. Once it turns a deep amber color (think the color of a penny), immediately remove it from the heat and pour it into a heatproof bowl to stop the cooking. Let it cool for about 15-20 minutes until it’s just warm to the touch, not hot. Pro tip: Don’t walk away from the butter while it’s browning. It goes from perfect to burnt in about 30 seconds.
- Mix the wet ingredients: In the bowl of a stand mixer fitted with the paddle attachment (or a large bowl with a hand mixer), combine the cooled brown butter, packed light brown sugar, and granulated sugar. Beat on medium speed for 2-3 minutes until the mixture looks like wet sand and is slightly lighter in color. Add the pumpkin puree, the room temperature egg, and the vanilla extract. Beat on medium-low until everything is smooth and well combined. The mixture might look a little separated at first—that’s okay. Keep mixing until it comes together into a thick, glossy batter.
- Combine the dry ingredients: In a separate bowl, whisk together the all-purpose flour, baking soda, baking powder, salt, pumpkin pie spice, and cinnamon. Whisking aerates the flour and ensures the leavening agents and spices are evenly distributed. No one wants a cookie with a pocket of baking soda.
- Add the dry to the wet: With the mixer on low speed, gradually add the dry ingredients to the wet ingredients. Mix just until the flour disappears. A few streaks of flour are fine—overmixing at this stage will develop too much gluten and make your cookies tough.
- Fold in the chocolate: Remove the bowl from the mixer and switch to a rubber spatula. Gently fold in the chocolate chips and chopped chocolate until they’re evenly distributed throughout the dough. The dough will be soft and slightly sticky, which is exactly what you want.
- Chill the dough (this is crucial): Cover the bowl with plastic wrap and refrigerate for at least 1 hour, or up to 3 days. Chilling the dough solidifies the brown butter, which prevents the cookies from spreading too much in the oven. It also allows the flavors to meld and deepen. I know it’s hard to wait, but this step makes a real difference.
- Preheat and prepare: When you’re ready to bake, preheat your oven to 350°F (175°C). Line two baking sheets with parchment paper.
- Scoop and bake: Use your cookie scoop to portion the dough into balls, about 1.5 tablespoons each. Place them 2 inches apart on the prepared baking sheets. Bake one sheet at a time for 11-13 minutes, or until the edges are golden brown and set, and the centers still look slightly soft and puffy. They will look underdone in the middle—trust that. They’ll continue to set on the hot baking sheet.
- Cool and enjoy: Let the cookies cool on the baking sheet for 5 minutes. This allows them to firm up enough to transfer without falling apart. Then, carefully move them to a wire rack to cool completely. Or, you know, eat one warm. I won’t tell anyone.
Cooking Tips & Techniques
I’ve made these cookies enough times to know exactly where things can go wrong. Here are the lessons I learned the hard way so you don’t have to.
- The brown butter temperature is everything. The first time I made these, I was impatient and used the brown butter while it was still hot. The cookies spread into thin, greasy discs. The second time, I let it cool completely, and they were perfect. Aim for the texture of softened butter—firm but still pliable.
- Don’t overbake them. This is the most common mistake with pumpkin cookies. Because pumpkin adds so much moisture, they can look underdone even when they’re perfectly baked. Pull them out when the edges are set and golden but the centers are still soft and slightly puffed. They’ll continue to bake on the hot sheet.
- Use a cookie scoop for even baking. I used to just eyeball it with two spoons, and I’d end up with a tray of cookies where some were burnt and some were raw. A cookie scoop is a $10 investment that pays for itself in perfectly uniform cookies.
- Rotate your baking sheet halfway through. Most ovens have hot spots. Halfway through the baking time, spin the sheet 180 degrees to ensure even browning. Your cookies will thank you.
- Let them rest on the sheet. I know it’s tempting to move them immediately, but those 5 minutes on the hot baking sheet are crucial for setting the structure. Move them too soon, and they’ll fall apart.
Variations & Adaptations
One of the best things about this recipe is how easy it is to tweak. Here are a few ways I’ve personalized it over the years.
- Gluten-Free Version: Substitute the all-purpose flour with a 1:1 gluten-free baking flour blend that contains xanthan gum. I’ve had great results with Bob’s Red Mill. The texture will be slightly more tender, but they’re still delicious.
- Dairy-Free Version: Use a high-quality vegan butter stick (like Miyoko’s or Earth Balance) for browning. It browns beautifully and has a similar nutty flavor. Make sure your chocolate chips are dairy-free too.
- Add Some Crunch: Fold in 1/2 cup of toasted pecans or walnuts along with the chocolate. The nuttiness of the brown butter pairs so well with the crunch of toasted nuts. I did this once for a Thanksgiving cookie platter, and they were the first to disappear.
- Spice It Up: If you like things warm and spicy, add a pinch of cayenne pepper or a 1/4 teaspoon of ground ginger to the dry ingredients. It gives the cookies a subtle heat that lingers after the sweetness fades.
- White Chocolate Cranberry: Swap the semi-sweet chocolate for 1 cup of white chocolate chips and 1/2 cup of dried cranberries. This version is a little sweeter and feels more festive—perfect for holiday cookie exchanges.
- Make Them Chewier: For an even chewier texture, replace 1/4 cup of the all-purpose flour with 1/4 cup of bread flour. The higher protein content in bread flour creates more chew.
Serving & Storage Suggestions
These cookies are versatile, and how you serve them can totally change the experience.
- Serving Temperature: They’re absolutely divine warm, when the chocolate is still melty and the edges are perfectly crisp. But they’re also fantastic at room temperature—the flavors actually become more pronounced after they’ve cooled completely. If you’re serving them for a party, let them cool fully so they hold their shape better.
- Pairing Ideas: A cold glass of milk is the classic choice, but I love them with a hot cup of chai latte or a spiced apple cider. The warm spices in the drink complement the pumpkin and brown butter beautifully. For a grown-up treat, they’re amazing with a dark stout or a bourbon old fashioned.
- Storing: Store the cookies in an airtight container at room temperature for up to 5 days. To keep them soft, add a slice of plain bread to the container—the bread absorbs excess moisture and releases it slowly, keeping the cookies perfectly tender. Replace the bread slice every couple of days.
- Freezing: You can freeze the baked cookies for up to 3 months. Layer them between sheets of parchment paper in a freezer-safe container. To thaw, just leave them at room temperature for about 30 minutes. You can also freeze the raw dough balls. Scoop them onto a parchment-lined baking sheet, freeze until solid, then transfer to a freezer bag. Bake from frozen, adding 2-3 minutes to the baking time.
- Reheating: If you want that just-baked experience, pop a cookie in the microwave for 10-15 seconds. Or, for crispier edges, reheat them in a 300°F (150°C) oven for 5 minutes.
Nutritional Information & Benefits
Let’s be real—these are cookies, not health food. But they do have a few redeeming qualities worth mentioning.
- Estimated Nutritional Values (per cookie, based on 24 cookies): Calories: 185, Fat: 10g, Saturated Fat: 6g, Cholesterol: 25mg, Sodium: 110mg, Carbohydrates: 24g, Fiber: 1g, Sugar: 15g, Protein: 2g.
- Pumpkin Power: Pumpkin puree is packed with vitamin A (from beta-carotene), which is great for eye health and immune function. It also adds moisture without extra fat, which is why these cookies stay so soft.
- Brown Butter Benefits: Okay, this is a stretch, but browning butter does concentrate its flavor, which means you can use less butter overall compared to a recipe that relies on the same amount of regular butter for flavor. Every little bit counts, right?
- Dietary Considerations: This recipe can easily be made gluten-free or dairy-free with simple substitutions. It’s also nut-free as written (unless you add the pecans).
- Potential Allergens: Contains wheat (gluten), dairy, and eggs. Always check your chocolate chip label for potential cross-contamination if you’re serving someone with severe allergies.
Conclusion
These brown butter pumpkin chocolate chip cookies are the kind of recipe that feels special without being fussy. They have that perfect balance of crispy edges and soft, fudgy centers, with a deep, nutty flavor that makes you wonder why you haven’t been browning butter for cookies your whole life. They’re the cookie you’ll want to make for fall gatherings, cozy weekends, or just because you have a can of pumpkin and an hour to spare.
I’d love to hear how they turn out for you. Did you try a variation? Did you add nuts or swap the chocolate? Drop a comment below and let me know—your tweaks might just inspire someone else’s next batch. And if you’re looking for more cozy fall treats, you might enjoy my no-bake pumpkin cheesecake for those days you don’t even want to turn on the oven, or these classic sweet potato pie for a soul-food twist on your holiday table. Happy baking, friends. I hope these cookies bring a little warmth to your kitchen.
Frequently Asked Questions
Can I use canned pumpkin pie filling instead of pumpkin puree?
I wouldn’t recommend it. Pumpkin pie filling already has sugar and spices added, which will throw off the balance of this recipe. Stick with 100% pure pumpkin puree for the best results.
Why did my cookies spread too much?
This usually happens for one of two reasons: the brown butter was too warm when you mixed the dough, or the dough wasn’t chilled long enough. Make sure your butter is cooled to room temperature and chill the dough for at least an hour before baking.
Can I make the dough ahead of time?
Absolutely! The dough can be refrigerated for up to 3 days. In fact, the flavor gets even better as it rests. You can also freeze the dough balls for up to 3 months and bake them straight from the freezer—just add a couple of minutes to the baking time.
My cookies came out cakey. What went wrong?
Cakey cookies are usually a sign of too much flour or overmixing. Make sure you’re spooning and leveling your flour rather than scooping it directly from the bag. Also, mix the dry ingredients into the wet just until they disappear—overmixing develops gluten, which leads to a tougher, more cake-like texture.
Can I use dark chocolate instead of semi-sweet?
Definitely. I actually prefer a mix of semi-sweet chips and chopped dark chocolate (around 60-70% cacao). The darker chocolate provides a nice bitter contrast to the sweet, nutty dough. Just keep in mind that the higher the cocoa percentage, the less sweet the cookie will be overall.
Pin This Recipe!
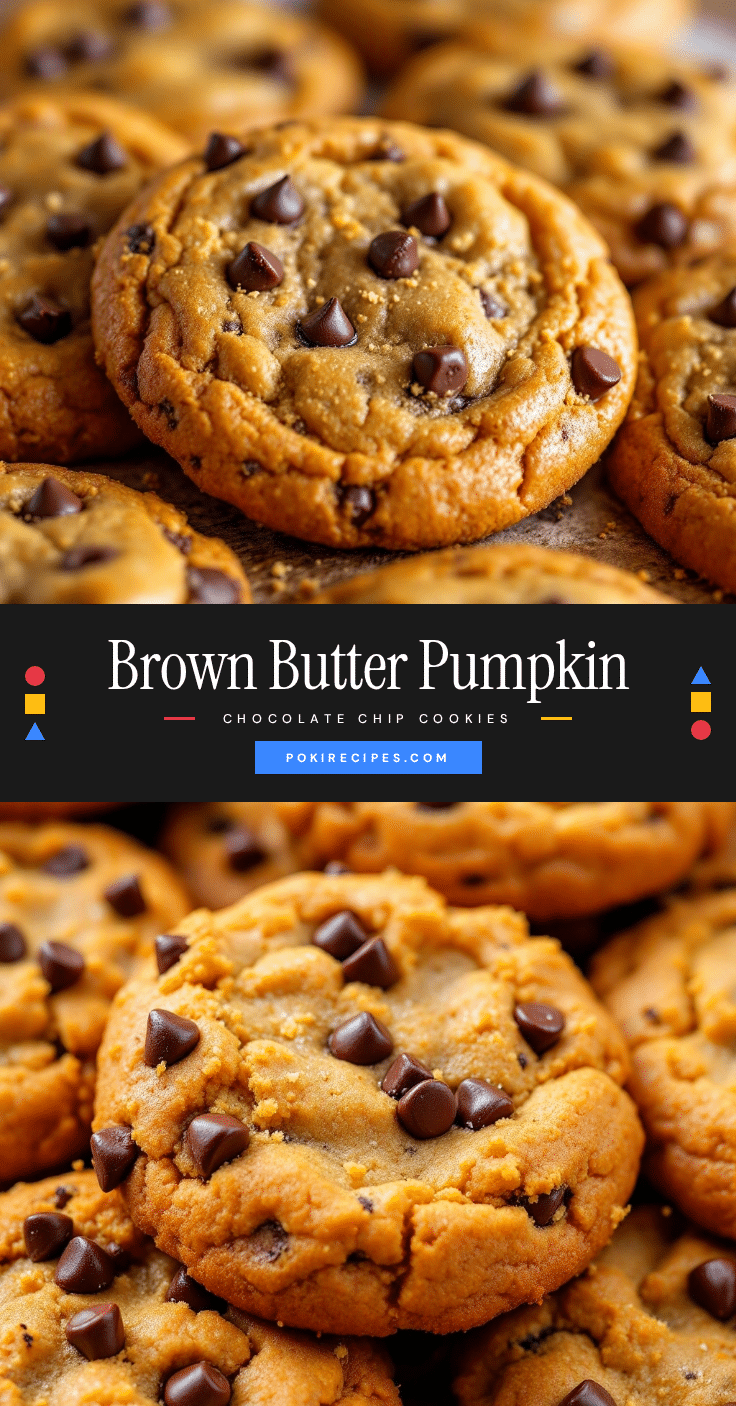
Best Brown Butter Pumpkin Chocolate Chip Cookies

These brown butter pumpkin chocolate chip cookies have crispy, caramelized edges and soft, fudgy centers, with a nutty depth from browned butter and a perfect balance of pumpkin and chocolate.
- Prep Time: 20 minutes
- Cook Time: 12 minutes
- Total Time: 1 hour 32 minutes (includes 1 hour chilling)
- Yield: 24 cookies 1x
- Category: Dessert
- Cuisine: American
Ingredients
- 1 cup (2 sticks / 226g) unsalted butter (for browning)
- 1 cup (200g) light brown sugar, packed
- 1/2 cup (100g) granulated sugar
- 1/2 cup (120g) pumpkin puree (100% pure, not pie filling)
- 1 large egg, at room temperature
- 2 teaspoons vanilla extract
- 2 cups (250g) all-purpose flour
- 1 teaspoon baking soda
- 1/2 teaspoon baking powder
- 1 teaspoon fine sea salt
- 1 1/2 teaspoons pumpkin pie spice
- 1/2 teaspoon cinnamon
- 1 1/2 cups (270g) semi-sweet chocolate chips (or a mix of chips and chopped dark chocolate)
Instructions
- Brown the butter: Place butter in a light-colored saucepan over medium heat. Melt completely, then stir occasionally. After a few minutes, it will foam and sputter. Continue stirring until brown specks form and butter turns deep amber (color of a penny). Immediately remove from heat and pour into a heatproof bowl. Cool for 15-20 minutes until just warm to the touch.
- Mix wet ingredients: In a stand mixer with paddle attachment (or large bowl with hand mixer), combine cooled brown butter, brown sugar, and granulated sugar. Beat on medium speed for 2-3 minutes until like wet sand and slightly lighter. Add pumpkin puree, egg, and vanilla. Beat on medium-low until smooth and well combined.
- Combine dry ingredients: In a separate bowl, whisk together flour, baking soda, baking powder, salt, pumpkin pie spice, and cinnamon.
- Add dry to wet: With mixer on low, gradually add dry ingredients to wet. Mix just until flour disappears (a few streaks are fine).
- Fold in chocolate: Remove bowl from mixer. Gently fold in chocolate chips and chopped chocolate with a rubber spatula until evenly distributed. Dough will be soft and slightly sticky.
- Chill dough: Cover bowl with plastic wrap and refrigerate for at least 1 hour, or up to 3 days.
- Preheat and prepare: When ready to bake, preheat oven to 350°F (175°C). Line two baking sheets with parchment paper.
- Scoop and bake: Use a cookie scoop (about 1.5 tablespoons) to portion dough into balls. Place 2 inches apart on prepared sheets. Bake one sheet at a time for 11-13 minutes, until edges are golden brown and set, centers still soft and puffy.
- Cool and enjoy: Let cookies cool on baking sheet for 5 minutes, then transfer to a wire rack to cool completely.
Notes
Chilling the dough is crucial to prevent spreading. Brown butter must be cooled to room temperature before mixing. Do not overbake; cookies will continue to set on the hot sheet. For best results, use a light-colored pan for browning butter.
Nutrition
- Serving Size: 1 cookie
- Calories: 185
- Sugar: 15
- Sodium: 110
- Fat: 10
- Saturated Fat: 6
- Carbohydrates: 24
- Fiber: 1
- Protein: 2
Keywords: brown butter, pumpkin, chocolate chip cookies, fall cookies, pumpkin cookies, brown butter cookies