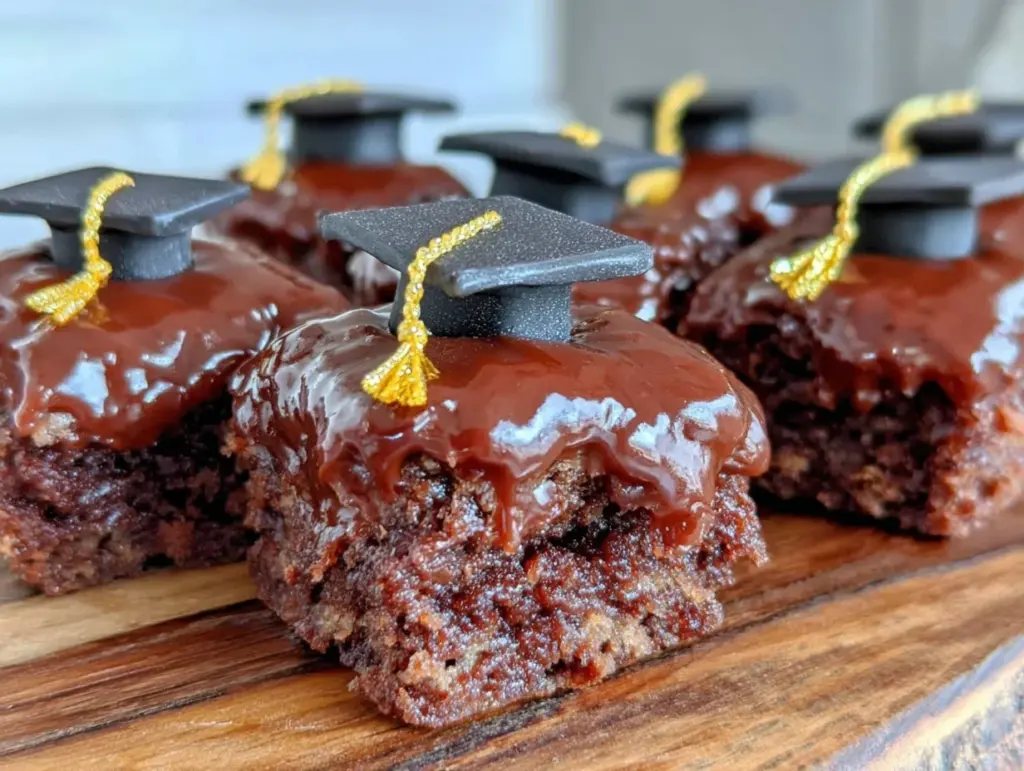
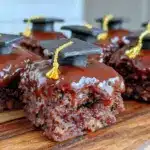
“Hey, do you think we can pull off making those cute little graduation cap brownies for the party tomorrow?” was the text I got from my sister at 9 PM the night before the big day. Honestly, I was half-expecting a disaster—last-minute baking tends to be a gamble in our family. But those Perfect Graduation Cap Brownie Bites ended up being the unexpected star of the celebration. I remember sneaking a bite while frosting the tiny caps, the rich, fudgy brownie base paired with the crisp chocolate mortarboard made me pause and smile. These bites weren’t just treats; they felt like little tokens of pride, the kind that make you forget the stress of the day.
It’s funny how such a simple idea can turn into a tradition. Since that night, I’ve found myself baking these Perfect Graduation Cap Brownie Bites over and over for graduations, but also for other milestones. The recipe is ridiculously easy, which is a lifesaver when you’ve got a million things to juggle, and the way they look on a dessert table? Absolutely charming—like edible little hats of accomplishment. There’s a quiet joy in serving something homemade that looks this thoughtful without the fuss.
What really hooked me was how the texture nails that perfect brownie bite: fudgy inside, slightly crisp edges, and topped with a neat, glossy chocolate square that you can decorate however you like. It’s a small detail, but the little “button” on top—usually a dot of icing or candy—makes it unmistakably a graduation cap. I’ve since used this recipe to celebrate friends finishing courses, promotions, and even the end of a tough week. It’s more than dessert; it’s a moment of celebration captured in a bite.
So, if you’re thinking about whipping up a batch for your next celebration—or maybe just because you want to feel a little fancy without the hassle—these Perfect Graduation Cap Brownie Bites might just become your go-to. They’re proof that you don’t have to be a pro baker to impress, and honestly, that’s the kind of win we all need sometimes.
Why You’ll Love This Recipe
After testing and tweaking this recipe through several celebrations and last-minute baking marathons, I can confidently say these Perfect Graduation Cap Brownie Bites are a keeper for many reasons. They hit all the marks that matter when you want a homemade treat that’s both fun and fuss-free.
- Quick & Easy: The batter comes together in under 15 minutes, and the whole batch bakes in just about 20 minutes—ideal for busy nights or unexpected gatherings.
- Simple Ingredients: You don’t need fancy or hard-to-find items. Basic pantry staples like cocoa powder, sugar, and eggs make this recipe accessible to everyone.
- Perfect for Celebrations: Whether it’s graduation day, a birthday, or any milestone, these bites bring a festive, personalized touch that’s hard to beat.
- Crowd-Pleaser: Kids and adults alike can’t get enough of these fudgy brownie bites topped with their adorable mortarboards.
- Unbelievably Delicious: The balance of a chewy, rich brownie base with the smooth chocolate cap is comfort food at its best.
What sets this recipe apart? I’ve made sure the brownies are just the right fudgy texture—not cakey or dry—which means they hold up perfectly even after adding the chocolate caps. Plus, the mortarboards are easy to customize with different colored frosting or edible glitter if you want to add a splash of school colors or personality. It’s not just another brownie recipe; it’s a little celebration in every bite that you can make confidently, even if you’re not usually a baker.
Honestly, every time I make these, I find myself closing my eyes and savoring that first bite like it’s a small win. These bites have become my way of turning a simple dessert into a memory—just the kind of homemade magic that sticks with you.
What Ingredients You Will Need
This recipe uses simple, wholesome ingredients to deliver bold flavor and that fudgy brownie texture we all crave. Most are pantry staples, so no last-minute grocery runs needed.
- For the Brownie Base:
- Unsalted butter, 1/2 cup (113g), melted (adds richness and moisture)
- Granulated sugar, 1 cup (200g)
- Large eggs, 2, room temperature (for structure and tenderness)
- Pure vanilla extract, 1 teaspoon (boosts flavor depth)
- All-purpose flour, 3/4 cup (95g), sifted
- Unsweetened cocoa powder, 1/2 cup (50g), sifted (I prefer Ghirardelli for a deep chocolate taste)
- Salt, 1/4 teaspoon (balances sweetness)
- For the Graduation Cap Topping:
- Dark chocolate chips or melting wafers, 1 cup (175g), for glossy caps
- Black or dark brown food coloring gel (optional, for richer color)
- White royal icing or store-bought white frosting, for the “button” on top (a small dot completes the cap look)
- Miniature candy pearls or sprinkles (optional, for extra decoration)
Pro tip: If you want to make these gluten-free, swapping the all-purpose flour with almond flour works well—just expect a slightly denser bite. For dairy-free or vegan versions, you can use coconut oil instead of butter and flax eggs in place of regular eggs, though the texture shifts a bit. In summer, I sometimes swap cocoa powder for a mix of cocoa and espresso powder to deepen the flavor, which makes the bites feel extra special for celebrations.
Equipment Needed
- 8×8-inch (20×20 cm) baking pan – a standard size that helps keep the brownie thickness just right
- Mixing bowls – one for wet ingredients, one for dry
- Whisk or electric mixer – to combine ingredients smoothly
- Spatula – essential for folding in flour and scraping the batter cleanly
- Cooling rack – allows brownies to cool evenly, preventing sogginess
- Small round cookie cutter or sharp knife – to cut brownies into bite-sized squares
- Microwave-safe bowl or double boiler – for melting chocolate caps
- Piping bag or small zip-top bag (optional) – for precise royal icing dots
If you don’t have an 8×8-inch pan, a 9×9-inch works fine; just keep an eye on the baking time as a thinner layer will bake faster. For melting chocolate, I prefer a double boiler method because it gives me more control and avoids scorching, but a microwave in short bursts also does the trick. I once tried using a silicone mold to shape the caps, but found cutting from a chocolate sheet easier and less messy. For budget-friendly options, a simple glass or metal pan and a butter knife for cutting work perfectly well.
Preparation Method

- Preheat your oven to 350°F (175°C). Grease your 8×8-inch baking pan or line it with parchment paper to prevent sticking. This step saves a lot of cleanup hassle later.
- Mix the wet ingredients: In a medium bowl, whisk together the melted butter and granulated sugar until smooth and slightly glossy, about 1-2 minutes. Add the eggs one at a time, beating well after each addition. Stir in the vanilla extract. The batter should look shiny and thick.
- Sift the dry ingredients: In a separate bowl, sift together the flour, cocoa powder, and salt. This helps avoid lumps and ensures a smooth batter. Gently fold the dry mixture into the wet ingredients using a spatula, being careful not to overmix—stop as soon as you see no streaks of flour.
- Pour the batter into the prepared pan: Spread it evenly with a spatula, smoothing the top. The batter will be thick but spreadable. Bake for 18-22 minutes, checking at 18 minutes with a toothpick inserted in the center. It should come out with a few moist crumbs but not wet batter.
- Cool completely on a wire rack: This is crucial. If you try to cut or frost while warm, the brownies will crumble. Cooling takes about 45 minutes to an hour.
- Cut into bite-sized squares: Use a sharp knife or a small round cookie cutter for uniform pieces, roughly 1.5 inches (4 cm) across. Wipe your knife clean between cuts for neat edges.
- Melt the chocolate for the caps: Use a microwave in 20-second bursts, stirring in between, or melt over a double boiler until smooth. Stir in a drop of black food coloring if you want an extra dark hue.
- Form the graduation caps: Dip the top of each brownie bite into the melted chocolate or spread a thin layer on top using a small spatula. Let it set slightly but still tacky—this helps the “button” stick later.
- Add the “button”: Pipe a small dot of white royal icing or frosting in the center of each chocolate cap. If you want to get fancy, place a tiny candy pearl or sprinkle on top for that classic finishing touch.
- Let everything set: Place the brownie bites in the fridge for 15-20 minutes to allow the chocolate and icing to firm up completely before serving.
Pro tip: If you notice the chocolate is too thick to spread, add a tiny splash of vegetable oil to loosen it up. Also, cutting brownies while fully cooled keeps the edges clean and prevents crumbling. I’ve learned the hard way that rushing this step just ends in crumb chaos.
Cooking Tips & Techniques
Making Perfect Graduation Cap Brownie Bites is pretty straightforward, but a few tricks help get them just right every time.
- Don’t overmix the batter. Once the flour goes in, fold gently until just combined. Overmixing can lead to cakey brownies, and honestly, that fudgy texture is where the magic lives.
- Timing is everything. Start checking your brownies at the lower end of the baking time. Ovens vary, and a toothpick test that comes out with a few moist crumbs is perfect. Overbaking dries them out.
- Cooling is key. Patience here pays off. Cutting warm brownies is a shortcut to crumb mess. Let them chill on a rack for at least 45 minutes, or pop them in the fridge if you’re short on time.
- Use good-quality cocoa powder. It really makes a difference. I keep a stash of Ghirardelli or Valrhona for baking. It’s one of those small upgrades that pays off in flavor.
- Melting chocolate gently prevents seizing. Whether using the microwave or double boiler, keep the heat low and stir often. If your chocolate thickens, a tiny bit of vegetable oil or shortening can smooth it out.
- Customize your caps with ease. If piping isn’t your favorite, use a toothpick to place the royal icing “button” or try edible markers for fun details.
Early on, I tried rushing the chocolate setting and ended up with messy, droopy caps. Now I always chill the bites before serving, and it makes all the difference. Also, multitasking by prepping the frosting while brownies bake saves time and keeps the process smooth. It’s all about pacing yourself and enjoying the little moments.
Variations & Adaptations
If you want to switch things up or cater to different dietary needs, these Perfect Graduation Cap Brownie Bites are quite adaptable.
- Flavor Variations: Add a teaspoon of espresso powder to the batter for a mocha twist that deepens the chocolate flavor. Or swirl in peanut butter before baking for a rich, nutty surprise.
- Dietary Adaptations: For gluten-free, replace the flour with a gluten-free all-purpose blend or almond flour. For a vegan option, use flax eggs (1 tablespoon ground flaxseed + 3 tablespoons water per egg) and coconut oil instead of butter.
- Decoration Twists: Instead of dark chocolate caps, try white chocolate dyed in school colors or vibrant candy melts. You can also swap royal icing for colored buttercream or edible glitter for a festive shine.
- Size Adjustments: Make mini versions using a mini muffin tin for bite-sized pops or larger squares for a more indulgent treat.
- Personal Variation: One year, I made these with a sprinkle of sea salt on top of the chocolate cap before setting. The salty-sweet combo was surprisingly addictive and got rave reviews at the party.
Also, if you happen to love brownies but want a different celebratory shape, you might enjoy trying the peanut butter blossoms for a cookie twist on celebration treats.
Serving & Storage Suggestions
These Perfect Graduation Cap Brownie Bites are best served at room temperature after chilling to set the chocolate caps. Arrange them neatly on a platter or tiered dessert stand for a polished look. They pair beautifully with a cup of coffee or a chilled glass of milk for a classic combo.
If you’re hosting a larger celebration, consider offering a variety of treats alongside these bites. For example, a fresh salad like the strawberry spinach salad can balance the richness, or a savory option like Thai basil chicken for a complete party spread.
For storage, keep the brownie bites in an airtight container at room temperature for up to 3 days. If your home is warm, refrigeration is better; just bring them back to room temp before serving to soften the texture. They also freeze well—wrap tightly and freeze for up to 2 months. Thaw overnight in the fridge and let sit at room temperature before enjoying.
Over time, the flavors deepen and the chocolate cap firms nicely, making them even more satisfying the next day. Just be sure to add the royal icing “button” fresh if freezing, as it can lose texture in the freezer.
Nutritional Information & Benefits
While these brownie bites are definitely a celebratory treat, they’re made with straightforward ingredients and can fit into a balanced diet when enjoyed in moderation.
| Nutrient | Per Brownie Bite (approx.) |
|---|---|
| Calories | 110 |
| Total Fat | 6g |
| Saturated Fat | 3.5g |
| Carbohydrates | 14g |
| Sugars | 10g |
| Protein | 1g |
Key benefits come from the cocoa powder, which is rich in antioxidants and may support heart health. Using unsalted butter and controlling sugar amounts help keep this treat as wholesome as possible. For those with dietary restrictions, gluten-free and vegan adaptations ensure everyone can join the celebration.
Personally, I appreciate that this recipe doesn’t call for any artificial ingredients or preservatives, making it a comforting, homemade alternative to store-bought sweets.
Conclusion
These Perfect Graduation Cap Brownie Bites have become my little way to mark milestones with a homemade touch that’s surprisingly easy and always appreciated. Whether you’re celebrating a graduation, a new job, or just a win in your day, these bites bring a smile and a moment of sweetness that feels just right.
Feel free to tweak the decorations, try different flavor variations, or adapt the recipe to fit your dietary needs. It’s your celebration, after all, and these brownie bites are ready to play their part in making it memorable.
Thanks for reading, and if you give these a try, I’d love to hear how you personalized them or what celebrations they brightened up. Sharing those little wins is what makes baking even better!
FAQs About Perfect Graduation Cap Brownie Bites
How do I keep the brownie bites fudgy and not cakey?
Be careful not to overmix the batter once the flour is added and avoid overbaking. Pull them out when a toothpick comes out with moist crumbs.
Can I make these brownies ahead of time?
Yes! They can be baked a day ahead and stored airtight at room temperature or in the fridge. Just add the royal icing “buttons” the day of serving for best results.
What can I use if I don’t have royal icing?
Store-bought white frosting or even a simple white chocolate dot works well as the “button” on the graduation cap.
Can I freeze the brownie bites?
Absolutely. Wrap them tightly and freeze for up to 2 months. Thaw overnight in the fridge before serving, and add icing fresh if possible.
How can I make these gluten-free or vegan?
Swap all-purpose flour with almond flour or a gluten-free blend for gluten-free. For vegan, use flax eggs and coconut oil instead of butter. Texture will vary slightly but still delicious.
Pin This Recipe!
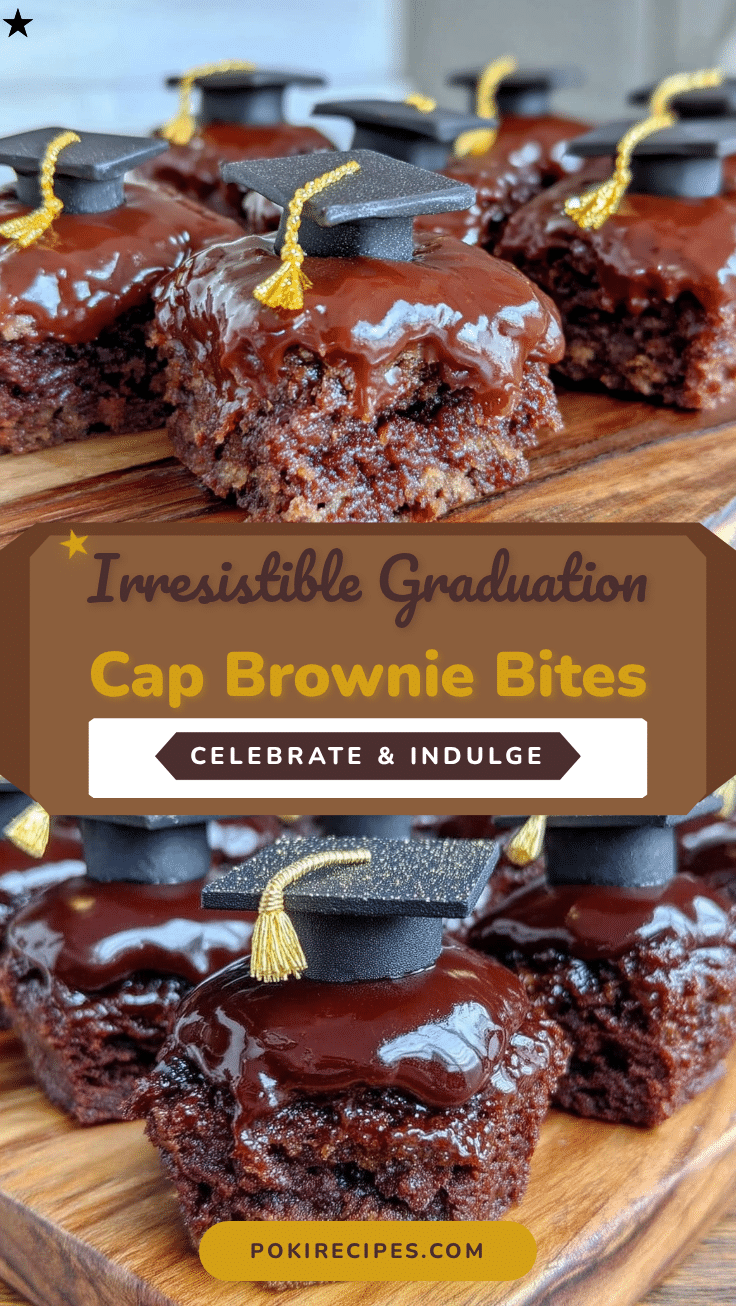
Perfect Graduation Cap Brownie Bites
These fudgy brownie bites topped with glossy chocolate caps and a royal icing button are an easy, charming treat perfect for graduations and celebrations.
- Prep Time: 15 minutes
- Cook Time: 20 minutes
- Total Time: 1 hour 35 minutes
- Yield: 24 brownie bites 1x
- Category: Dessert
- Cuisine: American
Ingredients
- 1/2 cup (113g) unsalted butter, melted
- 1 cup (200g) granulated sugar
- 2 large eggs, room temperature
- 1 teaspoon pure vanilla extract
- 3/4 cup (95g) all-purpose flour, sifted
- 1/2 cup (50g) unsweetened cocoa powder, sifted
- 1/4 teaspoon salt
- 1 cup (175g) dark chocolate chips or melting wafers
- Black or dark brown food coloring gel (optional)
- White royal icing or store-bought white frosting
- Miniature candy pearls or sprinkles (optional)
Instructions
- Preheat your oven to 350°F (175°C). Grease an 8×8-inch baking pan or line it with parchment paper.
- In a medium bowl, whisk together the melted butter and granulated sugar until smooth and slightly glossy, about 1-2 minutes.
- Add the eggs one at a time, beating well after each addition. Stir in the vanilla extract.
- In a separate bowl, sift together the flour, cocoa powder, and salt.
- Gently fold the dry mixture into the wet ingredients using a spatula, stopping as soon as no streaks of flour remain.
- Pour the batter into the prepared pan and spread evenly with a spatula.
- Bake for 18-22 minutes, checking at 18 minutes with a toothpick inserted in the center; it should come out with a few moist crumbs but not wet batter.
- Cool completely on a wire rack for 45 minutes to an hour.
- Cut into bite-sized squares about 1.5 inches (4 cm) across using a sharp knife or small round cookie cutter.
- Melt the chocolate chips using a microwave in 20-second bursts or over a double boiler until smooth. Stir in a drop of black food coloring if desired.
- Dip the top of each brownie bite into the melted chocolate or spread a thin layer on top with a spatula. Let it set until tacky.
- Pipe a small dot of white royal icing or frosting in the center of each chocolate cap. Optionally, add a tiny candy pearl or sprinkle on top.
- Place the brownie bites in the fridge for 15-20 minutes to allow the chocolate and icing to firm up before serving.
Notes
Do not overmix the batter to keep brownies fudgy. Cool brownies completely before cutting and frosting to avoid crumbling. Add a tiny splash of vegetable oil to melted chocolate if too thick. Customize caps with colored frosting or edible glitter. For gluten-free, substitute flour with almond flour; for vegan, use flax eggs and coconut oil.
Nutrition
- Serving Size: 1 brownie bite (appr
- Calories: 110
- Sugar: 10
- Fat: 6
- Saturated Fat: 3.5
- Carbohydrates: 14
- Protein: 1
Keywords: brownie bites, graduation treats, fudgy brownies, celebration desserts, easy brownies, homemade treats


