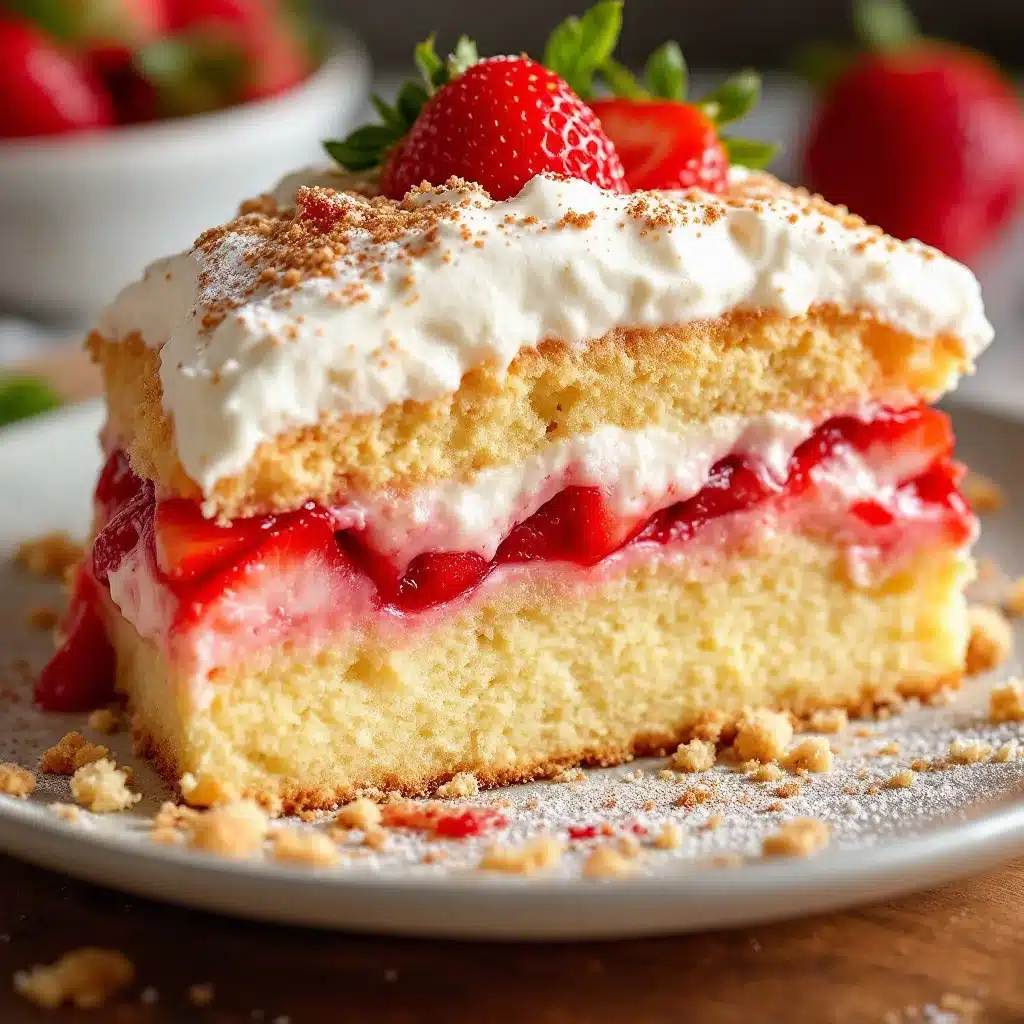
I want strawberry shortcake right now, but the oven is already off and the thought of turning it back on makes me want to cry. That is the kind of honest, slightly dramatic thought that leads to the best kitchen discoveries. I had a box of vanilla wafers, a pint of strawberries that were just past their prime, and a container of heavy cream that was dangerously close to its expiration date. It was not a planned dessert. It was a refrigerator crisis, honestly. And out of that chaos came this No-Bake Strawberry Shortcake Icebox Cake.
There is something almost magical about how a few simple layers transform overnight. You stack cookies, cream, and berries, then you walk away. The fridge does all the work. The wafers soak up the sweet cream and strawberry juices, softening into something that tastes like a shortcake biscuit but without any flour, butter, or baking. It is a shortcut that feels like a secret. The first time I made this, I pulled it out the next day and stared at it. It looked like I had spent hours in the kitchen. I had spent fifteen minutes. Fifteen minutes, and the payoff was a dessert that disappeared in about the same amount of time at the party I brought it to. That is the kind of recipe math I can get behind.
This is not a fussy dessert. It does not require a springform pan or a mixer with ten attachments. You just need a dish, some patience, and the willingness to let the refrigerator do the heavy lifting. And honestly, in a world where we are all trying to do a little less, that feels like the right approach.
Why You’ll Love This Recipe
I have tested this No-Bake Strawberry Shortcake Icebox Cake about six times now, adjusting the cream sweetness and the layering technique each time. Here is why I keep coming back to it.
- Quick & Easy: This comes together in under 15 minutes of active work. No oven, no stove, no complicated techniques. It is the perfect dessert for hot summer days when you want something impressive without breaking a sweat.
- Simple Ingredients: You need vanilla wafers, fresh strawberries, heavy cream, powdered sugar, and a little vanilla extract. That is it. No specialty baking items or grocery store scavenger hunts.
- Perfect for Entertaining: This is a crowd-pleaser that looks like a showstopper. It slices beautifully, and everyone thinks you put in way more effort than you actually did. I have brought this to potlucks, barbecues, and birthday dinners, and it always gets the same reaction: “Wait, you made this?”
- Make-Ahead Magic: You can assemble this the day before and forget about it. The flavors actually get better as it sits, so it is perfect for when you want to prep dessert in advance and focus on the main course.
- Unbelievably Delicious: The texture is what gets me every time. The wafers turn into a cake-like layer, the cream stays light and fluffy, and the strawberries add these bright, juicy bursts of flavor. It is comfort food that feels fresh and indulgent at the same time.
What makes this recipe different from other icebox cakes is the layering technique. I do not just throw everything together. I macerate the strawberries first with a little sugar, which draws out their natural juices and creates a syrupy layer that soaks into the wafers. That little extra step makes a huge difference. It is not just a strawberry cake—it is a strawberry shortcake experience, minus the oven.
This is the kind of dessert that makes you close your eyes after the first bite. It is simple, it is honest, and it is exactly what you need when you want something sweet without all the work.
What Ingredients You Will Need
The beauty of this No-Bake Strawberry Shortcake Icebox Cake is that it relies on simple, everyday ingredients to create something truly special. You probably have most of these in your kitchen right now.
- For the Strawberry Layer:
- 2 pounds fresh strawberries, hulled and sliced (about 6 cups sliced)
- 3 tablespoons granulated sugar (helps draw out the natural juices and creates a syrupy layer)
- 1 tablespoon fresh lemon juice (brightens the flavor and balances the sweetness)
- For the Cream Layer:
- 3 cups heavy whipping cream, cold (I recommend using a brand like Horizon Organic or Organic Valley for the best flavor and stability)
- 1/2 cup powdered sugar (dissolves easily into the cream without grittiness)
- 2 teaspoons vanilla extract (use pure vanilla extract, not imitation, for the best flavor)
- 1/4 teaspoon salt (optional, but it balances the sweetness beautifully)
- For the Cookie Layer:
- 2 (11-ounce) boxes vanilla wafers (you need about 80-90 wafers total; I prefer the Nilla brand for their consistent texture and size)
- For Garnish (Optional):
- Fresh whole strawberries with stems
- Mint sprigs
- Additional whipped cream for piping
Ingredient Tips: Look for strawberries that are ripe but still firm. Overly soft strawberries will turn mushy when macerated. If your strawberries are not super sweet, add an extra tablespoon of sugar to the maceration mixture. For the cream, make sure it is well-chilled before whipping. Warm cream will not whip properly and can turn into butter if overbeaten. If you are dairy-free, you can substitute the heavy cream with a full-fat coconut cream, but the texture will be slightly different and less stable.
Equipment Needed
You do not need a lot of fancy equipment for this recipe. Here is what you will need:
- 9×13-inch Baking Dish: This is the ideal size for this recipe. It allows for three full layers of cookies, cream, and strawberries. A glass or ceramic dish works best because it conducts cold evenly.
- Electric Mixer: A stand mixer or hand mixer works perfectly for whipping the cream. You can whip by hand with a whisk, but it will take about 8-10 minutes of vigorous arm work. I have done it, and it is a great arm workout, but the mixer is easier.
- Large Mixing Bowls: You need one for the strawberries and one for the cream. Stainless steel or glass bowls work best because they stay cold longer.
- Spatula: A rubber spatula is essential for spreading the cream evenly without deflating it.
- Sharp Knife and Cutting Board: For slicing the strawberries.
Budget-Friendly Alternatives: If you do not have an electric mixer, a manual whisk and some elbow grease will work. If you do not have a 9×13 dish, you can use a deep 9×9 square dish and do more layers, or even a loaf pan for a smaller version. The key is to have a dish that allows for even layering.
Preparation Method
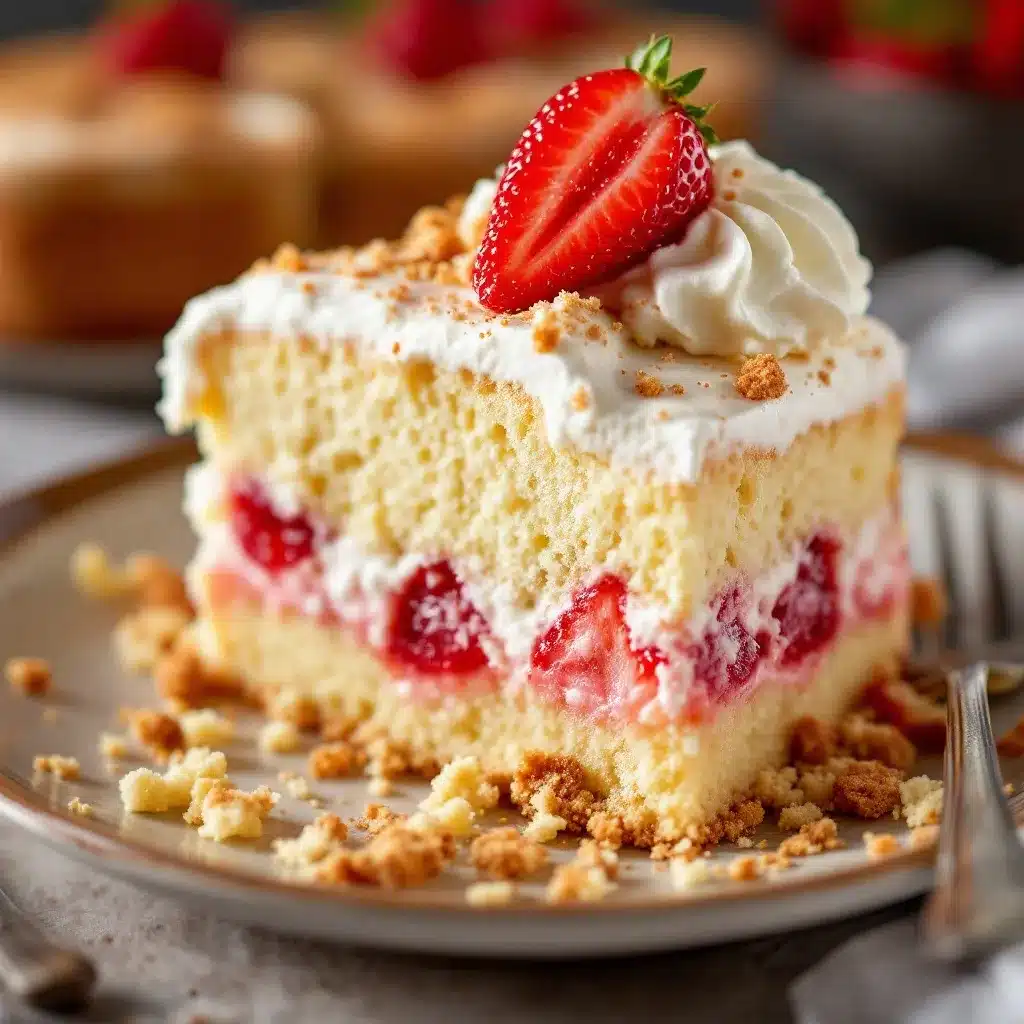
Let me walk you through this step by step. It is simpler than you think.
- Macerate the Strawberries: In a large bowl, combine the sliced strawberries, granulated sugar, and lemon juice. Toss gently to coat. Let it sit at room temperature for 15-20 minutes. You will see the strawberries release their juices, creating a beautiful red syrup. Stir occasionally. This step is crucial because it softens the strawberries and creates the liquid that will soak into the wafers.
- Whip the Cream: In a separate large bowl, add the cold heavy cream, powdered sugar, vanilla extract, and salt. Using an electric mixer, start on low speed to avoid splashing, then gradually increase to medium-high. Whip until stiff peaks form. This means when you lift the beaters, the cream stands up in peaks that hold their shape. Do not overbeat, or you will end up with butter. It takes about 3-5 minutes with a mixer. The cream should be smooth, thick, and spreadable.
- Layer One: Cookies Spread a single layer of vanilla wafers across the bottom of your 9×13 dish. Cover the entire surface. Do not leave gaps—the wafers will expand slightly as they soften, but you want a solid base. You will need about 30-35 wafers per layer.
- Layer One: Strawberries Spoon about one-third of the macerated strawberries (including the juices) evenly over the wafers. Spread them out so every bite gets some fruit.
- Layer One: Cream Drop spoonfuls of whipped cream over the strawberries, then gently spread it into an even layer using your spatula. Use about one-third of the cream. Be gentle—you do not want to deflate the cream.
- Repeat Layers: Add another layer of wafers on top of the cream. Press down gently to ensure they make contact. Add another third of the strawberries, then another third of the cream. Repeat one more time with the remaining wafers, strawberries, and cream. You should end with a final layer of cream on top.
- Finish the Top: Use your spatula to smooth the top layer of cream. You can create decorative swirls if you like. Cover the dish tightly with plastic wrap, making sure the wrap touches the surface of the cream to prevent a skin from forming.
- Chill: Refrigerate for at least 6 hours, but overnight is best. The longer it sits, the more the wafers soften and meld with the cream and strawberries. I have left it for up to 24 hours, and it was perfect.
- Garnish and Serve: Before serving, top with fresh whole strawberries and mint sprigs if desired. You can also pipe extra whipped cream on top for a fancier presentation. Slice and serve cold.
Visual Cues: When you slice into the cake, the layers should be distinct but soft. The wafers should have absorbed the moisture and turned cake-like, not crunchy. The cream should hold its shape but be light and airy. If the wafers are still crunchy, it needs more time in the fridge.
Time Estimate: Active prep time is about 15 minutes. Total time including chilling is at least 6 hours, but overnight is ideal.
Cooking Tips & Techniques
I have made this No-Bake Strawberry Shortcake Icebox Cake enough times to know where things can go wrong. Here is what I have learned the hard way so you do not have to.
Do not skip macerating the strawberries. I tried it once because I was in a hurry, and the cake was dry. The juices from the macerated strawberries are what soften the wafers. Without them, you end up with a crunchy, dry dessert that is not nearly as good. Let the strawberries sit for the full 15-20 minutes. It is worth it.
Whip the cream to stiff peaks, not soft peaks. Soft peaks will deflate as you layer, and your cake will be flat and dense. Stiff peaks hold their shape and create those beautiful, airy layers. If you are unsure, whip it a little longer than you think you need to, but stop before it looks grainy. Grainy cream means you have gone too far and are starting to make butter.
Press the wafers down gently after each layer. This ensures they make good contact with the cream and strawberries. If they are floating on top, they will not soften properly. A gentle press with your hand or the back of a spatula is all you need.
Let it chill overnight. Six hours is the minimum, but overnight is where the magic happens. The flavors meld, the textures soften, and everything comes together into one cohesive dessert. I have made it in the morning for an evening event, and it was good. I have made it the night before, and it was incredible. Patience pays off here.
If you are making this for a party, garnish it right before serving. The fresh strawberries on top will weep and soften if they sit too long. Keep the cake covered in the fridge until you are ready to serve, then add the garnish. It makes a big difference in presentation.
One mistake I made early on: I used low-fat cream cheese in the cream layer thinking it would make it lighter. Do not do that. The cream layer needs to be pure whipped cream for the right texture. Save the cream cheese for a cheesecake.
Variations & Adaptations
This recipe is incredibly versatile. Here are some ways to switch it up.
Berry Medley Icebox Cake: Swap half the strawberries for fresh blueberries, raspberries, or blackberries. The combination of berries creates a beautiful color contrast and a more complex flavor. I made this for a Fourth of July party, and it was a hit.
Chocolate Strawberry Shortcake: Use chocolate wafer cookies instead of vanilla wafers. The chocolate and strawberry combination is classic for a reason. You can also add a layer of chocolate shavings between the cream layers for extra decadence.
Lemon Strawberry Shortcake: Add the zest of one lemon to the whipped cream and use lemon-flavored wafers if you can find them. The lemon brightens the whole dessert and pairs beautifully with the strawberries. This is my personal favorite variation for spring.
Dairy-Free Version: Substitute the heavy cream with full-fat coconut cream. Chill the can of coconut cream overnight, then scoop out the solid part and whip it with the powdered sugar and vanilla. The texture is slightly different—a little less stable—but it works well. Use dairy-free vanilla wafers if needed.
Gluten-Free Option: Use gluten-free vanilla wafers or gluten-free shortbread cookies. Most brands of vanilla wafers contain wheat flour, so check the label carefully. The texture will be slightly different, but the result is still delicious.
Individual Servings: Instead of a large dish, layer the ingredients in small mason jars or dessert cups. This is perfect for parties or portion control. Layer the ingredients in the same order, then chill. These individual servings are also great for grab-and-go desserts.
Serving & Storage Suggestions
This No-Bake Strawberry Shortcake Icebox Cake is best served cold, straight from the refrigerator. The texture is perfect when it is well-chilled—the cream is firm but light, and the wafers have softened into a cake-like consistency.
Serving Temperature: Serve it cold. Do not let it sit at room temperature for more than 30 minutes, or the cream will start to soften and the layers will slide. If you are serving it at a party, keep it in the fridge until the last minute.
Presentation: Slice it cleanly with a sharp knife, wiping the blade between cuts for neat slices. Serve each slice with a fresh strawberry on top and a sprig of mint for color. You can also drizzle a little strawberry syrup from the maceration over each slice for extra flavor.
Complementary Dishes: This dessert pairs beautifully with a cup of coffee or a glass of cold milk. If you are serving it after a meal, it goes well with lighter mains like grilled chicken or a fresh salad. For a brunch spread, serve it alongside Japanese souffle pancakes for a truly indulgent table.
Storage: Cover the dish tightly with plastic wrap or transfer leftovers to an airtight container. Store in the refrigerator for up to 3 days. The texture will continue to soften as it sits, so it is best eaten within 2 days. After that, the wafers can become too soft and the cream can start to separate slightly.
Freezing: I do not recommend freezing this dessert. The cream will become watery and grainy when thawed, and the strawberries will release too much liquid. If you have leftovers, just keep them in the fridge and eat them within a few days.
Flavor Development: The flavors actually improve after 24 hours in the fridge. The strawberries continue to release their juices, the cream absorbs the vanilla and strawberry flavors, and everything melds together into one harmonious dessert. Day two is often better than day one.
Nutritional Information & Benefits
Here is the estimated nutritional breakdown for one serving (based on 12 servings):
| Nutrient | Amount per Serving |
|---|---|
| Calories | 385 |
| Total Fat | 24g |
| Saturated Fat | 14g |
| Cholesterol | 82mg |
| Sodium | 195mg |
| Total Carbohydrates | 41g |
| Dietary Fiber | 2g |
| Sugars | 28g |
| Protein | 3g |
| Vitamin C | 45mg (75% DV) |
This dessert is not exactly health food, but it does have some redeeming qualities. Strawberries are packed with vitamin C and antioxidants, which support immune health and fight inflammation. The heavy cream provides calcium and vitamin A, though it is high in saturated fat. If you are watching your sugar intake, you can reduce the powdered sugar in the cream to 1/4 cup without affecting the texture too much.
Dietary Considerations: This recipe contains dairy and gluten (from the vanilla wafers). It is not suitable for vegans or those with dairy allergies unless you make the substitutions mentioned above. It is naturally nut-free and egg-free, which makes it a good option for those with those allergies.
My Personal Take: I believe in balance. This is a dessert, and it should taste like one. I do not try to make it “healthy” because that usually compromises the flavor and texture. Instead, I enjoy it in moderation and savor every single bite. Life is too short for bad desserts.
Conclusion
This No-Bake Strawberry Shortcake Icebox Cake is the kind of recipe that makes you look like a hero with almost no effort. It is simple, it is beautiful, and it tastes like you spent hours in the kitchen. The combination of creamy, fruity, and crunchy textures is absolutely irresistible, and the fact that it comes together in 15 minutes is almost unbelievable.
I love this recipe because it reminds me that you do not need fancy techniques or complicated ingredients to create something memorable. Sometimes the best desserts are the ones that come from a moment of kitchen desperation, a box of wafers, and a willingness to let the fridge do the work. It is honest, it is delicious, and it is exactly what a summer dessert should be.
I encourage you to make this your own. Swap the berries, change the cookies, or add your favorite flavors. The base recipe is forgiving, and the possibilities are endless. If you try it, I would love to hear how it turns out. Leave a comment below and let me know what variations you tried. And if you are looking for another easy, no-bake dessert, check out this no-bake pumpkin cheesecake for a fall-friendly twist. Happy cooking, friends!
Frequently Asked Questions
Can I use frozen strawberries instead of fresh?
You can, but I do not recommend it. Frozen strawberries release a lot of water when they thaw, which can make the dessert watery and the wafers too soft. If you must use frozen, thaw them completely, drain off the excess liquid, and pat them dry before macerating. The texture will be softer, but the flavor will still be good.
How long does this icebox cake need to set?
At least 6 hours, but overnight is best. The wafers need time to absorb the moisture from the cream and strawberries and soften into a cake-like texture. If you cut into it too early, the wafers will still be crunchy and the layers will not hold together well. Patience is key here.
Can I use Cool Whip instead of homemade whipped cream?
You can, but the texture and flavor will be different. Homemade whipped cream is lighter, fluffier, and has a richer flavor. Cool Whip is more stable and holds its shape longer, but it has a slightly artificial taste. If you are short on time, Cool Whip will work, but I recommend making your own for the best results.
Why did my cream turn out grainy?
Grainy cream usually means you overwhipped it. When cream is whipped too long, the fat separates from the liquid and starts to form butter. The cream will look clumpy and grainy instead of smooth and fluffy. To avoid this, whip on medium speed and stop as soon as stiff peaks form. If you do over whip it, you can try to save it by adding a tablespoon of cold cream and gently folding it in, but it is often better to start over.
Can I make this dessert ahead of time for a party?
Absolutely. In fact, I recommend it. This dessert is perfect for making the day before a party. Assemble it, cover it tightly, and let it chill in the fridge overnight. The flavors will meld, the texture will be perfect, and you will have one less thing to worry about on the day of your event. Just add the fresh garnish right before serving.
Pin This Recipe!
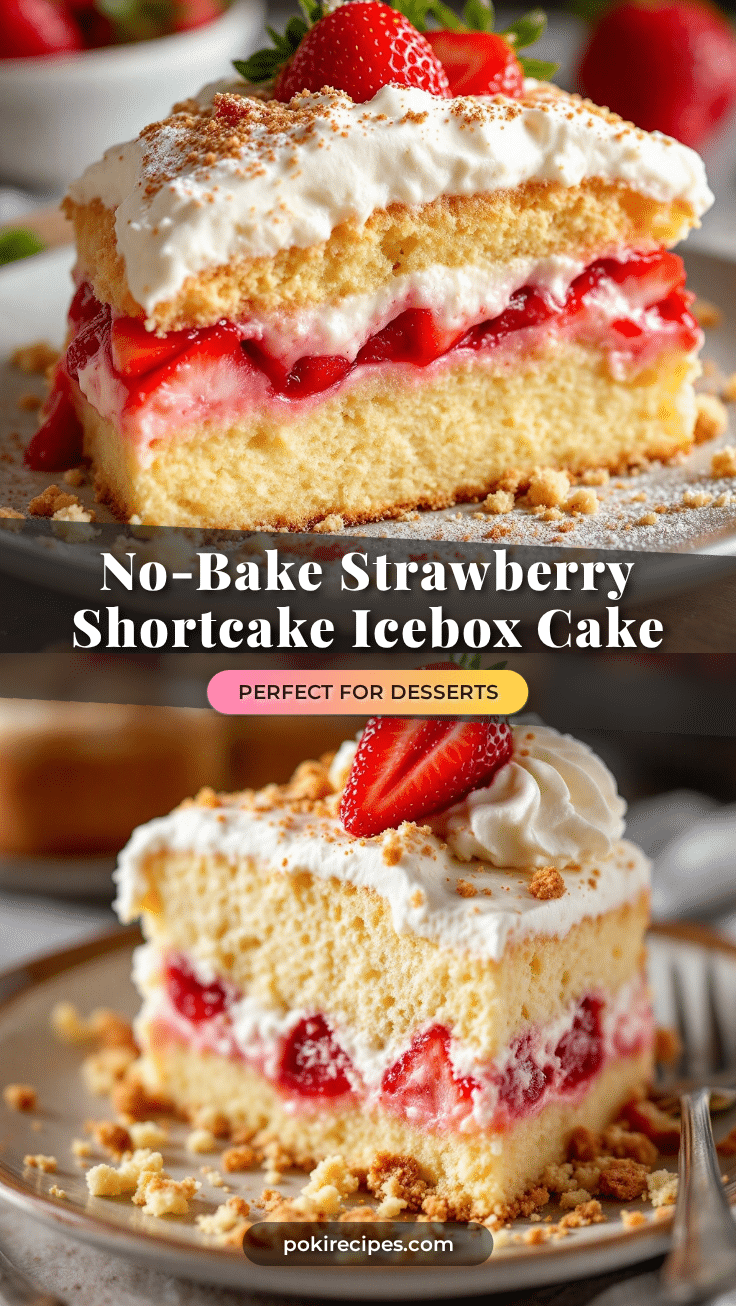
No-Bake Strawberry Shortcake Icebox Cake: Easy 15-Minute Dessert

A quick and easy no-bake dessert made with layers of vanilla wafers, macerated strawberries, and homemade whipped cream. Perfect for summer entertaining, this icebox cake comes together in just 15 minutes of active prep and requires no oven.
- Prep Time: 15 minutes
- Cook Time: 0 minutes
- Total Time: 6 hours 15 minutes (includes chilling)
- Yield: 12 servings 1x
- Category: Dessert
- Cuisine: American
Ingredients
- 2 pounds fresh strawberries, hulled and sliced (about 6 cups sliced)
- 3 tablespoons granulated sugar
- 1 tablespoon fresh lemon juice
- 3 cups heavy whipping cream, cold
- 1/2 cup powdered sugar
- 2 teaspoons vanilla extract
- 1/4 teaspoon salt (optional)
- 2 (11-ounce) boxes vanilla wafers (about 80–90 wafers)
- Fresh whole strawberries with stems (for garnish, optional)
- Mint sprigs (for garnish, optional)
- Additional whipped cream for piping (optional)
Instructions
- Macerate the Strawberries: In a large bowl, combine the sliced strawberries, granulated sugar, and lemon juice. Toss gently to coat. Let it sit at room temperature for 15-20 minutes, stirring occasionally, until the strawberries release their juices.
- Whip the Cream: In a separate large bowl, add the cold heavy cream, powdered sugar, vanilla extract, and salt. Using an electric mixer, start on low speed, then gradually increase to medium-high. Whip until stiff peaks form, about 3-5 minutes.
- Layer One: Spread a single layer of vanilla wafers across the bottom of a 9×13-inch baking dish, covering the entire surface without gaps (about 30-35 wafers).
- Layer One: Spoon about one-third of the macerated strawberries (including juices) evenly over the wafers.
- Layer One: Drop spoonfuls of whipped cream over the strawberries, then gently spread into an even layer using a spatula. Use about one-third of the cream.
- Repeat Layers: Add another layer of wafers on top of the cream, pressing down gently. Add another third of the strawberries, then another third of the cream. Repeat one more time with the remaining wafers, strawberries, and cream, ending with a final layer of cream on top.
- Finish the Top: Smooth the top layer of cream with a spatula. Cover the dish tightly with plastic wrap, ensuring the wrap touches the surface of the cream.
- Chill: Refrigerate for at least 6 hours, but overnight is best (up to 24 hours).
- Garnish and Serve: Before serving, top with fresh whole strawberries and mint sprigs if desired. Slice and serve cold.
Notes
Do not skip macerating the strawberries; it is crucial for softening the wafers. Whip cream to stiff peaks for best texture. Press wafers down gently after each layer. Chill overnight for best results. Garnish right before serving. Leftovers can be stored in the refrigerator for up to 3 days. Freezing is not recommended.
Nutrition
- Serving Size: 1 slice (1/12 of cak
- Calories: 385
- Sugar: 28
- Sodium: 195
- Fat: 24
- Saturated Fat: 14
- Carbohydrates: 41
- Fiber: 2
- Protein: 3
Keywords: no-bake strawberry shortcake, icebox cake, easy dessert, no-bake dessert, strawberry dessert, summer dessert, make-ahead dessert