The sizzle of jalapeños, the oozy stretch of warm cheese, and that first bite—crispy, creamy, a little spicy, and totally addictive. That’s what you get with these Jalapeño Popper Cheesy Thumbprint Bites. I still remember the first time I made them for a game night; folks kept circling back to the platter, and not a single crumb survived till halftime. If you’re after a party appetizer that’s playful, easy, and guaranteed to disappear fast, you’re in the right place.
I came up with this recipe one Friday when the snack cravings hit hard and I didn’t want to fuss with deep-frying. After all, who wants to spend a party in the kitchen? These bites capture everything you love about classic jalapeño poppers—creaminess, tang, a pop of heat—wrapped up in a buttery, savory thumbprint shell. Even better, you can prep them ahead, and they bake instead of fry. Whether you’re feeding a crowd, prepping for a potluck, or just need a savory snack fix, these little wonders are a win every time.
Honestly, I’ve tested this recipe more times than I can count—tweaking ratios, swapping cheeses, even sneaking in bacon (yum). The result? A foolproof, crazy-good appetizer that gets everyone talking. If you love jalapeño poppers but want something a bit more bite-sized and less messy, these thumbprint bites are your go-to. And let’s face it, a tray of cheesy, golden bites with flecks of green is always a Pinterest favorite. So, let’s get you set up for appetizer glory!
Why You’ll Love These Jalapeño Popper Cheesy Thumbprint Bites
- Quick & Easy: Mix, fill, and bake—no complicated steps or frying. Ready in about 35 minutes, which is awesome when you’re short on prep time or want to whip up something last-minute.
- Simple Ingredients: No fancy shopping list here. Most of these are pantry staples or things you can grab at any grocery store. I promise, you won’t be hunting down anything obscure.
- Perfect for Parties: Whether it’s game day, a holiday gathering, or a backyard BBQ, these bites always steal the show. They look fun on a platter and are easy to grab and go—no forks needed!
- Crowd-Pleaser: Cheesy, creamy centers with a just-right kick of jalapeño—kids, adults, and even spice skeptics can’t resist. Bonus: you can control the heat.
- Unbelievably Delicious: The flavor combo is magic—sharp cheddar, tangy cream cheese, smoky bacon (optional), and that satisfying crunch from the breadcrumbs. I dare you to eat just one.
What sets these apart from just another jalapeño popper recipe? It’s the thumbprint shell—rich and buttery, like the best savory shortbread, hugging a creamy, spicy filling. Blending the cheeses together makes the filling ultra-smooth, and the pinch of smoked paprika gives it a subtle depth. Plus, these are baked, not fried, so you get all the flavor with a little less mess and grease.
Honestly, these are the kind of appetizers people remember. I’ve served them at everything from girls’ nights to big family dinners, and I always get requests for the recipe (and a few “are there more in the kitchen?” whispers). If you want an appetizer that’s easy, impressive, and totally crave-worthy, you’ve found it!
What Ingredients You Will Need
This recipe uses simple, wholesome ingredients to deliver bold flavor and a crowd-pleasing texture—no fuss, no specialty shopping trips required. Here’s what you’ll need:
- For the Thumbprint Dough:
- 1/2 cup (115g) unsalted butter, softened (adds richness and that perfect crumb)
- 3 ounces (85g) cream cheese, softened (adds tang and tenderness)
- 1 large egg, room temperature
- 1 1/4 cups (160g) all-purpose flour
- 1/2 teaspoon garlic powder
- 1/2 teaspoon kosher salt
- 1/4 teaspoon smoked paprika (optional, for extra depth)
- For the Cheesy Jalapeño Filling:
- 4 ounces (115g) cream cheese, softened
- 1 cup (115g) shredded sharp cheddar cheese (I love Cabot or Tillamook for great melt)
- 2-3 medium jalapeños, seeded and finely diced (adjust for your preferred heat)
- 2 tablespoons finely chopped chives or scallions (optional but tasty)
- 2-3 slices cooked bacon, crumbled (optional for smoky goodness)
- 1/4 teaspoon black pepper
- For Topping:
- 1/3 cup (30g) panko breadcrumbs (for crunch—regular or gluten-free)
- 1 tablespoon unsalted butter, melted
- Pinch of smoked paprika or cayenne (optional, for color and a hint more heat)
Ingredient Tips:
For gluten-free, swap in a 1:1 gluten-free flour blend and gluten-free panko. If you want a lighter version, use Neufchâtel cheese instead of full-fat cream cheese. For extra convenience, pre-shredded cheese works, but freshly grated gives you a smoother melt. If you’re out of fresh jalapeños, canned ones (drained and chopped) will do in a pinch, but you’ll miss a bit of that fresh, grassy kick.
Substitutions:
You can use pepper jack or Monterey Jack cheese for a twist. If you need a vegetarian version, just skip the bacon. For dairy-free, try plant-based butter and cream cheese (I’ve had success with Miyoko’s and Violife), and a vegan cheddar shreds for the filling. The recipe is flexible—use what you love or have on hand!
Equipment Needed
You don’t need a lot of fancy equipment to pull off these Jalapeño Popper Cheesy Thumbprint Bites. Here’s what I reach for every time:
- Mixing Bowls: At least two—one for the dough, one for the filling. Glass or stainless steel bowls work best for easy cleanup.
- Hand Mixer or Stand Mixer: Makes creaming the butter and cheese quick and easy. You can use a sturdy whisk and elbow grease if you don’t have a mixer.
- Baking Sheet: Lined with parchment paper for easy removal and cleanup. I’ve used both standard and rimmed sheets; either works.
- Small Cookie Scoop or Spoon: Helps portion the dough evenly (I use a 1.5-tablespoon scoop).
- Measuring Cups & Spoons: For accuracy—especially important for baking.
- Small Spoon or Your Thumb: To make the signature “thumbprint” indentations. I sometimes use the rounded end of a wooden spoon handle for consistency.
- Wire Rack: For cooling—keeps the bottoms from getting soggy.
Budget Tip:
No need for a food processor or special pans. If you don’t have a mixer, let your butter and cheeses come fully to room temp and beat them with a big wooden spoon. For parchment, you can use a silicone baking mat if you’ve got one (I use mine all the time and just rinse it off). If you have to bake in batches, just reuse the same baking sheet after it cools a bit—works like a charm.
How to Make Jalapeño Popper Cheesy Thumbprint Bites

-
Prep Your Oven and Baking Sheet:
Preheat your oven to 350°F (175°C). Line a baking sheet with parchment paper or a silicone baking mat. This keeps the bites from sticking and helps them brown evenly. -
Make the Thumbprint Dough:
In a large mixing bowl, cream together 1/2 cup (115g) softened butter and 3 ounces (85g) cream cheese with a hand mixer (or stand mixer) on medium speed until smooth—about 2 minutes. Scrape down the sides as needed.
Add 1 large egg and beat until fully incorporated.
On low speed, mix in 1 1/4 cups (160g) all-purpose flour, 1/2 teaspoon garlic powder, 1/2 teaspoon salt, and 1/4 teaspoon smoked paprika. The dough will be soft but not sticky. If it feels too wet, add 1 tablespoon flour at a time until it holds shape. -
Mix Up the Cheesy Filling:
In a separate medium bowl, combine 4 ounces (115g) cream cheese, 1 cup (115g) shredded cheddar, 2-3 diced jalapeños, 2 tablespoons chives/scallions, bacon (if using), and 1/4 teaspoon black pepper. Stir until well blended. Taste and add extra jalapeño if you want more zip. -
Shape the Bites:
Scoop out 1.5-tablespoon portions of dough, rolling each into a ball. Place on the prepared baking sheet, spacing about 2 inches (5cm) apart. You should get 20-22 bites.
Using your thumb or the back of a rounded spoon handle, gently press an indentation in the center of each dough ball—don’t press all the way through. -
Fill and Top:
Spoon about 1 teaspoon of the cheesy jalapeño filling into each indentation. Don’t overfill; a little mound is perfect and keeps the bites neat.
In a small bowl, mix 1/3 cup (30g) panko with 1 tablespoon melted butter and a pinch of paprika or cayenne. Sprinkle generously over the tops of the filled bites. -
Bake:
Bake in the preheated oven for 17-20 minutes, or until the edges are lightly golden and the filling is bubbly. If you like them extra crisp on top, broil for 1-2 minutes at the end—watch closely so they don’t burn! -
Cool and Serve:
Let the bites cool for 5 minutes on the baking sheet, then transfer to a wire rack. Serve warm, garnished with extra chives or a little more diced jalapeño if you like it hot.
Troubleshooting:
If your dough spreads too much, chill it for 10-15 minutes before shaping. If the filling runs, try using slightly less cream cheese or patting your jalapeños dry before mixing.
Personal Tip:
If you’re short on time, you can shape and fill the bites and refrigerate them (covered) for up to 24 hours before baking. Super handy for party prep!
Cooking Tips & Techniques
Baking these Jalapeño Popper Cheesy Thumbprint Bites is way less fussy than frying, but there are still a few tricks for getting them just right:
- Room Temperature Ingredients:
Let your butter and cream cheese fully soften before mixing. Cold ingredients won’t blend smoothly and can leave lumps in the dough. - Don’t Overwork the Dough:
Mix just until the flour is incorporated. Overmixing can make the bites tough instead of tender. - Chill If Needed:
If your kitchen is warm or the dough is sticky, pop it in the fridge for 10 minutes before shaping. This helps the bites hold their shape in the oven. - Cheese Choices Matter:
Freshly grated cheddar will melt better than pre-shredded (which can be coated in anti-caking agents). If you only have bagged cheese, it’ll still work—just expect a little less gooeyness. - Customize the Heat:
Jalapeños vary in spice. Taste yours before adding, and adjust to your liking. For a milder bite, remove all seeds and membranes. For more kick, leave some in or add a pinch of cayenne. - Keep An Eye on Baking Time:
All ovens run a bit differently. Start checking at 17 minutes—look for golden edges and bubbling cheese. If you want extra crunch, broil at the end, but don’t walk away! - Personal Mishaps:
I once forgot to pat my jalapeños dry, and the filling got a bit watery. Lesson learned—always dry them well for the best texture!
My favorite hack? I prep the filling a day ahead and store it in the fridge—makes assembly a breeze on party day. And if you’re doubling the recipe, just bake in batches using the same parchment. These little tweaks make all the difference for perfect, party-ready bites every time.
Variations & Adaptations
There are so many fun ways to make these Jalapeño Popper Cheesy Thumbprint Bites your own! Here are a few favorites:
- Gluten-Free:
Swap in a cup-for-cup gluten-free flour blend and gluten-free panko breadcrumbs. The texture stays crisp and nobody will know the difference. - Vegetarian:
Just leave out the bacon. You can add a handful of finely chopped roasted red pepper or sun-dried tomatoes for extra flavor and color. - Spicy Southwest:
Mix in a little chipotle powder or smoked paprika to the filling, and use pepper jack cheese instead of cheddar. Garnish with chopped cilantro after baking. - For Kids:
Use only half the jalapeños (or mild poblano pepper) and add an extra tablespoon of cream cheese. They’re still cheesy and fun, just less spicy. - Dairy-Free:
Use plant-based butter, vegan cream cheese, and your favorite dairy-free cheddar shreds. The texture is a tad softer but still satisfying. - Air Fryer Adaptation:
Place the shaped and filled bites in the air fryer basket (lined with parchment), and cook at 325°F (160°C) for 9-11 minutes. They get extra crispy!
One personal favorite? I once added a teaspoon of hot honey to the filling for a sweet-spicy twist—so good with a cold drink! Don’t be afraid to swap, mix, and play around with the flavors to suit your taste buds or dietary needs.
Serving & Storage Suggestions
These Jalapeño Popper Cheesy Thumbprint Bites are best served warm when the cheese is gooey and the tops are crisp. Arrange them on a platter with a sprinkle of extra chives or a few thin jalapeño rings for a festive look.
- Serving Ideas:
Pair with a cool ranch dip or a tangy salsa for dipping. They also go great with other party bites like mini sliders, nachos, or a big pitcher of margaritas. - Storage:
Leftovers (if you have any!) can be stored in an airtight container in the fridge for up to 3 days. For longer storage, freeze the baked bites in a single layer, then transfer to a zip-top bag—good for up to a month. - Reheating:
To reheat, bake at 350°F (175°C) for 8-10 minutes from the fridge, or 15 minutes from frozen. The oven brings back the crunch way better than the microwave. - Flavor Note:
I’ve found that the flavors actually get a bit bolder after a day in the fridge, so don’t worry about making these ahead. If anything, they’re even better for snacking the next day!
Nutritional Information & Benefits
Each Jalapeño Popper Cheesy Thumbprint Bite is estimated to provide around 90 calories, 6g fat, 5g carbohydrates, and 3g protein (based on the standard recipe, without bacon). They’re naturally low in sugar and offer a little boost of calcium and vitamin A thanks to the cheese.
Key Ingredient Benefits:
Jalapeños are a great source of vitamin C and antioxidants, while chives add a gentle onion flavor and extra nutrients. If you use whole grain or gluten-free flour, you’ll sneak in a bit more fiber, too.
Dietary Notes:
These bites can be adapted to be gluten-free, vegetarian, or even dairy-free with the right swaps. The main allergens here are dairy, eggs, and wheat—so be sure to adjust if you’re serving guests with food sensitivities.
From a wellness perspective, I think of these as a treat that balances flavor and portion control—a couple of bites are super satisfying and feel special without overdoing it. Plus, making them yourself means you get to control exactly what goes in!
Conclusion
If you’re looking for an appetizer that’s seriously fun, crazy-delicious, and totally doable at home, these Jalapeño Popper Cheesy Thumbprint Bites are your new secret weapon. They’re the kind of recipe you’ll make once and then keep coming back to—whether it’s for a party, a picnic, or just because you’re craving something cheesy and a little spicy.
Play around with the fillings, try out different cheese combos, or throw in your own twist. That’s half the fun! Honestly, I love these because they always bring people together—there’s just something about a warm, cheesy bite that gets everyone smiling.
If you try them, let me know what you think—drop a comment, share your photos, or tag your own creative variations! Here’s to more gatherings, more laughter, and more good food shared with friends. Happy snacking!
FAQs About Jalapeño Popper Cheesy Thumbprint Bites
Can I make these bites ahead of time?
Yes! You can prep and fill the bites, cover, and refrigerate them for up to 24 hours before baking. They’re perfect for party prep.
How spicy are these?
They have a gentle kick, but you can make them milder by removing all jalapeño seeds or hotter by leaving some in. Taste as you go and adjust to your preference.
Can I freeze Jalapeño Popper Cheesy Thumbprint Bites?
Absolutely. Freeze baked bites in a single layer, then transfer to a freezer bag. Reheat straight from frozen in the oven until warmed through and crisp.
What can I use instead of jalapeños?
Try diced poblano peppers for less heat, or use pickled jalapeños for a tangy kick. You could even use mild green chilies for a gentle flavor.
Do I have to use bacon?
Nope! The bites are delicious with or without bacon. For a smokier flavor without meat, try a pinch of smoked paprika or a few chopped sun-dried tomatoes.
Pin This Recipe!

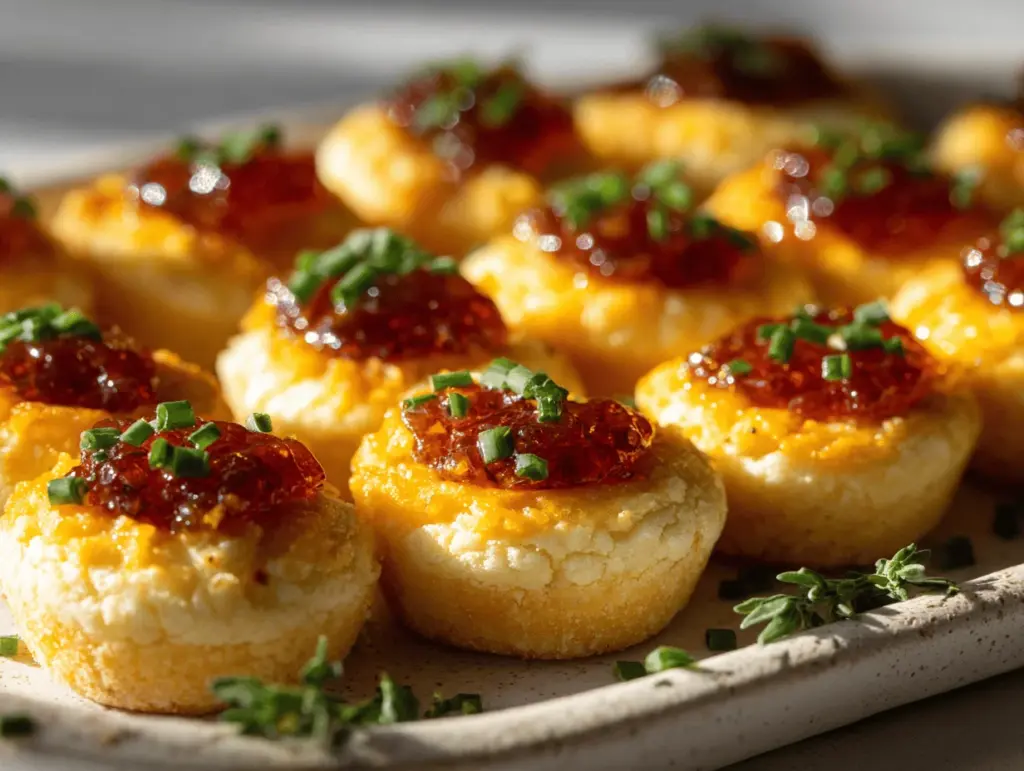
Jalapeño Popper Cheesy Thumbprint Bites

These Jalapeño Popper Cheesy Thumbprint Bites are a playful, easy, and crowd-pleasing party appetizer. They combine a buttery, savory thumbprint shell with a creamy, cheesy, and slightly spicy jalapeño filling, all baked to golden perfection.
- Prep Time: 15 minutes
- Cook Time: 20 minutes
- Total Time: 35 minutes
- Yield: 20-22 bites (about 6-8 servings) 1x
- Category: Appetizer
- Cuisine: American
Ingredients
- 1/2 cup (115g) unsalted butter, softened
- 3 ounces (85g) cream cheese, softened
- 1 large egg, room temperature
- 1 1/4 cups (160g) all-purpose flour
- 1/2 teaspoon garlic powder
- 1/2 teaspoon kosher salt
- 1/4 teaspoon smoked paprika (optional)
- 4 ounces (115g) cream cheese, softened
- 1 cup (115g) shredded sharp cheddar cheese
- 2–3 medium jalapeños, seeded and finely diced
- 2 tablespoons finely chopped chives or scallions (optional)
- 2–3 slices cooked bacon, crumbled (optional)
- 1/4 teaspoon black pepper
- 1/3 cup (30g) panko breadcrumbs (regular or gluten-free)
- 1 tablespoon unsalted butter, melted
- Pinch of smoked paprika or cayenne (optional)
Instructions
- Preheat your oven to 350°F (175°C). Line a baking sheet with parchment paper or a silicone baking mat.
- In a large mixing bowl, cream together 1/2 cup softened butter and 3 ounces cream cheese with a hand mixer until smooth, about 2 minutes. Scrape down the sides as needed.
- Add 1 large egg and beat until fully incorporated.
- On low speed, mix in 1 1/4 cups all-purpose flour, 1/2 teaspoon garlic powder, 1/2 teaspoon salt, and 1/4 teaspoon smoked paprika. The dough should be soft but not sticky. If too wet, add flour 1 tablespoon at a time.
- In a separate medium bowl, combine 4 ounces cream cheese, 1 cup shredded cheddar, 2-3 diced jalapeños, 2 tablespoons chives/scallions, bacon (if using), and 1/4 teaspoon black pepper. Stir until well blended. Taste and adjust jalapeño to preference.
- Scoop out 1.5-tablespoon portions of dough, rolling each into a ball. Place on the prepared baking sheet, spacing about 2 inches apart. You should get 20-22 bites.
- Using your thumb or the back of a rounded spoon handle, gently press an indentation in the center of each dough ball—don’t press all the way through.
- Spoon about 1 teaspoon of the cheesy jalapeño filling into each indentation. Don’t overfill.
- In a small bowl, mix 1/3 cup panko with 1 tablespoon melted butter and a pinch of paprika or cayenne. Sprinkle generously over the tops of the filled bites.
- Bake in the preheated oven for 17-20 minutes, or until the edges are lightly golden and the filling is bubbly. For extra crisp, broil for 1-2 minutes at the end, watching closely.
- Let the bites cool for 5 minutes on the baking sheet, then transfer to a wire rack. Serve warm, garnished with extra chives or diced jalapeño if desired.
Notes
For gluten-free, use a 1:1 gluten-free flour blend and gluten-free panko. Omit bacon for vegetarian. For extra crisp tops, broil briefly at the end. Dough can be made ahead and chilled if needed. Filling can be prepped a day ahead. Adjust jalapeño quantity for desired heat. If dough is sticky, chill before shaping.
Nutrition
- Serving Size: 1 bite
- Calories: 90
- Sugar: 0.7
- Sodium: 120
- Fat: 6
- Saturated Fat: 3.5
- Carbohydrates: 5
- Fiber: 0.3
- Protein: 3
Keywords: jalapeño popper, cheesy thumbprint bites, party appetizer, baked jalapeño poppers, finger food, game day snacks, easy appetizer, spicy bites, cheese appetizer, crowd pleaser


