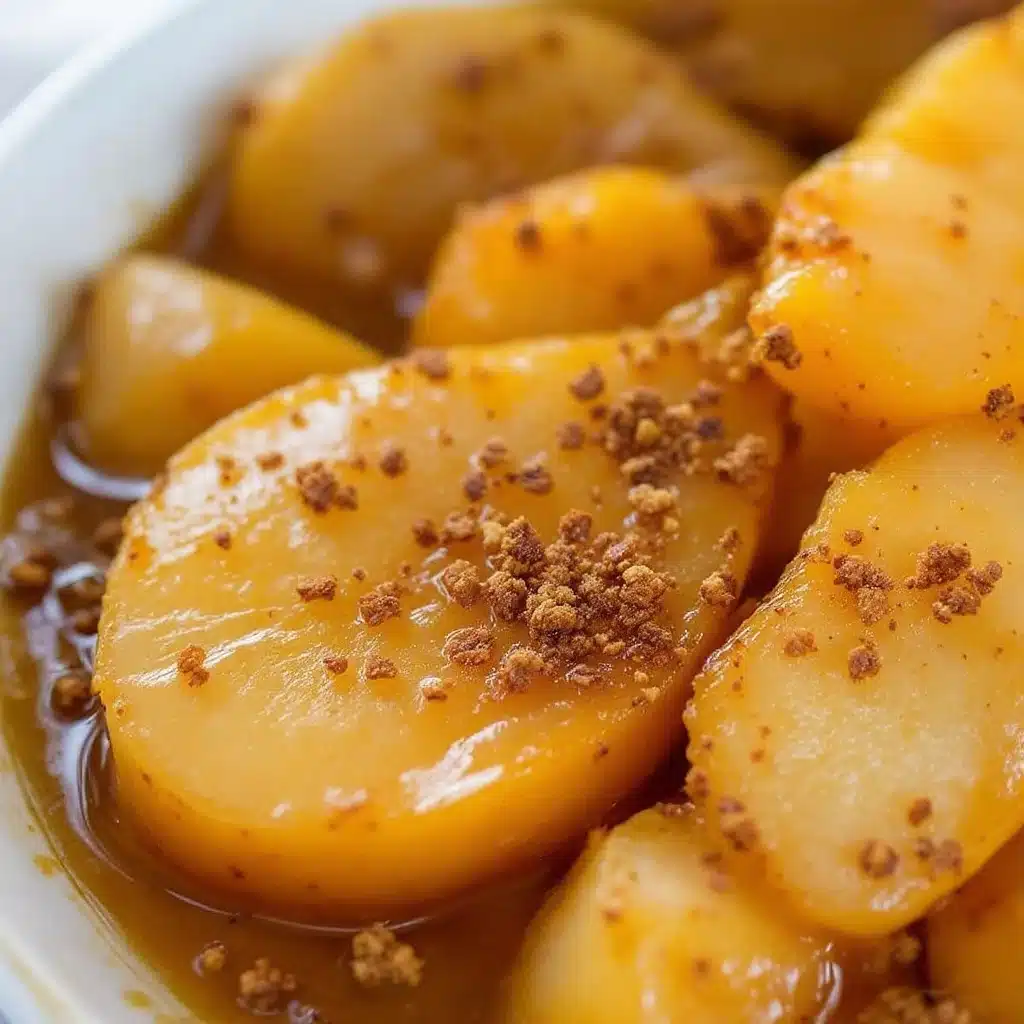
“These are the best pears I’ve ever eaten.” My neighbor, Mrs. Gable, said that while holding a spoonful of these spiced vanilla pears like she’d just discovered fire. She’s in her eighties and has probably cooked more pears than I’ve eaten in my life, so that comment stuck with me. I had brought a small jar over as a thank-you for watching our mail, and honestly, I didn’t think much of it. It was just a quick experiment on a Tuesday night when I had three pears going soft on the counter and a craving for something warm.
That night, I was tired. The kind of tired where you stare into the fridge hoping dinner will cook itself. I spotted those pears and remembered a simple poaching technique I’d learned years ago. I grabbed a saucepan, some vanilla, cinnamon, and a little sugar, and within fifteen minutes, the whole kitchen smelled like a cozy autumn day. It was so easy that I almost felt guilty calling it a recipe. But then I tasted it, and the guilt disappeared. The pears turned tender and sweet, soaking up that vanilla-spiced syrup like little sponges. It was dessert, breakfast topping, and a little moment of peace all in one bowl.
This recipe stuck with me not because it’s fancy, but because it’s honest. It uses simple ingredients and a tiny bit of time to create something that feels special. It’s the kind of recipe you make for yourself on a quiet night or for guests when you want to look like you tried harder than you actually did. And honestly, that’s my favorite kind of cooking.
Why You’ll Love This Recipe
I’ve tested this recipe more times than I can count, tweaking the spice ratios and cooking times until it was just right. It’s one of those rare dishes that feels both indulgent and effortless, and I think you’re going to love it for so many reasons.
- Quick & Easy: From start to finish, these spiced vanilla pears are ready in just 15 minutes. That’s faster than ordering takeout and way more impressive.
- Simple Ingredients: You probably have most of these ingredients in your pantry right now. No fancy trips to a specialty store required.
- Perfect for Any Occasion: Serve them warm over ice cream for an elegant dessert, spoon them over oatmeal for a cozy breakfast, or enjoy them straight from the pan with a dollop of yogurt. They work for everything.
- Crowd-Pleaser: I’ve served these to kids who swear they don’t like fruit and to adults at dinner parties. Everyone goes back for seconds.
- Unbelievably Delicious: The texture is soft but not mushy, and the flavor is a perfect balance of warm spices and sweet vanilla. It’s comfort food at its simplest.
What makes this recipe different from all the others? It’s the technique. Instead of a complicated poaching process, this uses a quick simmer that locks in flavor without breaking down the pears. And the spice blend? I’ve tested it until it sings. It’s not just another fruit recipe—it’s my best version, and I’m so excited to share it with you.
This recipe is the kind that makes you close your eyes after the first bite. It’s simple, soul-soothing, and perfect for turning a regular Tuesday into something a little more memorable.
What Ingredients You Will Need
This recipe uses humble ingredients that come together to create something truly special. Each one plays a role in building that warm, comforting flavor profile. Let’s talk about what you’ll need.
- Pears (3 medium, firm but ripe): The star of the show. You want pears that are ripe enough to be sweet but still firm enough to hold their shape during cooking. Bosc or Anjou pears work beautifully here. If they’re too soft, they’ll turn to mush. Too hard, and they won’t absorb the syrup properly. I usually buy mine a day or two ahead and let them sit on the counter.
- Water (1 cup / 240 ml): The base of our poaching liquid. It helps create the syrup without making it too heavy.
- Granulated Sugar (1/3 cup / 65 grams): Adds sweetness and helps create that lovely, slightly thick syrup. You can adjust this up or down depending on how sweet your pears are and your personal preference.
- Vanilla Extract (1 tablespoon / 15 ml): Pure vanilla extract is a must here. The flavor is deep and aromatic, and it pairs perfectly with the pears. I always use Nielsen-Massey or Simply Organic brands for the best results. Avoid imitation vanilla—it just doesn’t have the same warmth.
- Cinnamon Stick (1 whole): This infuses the syrup with a gentle, warming spice without being overpowering. If you don’t have a cinnamon stick, you can use 1/2 teaspoon of ground cinnamon, but the flavor will be a bit more intense and the syrup won’t be as clear.
- Whole Cloves (3 to 4): Just a few cloves add a subtle, aromatic depth that makes these pears taste like they’ve been simmering for hours. Be careful not to overdo it—cloves are strong.
- Star Anise (1 whole, optional): This is my little secret. A single star anise adds a subtle licorice note that makes the whole dish feel more sophisticated. You can leave it out if you don’t have it, but I really recommend trying it at least once.
- Lemon Juice (1 tablespoon / 15 ml): A squeeze of fresh lemon juice balances the sweetness and helps prevent the pears from browning. It also brightens up all the other flavors.
- Pinch of Salt: Just a tiny pinch. Salt enhances sweetness and rounds out the flavors. Don’t skip it.
Substitution Guidance: If you’re out of cinnamon sticks, ground cinnamon works in a pinch. For a sugar-free version, you can use honey or maple syrup, but the syrup will be a bit thinner. And if you don’t have star anise, no worries—the recipe is still delicious without it.
Equipment Needed
You don’t need a fancy kitchen to make these spiced vanilla pears. Here’s what you’ll need.
- Medium Saucepan or Small Pot: A 2-quart saucepan is perfect. You want something with a heavy bottom so the syrup heats evenly without scorching.
- Sharp Knife and Cutting Board: For peeling and cutting the pears. A good chef’s knife makes this job quick and easy.
- Vegetable Peeler: Optional, but it makes peeling the pears much faster than using a knife.
- Measuring Cups and Spoons: For accurate measurements. Baking is a science, and even simple cooking benefits from precision.
- Wooden Spoon or Silicone Spatula: For stirring the syrup and gently turning the pears.
- Slotted Spoon or Tongs: For removing the pears from the hot syrup without burning yourself.
- Jar or Airtight Container: For storing any leftover pears and syrup. A glass mason jar works great.
I’ve made this recipe with just a cheap saucepan and a butter knife when I was traveling, and it still turned out great. Don’t let a lack of fancy equipment stop you. Just keep an eye on the heat and stir gently.
Preparation Method
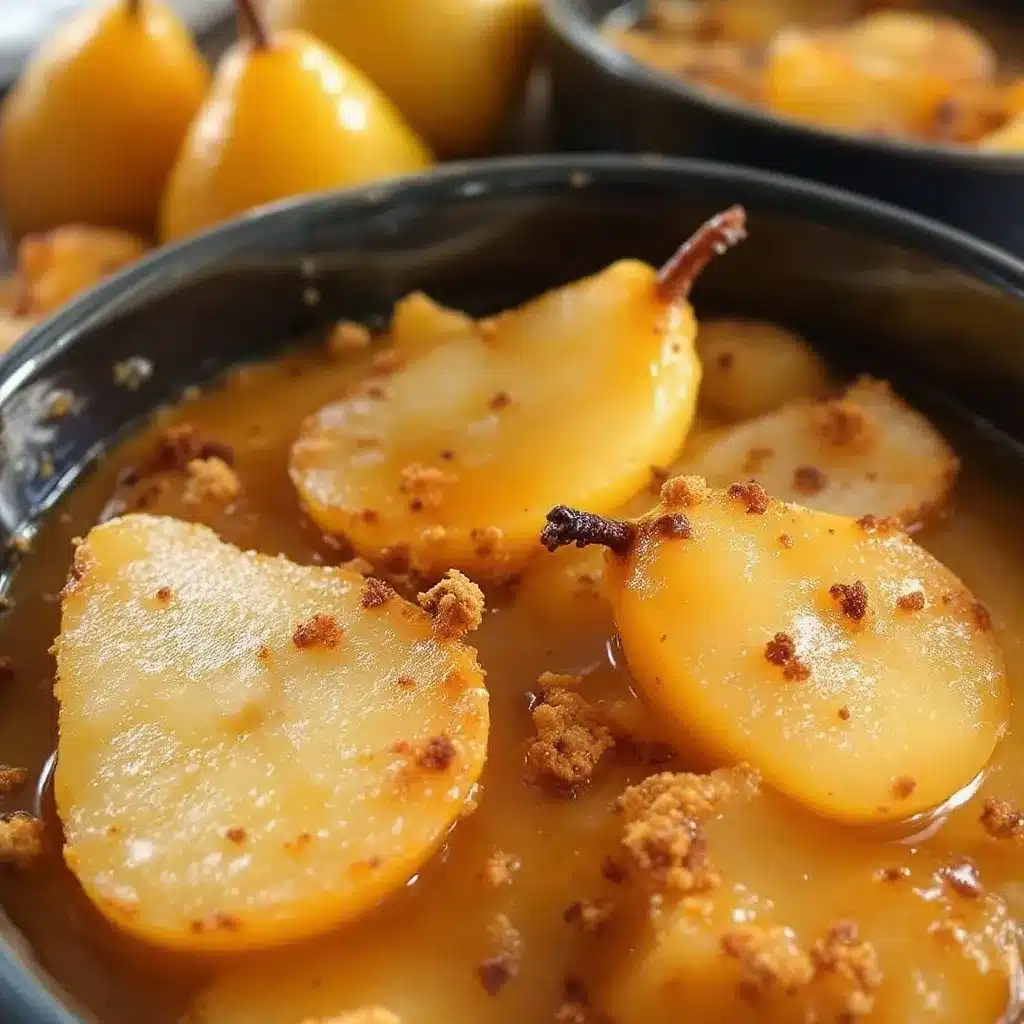
Let’s get cooking. This recipe moves fast, so I like to have everything prepped before I turn on the stove. Trust me on this one.
- Prep the pears. Wash your pears under cool water. Using a vegetable peeler or a sharp knife, peel the skin off each pear. Then, cut each pear in half lengthwise. Use a small spoon or a melon baller to scoop out the core and seeds. If you want to be fancy, you can leave the stems on for a prettier presentation. I usually cut them into quarters or thick slices, depending on what I’m serving them with. For oatmeal or yogurt, slices work best. For a dessert, halves look gorgeous.
- Combine the poaching liquid. In your medium saucepan, add the water, granulated sugar, vanilla extract, cinnamon stick, whole cloves, star anise (if using), lemon juice, and a pinch of salt. Give it a quick stir with your wooden spoon. Don’t worry if the sugar doesn’t dissolve completely at this point—it will as the liquid heats up.
- Bring to a simmer. Place the saucepan over medium-high heat. Let the mixture come to a gentle simmer, which should take about 2 to 3 minutes. You’ll see small bubbles forming around the edges of the pan. The sugar should be fully dissolved by now, and the liquid will smell amazing—like a warm, spiced hug.
- Add the pears. Carefully place your prepared pear halves or slices into the simmering syrup. They should be mostly submerged. If they’re not, that’s okay—just turn them halfway through cooking. Reduce the heat to medium-low so the liquid stays at a gentle simmer, not a rolling boil.
- Simmer until tender. Let the pears cook for about 8 to 12 minutes, depending on their ripeness and size. You’ll know they’re done when you can easily pierce them with the tip of a sharp knife or a fork, but they still hold their shape. They should feel tender, not mushy. For firmer pears, start checking at the 8-minute mark. For very ripe pears, check earlier.
- Remove from heat. Using a slotted spoon or tongs, carefully transfer the cooked pears to a plate or bowl. Don’t discard the syrup! This is liquid gold.
- Reduce the syrup (optional but recommended). Turn the heat back up to medium-high and let the syrup simmer for another 3 to 5 minutes, stirring occasionally. It will thicken slightly and become more concentrated in flavor. You want it to be syrupy but not too thick—it should coat the back of a spoon. Remove the cinnamon stick, cloves, and star anise before serving or storing.
- Serve or store. Pour the warm syrup over the pears. Serve immediately, or let them cool and store them in an airtight container in the refrigerator. The flavors will continue to develop as they sit, making them even better the next day.
Sensory cue: At each stage, take a moment to notice. The way the syrup smells like a holiday market. The way the pears turn a deeper, golden color as they cook. The way a fork slides through them with just a little resistance. That’s how you know it’s perfect.
Cooking Tips & Techniques
I’ve made this recipe dozens of times, and I’ve learned a few things the hard way. Let me save you some trouble.
Don’t overcook the pears. This is the most common mistake. Pears go from perfectly tender to mushy really fast. Start checking them at the 8-minute mark. If a knife slides in with just a little resistance, they’re done. Remember, they’ll continue to cook a bit from residual heat even after you take them off the stove.
Use firm pears. I cannot stress this enough. If your pears are already super soft and juicy, they’ll fall apart in the syrup. You want pears that yield slightly to pressure but still feel solid. Bosc pears are my go-to because they hold their shape beautifully.
Toast your spices first for a deeper flavor. This is a pro tip. Before you add the water and sugar, toss the cinnamon stick, cloves, and star anise into the dry saucepan over medium heat for about 30 seconds. You’ll smell them release their oils. Then add the rest of the ingredients. It makes a noticeable difference in depth of flavor.
Multitask wisely. While the pears are simmering, you can prep your serving dishes or whip up a quick batch of creamy mashed potatoes for a savory side. The pears don’t need constant attention, just a gentle stir halfway through.
Save the syrup. Don’t you dare throw that syrup away. It’s amazing drizzled over yogurt, pancakes, or even used as a cocktail mixer. I once used it to sweeten a batch of champagne cocktails, and it was a hit. Store it separately in the fridge for up to two weeks.
My biggest failure: The first time I made these, I used overripe pears and cranked the heat too high. I ended up with pear soup and a burnt pan. It was a mess. But that failure taught me patience and the importance of low, gentle heat. So if your first batch isn’t perfect, don’t give up. Adjust and try again.
Variations & Adaptations
One of the best things about this recipe is how easy it is to adapt. Here are some of my favorite variations.
- Dietary Adaptations: For a sugar-free version, swap the granulated sugar for honey, maple syrup, or a monk fruit sweetener. The syrup will be slightly thinner, but the flavor is still wonderful. For a vegan version, this recipe is already plant-based, so you’re good to go.
- Seasonal Variations: In the fall, add a pinch of nutmeg or allspice to the syrup for extra warmth. In the summer, swap the cinnamon and cloves for a split vanilla bean and some fresh mint. The pears become lighter and more refreshing.
- Flavor Twists: Add a strip of orange or lemon zest to the syrup for a citrusy note. Or, stir in a tablespoon of bourbon or rum after you remove the pears from the heat for an adult version. I’ve also tried adding a small piece of fresh ginger, and it adds a lovely, subtle heat.
- Cooking Method Adjustments: You can make these in a slow cooker! Just combine all the ingredients (except the lemon juice) in the slow cooker and cook on low for 2 to 3 hours. The pears will be incredibly tender. For a quicker version, use the microwave: combine everything in a microwave-safe bowl and cook on high for 4 to 5 minutes, stirring halfway through.
- Personal Variation: My favorite way to make these is with a tablespoon of rose water added at the very end. It sounds fancy, but it’s actually really easy, and the floral note pairs beautifully with the vanilla and pears. I serve them over a simple no-bake pumpkin cheesecake for a show-stopping fall dessert.
Serving & Storage Suggestions
These spiced vanilla pears are incredibly versatile. Here’s how I like to serve and store them.
Serving Temperature: They’re delicious warm, right out of the pan. But they’re also amazing chilled. The flavors actually meld together beautifully after a few hours in the fridge. Try them both ways and see which you prefer.
Presentation Ideas: For a simple dessert, arrange the pear halves on a plate, drizzle with the reduced syrup, and add a dollop of whipped cream or a scoop of vanilla ice cream. For a breakfast treat, spoon the pears and syrup over oatmeal, yogurt, or pancakes. They also make a lovely topping for a cheese board—try them with a sharp cheddar or a creamy brie.
Complementary Dishes: These pears pair wonderfully with a warm slice of apple pie with cheddar crust for a double-fruit dessert. They also go great with a simple pound cake or a scoop of creamy scrambled eggs for a sweet and savory brunch plate. For drinks, a cup of hot tea or a glass of sparkling wine is perfect.
Storage Instructions: Store any leftover pears and syrup together in an airtight container in the refrigerator. They’ll keep for up to 5 days. The flavors will continue to develop, so they might taste even better on day two.
Reheating Methods: To reheat, gently warm the pears and syrup in a small saucepan over low heat for 3 to 4 minutes. You can also microwave them in a bowl for 30 to 60 seconds. Add a splash of water or orange juice if the syrup has thickened too much.
Freezing: Yes, you can freeze them! Place the cooled pears and syrup in a freezer-safe container, leaving a little headspace. They’ll keep for up to 3 months. Thaw them overnight in the refrigerator before reheating. The texture might be slightly softer, but the flavor will still be amazing.
Nutritional Information & Benefits
This recipe is not only delicious but also surprisingly good for you. Here’s a quick breakdown.
Estimated Nutritional Values (per serving, about 1/2 pear with syrup):
- Calories: 120-150
- Fat: 0g
- Carbohydrates: 32g
- Fiber: 4g
- Sugar: 26g (from natural and added sources)
- Protein: 0.5g
- Vitamin C: 10% of Daily Value
- Potassium: 5% of Daily Value
Health Benefits: Pears are an excellent source of dietary fiber, which is great for digestion and heart health. They also contain antioxidants, including vitamin C and copper, which support your immune system. The cinnamon in this recipe has anti-inflammatory properties and can help regulate blood sugar levels. And the cloves are packed with antioxidants too.
Dietary Considerations: This recipe is naturally gluten-free, dairy-free, and vegan. It’s also low in fat and sodium. If you use a sugar substitute, it can easily fit into a low-carb or keto-friendly lifestyle. Just be mindful of the natural sugars from the pears.
Potential Allergens: This recipe is free from common allergens like nuts, dairy, eggs, and soy. However, always check your spice labels for potential cross-contamination if you have severe allergies.
I love that this dessert feels indulgent but is actually packed with goodness. It’s a win-win in my book.
Conclusion
These quick spiced vanilla pears are proof that you don’t need a lot of time or fancy ingredients to create something truly special. They’re warm, comforting, and incredibly versatile—perfect for a quiet weeknight dessert or an impressive dinner party finale. I’ve made them for myself on tired Tuesdays and for friends on celebratory Saturdays, and they’ve never let me down.
I really hope you give this recipe a try. Don’t be afraid to play around with the spices or serving suggestions. Make it your own. That’s the beauty of simple cooking—it leaves room for your personal touch.
If you make these pears, I’d love to hear about it. Leave a comment below and let me know how they turned out. Did you try a fun variation? Did you serve them with something unexpected? Share your stories and photos—I read every single comment. And if you loved this recipe, please share it with a friend who needs a little sweetness in their life.
Happy cooking, friend. You’ve got this.
Frequently Asked Questions
Can I use canned pears for this recipe?
I wouldn’t recommend it. Canned pears are already cooked and very soft, so they’ll turn to mush in the syrup. Fresh, firm pears are really the way to go for the best texture. If you’re in a pinch, you can try draining canned pears and just warming them in the syrup for 2 to 3 minutes, but the result won’t be the same.
What if I don’t have a cinnamon stick?
No problem! You can use 1/2 teaspoon of ground cinnamon instead. Just stir it into the syrup with the other ingredients. The flavor will be a bit more intense and the syrup won’t be as clear, but it will still be delicious. Just be aware that ground cinnamon can sometimes clump, so whisk it in well.
Can I make this recipe ahead of time?
Absolutely! In fact, I often make these pears a day or two ahead of time. The flavors meld and deepen as they sit in the refrigerator. Just store them in an airtight container and reheat gently before serving. They’re actually one of those rare recipes that tastes even better the next day.
How do I know when the pears are done cooking?
The best test is the fork test. Gently pierce a pear with the tip of a sharp knife or a fork. It should slide in easily with just a little resistance. The pear should feel tender but still hold its shape. If it falls apart, it’s overcooked. If the knife meets firm resistance, it needs more time. Start checking at the 8-minute mark.
Can I use this syrup for other things?
Yes, please do! The leftover spiced syrup is amazing. Use it to sweeten cocktails or mocktails, drizzle it over pancakes or waffles, stir it into yogurt or oatmeal, or even use it as a glaze for roasted carrots or butternut squash. It’s a little jar of magic that can elevate so many dishes.
Pin This Recipe!
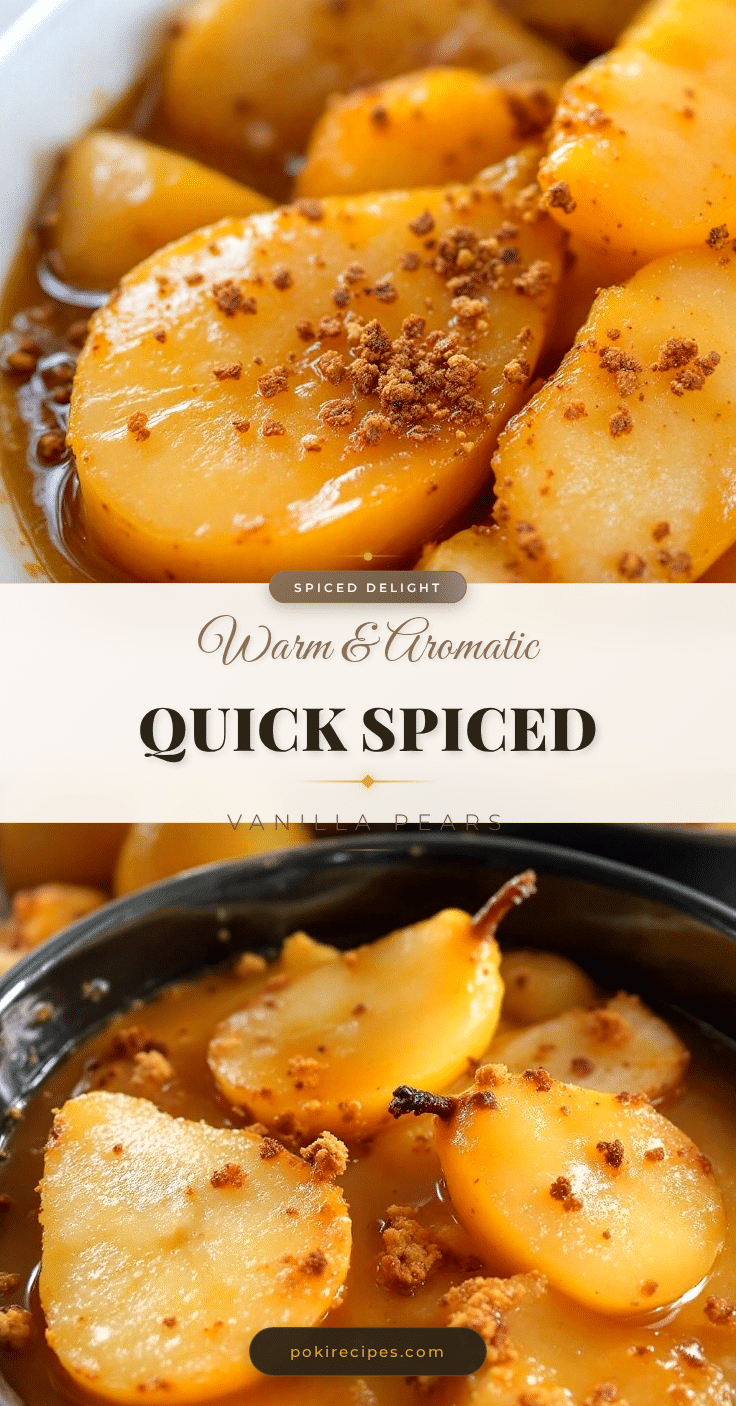
Easy Spiced Vanilla Pears in 15 Minutes

These quick spiced vanilla pears are tender, sweet, and infused with warm vanilla and aromatic spices. Ready in just 15 minutes, they’re perfect for a cozy dessert, breakfast topping, or an impressive yet effortless treat.
- Prep Time: 5 minutes
- Cook Time: 10 minutes
- Total Time: 15 minutes
- Yield: 4 servings 1x
- Category: Dessert
- Cuisine: American
Ingredients
- 3 medium firm but ripe pears (Bosc or Anjou recommended)
- 1 cup water (240 ml)
- 1/3 cup granulated sugar (65 grams)
- 1 tablespoon vanilla extract (15 ml)
- 1 whole cinnamon stick
- 3 to 4 whole cloves
- 1 whole star anise (optional)
- 1 tablespoon lemon juice (15 ml)
- Pinch of salt
Instructions
- Prep the pears: Wash, peel, and cut each pear in half lengthwise. Remove the core and seeds with a spoon or melon baller. Optionally cut into quarters or thick slices.
- Combine the poaching liquid: In a medium saucepan, add water, sugar, vanilla extract, cinnamon stick, cloves, star anise (if using), lemon juice, and a pinch of salt. Stir briefly.
- Bring to a simmer: Place the saucepan over medium-high heat and bring to a gentle simmer (about 2-3 minutes), until sugar dissolves.
- Add the pears: Carefully place the pear halves or slices into the simmering syrup. Reduce heat to medium-low to maintain a gentle simmer.
- Simmer until tender: Cook for 8-12 minutes, depending on ripeness and size. Pears are done when easily pierced with a knife but still hold their shape.
- Remove from heat: Use a slotted spoon or tongs to transfer pears to a plate or bowl. Reserve the syrup.
- Reduce the syrup (optional): Increase heat to medium-high and simmer syrup for 3-5 minutes until slightly thickened. Remove cinnamon stick, cloves, and star anise.
- Serve or store: Pour warm syrup over pears. Serve immediately or cool and store in an airtight container in the refrigerator.
Notes
Use firm pears to avoid mushiness. Start checking doneness at 8 minutes. For deeper flavor, toast spices in dry pan for 30 seconds before adding liquid. Leftover syrup can be used for cocktails, oatmeal, or glazes. Store pears and syrup in fridge for up to 5 days; freeze for up to 3 months.
Nutrition
- Serving Size: 1/2 pear with syrup
- Calories: 120150
- Sugar: 26
- Carbohydrates: 32
- Fiber: 4
- Protein: 0.5
Keywords: spiced pears, vanilla pears, quick dessert, easy fruit recipe, 15-minute recipe, poached pears, autumn dessert