Three-time in a week and the strawberries still aren’t quite perfect for my Easy No-Bake Cheesecake Flag Dessert for Patriotic Celebrations. Honestly, by the third try, I was knee-deep in crushed graham crackers and cream cheese swirls, marveling at how simple ingredients could turn into something that actually looks like a flag. Every Friday for the past month, I found myself drawn to this dessert, tweaking the berry arrangement, adjusting the creaminess, and trying to get the perfect set without turning the crust soggy. The kitchen counter littered with mixing bowls and red, white, and blue toppings became my little shrine to summer celebrations.
What kept pulling me back wasn’t just the festive colors or the sweet tang of the cheesecake — it was that quiet magic moment when it all came together: the chill in the fridge, the faint scent of vanilla and citrus, and that first creamy, berry-packed bite. No fancy baking, no oven heat fighting against the summer sun — just a cool, creamy slice that somehow feels like a mini celebration all on its own. I didn’t expect to get this hooked, but here I am, already planning how to make it again for the next picnic.
There’s a strange comfort in the repetitiveness of it — the layering, the gentle pressing of the crust, the careful placement of blueberries to mimic stars. This dessert stuck around because it’s a sweet little project that feels both simple and special, like a quiet nod to the red, white, and blue that brings people together. So, if you’re looking for a fuss-free, crowd-pleasing dessert that’s as much about the joy of making as it is about the eating, this cheesecake flag might just become your next obsession too.
Why You’ll Love This Recipe
Making this Easy No-Bake Cheesecake Flag Dessert for Patriotic Celebrations quickly became my go-to for summer gatherings, and I’m pretty sure it’ll be yours too. It’s not just a dessert; it’s a festive centerpiece that doesn’t demand hours of baking or tricky techniques. Here’s why it stands out:
- Quick & Easy: Ready to serve in just about 4 hours total, including chilling time — perfect for last-minute party prep or a relaxed afternoon treat.
- Simple Ingredients: Pantry staples like cream cheese, graham crackers, and fresh berries make this recipe super accessible without hunting for anything exotic.
- Perfect for Patriotic Occasions: Whether it’s the Fourth of July, Memorial Day, or any summer barbecue, this dessert screams celebration without shouting.
- Crowd-Pleaser: Kids love the bright colors, adults appreciate the creamy, tangy cheesecake, and the no-bake style means no kitchen heat battles.
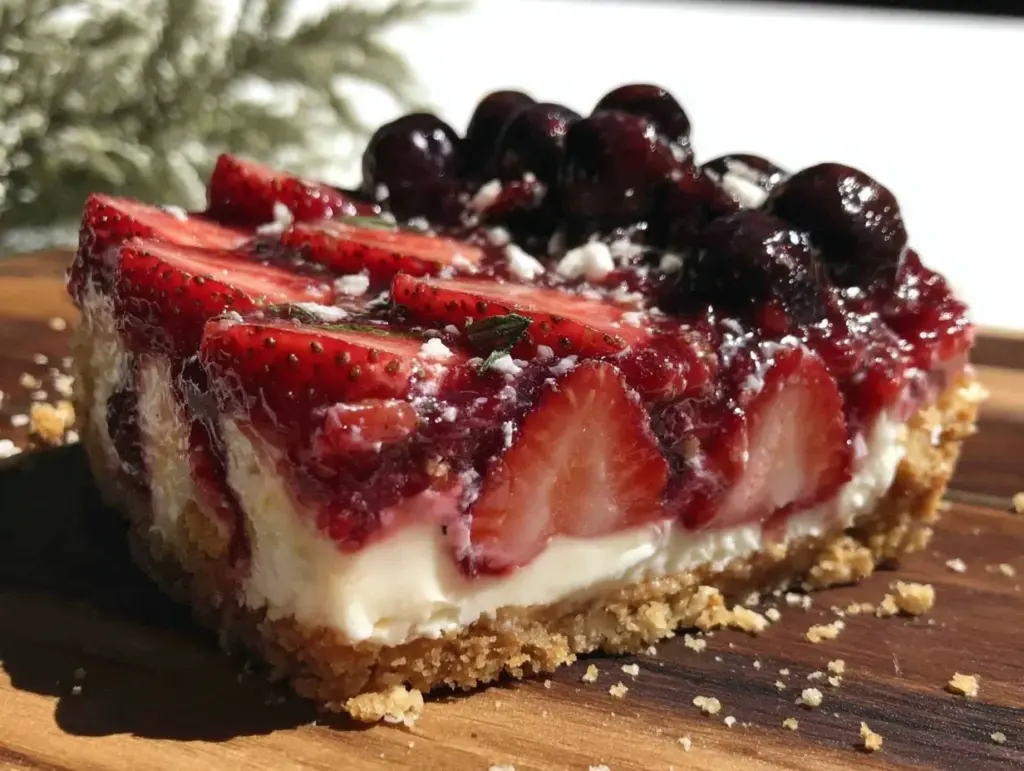
- Unbelievably Delicious: The cream cheese filling is silky and light, the crumbly crust adds texture, and the fresh berries keep it fresh and vibrant — honestly, it’s comfort food with a festive twist.
What makes this cheesecake flag different? It’s the balance — not too sweet, with just the right tang from the cream cheese and a hint of citrus that wakes up the flavor. Plus, the no-bake crust keeps things easy and stable, so no soggy bottoms here. I tried swapping out the usual heavy cream for whipped topping for a lighter feel, and that little change made the texture just dreamy. Honestly, this dessert isn’t just a pretty face; it’s the kind that makes you close your eyes after the first bite and smile, knowing you nailed it without breaking a sweat.
What Ingredients You Will Need
This recipe uses simple, wholesome ingredients to deliver bold flavor and satisfying texture without the fuss. Most of these you likely have on hand, and the fresh berries really bring the colors and contrast to life.
- For the Crust:
- 1 ½ cups (150g) graham cracker crumbs (I recommend using Honey Maid for the best texture)
- 6 tablespoons (85g) unsalted butter, melted (adds richness and helps the crust hold together)
- ¼ cup (50g) granulated sugar
- For the Cheesecake Filling:
- 16 oz (450g) cream cheese, softened (room temperature is key to avoid lumps)
- 1 cup (240ml) heavy whipping cream or whipped topping (I sometimes use Reddi-wip for ease)
- ¾ cup (90g) powdered sugar
- 1 teaspoon pure vanilla extract (fresh vanilla makes all the difference)
- 1 tablespoon lemon juice (brightens the flavor and balances sweetness)
- For the Topping (the Flag):
- 1 cup fresh strawberries, sliced (in season, they’re juicier and sweeter)
- 1 cup fresh blueberries (look for firm, plump berries)
- Optional: 2 tablespoons powdered sugar to dust over berries for extra sweetness
If you want to switch things up, almond flour can replace graham cracker crumbs for a gluten-free crust, and coconut yogurt can be blended in with the cream cheese for a dairy-free twist. In summer, swapping strawberries for fresh raspberries adds a tart pop that’s just delightful. Also, feel free to use frozen berries thawed and drained if fresh ones aren’t available — just be mindful of extra moisture.
Equipment Needed
- 9×13 inch (23×33 cm) rectangular baking dish or similar size glass pan — perfect for showing off the flag design
- Mixing bowls — one large for the cream cheese filling, one medium for the crust
- Electric mixer or stand mixer — highly recommended for smooth, lump-free cheesecake filling
- Measuring cups and spoons for precision
- Spatula for folding and spreading the filling evenly
- Knife for slicing strawberries and arranging the flag pattern
- Plastic wrap or foil for covering the dessert during chilling
If you don’t have a mixer, a sturdy whisk and a bit of elbow grease will do — just be patient with the cream cheese until it’s smooth. For budget-friendly options, you can substitute a smaller pan, but remember the flag design looks best in a rectangular shape. Keeping your equipment clean and dry before starting helps the filling set nicely, and a chilled mixing bowl can keep the cream whipping faster.
Preparation Method

- Prepare the Crust: In a medium bowl, combine 1 ½ cups (150g) graham cracker crumbs, 6 tablespoons (85g) melted unsalted butter, and ¼ cup (50g) granulated sugar. Mix until the crumbs are evenly coated and resemble wet sand. Press the mixture firmly into the bottom of your 9×13 inch baking dish, pressing evenly to form a compact base. This should take about 5 minutes. A flat-bottomed glass or measuring cup works great to press down firmly and get a smooth surface.
- Chill the Crust: Place the crust in the fridge for at least 15 minutes to firm up while you prepare the filling. This step prevents sogginess and helps the crust hold its shape.
- Make the Cheesecake Filling: In a large mixing bowl, beat 16 oz (450g) softened cream cheese with an electric mixer on medium speed until creamy and smooth, about 2-3 minutes. Add ¾ cup (90g) powdered sugar, 1 teaspoon vanilla extract, and 1 tablespoon lemon juice. Mix until fully incorporated.
- Whip the Cream: In a separate bowl, whip 1 cup (240ml) heavy cream or use whipped topping until stiff peaks form. This usually takes about 3-4 minutes with an electric mixer on high. If you overwhip, the cream will look grainy, so watch carefully.
- Fold the Cream into the Cream Cheese: Gently fold the whipped cream into the cream cheese mixture using a spatula. This keeps the filling airy and light. Take your time here, folding carefully to avoid deflating the mixture. The filling should be fluffy and smooth.
- Assemble the Cheesecake: Remove the crust from the fridge. Spread the cheesecake filling evenly over the crust with a spatula, smoothing the surface. Tap the pan gently on the counter to release any air bubbles.
- Arrange the Flag: Slice 1 cup of fresh strawberries lengthwise and arrange them in horizontal stripes across the dessert to mimic the red stripes of the flag. Use 1 cup of fresh blueberries to create the blue field in the upper left corner. You can dust the berries lightly with powdered sugar for a frosted effect if you like. This step takes about 10 minutes, but take your time to get the pattern just right — it makes all the difference.
- Chill Before Serving: Cover the dessert with plastic wrap and chill in the refrigerator for at least 3 hours, preferably overnight. This lets the filling set properly and allows all the flavors to meld together. Avoid freezing, as that can change the texture.
- Serve & Enjoy: Once chilled, slice into squares and serve cold. This dessert holds up well, but for the best presentation, slice just before serving to keep the berries fresh and vibrant.
If you notice the filling is too soft after chilling, a quick fix is to pop it back in the fridge for another hour or two. And if you want to speed things up, setting it in the freezer for 30 minutes works too — just don’t forget it!
Cooking Tips & Techniques
One thing I learned the hard way is to never skip softening the cream cheese — trying to mix cold cream cheese usually ends with lumps and frustration. Letting it sit out for about 30 minutes or microwaving it in 10-second bursts helps it come to the perfect mixing temperature without melting.
When whipping cream, start with a chilled bowl and beaters for quicker, more stable peaks. Watch the cream carefully because it can go from perfect to butter in seconds if you’re not paying attention.
Pressing the crust evenly but firmly is key to avoid a crumbly base that falls apart. Using a flat-bottomed glass makes this easier and more uniform.
For arranging the berries, I find it helpful to lay out the pattern on parchment paper first — that way, you can adjust the design before placing it on the cheesecake. And don’t forget to pat dry your berries if they’re wet; extra moisture can make the crust soggy.
Timing-wise, this dessert is forgiving. You can prep the crust and filling a day ahead and add the berries last minute. This flexibility makes it ideal for busy holiday weekends, letting you focus on other dishes — like the crispy loaded potato skins I love for game days.
Variations & Adaptations
This cheesecake flag recipe is a great canvas for customization depending on dietary needs or flavor preferences.
- Dietary Variation: Swap the graham cracker crust for a gluten-free almond flour crust to make it gluten-free. Use coconut cream instead of heavy cream for a dairy-free version — just make sure to chill it overnight first.
- Seasonal Twist: In fall or winter, switch out the strawberries and blueberries for pomegranate seeds and kiwi slices for a festive red-green-white look. Or try raspberries in place of strawberries for a tart punch.
- Flavor Boost: Add a teaspoon of orange zest to the filling for a citrusy note that pairs beautifully with the berries. Alternatively, swirl in a tablespoon of strawberry jam into the cream cheese mixture for extra berry flavor.
- Cooking Method Adjustment: If you prefer a firmer texture, add 1 tablespoon of unflavored gelatin dissolved in warm water to the filling before folding in the whipped cream. This sets the cheesecake more firmly without baking.
Personally, I tried adding chopped fresh mint leaves to the filling once — it gave a refreshing twist that surprised everyone. If you want to see more easy breakfast ideas to pair with your celebrations, my egg muffins recipe is a great savory option that complements sweeter treats perfectly.
Serving & Storage Suggestions
This dessert is best served chilled, right out of the fridge. The cool cream cheese filling and fresh berries are a perfect refreshing contrast to warm summer days. For presentation, serve it on a white platter to make the red, white, and blue colors really pop.
It pairs wonderfully with light beverages like sparkling lemonade or a simple iced tea. For a boozy twist, a chilled glass of champagne or a festive cocktail (like those in my champagne cocktails guide) complements the dessert beautifully.
Store leftovers tightly covered in the fridge for up to 3 days. The crust holds up surprisingly well, but the berries may release some juice over time, so it’s best to add fresh berries if serving again after a day or two. Reheat is not recommended — just enjoy it cold for that creamy, fresh texture.
Over time, the flavors meld and the lemon and vanilla notes deepen, making the cheesecake even more flavorful the next day. Just be sure to keep it covered to prevent it from absorbing fridge odors.
Nutritional Information & Benefits
This Easy No-Bake Cheesecake Flag Dessert offers a moderate calorie count per serving, roughly 320 calories for a 3×3 inch slice (depending on portion size). It provides a good source of calcium and protein from the cream cheese and cream, with the fresh berries adding antioxidants and vitamin C.
Because it’s no-bake, it avoids extra fats from butter or oils typically used in baked crusts, and you can adjust sugar levels to taste. This dessert can fit into a balanced diet when enjoyed in moderation, especially when using fresh fruit for natural sweetness.
Note that it contains dairy and gluten, so it’s not suitable for those with allergies or intolerances unless substitutions are made. Personally, I appreciate how it feels indulgent without being heavy, making it a satisfying treat for warm-weather celebrations.
Conclusion
The Easy No-Bake Cheesecake Flag Dessert for Patriotic Celebrations isn’t just a dessert; it’s a little project that brings color, flavor, and a touch of fun to any party. It’s simple enough to whip up on a whim, yet special enough to impress family and friends. The balance of creamy filling, crumbly crust, and fresh berries makes every bite a delight.
Feel free to make it your own — swap berries, adjust sweetness, or try different crusts. I love how this recipe fits easily into busy summer days, letting me enjoy the celebration without fuss. If you give it a try, I’d love to hear how you made it yours — drop a comment or share your berry arrangement story!
Here’s to more sweet, simple moments worth repeating (maybe three times a week, like me).
FAQs
Can I use frozen berries for the flag topping?
Yes, but make sure to thaw and drain them well to avoid excess moisture that can soften the crust or filling.
How long does this no-bake cheesecake need to chill?
At least 3 hours in the fridge is recommended for the filling to set properly, but overnight chilling gives the best texture.
Can I make this dessert ahead of time for a party?
Absolutely! Prepare the crust and filling a day before, add the berries just before serving to keep them fresh.
Is there a way to make this recipe gluten-free?
Yes, substitute the graham cracker crumbs with almond flour or gluten-free cookie crumbs for a gluten-free crust.
What can I use instead of heavy cream in the filling?
You can use whipped topping like Cool Whip for a lighter, easier option or coconut cream for dairy-free alternatives.
Pin This Recipe!
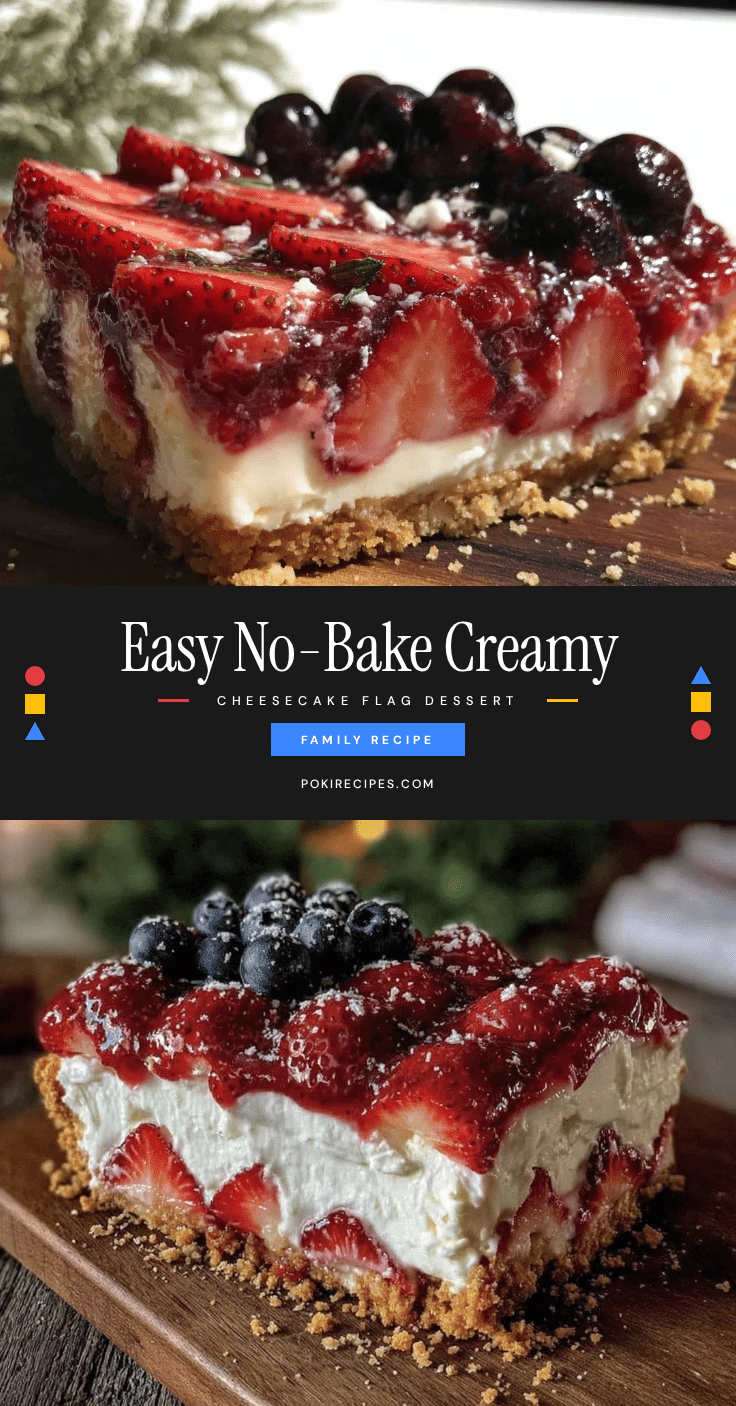
Easy No-Bake Cheesecake Flag Dessert Recipe for Perfect Patriotic Celebrations

A simple, no-bake cheesecake dessert featuring a graham cracker crust, creamy cream cheese filling, and fresh berries arranged to resemble a patriotic flag. Perfect for summer celebrations and quick to prepare.
- Prep Time: 20 minutes
- Cook Time: 0 minutes
- Total Time: 4 hours
- Yield: 12 servings 1x
- Category: Dessert
- Cuisine: American
Ingredients
- 1 ½ cups (150g) graham cracker crumbs
- 6 tablespoons (85g) unsalted butter, melted
- ¼ cup (50g) granulated sugar
- 16 oz (450g) cream cheese, softened
- 1 cup (240ml) heavy whipping cream or whipped topping
- ¾ cup (90g) powdered sugar
- 1 teaspoon pure vanilla extract
- 1 tablespoon lemon juice
- 1 cup fresh strawberries, sliced
- 1 cup fresh blueberries
- Optional: 2 tablespoons powdered sugar to dust over berries
Instructions
- Prepare the Crust: In a medium bowl, combine graham cracker crumbs, melted butter, and granulated sugar. Mix until crumbs are evenly coated and resemble wet sand. Press firmly into the bottom of a 9×13 inch baking dish to form a compact base. This takes about 5 minutes.
- Chill the Crust: Place the crust in the fridge for at least 15 minutes to firm up.
- Make the Cheesecake Filling: Beat softened cream cheese with an electric mixer on medium speed until creamy and smooth, about 2-3 minutes. Add powdered sugar, vanilla extract, and lemon juice. Mix until fully incorporated.
- Whip the Cream: In a separate bowl, whip heavy cream or whipped topping until stiff peaks form, about 3-4 minutes.
- Fold the Cream into the Cream Cheese: Gently fold whipped cream into the cream cheese mixture using a spatula until fluffy and smooth.
- Assemble the Cheesecake: Remove crust from fridge. Spread cheesecake filling evenly over crust and smooth the surface. Tap pan gently to release air bubbles.
- Arrange the Flag: Slice strawberries lengthwise and arrange in horizontal stripes across the dessert. Use blueberries to create the blue field in the upper left corner. Optionally dust berries with powdered sugar.
- Chill Before Serving: Cover dessert with plastic wrap and chill in refrigerator for at least 3 hours, preferably overnight.
- Serve & Enjoy: Slice into squares and serve cold. For best presentation, slice just before serving.
Notes
Soften cream cheese before mixing to avoid lumps. Use a chilled bowl and beaters for whipping cream. Press crust firmly to avoid crumbling. Arrange berries on parchment paper first for easier design. Thaw and drain frozen berries well to avoid excess moisture. Can prepare crust and filling a day ahead and add berries last minute.
Nutrition
- Serving Size: 1 slice (3x3 inch)
- Calories: 320
- Sugar: 18
- Sodium: 210
- Fat: 22
- Saturated Fat: 13
- Carbohydrates: 24
- Fiber: 2
- Protein: 5
Keywords: no-bake cheesecake, patriotic dessert, summer dessert, easy cheesecake, berry cheesecake, flag dessert, no oven dessert


