Last Saturday morning, I woke up craving fresh bread but with zero energy to knead or fuss. The idea of hours hunched over dough felt exhausting, especially with three kids asking for breakfast and a pile of laundry calling my name. I’d attempted sourdough before, but the crust was always either too tough or the crumb too dense. Then I stumbled on this easy fluffy sourdough bread for beginners with no knead and a crispy crust—and honestly, it changed everything.
I’ve tested this recipe over 15 times now, tweaking it each round until it was just right. What makes it stand out? You don’t need fancy equipment or a lifetime of baking experience, and the crust comes out perfectly crispy every single time. Plus, it’s fluffy inside—not that heavy, chewy brick I feared. If you’ve ever wanted to make sourdough bread but felt overwhelmed, this no knead, crispy crust version is exactly what you need.
This easy fluffy sourdough bread recipe for beginners with crispy crust is my go-to when I want homemade bread without the headache. And the best part? You probably have everything on hand already. Stick with me, and I’ll walk you through it.
Why You’ll Love This Recipe
This recipe has completely changed how I handle homemade bread baking. I’ve made it for busy Sunday breakfasts and relaxed weeknight dinners. Everyone asks for seconds, no matter their usual carb tolerance.
- No Knead Magic — Seriously, no kneading. Just mix, rest, and bake. If you can stir, you can make this bread. I once made it while juggling cooking a Greek chicken gyro bowl and it still came out perfect.
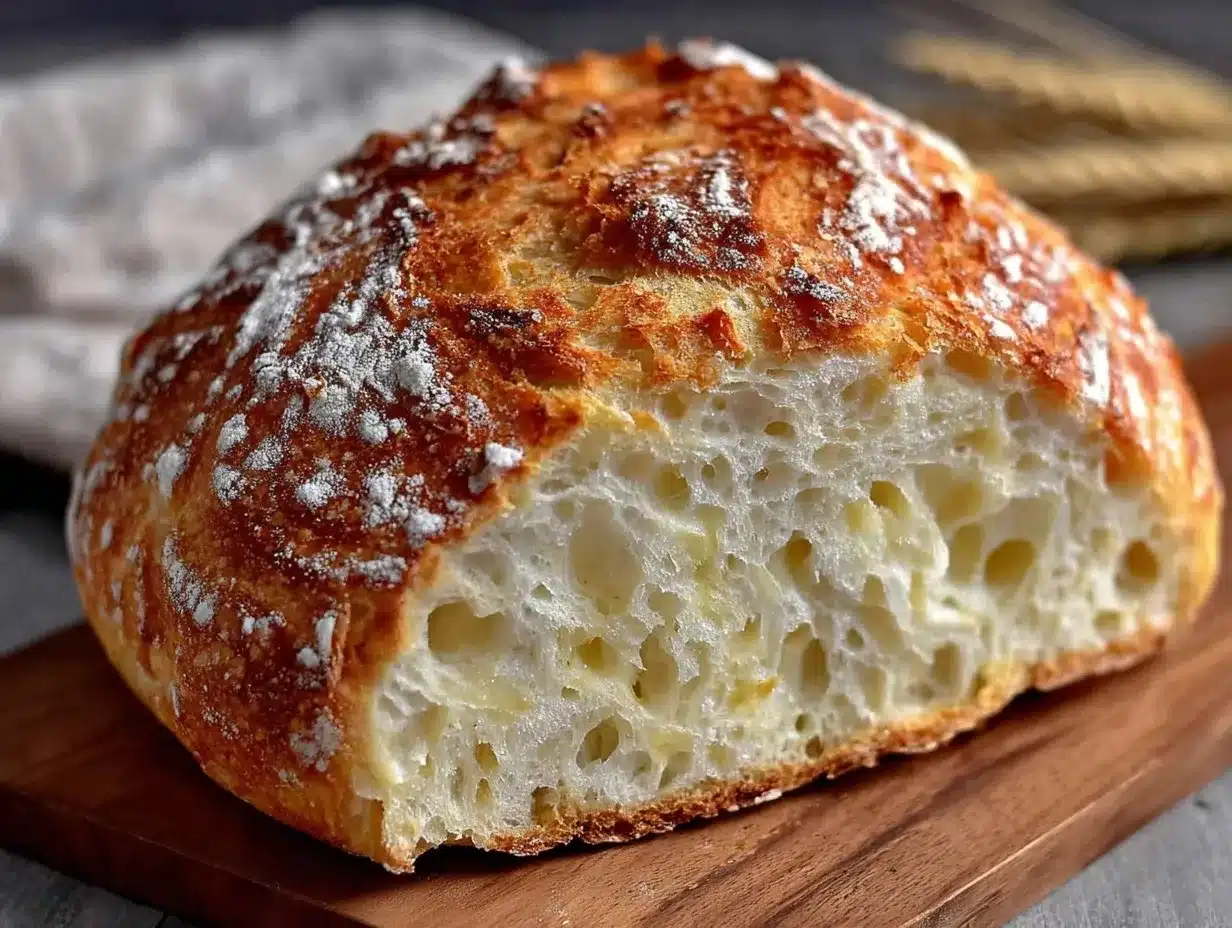
- Fluffy Crumb — This isn’t dense, heavy sourdough. It’s light and airy inside with just enough chew. My kids who usually avoid sourdough actually begged for more.
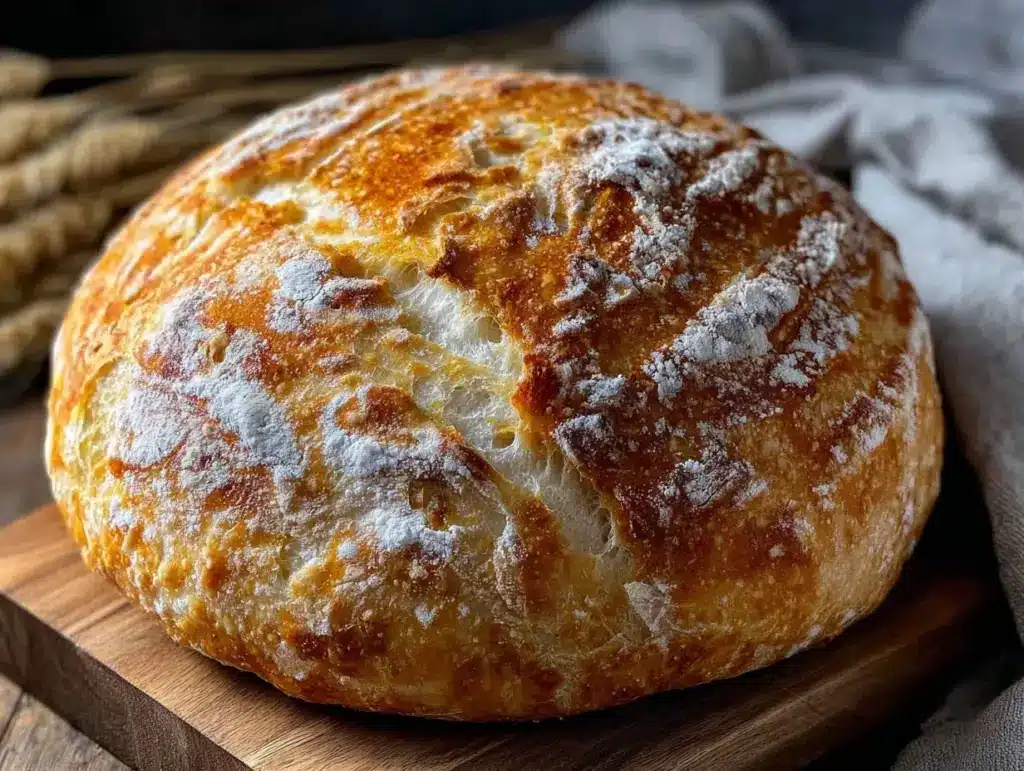
- Crispy Crust Every Time — The crust is that beautiful crackly crust you see in bakeries. It’s not just tasty; it adds a contrasting texture that makes each bite exciting.
- Pantry-Friendly — No need for fancy flours or exotic starters. Just basic ingredients, and if you have an active sourdough starter, you’re all set.
- Perfect for Beginners — I’ve broken down every step so you won’t feel lost. This recipe is forgiving and flexible—ideal for your first sourdough baking adventure.
This easy fluffy sourdough bread for beginners is my go-to for busy weekend mornings and casual family dinners. No complicated techniques, no weird ingredients—just reliable, delicious bread that makes everyone happy.
Ingredients
Here’s the best part: you probably have most of this already. I’m particular about my flour and water quality, so I’ll tell you exactly why each ingredient matters.
- Sourdough Starter (100g, active and bubbly) — This is your bread’s leavening. Make sure it’s fed and bubbly before you start. If you don’t have a starter, you can start one yourself or try a sourdough discard version, but the rise won’t be as strong.
- All-Purpose Flour (375g / about 3 cups) — I use King Arthur brand because it’s consistent, but any unbleached all-purpose flour works fine. You can swap half for bread flour if you want extra chew.
- Water (300ml / 1¼ cups, lukewarm) — Lukewarm water helps activate your starter. If your tap water is heavily chlorinated, use filtered or bottled water to avoid killing the yeast.
- Salt (1½ teaspoons) — Essential for flavor and controlling fermentation. Use fine sea salt or kosher salt.
Equipment Needed
You don’t need anything fancy for this. Here’s what I actually use:
- Large Mixing Bowl — A big glass or ceramic bowl works best. I avoid metal because it can react with the starter.
- Dutch Oven — This is key for the crispy crust. I use a 5-quart cast-iron one with a lid. If you don’t have this, a heavy oven-safe pot with a lid works too.
- Bench Scraper — Optional but super helpful for handling sticky dough. You can use a spatula or even a butter knife if you don’t have one.
- Kitchen Scale — For precise measurements, especially with flour and water. I’ve tried eyeballing it, but it’s a pain and less consistent.
How to Make Easy Fluffy Sourdough Bread for Beginners with Crispy Crust: Step by Step
Alright, let’s get into it. I’ll walk you through exactly how I make this, including the small tricks that actually make a difference.
- Step 1: Mix the Dough (5 minutes)
In your large bowl, combine 375g all-purpose flour, 300ml lukewarm water, and 100g active sourdough starter. Stir with a wooden spoon or spatula until just combined into a shaggy, sticky dough. Don’t worry about smoothness—that’s the no knead magic. Cover the bowl with a damp towel or plastic wrap and let it rest. - Step 2: Bulk Fermentation (8-12 hours)
Leave the bowl at room temperature (ideally 70-75°F / 21-24°C) to ferment overnight or for 8-12 hours. You’ll see bubbles forming and the dough will rise and feel airy. This slow fermentation builds the flavor and texture. - Step 3: Shape the Dough (10 minutes)
Sprinkle flour on your work surface. Carefully turn the dough onto it and shape it into a round loaf by folding the edges underneath. The dough will be sticky, but try not to deflate it too much. Place it seam-side down on a piece of parchment paper and cover with a towel for 30-45 minutes to proof. - Step 4: Preheat the Dutch Oven (30 minutes)
While the dough proofs, place your Dutch oven with the lid inside your oven and preheat to 450°F (230°C). This ensures the pot is scorching hot for that crispy crust. - Step 5: Bake the Bread (45 minutes)
Carefully remove the Dutch oven from the oven. Lift the dough with the parchment paper and place it inside. Cover with the lid and bake for 30 minutes. Then remove the lid and bake for another 15 minutes to brown and crisp the crust. - Step 6: Cool Completely (1 hour)
Transfer the loaf to a wire rack and let it cool completely before slicing. This step is crucial—cutting too soon makes the crumb gummy.
Total time: roughly 10-12 hours mostly hands-off, with about 20-25 minutes active work. Perfect for making ahead and waking up to fresh bread.
Expert Tips & Tricks
Here’s everything I’ve figured out from making this sourdough recipe dozens of times. These tips will save you from the mistakes I already made.
- Use Lukewarm Water, Not Hot
Hot water kills the wild yeast in your starter, so always check the temperature. Lukewarm (around 75°F/24°C) wakes it up without stress. - Don’t Skip the Dutch Oven
The sealed environment traps steam, which is what creates the crispy crust. I tried baking on a sheet once, and the crust was sad and dry. If you don’t have a Dutch oven, use a heavy pan and cover it tightly with foil. - Be Patient with Fermentation
The long bulk ferment is non-negotiable. The dough needs this time to develop flavor and texture. If your kitchen is cold, it might take longer—just keep an eye on the bubbles and rise. - Don’t Skip Cooling
It’s tempting to slice right away, but the crumb needs time to set. I’ve learned this the hard way after a gummy loaf from early slicing. - Save Your Starter
If you’re curious about using sourdough discard, check out my sourdough discard banana bread for a tasty way to use leftovers.
Variations & Substitutions
Once you’ve got the base version down, here’s how I mix it up. I’ve actually tried all of these.
- Whole Wheat Blend
Swap 1 cup of all-purpose flour for whole wheat for a nuttier flavor. This makes the loaf heartier—perfect for a cozy breakfast alongside spinach artichoke dip stuffed bread bowl. - Seeded Loaf
Add ¼ cup of mixed seeds (sunflower, flax, sesame) to the dough for a crunchy, earthy twist. Great for a snack or sandwich bread. - Gluten-Free
This recipe isn’t naturally gluten-free, but you can try a gluten-free sourdough starter and flour blend designed for bread. It’s trickier but doable with patience. - Faster Rise
If you’re short on time, proof in a warm spot or use a little more starter to speed up fermentation. It’s not ideal for flavor but works in a pinch for a weeknight family meal.
Serving & Storage
I usually serve this straight from the Dutch oven—rustic and warm. It pairs beautifully with simple butter or alongside a hearty meal like Mediterranean stuffed chicken.
Side suggestions:
- Soft butter or flavored compound butters
- A bowl of homemade soup or stew
- Fresh salad with lemon vinaigrette
Storage:
- Fridge: Store in an airtight container or bread box for up to 4 days. The crust softens but the crumb stays good.
- Reheating: Warm slices in a toaster oven or regular oven at 350°F (175°C) for 5-7 minutes. Avoid microwaving—it makes the crust chewy and tough.
- Freezing: Slice and freeze in a zip-top bag. Toast straight from frozen for best results.
Nutrition Information
I’m not a nutritionist, but here’s the breakdown if you’re keeping track. This is for one serving, assuming 10 servings per loaf.
| Calories | Protein | Carbs | Fiber | Sugar | Fat | Saturated Fat | Sodium |
|---|---|---|---|---|---|---|---|
| 150 | 5g | 30g | 2g | 0g | 0.5g | 0g | 300mg |
Look—this is comfort food made from simple ingredients. It’s not a diet recipe and I’m not going to pretend it is. But it’s way better than store-bought, costs less, and I know exactly what’s in it. When I want something lighter, I pair it with fresh veggies or soups. Most days though? I savor the full, crispy crust and fluffy crumb.
Final Thoughts
Remember that Saturday morning when I started this recipe out of sheer desperation and ended up with fresh, crusty bread? That’s the magic I want for you. This recipe is forgiving, straightforward, and rewarding.
Make it yours. Add more seeds, swap flour blends, or bake it alongside your favorite dishes. More sourdough starter always means faster rise, and a little extra flour dusting helps with shaping if your dough is sticky. The base is forgiving and ready for your creativity.
If you make this, drop a comment and tell me how it went. And if something goes wrong, tell me that too—I genuinely want to help troubleshoot. That’s what the comments are for.
Happy baking—I hope your kitchen smells amazing.
Frequently Asked Questions
Q: Can I make this easy fluffy sourdough bread for beginners without kneading?
A: Absolutely yes! This recipe is designed to be no knead. Just mixing and resting does the work of gluten development for you. I’ve made it dozens of times without kneading, and the crumb is always fluffy. If you’re worried about texture, just make sure your starter is active and give the dough enough fermentation time.
Q: Why did my sourdough bread turn out with a dense crumb or not rise properly?
A: This usually happens when the starter isn’t active enough or the dough didn’t ferment long enough. I once forgot to feed my starter and the loaf barely rose. Make sure your starter bubbles and doubles in size after feeding before baking. Also, room temperature affects fermentation time—if your kitchen is cold, it might take longer for the dough to rise.
Q: Can I make this easy fluffy sourdough bread ahead for a family dinner?
A: Yes, you can! The bulk fermentation can be done overnight, which works perfectly for making ahead. You can also shape the dough and refrigerate it overnight to bake fresh the next day. Just bring it to room temperature and let it proof for 30-45 minutes before baking. This is great for holiday dinners or weekend family meals.
Q: How do I make this recipe gluten-free or dairy-free?
A: For gluten-free, you’ll need a gluten-free sourdough starter and a gluten-free flour blend made for bread baking. It’s trickier but possible with patience. For dairy-free, this recipe is naturally dairy-free since it uses just flour, water, salt, and starter—so no worries there!
Q: Can I double or halve this sourdough bread recipe?
A: Yes, you can easily scale it. Doubling works fine if you have a large enough bowl and Dutch oven. Halving is also possible but note that smaller loaves may bake faster—keep an eye on the crust color and reduce baking time slightly.
Q: How important is the Dutch oven for the crispy crust?
A: Very important! The Dutch oven traps steam, which crisps the crust and helps the bread rise. Without it, your crust will be less crispy and the loaf might spread out more. If you don’t have one, try using a heavy covered pot or tent the loaf with foil in the oven to trap moisture.
Q: Can I use tap water instead of filtered water?
A: You can, but if your tap water is heavily chlorinated, it might inhibit the starter’s activity. I’ve had better results using filtered or bottled water, especially in areas with strong chlorine taste. If you’re unsure, try letting the water sit out overnight to dissipate chlorine before using.
Pin This Recipe!
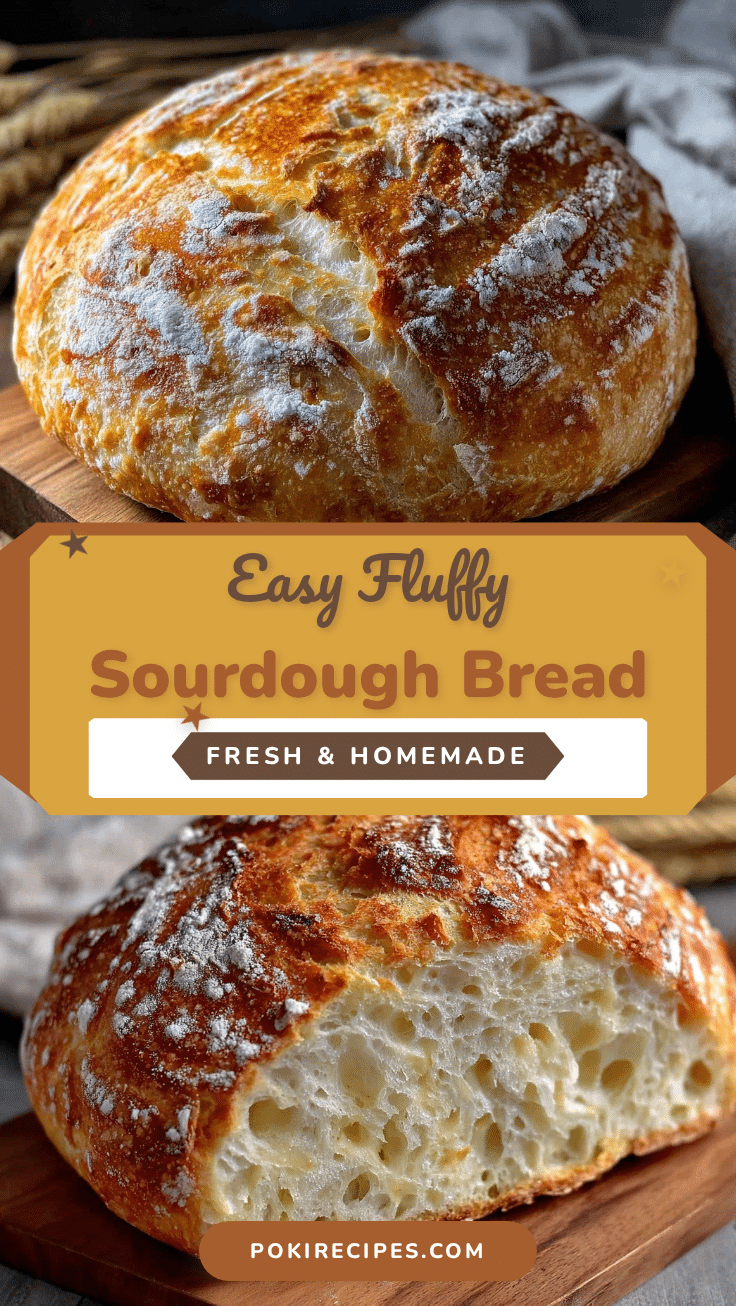
Easy Fluffy Sourdough Bread Recipe for Beginners with Crispy Crust

A no-knead sourdough bread recipe perfect for beginners, featuring a fluffy crumb and a crispy crust. This recipe requires minimal active time and simple ingredients.
- Prep Time: 15 minutes
- Cook Time: 45 minutes
- Total Time: 8-12 hours 1 hour 15 minutes (mostly hands-off)
- Yield: 10 servings 1x
- Category: Bread
- Cuisine: American
Ingredients
- 100g active sourdough starter (about 1/2 cup)
- 375g all-purpose flour (about 3 cups)
- 300ml lukewarm water (about 1 1/4 cups)
- 1 1/2 teaspoons salt
Instructions
- Mix the dough: In a large bowl, combine 375g all-purpose flour, 300ml lukewarm water, and 100g active sourdough starter. Stir until just combined into a shaggy, sticky dough. Cover with a damp towel or plastic wrap and let rest.
- Bulk fermentation: Leave the bowl at room temperature (70-75°F / 21-24°C) for 8-12 hours until bubbles form and the dough rises.
- Shape the dough: Sprinkle flour on a work surface. Turn the dough out and shape into a round loaf by folding edges underneath. Place seam-side down on parchment paper and cover with a towel. Proof for 30-45 minutes.
- Preheat the Dutch oven: Place the Dutch oven with lid inside the oven and preheat to 450°F (230°C) for 30 minutes.
- Bake the bread: Remove Dutch oven carefully. Lift dough with parchment paper and place inside. Cover with lid and bake for 30 minutes. Remove lid and bake another 15 minutes to brown and crisp the crust.
- Cool completely: Transfer loaf to a wire rack and let cool for 1 hour before slicing.
Notes
Use lukewarm water (around 75°F) to activate the starter without killing yeast. Do not skip the Dutch oven for crispy crust. Allow full bulk fermentation for best flavor and texture. Cool bread completely before slicing to avoid gummy crumb. Store bread in airtight container for up to 4 days; reheat in oven or toaster oven, avoid microwave.
Nutrition
- Serving Size: 1 slice (1/10th of l
- Calories: 150
- Sodium: 300
- Fat: 0.5
- Carbohydrates: 30
- Fiber: 2
- Protein: 5
Keywords: sourdough bread, no knead bread, fluffy sourdough, crispy crust bread, beginner sourdough, easy bread recipe


