It was a chilly Saturday evening, the kind where the sun dips early and the campfire feels like a warm hug. My husband and I had just set up our tents at the edge of a quiet lake, the kids running around with marshmallow sticks in hand. I wanted a dinner that was hearty enough to fill hungry bellies but simple enough to make without a full kitchen. That’s when I pulled out my trusty Dutch oven and whipped up this Dutch oven chili for campfire. After years of tweaking this recipe, I finally nailed the balance of rich, savory, and just the right kick of spice—perfect for an outdoor dinner.
This recipe is my go-to for any camping trip or backyard fire pit night because it’s easy to prep at home, then just simmer over coals or a camp stove. I’ve tested it over a dozen times—sometimes with friends, sometimes with just the family—and it never disappoints. If you’re wondering how to get a hearty and easy outdoor dinner that feels like it took hours but really didn’t, this chili for campfire nights is exactly what you need.
And yes, you can absolutely make this Dutch oven chili for campfire easy hearty outdoor dinner recipe even if you’re new to cooking outside. I’ll walk you through everything.
Why You’ll Love This Recipe
This Dutch oven chili for campfire has completely changed how I handle outdoor dinners. It’s not just a recipe; it’s a reliable meal that makes every camping trip better.
- Hands-Off Cooking — Once your ingredients are in the Dutch oven, you mostly let the fire do the work. I love this because it frees me up to hang out with the kids or chat with friends instead of standing over a stove.
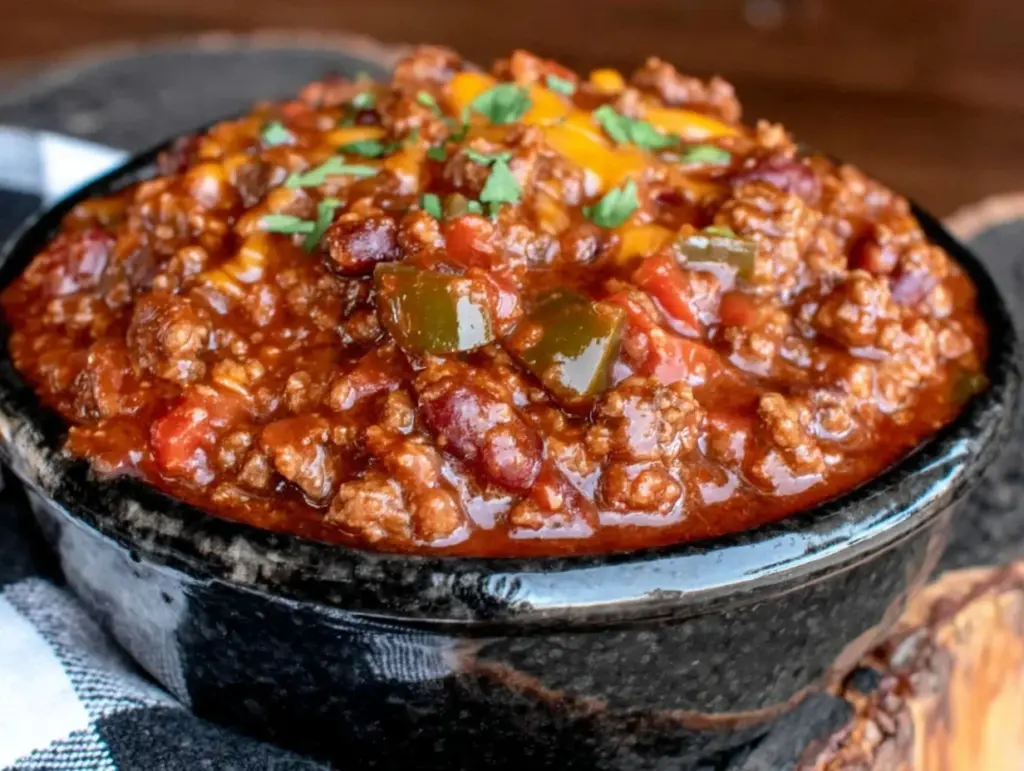
- Rich, Hearty Flavor — This chili has a deep, smoky taste that you just can’t get from a regular stovetop pot. The cast iron Dutch oven is a game-changer here, giving a slow-cooked richness perfect for cold nights.
- Simple Prep, Big Payoff — You probably have most of these ingredients in your pantry or fridge already. I keep canned tomatoes and beans stocked just for recipes like this, so I can throw it together last minute.
- Perfect for Campfire or Backyard — Whether you’re camping, tailgating, or just craving a cozy outdoor dinner, this chili fits the bill. It’s filling enough for a hungry crowd but easy to scale down for just a couple.
- Feeds a Crowd or Family — I’ve made this for weekend camping trips with friends and for my family of five. Everyone cleans their bowl, no matter how picky.
This chili is my go-to for weekend campfire dinners or even backyard fire pit nights. No fancy ingredients, no fuss—just solid, comforting food that hits the spot every time.
Ingredients You’ll Need
Here’s the best part: most of these ingredients are pantry staples or easy to grab at the store. I’m picky about a few key things that really make the flavor pop, and I’ll share those tips below.
- Ground beef (1 pound / 450g) — I use 80/20 for the best balance of flavor and fat. Leaner beef can dry out the chili.
- Onion (1 medium, diced) — Adds sweetness and depth. Yellow onions work best here, but white is fine too.
- Garlic (4 cloves, minced) — Fresh garlic is a must for that punch. I buy pre-peeled garlic cloves if I’m short on time.
- Canned diced tomatoes (1 can, 14.5 oz / 411g) — Go for no-salt-added if you want to control sodium.
- Canned kidney beans (1 can, 15 oz / 425g), drained and rinsed — Kidney beans hold their shape well in chili.
- Beef broth (1 cup / 240ml) — Adds richness. You can substitute with vegetable broth for a lighter version.
- Chili powder (2 tablespoons) — The star seasoning. Use a good-quality spice blend for the best flavor.
- Cumin (1 tablespoon) — Earthy, warm, and essential for authentic chili flavor.
- Smoked paprika (1 teaspoon) — Adds a subtle smoky note that pairs perfectly with campfire cooking.
- Salt (to taste) — Don’t be shy here. Salt brings all the flavors together.
- Black pepper (½ teaspoon) — Freshly ground, of course.
- Olive oil (2 tablespoons) — For sautéing the aromatics.
Equipment Needed
You don’t need anything fancy for this. Here’s what I actually use and recommend:
- Dutch oven — A 5 to 7-quart cast iron Dutch oven is perfect. It holds heat evenly and is sturdy enough for campfire cooking. If you don’t have cast iron, a heavy-duty stainless steel pot with a lid will work on a camp stove.
- Campfire or portable burner — I use a simple tripod over the fire or a camp stove when the fire isn’t going strong.
- Wooden spoon or heatproof spatula — For stirring. Metal spoons can scratch your Dutch oven’s seasoning.
- Knife and cutting board — For prepping veggies.
- Optional: Fire gloves — If you’re handling hot lids or adjusting coals, these are a lifesaver.
How to Make Dutch Oven Chili for Campfire: Step by Step
Alright, let’s get into it. I’ll walk you through exactly how I make this, including the small tricks that actually make a difference when you’re cooking outdoors.
- Prep and assemble your ingredients (10 minutes)
Dice your onion, mince the garlic, and drain and rinse the kidney beans. Measure out your spices and have the canned tomatoes and broth nearby. Prep is key because once you start cooking over a campfire, things move fast and you don’t want to be scrambling. - Heat the Dutch oven and sauté aromatics (5 minutes)
Place your Dutch oven over medium heat on the camp stove or fire tripod. Add olive oil, let it warm until shimmering, then add diced onion. Stir often until the onions soften and smell sweet, about 3 minutes. Add garlic and cook for another minute, stirring constantly to prevent burning. This step builds the flavor base, so don’t rush it. - Brown the ground beef (7 minutes)
Add the ground beef to the Dutch oven, breaking it apart with your spoon. Cook until browned but not dried out. You should see some nice caramelization on the edges—that’s flavor magic happening. If there’s excess fat, carefully spoon some out, but you want enough for richness. - Add tomatoes, beans, broth, and spices (3 minutes)
Stir in the canned diced tomatoes, kidney beans, and beef broth. Sprinkle in chili powder, cumin, smoked paprika, salt, and pepper. Stir well to combine everything. The mixture should look thick and chunky, with spices evenly distributed. - Simmer the chili (30–40 minutes)
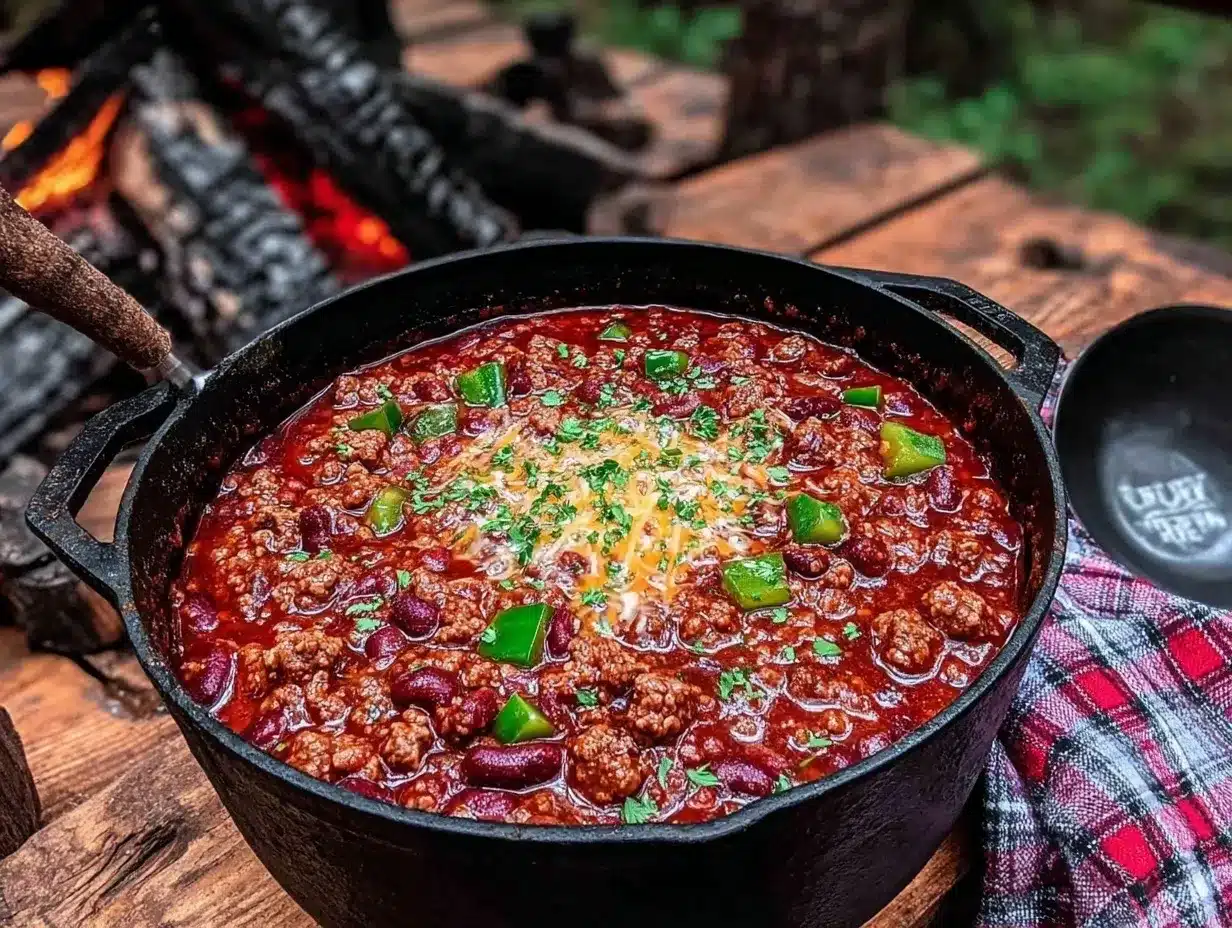
Put the lid on and let the chili simmer over low heat. If you’re over a campfire, arrange coals around the Dutch oven’s sides and lid for even heat. Stir every 10 minutes to prevent sticking. The chili will thicken and deepen in flavor. The smell alone will have everyone pulling up chairs. - Final taste and seasoning (2 minutes)
Give the chili a final stir and taste. Add salt or chili powder if you want more heat. If it’s too thick, splash in a bit more broth or water. If it’s too thin, keep simmering uncovered for a few extra minutes. - Serve straight from the Dutch oven
Dish out bowls right at the campfire. Add your favorite toppings (I love shredded cheese, sour cream, and chopped green onions). It’s rustic, warm, and perfect for outdoor dinners.
Total time: About 50 minutes, with roughly 15 minutes active prep and cooking.
Expert Tips & Tricks
Here’s everything I’ve figured out from making this Dutch oven chili for campfire recipe dozens of times. These tips will save you from the mistakes I already made.
- Don’t rush the browning
Take your time browning the ground beef. The caramelized bits add so much depth. If you rush, it steams instead of browns, and the chili ends up flat. - Use fresh garlic and quality chili powder
I can’t overstate how much better fresh garlic tastes here. The same goes for chili powder—cheap blends can taste powdery or dull. I like McCormick brand for consistent flavor. - Keep the heat low during simmer
High heat burns the bottom and toughens the meat. If you notice burning, move coals or lower your burner. Slow and steady is the way to go. - Save leftovers for lunch
This chili tastes even better the next day. I always make extra intentionally to have for camp lunches or quick dinners at home. - Don’t forget the salt
Salt is the flavor enhancer in every recipe—undersalt and the chili will taste dull. Add it gradually and taste as you go.
One common mistake is chili turning watery—usually from too much broth or not simmering long enough. Fix it by simmering uncovered to let liquid reduce, or adding a spoonful of tomato paste to thicken.
Variations & Substitutions
Once you’ve got the base version down, here’s how I mix it up. I’ve actually tried all of these with great success.
- Turkey Chili Version
Swap ground beef for ground turkey for a leaner option. I add a splash more olive oil to keep it moist. Great for lighter camping dinners. - Vegetarian Chili
Replace ground beef with extra beans and add diced bell peppers and corn. Use vegetable broth. This is a favorite when camping with vegetarians in the group. - Spicy Campfire Chili
Add 1 diced jalapeño and a teaspoon of cayenne pepper. This version is a hit for those who like a little fire with their fire pit. - Slow Cooker Adaptation
If you’re not outside but want the same flavor, try making this chili in a slow cooker. Brown meat and sauté aromatics first, then dump everything in and cook on low for 6-8 hours. - Gluten-Free
This recipe is naturally gluten-free—just double-check your broth and spices to avoid hidden gluten. - Dairy-Free
Serve without cheese or sour cream, or use dairy-free alternatives. Perfect for camping friends with allergies.
Serving & Storage
I usually serve this straight from the Dutch oven—it looks rustic and stays warm for everyone to help themselves. Here are my favorite sides to round out the meal:
- Crusty bread or corn muffins for soaking up the sauce
- Simple green salad with a tangy vinaigrette to balance the richness
- Grilled or roasted veggies like bell peppers or zucchini for added freshness
For storage, transfer leftovers to an airtight container:
- Fridge: Keeps well up to 4 days. The chili thickens as it cools—just add a splash of broth when reheating.
- Reheating: Best on the stove over low heat with a little broth or water, stirring until warmed through. Microwave works in a pinch but can dry it out.
- Freezing: Yes, chili freezes well. Portion into freezer-safe containers and thaw overnight in the fridge before reheating.
If you want an easy side with similar campfire vibes, try this crispy garlic parmesan pull-apart bread—it’s a crowd-pleaser and perfect for dipping.
Nutrition Information
I’m not a nutritionist, but here’s the breakdown if you’re keeping track. This is based on 6 servings.
| Nutrient | Per Serving |
|---|---|
| Calories | 320 |
| Protein | 25g |
| Carbohydrates | 20g |
| Fiber | 6g |
| Sugar | 5g |
| Fat | 15g |
| Saturated Fat | 5g |
| Sodium | 420mg |
Look—this is comfort food made with ground beef and beans. It’s not a diet recipe and I’m not going to pretend it is. But it’s way better than canned chili or fast food, it costs less, and I know exactly what’s in it. When I want something lighter, I switch to turkey or vegetarian versions, but most camping nights? I go for the real deal and enjoy every bite.
Final Thoughts
That chilly Saturday night by the lake, with the fire crackling and this Dutch oven chili for campfire simmering, is exactly the kind of memory I want to keep making. It’s simple, satisfying, and brings everyone together—no fancy gear, no stress, just good food and good company.
Make it yours. Add extra garlic if you love a punch. Throw in whatever beans or peppers you have on hand. Swap the protein to fit your crew. The base is forgiving and forgiving is exactly what you want when you’re cooking outside.
If you make this, drop a comment and tell me how it went. And if something goes wrong, tell me that too—I genuinely want to help troubleshoot. That’s what the comments are for.
Happy cooking—I hope your kitchen (or campsite) smells amazing.
Frequently Asked Questions
Q: Can I make this Dutch oven chili for campfire without ground beef?
A: Yes, you definitely can. I’ve swapped ground beef for ground turkey or even just beans when I wanted a lighter meal. Just remember to add a bit more oil or broth to keep the chili moist if you use leaner proteins. I’ve also made a vegetarian version with extra beans and veggies that’s surprisingly hearty.
Q: Why did my chili turn out watery or too thin?
A: This usually happens if the chili hasn’t simmered long enough or if too much broth was added. I learned this the hard way when I was impatient and ended up with soup, not chili. The fix? Let it simmer uncovered for a bit longer to reduce liquid, or stir in a spoonful of tomato paste to thicken it up quickly.
Q: Can I make this chili ahead for a camping trip or outdoor dinner?
A: Absolutely. In fact, I often prepare the chili at home and refrigerate it overnight. It tastes even better the next day because the flavors meld. Just reheat it gently in the Dutch oven over the fire or on a camp stove before serving. This saves time and stress when you arrive at camp.
Q: Is this recipe gluten-free or dairy-free?
A: Yes, this chili is naturally gluten-free as long as you use gluten-free broth and spices. It’s also dairy-free until you add toppings like cheese or sour cream, which you can easily omit or substitute with dairy-free alternatives if needed. I’ve made it dairy-free many times for friends with allergies.
Q: Can I double or halve this recipe for different group sizes?
A: Yes, scaling this recipe is straightforward. Double it for bigger groups and cook in a larger Dutch oven if you have one. Halve it for just a couple—just keep an eye on cooking times since smaller amounts may cook faster. I do this regularly for solo camping trips or big family weekends.
Q: What should I do if my chili sticks to the bottom of the Dutch oven?
A: This can happen if the heat is too high or if you don’t stir often enough. Lower your heat or move coals away a bit when cooking over a fire. Stir every 10 minutes to prevent sticking and burning. If it does stick, don’t scrape aggressively—use a wooden spoon to gently loosen bits to avoid damaging your Dutch oven’s seasoning.
Q: Can I adapt this recipe for a slow cooker or stovetop at home?
A: Yes! I’ve made this chili in my slow cooker many times. Just brown the meat and sauté aromatics first, then dump everything in and cook low and slow for 6 to 8 hours. On the stovetop, follow the same steps but simmer gently on low heat, stirring occasionally. It won’t have the campfire smokiness, but it’s still delicious and easy.
Pin This Recipe!
Dutch Oven Chili for Campfire Easy Hearty Outdoor Dinner Recipe

A rich, hearty, and easy-to-make chili perfect for campfire or backyard cooking, delivering deep smoky flavors with minimal hands-on time.
- Prep Time: 15 minutes
- Cook Time: 35 minutes
- Total Time: 50 minutes
- Yield: 6 servings 1x
- Category: Main Course
- Cuisine: American
Ingredients
- 1 pound ground beef (80/20)
- 1 medium onion, diced
- 4 cloves garlic, minced
- 1 can (14.5 oz) canned diced tomatoes, no-salt-added preferred
- 1 can (15 oz) canned kidney beans, drained and rinsed
- 1 cup beef broth (240 ml)
- 2 tablespoons chili powder
- 1 tablespoon cumin
- 1 teaspoon smoked paprika
- Salt to taste
- ½ teaspoon black pepper
- 2 tablespoons olive oil
Instructions
- Prep and assemble your ingredients: dice onion, mince garlic, drain and rinse kidney beans, measure spices, and have canned tomatoes and broth ready.
- Heat the Dutch oven over medium heat on a camp stove or fire tripod. Add olive oil and warm until shimmering.
- Add diced onion and sauté until softened and sweet, about 3 minutes. Add garlic and cook for another minute, stirring constantly.
- Add ground beef, breaking it apart with a spoon. Brown the beef until caramelized but not dried out, about 7 minutes. Spoon out excess fat if necessary.
- Stir in canned diced tomatoes, kidney beans, beef broth, chili powder, cumin, smoked paprika, salt, and black pepper. Mix well.
- Cover and simmer the chili over low heat for 30–40 minutes, stirring every 10 minutes to prevent sticking. Arrange coals evenly if cooking over a campfire.
- Taste and adjust seasoning with salt or chili powder. If too thick, add broth or water; if too thin, simmer uncovered to reduce.
- Serve directly from the Dutch oven with optional toppings like shredded cheese, sour cream, and chopped green onions.
Notes
[‘Take your time browning the ground beef to develop deep flavor.’, ‘Use fresh garlic and quality chili powder for best taste.’, ‘Keep heat low during simmer to avoid burning.’, ‘Add salt gradually and taste as you go.’, ‘If chili is watery, simmer uncovered to reduce or add tomato paste to thicken.’, ‘Leftovers taste better the next day; reheat gently with added broth if needed.’, ‘This recipe is naturally gluten-free; verify broth and spices to avoid hidden gluten.’, ‘For dairy-free, omit cheese and sour cream or use alternatives.’]
Nutrition
- Serving Size: 1 bowl (approximatel
- Calories: 320
- Sugar: 5
- Sodium: 420
- Fat: 15
- Saturated Fat: 5
- Carbohydrates: 20
- Fiber: 6
- Protein: 25
Keywords: Dutch oven chili, campfire chili, outdoor dinner, hearty chili, easy chili recipe, camping food, backyard fire pit meal