
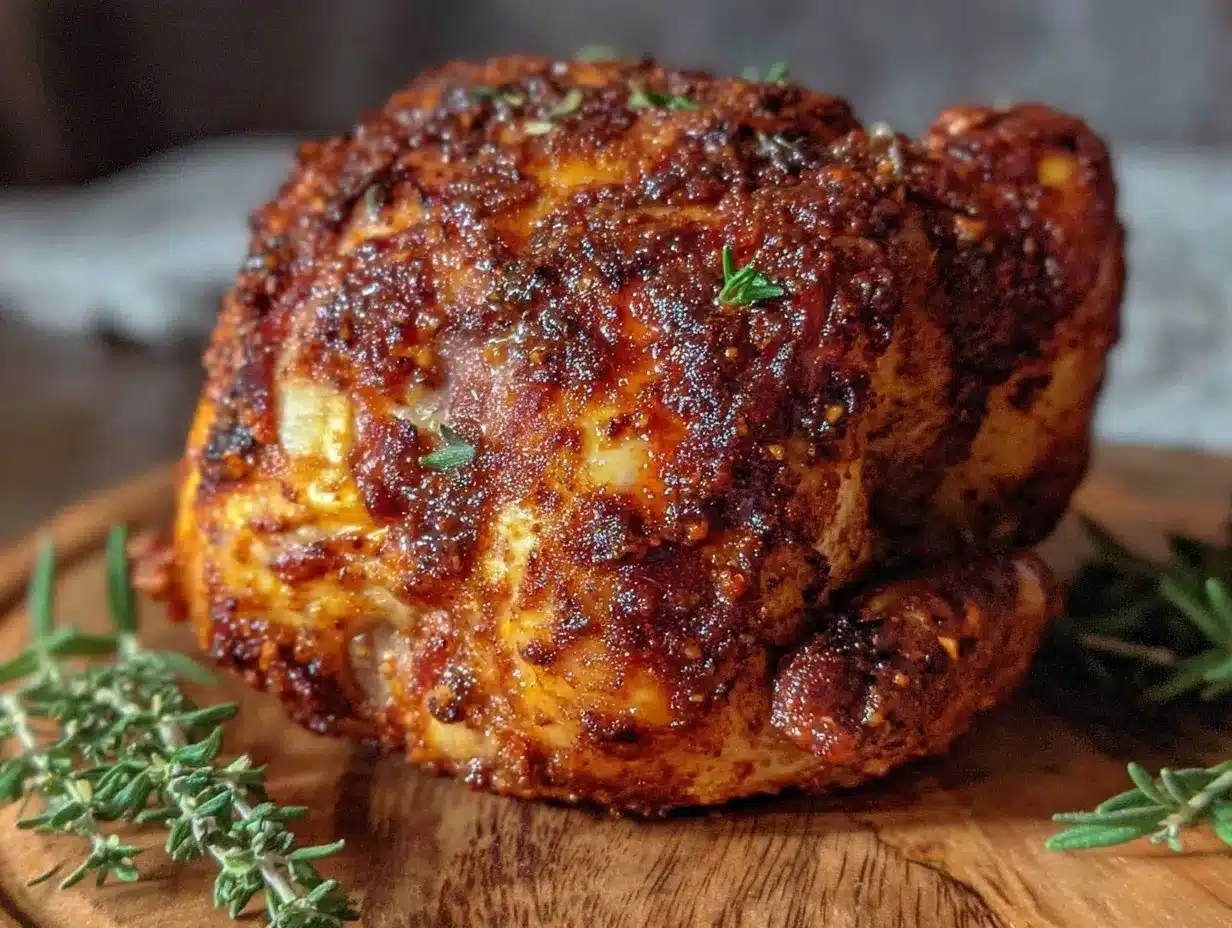
“Hey, you gotta try this chicken I just made,” my neighbor called over the fence one humid evening as the sun dipped low. Honestly, I wasn’t expecting much—beer can chicken sounded like one of those backyard BBQ myths, you know? But the smell was seriously tempting, that smoky, spicy aroma curling through the air. I figured, why not? Next thing I knew, I was hooked on this crispy beer can chicken with smoky rub that turned my usual grill night upside down.
It wasn’t some fancy or complicated getup—just a humble can of beer, a handful of spices, and a whole chicken perched like a quirky centerpiece on the grill. What caught me off guard was how the skin crisped up perfectly, with just the right amount of smoky bite. I remember thinking, “This can’t be this easy and this good.” But it was, and I ended up making it three times that week, each time tweaking the smoky rub just a little.
What really sealed the deal was how the beer inside the can kept the chicken moist from the inside while the rub developed that crunchy, flavorful crust. It’s like the chicken was whispering, “You’ll wanna make me again.” So here’s the recipe that surprised me, and I’m pretty sure you’ll feel the same trust once you taste it.
At the end of the day, this recipe stuck with me because it’s simple enough for a busy weeknight yet impressive enough for a casual get-together. You get that deep, smoky flavor without hours of babysitting the grill. Let’s just say, this crispy beer can chicken with smoky rub became my go-to when I wanted dinner to feel like a small celebration without the fuss.
Why You’ll Love This Crispy Beer Can Chicken Recipe
After testing this recipe multiple times (sometimes twice in one weekend—I’m not kidding), I’m confident it’s one of the most satisfying ways to cook a whole chicken. The combination of the beer can technique with the smoky rub creates a balance that’s hard to beat.
- Quick & Easy: From prep to table in about 1 hour 15 minutes, perfect for when you want something hearty without the wait.
- Simple Ingredients: You probably have most spices in your pantry already—no special trips needed.
- Perfect for Outdoor Gatherings: Whether it’s a weekend BBQ or a casual backyard hangout, this chicken is a crowd magnet.
- Crowd-Pleaser: Juicy inside, crispy outside—kids and adults alike have asked me for the recipe multiple times.
- Unbelievably Delicious: The smoky rub adds depth without overpowering, and the beer steams the chicken from within, keeping it moist.
What sets this recipe apart is the smoky rub’s perfectly balanced blend of spices. I experimented with everything from smoked paprika to a pinch of cayenne, landing on a mix that’s bold but not too aggressive. Plus, using a cold beer inside the can isn’t just for show—it actually infuses moisture subtly and helps create that tender texture inside the crispy skin. This isn’t just another roast chicken; it’s got a personality that makes you want to serve it again and again.
This recipe also taps into the simple joy of cooking outdoors without complicated gear or techniques. It’s approachable for backyard cooks who want that pit-smoked flavor without needing a smoker. Honestly, it’s one of those dishes you can bring to a potluck and watch disappear fast—much like my go-to sheet pan fajitas that always get rave reviews.
What Ingredients You Will Need
This recipe uses straightforward, pantry-friendly ingredients that come together to build the smoky, crispy magic. The spices in the rub are key, and the chicken choice matters for the best texture and flavor.
- Whole chicken, about 4 to 5 pounds (1.8 to 2.3 kg), preferably organic or free-range for more flavor and juiciness.
- Beer can, standard 12 oz (355 ml) size, any lager or pale ale works well (cold, straight from the fridge).
- Smoky Rub:
- Smoked paprika (2 tablespoons) – gives that deep smoky flavor without a smoker.
- Brown sugar (1 tablespoon) – adds a touch of caramelized sweetness to balance the spice.
- Garlic powder (1 teaspoon) – classic savory boost.
- Onion powder (1 teaspoon) – rounds out the flavor profile.
- Cayenne pepper (½ teaspoon) – optional for a little heat, adjust to taste.
- Salt (1 tablespoon) – helps crisp the skin and enhances all flavors.
- Black pepper (1 teaspoon) – freshly ground if possible.
- Dried thyme (1 teaspoon) – adds a subtle herbal note.
- Olive oil (2 tablespoons) – to help the rub stick and promote crispiness.
- Lemon, halved – optional, to stuff in the cavity for a fresh zing.
- Fresh herbs (like rosemary or thyme), optional for stuffing or garnish.
For the best results, I recommend using a lager-style beer like Bud Light or Corona for a mild background note, but feel free to experiment with craft beers if you want a bolder flavor. If you prefer non-alcoholic options, a can of sparkling water with a squeeze of lemon can substitute, though the flavor won’t be quite the same.
Don’t skip the brown sugar in the rub—it helps develop that irresistible caramelized crust that contrasts with the smoky spices. For a gluten-free option, check that your spices and beer are gluten-free certified.
Equipment Needed
- Grill: Charcoal or gas grill works fine; charcoal will add a nice smoky element but gas gives more control.
- Beer can chicken holder or stand: Optional but handy for stability; if you don’t have one, you can improvise with a sturdy roasting pan.
- Meat thermometer: Essential for checking doneness and avoiding overcooking.
- Mixing bowl: For combining the rub ingredients.
- Brush or hands: To apply the olive oil and rub evenly.
- Cutting board and sharp knife: For prepping the chicken and lemon.
I’ve tried this recipe with and without a dedicated beer can chicken stand. Honestly, the stand makes the process less messy and keeps the chicken upright perfectly, but if you’re in a pinch, just make sure to balance the chicken well on the can and grill. Also, keeping your meat thermometer calibrated makes a big difference—I learned that the hard way when I overcooked my first attempt.
For budget-friendly grilling, a simple charcoal kettle grill works wonders. It’s versatile, affordable, and you can use it for other recipes like grilled vegetables that pair beautifully with this chicken.
Preparation Method
- Prepare the chicken: Remove any giblets from the cavity and pat the chicken dry with paper towels. This step is key to getting that crispy skin.
- Make the rub: In a mixing bowl, combine smoked paprika, brown sugar, garlic powder, onion powder, cayenne pepper, salt, black pepper, and dried thyme. Mix well to blend all flavors evenly.
- Apply olive oil: Rub the chicken all over with olive oil, including under the skin where you can reach (be gentle!). This helps the spice rub stick and promotes browning.
- Rub the chicken: Generously coat the entire chicken with the smoky rub, massaging it into all surfaces, including inside the cavity. Don’t be shy here—the spices are what make the flavor pop.
- Prep the beer can: Open the beer and drink or pour out about half (or save for your own refreshment!). You want the can about half full. Optionally add a few herbs or a garlic clove inside the can for extra aroma.
- Place the chicken on the can: Carefully set the chicken upright onto the beer can so it stands stable. The chicken’s cavity should fit snugly over the can opening.
- Preheat the grill: For indirect heat, set your grill to medium heat (around 375°F / 190°C). If using charcoal, bank the coals to one side to create an indirect heat zone.
- Grill the chicken: Place the chicken standing upright on the grill grates over indirect heat. Close the lid and cook for about 1 hour to 1 hour 15 minutes. Check internal temperature with a meat thermometer inserted into the thickest part of the thigh (avoid the bone). Target temperature is 165°F (74°C).
- Check for crispiness: During the last 10 minutes, you can move the chicken over direct heat briefly, turning carefully to crisp the skin all around. Watch closely to avoid burning.
- Rest the chicken: Remove from grill and let it rest upright for 10 minutes before carving. Resting helps the juices redistribute and keeps the meat tender.
When you insert the thermometer, the juices should run clear and the skin feels taut and crackly. If you notice the skin isn’t as crispy as you want, that last direct heat blast on the grill usually does the trick. One time I skipped this step and ended with a slightly soggy crust—lesson learned!
Cooking Tips & Techniques
There’s a bit of technique behind this seemingly simple recipe, and after a few tries, I can share some tips that make all the difference.
- Dry the skin thoroughly: Moisture is the enemy of crispiness, so pat the chicken very dry before applying the oil and rub.
- Don’t rush the indirect cooking: Keep the heat moderate to allow the chicken to cook evenly inside without burning the rub.
- Use a meat thermometer: It’s the most reliable way to avoid under or overcooking. The thigh’s internal temp is your best bet.
- Balance the chicken on the can carefully: A wobbly setup can cause uneven cooking or spills. If your grill has a flat surface accessory, use it.
- Try different beers: A light lager is mild, but if you want a stronger flavor, a darker beer like an amber ale works well.
- Let the rub sit: If time allows, rub the chicken and refrigerate for an hour or overnight for deeper flavor penetration.
One time, I accidentally left the chicken on the grill too long, and the rub started to char. I learned that keeping an eye on the heat and timing is crucial. Also, I recommend prepping everything in advance to avoid scrambling at the last minute, especially if you’re managing sides like the protein pasta salad that pairs nicely with this chicken.
Variations & Adaptations
This recipe is flexible, so you can tailor it to your taste or dietary needs easily.
- Spice it up: Add chipotle powder or smoked chili flakes to the rub for a smoky heat kick.
- Herbaceous twist: Mix fresh chopped rosemary, thyme, and sage into the rub for a fragrant herbal note.
- Gluten-free version: All spices here are naturally gluten-free, but double-check your brands. Use gluten-free beer or substitute with sparkling water if needed.
- Low-sodium option: Reduce salt in the rub and add a splash of lemon juice or vinegar post-grilling to brighten flavors.
- Oven method: If you don’t have a grill, you can roast the chicken on a beer can in a preheated oven at 375°F (190°C) for about 1 hour and 20 minutes, but you’ll miss that smoky edge.
Personally, I once tried this with a bourbon glaze at the end, brushing the chicken just before the final crisp, and it was a game-changer—sweet, smoky, and sticky. If you love that kind of twist, it’s worth a shot.
Serving & Storage Suggestions
This crispy beer can chicken is best served hot and juicy right off the grill, but leftovers keep surprisingly well.
- Serving temperature: Serve warm, sliced against the grain for tender bites. Pair with grilled veggies, corn on the cob, or a fresh spring salad.
- Complementary sides: The smoky flavor pairs wonderfully with tangy coleslaw or a creamy potato salad—both crowd favorites.
- Storage: Refrigerate leftovers in an airtight container for up to 3 days. Keep the skin crispy by reheating uncovered in a 375°F (190°C) oven for 10-15 minutes.
- Freezing: You can freeze cooked chicken pieces for up to 2 months. Thaw in the fridge overnight before reheating.
- Flavor development: The smoky rub flavors deepen after resting a day, so making this a day ahead for a party is totally doable.
For a casual midweek dinner, I like to serve this chicken alongside a light, fresh salad like the strawberry spinach salad to balance the smoky richness with some brightness.
Nutritional Information & Benefits
This recipe offers a satisfying source of protein and can be made with wholesome ingredients that fit many diets.
- Approximate calories per serving (1/6 of chicken): 350–400 kcal depending on size and skin left on.
- Protein-rich: Whole chicken is an excellent source of complete protein to fuel your day.
- Low in carbs: Perfect for low-carb or keto plans when paired with veggie sides.
- Gluten-free: Naturally suitable for gluten-free diets if you use gluten-free beer or substitute.
- Rich in minerals: Chicken provides zinc and iron, important for immune health.
In my experience, this recipe strikes a nice balance between indulgence and nutrition. The smoky rub uses spices that have antioxidant properties, and cooking the chicken on the beer can keeps it moist without added fats. It’s a satisfying way to enjoy classic comfort food with a bit of a healthy mindset.
Conclusion
Cooking this crispy beer can chicken with smoky rub became a little ritual for me—whether it was a spontaneous weekend grill or a small gathering with friends. It’s straightforward enough to make any night feel special, but the flavor and texture bring that extra satisfaction you don’t often get from a simple roast.
I love how flexible the recipe is, letting you tweak the rub or sides to match your mood or pantry stash. Plus, the way the beer steams the chicken inside while the rub crisps the skin outside never gets old. If you’re looking for a recipe that’s both approachable and impressive, this one’s got your back. I’d love to hear how you make it your own—drop a comment or share your spin!
Here’s to many delicious, smoky chicken nights ahead!
FAQs about Crispy Beer Can Chicken with Smoky Rub
What type of beer is best for beer can chicken?
Light lagers or pale ales work best because they add subtle flavor without overpowering the chicken. Avoid very bitter or heavily hopped beers.
Can I make this recipe indoors without a grill?
Yes! Roast the chicken upright on the beer can in a preheated oven at 375°F (190°C) for about 1 hour 20 minutes, but you won’t get that smoky grilled flavor.
How do I know when the chicken is fully cooked?
Use a meat thermometer inserted into the thickest thigh part (avoiding bone). It should read 165°F (74°C) for safe, juicy chicken.
Is it safe to cook with the beer can inside the chicken?
Yes, as long as you use a standard, unopened beer can and cook the chicken properly. Avoid cans with plastic lining or coatings that could melt.
Can I prepare the smoky rub in advance?
Absolutely! The rub keeps well in an airtight container for weeks, so you can make a big batch and have it ready whenever you want to grill.
Pin This Recipe!
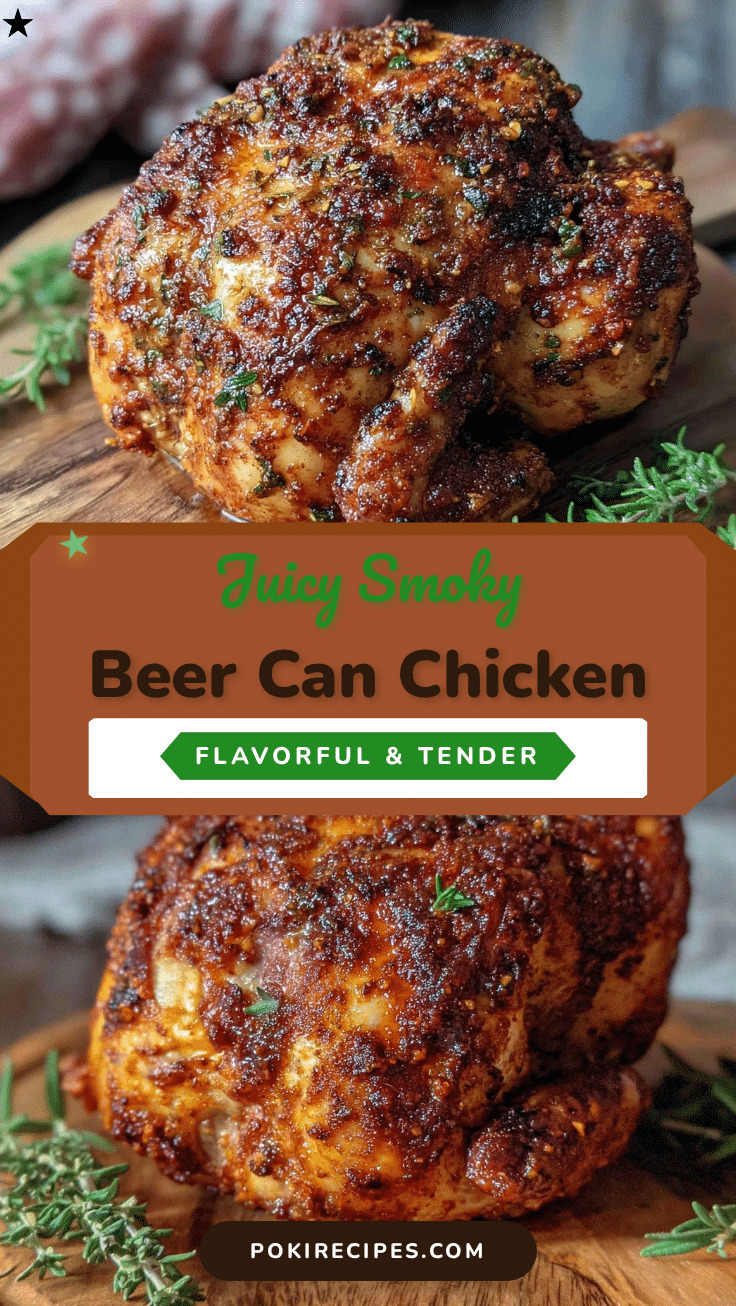
Crispy Beer Can Chicken Recipe Easy Smoky Rub for Perfect Flavor

A simple and flavorful beer can chicken recipe featuring a smoky rub that crisps the skin and keeps the meat juicy, perfect for quick weeknight dinners or casual gatherings.
- Prep Time: 15 minutes
- Cook Time: 1 hour 15 minutes
- Total Time: 1 hour 30 minutes
- Yield: 6 servings
- Category: Main Course
- Cuisine: American
Ingredients
- Whole chicken, about 4 to 5 pounds (1.8 to 2.3 kg), preferably organic or free-range
- Beer can, standard 12 oz (355 ml) size, any lager or pale ale (cold)
- Smoked paprika (2 tablespoons)
- Brown sugar (1 tablespoon)
- Garlic powder (1 teaspoon)
- Onion powder (1 teaspoon)
- Cayenne pepper (½ teaspoon, optional)
- Salt (1 tablespoon)
- Black pepper (1 teaspoon, freshly ground if possible)
- Dried thyme (1 teaspoon)
- Olive oil (2 tablespoons)
- Lemon, halved (optional, for stuffing)
- Fresh herbs like rosemary or thyme (optional, for stuffing or garnish)
Instructions
- Remove any giblets from the chicken cavity and pat the chicken dry with paper towels.
- In a mixing bowl, combine smoked paprika, brown sugar, garlic powder, onion powder, cayenne pepper, salt, black pepper, and dried thyme. Mix well.
- Rub the chicken all over with olive oil, including under the skin where possible.
- Generously coat the entire chicken with the smoky rub, massaging it into all surfaces including inside the cavity.
- Open the beer can and drink or pour out about half, leaving it half full. Optionally add herbs or a garlic clove inside the can.
- Carefully set the chicken upright onto the beer can so it stands stable with the cavity fitting snugly over the can opening.
- Preheat the grill to medium heat (around 375°F / 190°C) for indirect cooking. For charcoal grills, bank coals to one side.
- Place the chicken standing upright on the grill grates over indirect heat. Close the lid and cook for about 1 hour to 1 hour 15 minutes.
- Check internal temperature with a meat thermometer inserted into the thickest part of the thigh (avoid the bone). Target temperature is 165°F (74°C).
- During the last 10 minutes, move the chicken over direct heat briefly, turning carefully to crisp the skin all around. Watch closely to avoid burning.
- Remove the chicken from the grill and let it rest upright for 10 minutes before carving.
Notes
Pat the chicken dry thoroughly before applying oil and rub to ensure crispy skin. Use a meat thermometer to avoid under or overcooking. For extra crispiness, finish the chicken over direct heat for the last 10 minutes. The rub can be prepared in advance and refrigerated. For gluten-free, ensure spices and beer are certified gluten-free or substitute beer with sparkling water and lemon. The recipe can also be done in an oven at 375°F (190°C) for about 1 hour 20 minutes but will lack smoky flavor.
Nutrition
- Serving Size: 1/6 of the whole chi
- Calories: 350400
- Sugar: 3
- Sodium: 700
- Fat: 20
- Saturated Fat: 5
- Carbohydrates: 5
- Fiber: 1
- Protein: 40
Keywords: beer can chicken, smoky rub, grilled chicken, crispy chicken, BBQ chicken, easy chicken recipe, outdoor cooking, smoky flavor


