My niece showed up at my door on a rainy October afternoon, already dressed as a tiny vampire, and the only thing I had in the pantry was a bag of flour and a stick of butter that had seen better days. She had that look—the one that says “I need an activity, and I need it now.” I wasn’t planning on baking, honestly, but there’s something about a kid in a costume holding a plastic fang that makes you say yes to anything.
So we pulled out every sprinkle and food coloring I owned, which wasn’t much—just a sad little box of neon gels from last Easter. I remembered I had a batch of my go-to sugar cookie dough chilling in the fridge from a failed attempt at sugar cookies with royal icing the week before. The dough was meant for something else, but it became our canvas. We rolled it out, cut it into bats and pumpkins, and I whipped up a quick royal icing that ended up being the star of the show.
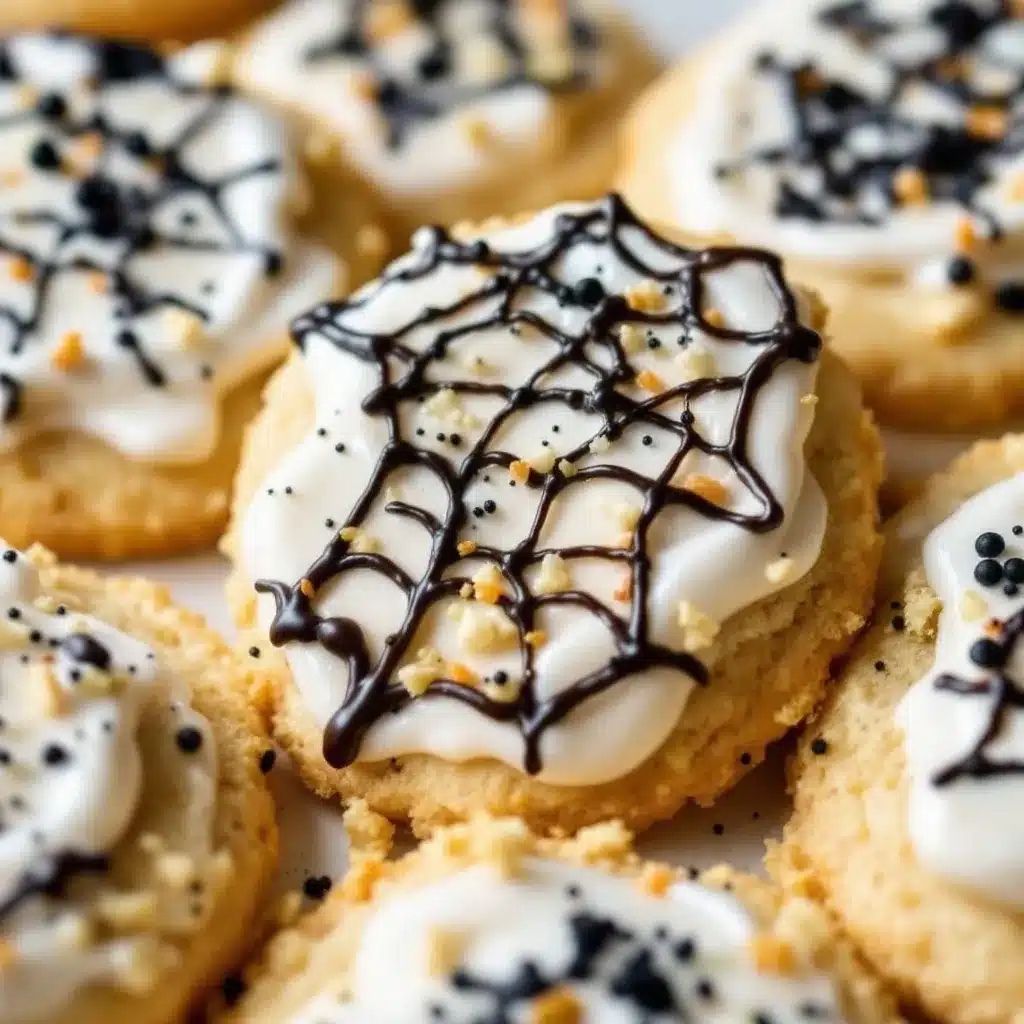
By the time her mom came to pick her up, we had a tray of frosted Halloween sugar cookies that looked like they belonged in a bakery window. The icing set perfectly—glossy, smooth, and firm enough to stack. The cookies were soft in the center with just a hint of crisp edge. That night, I realized this wasn’t just a last-minute save. It was a recipe I’d keep forever.
These Perfect Frosted Halloween Sugar Cookies with Royal Icing are the kind that make you feel like a decorating pro, even if you’re just starting out. They’re forgiving, fun, and honestly, they taste better than anything you can buy in a plastic tray at the store.
Why You’ll Love This Recipe
Let me tell you why these cookies are different. I’ve tested this dough at least a dozen times—too dry, too flat, too puffy. This version? It’s the Goldilocks of sugar cookies. It holds its shape perfectly in the oven, so your ghost doesn’t turn into a blob, and it stays soft for days.
- Easy Royal Icing: No complicated ratios or weird ingredients. Just powdered sugar, meringue powder, and water. It dries hard and shiny, perfect for stacking or packaging as gifts.
- No Spread, No Stress: The dough is chilled just right so your cutouts keep their crisp edges. No more deformed pumpkins.
- Perfect for Halloween Parties: These cookies are the life of the party. Kids love decorating them, and adults love eating them. It’s a win-win.
- Make-Ahead Friendly: You can prep the dough days in advance or freeze the baked cookies. The royal icing also stores beautifully.
- Unbelievably Delicious: The texture is that perfect balance—soft and tender in the middle with a slight, buttery crunch at the edges. The vanilla flavor is warm and nostalgic.
This isn’t just another sugar cookie recipe. It’s the one I bring to every Halloween gathering, the one my friends text me for in September. It’s the recipe that turns a rainy afternoon with a tiny vampire into a core memory.
What Ingredients You Will Need
This recipe uses simple, wholesome ingredients that you likely already have in your pantry. The magic is in the technique, not the grocery list. Here’s what you need and why each ingredient matters.
For the Sugar Cookies
- Unsalted butter (1 cup, 226g, softened): Butter is the soul of these cookies. I always use unsalted so I can control the salt level. Let it sit out for about an hour until it’s soft but not melty. If you’re in a rush, cut it into small cubes and let it sit for 15 minutes.
- Granulated sugar (1 cup, 200g): Regular white sugar gives the cookies that classic sweetness and helps with browning. No need for fancy stuff here.
- Large egg (1, room temperature): The egg binds everything together. Take it out of the fridge with the butter so it blends smoothly. A cold egg can seize the butter mixture.
- Vanilla extract (1 ½ teaspoons): Pure vanilla extract makes a real difference. I prefer Nielsen-Massey, but any good brand works. Avoid imitation vanilla if you can—it has a chemical aftertaste.
- All-purpose flour (2 ½ cups, 312g): Standard AP flour is perfect. Don’t use bread flour or cake flour here. AP gives the right structure without making the cookies tough.
- Baking powder (1 teaspoon): This gives the cookies a slight lift without making them puff up too much. Make sure it’s fresh—test it by dropping a bit in hot water; it should fizz.
- Salt (½ teaspoon): Salt balances the sweetness and enhances the buttery flavor. I use fine sea salt.
For the Royal Icing
- Powdered sugar (4 cups, 480g, sifted): Sifting is non-negotiable here. Lumps will ruin the smoothness of your icing. I use C&H or Domino.
- Meringue powder (3 tablespoons): This is the secret to royal icing that dries hard and glossy. You can find it at craft stores or online. Wilton is a reliable brand.
- Warm water (5-6 tablespoons, plus more for thinning): The water activates the meringue powder. Start with less and add more as needed. The consistency should be like runny honey for flooding, and a bit thicker for outlining.
- Gel food coloring (optional, for decorating): I love Americolor gels. They’re concentrated and don’t thin out the icing like liquid drops do. For Halloween, I use black, orange, purple, and green.
For Decorating
- Sprinkles, sanding sugar, or edible glitter: These are optional but fun. Add them while the icing is still wet.
- Piping bags or squeeze bottles: Disposable piping bags are easiest. I also use Wilton squeeze bottles for flooding large areas.
Equipment Needed
You don’t need a fancy kitchen to make these cookies, but a few specific tools make the job much easier.
- Stand mixer or hand mixer: A stand mixer with a paddle attachment is ideal for creaming butter and sugar. A hand mixer works fine, just be patient.
- Rolling pin with thickness rings: These rings attach to your rolling pin and ensure your dough is perfectly even. I use a wooden pin with adjustable rings. If you don’t have one, use two wooden spoons or chopsticks as guides.
- Halloween cookie cutters: Look for a set with ghosts, pumpkins, bats, and cats. I found a great metal set on Amazon that cuts cleanly.
- Baking sheets and parchment paper: Parchment is essential. It prevents sticking and helps the cookies bake evenly. Silicone mats work too, but cookies might spread a tiny bit more.
- Piping tips (small round #2 or #3): These are for outlining and flooding with royal icing. I use Wilton tips.
- Cooling racks: Letting cookies cool completely on a rack prevents soggy bottoms.
Preparation Method
This is the step-by-step guide to making perfect frosted Halloween sugar cookies. Take your time, and don’t rush the chilling steps—they’re crucial.
Step 1: Make the Dough
In the bowl of your stand mixer, beat the softened butter and granulated sugar together on medium speed until light and fluffy, about 3 minutes. You want it to look pale and airy. Scrape down the sides of the bowl halfway through. Add the egg and vanilla extract, and beat until just combined. Don’t overmix here.
In a separate bowl, whisk together the flour, baking powder, and salt. Gradually add the dry ingredients to the wet mixture, mixing on low speed. Stop as soon as the dough comes together—it should look crumbly at first, then form a cohesive ball. If it’s too dry, add a teaspoon of milk. If it’s too sticky, add a tablespoon of flour.
Step 2: Chill the Dough
Divide the dough into two disks, wrap each tightly in plastic wrap, and refrigerate for at least 2 hours. Overnight is even better. This step is non-negotiable. Chilled dough spreads less and holds its shape when cut. I once skipped this step and ended up with ghost-shaped blobs. Don’t be like me.
Step 3: Roll and Cut
Preheat your oven to 350°F (175°C). Line your baking sheets with parchment paper. Lightly flour your work surface and rolling pin. Roll one disk of dough to about ¼-inch thickness. Use your thickness rings if you have them. Cut out your Halloween shapes, re-rolling the scraps as needed. Place the cutouts about 2 inches apart on the prepared baking sheets. Chill the cutouts on the baking sheet for 15 minutes before baking. This is my secret weapon—it guarantees sharp edges.
Step 4: Bake
Bake for 8-10 minutes, rotating the baking sheet halfway through. The cookies are done when the edges are just barely golden. The centers should look set but not brown. Let them cool on the baking sheet for 5 minutes, then transfer to a wire rack to cool completely. Do not attempt to ice warm cookies—the icing will slide right off.
Step 5: Make the Royal Icing
In the bowl of your stand mixer, combine the sifted powdered sugar and meringue powder. Add 5 tablespoons of warm water and mix on low speed until combined. Increase to medium-high speed and beat for 5-7 minutes, until the icing is thick, glossy, and forms stiff peaks. Add more water, one teaspoon at a time, to reach the desired consistency.
For outlining, the icing should be thick—like toothpaste. For flooding (filling in the shapes), thin it with a few more drops of water until it flows like honey and smooths out within 10 seconds. If you’re using multiple colors, divide the icing into bowls and tint with gel food coloring.
Step 6: Decorate
Fit your piping bags with small round tips. Outline each cookie with the thicker icing, then flood the inside with the thinner icing. Use a toothpick to spread the icing into corners and pop any air bubbles. While the icing is still wet, add sprinkles or sanding sugar. Let the cookies dry at room temperature for at least 6 hours, or overnight. The icing should be hard to the touch before stacking.
Cooking Tips & Techniques
I’ve learned a few things the hard way so you don’t have to. Here are my best tips for perfect cookies every time.
- Don’t Overwork the Dough: Overmixing develops gluten, which makes cookies tough. Mix until just combined. A few streaks of flour are fine.
- Chill Between Rounds: If the dough gets sticky while you’re rolling and cutting, pop it back in the fridge for 10 minutes. Warm dough is a nightmare to work with.
- Use a Light Touch with Flour: Too much flour on your work surface can dry out the dough. Use just enough to prevent sticking.
- Test Bake One Cookie: Bake a single cookie first to check your oven temperature and baking time. Every oven is different.
- Royal Icing Consistency: This is the hardest part for beginners. If your flooding icing is too thick, it won’t smooth out. If it’s too thin, it will run off the cookie. Test it on a plate first—it should spread slowly but not puddle.
- Color in Advance: Tint your icing and let it sit for 30 minutes. The color deepens as it sits, so you can adjust before decorating.
Variations & Adaptations
One of the best things about this recipe is how flexible it is. Here are some ways to make it your own.
- Gluten-Free Version: Substitute the all-purpose flour with a 1:1 gluten-free baking flour blend. I’ve used Bob’s Red Mill with great results. The texture will be slightly more tender, but still delicious.
- Vegan Royal Icing: Replace meringue powder with aquafaba (the liquid from a can of chickpeas). Use 3 tablespoons of aquafaba in place of the meringue powder and water. The consistency is a bit different, but it works.
- Flavor Twists: Add ½ teaspoon of almond extract along with the vanilla for a nutty undertone. Or try lemon zest for a bright, citrusy sugar cookie.
- Spiced Halloween Cookies: Add 1 teaspoon of pumpkin pie spice to the dough for a fall-flavored twist. It pairs beautifully with the royal icing.
- Chocolate Version: Replace ¼ cup of the flour with unsweetened cocoa powder. These make amazing “dirt” cookies for graveyard scenes.
I once made a batch with a hint of orange zest and decorated them as jack-o’-lanterns. They were gone before the party even started.
Serving & Storage Suggestions
These cookies are best served at room temperature. The royal icing should be fully set and hard to the touch, which takes about 6-8 hours at room temperature. I usually decorate them the night before a party and let them sit out uncovered.
For a Halloween dessert table, arrange them on a large platter or tiered stand. They pair beautifully with hot apple cider or a warm cup of chai. If you’re feeling extra festive, serve them alongside a no-bake pumpkin cheesecake for a full autumn spread.
To store, place the decorated cookies in a single layer in an airtight container. Separate layers with parchment paper. They will stay fresh for up to 5 days at room temperature. Do not refrigerate—the moisture will soften the icing and ruin the texture.
You can also freeze the undecorated baked cookies for up to 3 months. Wrap them tightly in plastic wrap and store in a freezer bag. Thaw at room temperature before decorating. The royal icing itself can be stored in an airtight container in the fridge for up to 2 weeks. Just give it a good stir before using.
Nutritional Information & Benefits
Let’s be honest—these are a treat, not a health food. But here’s a rough estimate per cookie (based on a 2-inch cutout with icing):
- Calories: 120-150
- Fat: 6g
- Carbohydrates: 18g
- Protein: 1g
- Sugar: 12g
On the bright side, the butter provides a small amount of vitamin A, and the egg adds a bit of protein. The royal icing is fat-free, so there’s that. I like to think of these as a special occasion cookie—perfect for Halloween, not for everyday snacking.
If you’re looking for a lower-sugar option, you can reduce the sugar in the dough by ¼ cup, but the texture will be slightly less tender. You can also use a sugar substitute like monk fruit sweetener, but I haven’t tested that myself.
Conclusion
These Perfect Frosted Halloween Sugar Cookies with Royal Icing are more than just a recipe—they’re a tradition waiting to happen. They’re the cookies you make with your kids on a rainy October afternoon, the ones you bring to the office Halloween party, the ones that disappear from the dessert table before anything else.
I love this recipe because it’s forgiving. The dough is easy to work with, the icing is foolproof, and the results are always impressive. You don’t need to be a professional baker to make cookies that look like they came from a bakery. You just need a little patience and a willingness to get a little messy.
So go ahead—grab your cookie cutters, preheat your oven, and make some memories. And when you do, come back and tell me how they turned out. Did you try a fun variation? Did your kids go wild with the sprinkles? I’d love to hear about it in the comments. Happy Halloween, and happy baking!
Frequently Asked Questions
Can I use store-bought royal icing instead of making it from scratch?
You can, but it won’t taste as good or set as hard. Store-bought icing often has a waxy texture and artificial flavor. Homemade royal icing with meringue powder is far superior in taste and performance. It’s also very easy to make—just sift, mix, and beat.
How do I get my royal icing to dry faster?
Royal icing dries best at room temperature with low humidity. If you’re in a hurry, you can use a fan to circulate air around the cookies, but don’t use heat—it can cause the icing to crack. I usually decorate at night and let them dry overnight.
Why did my cookies spread in the oven?
This usually happens when the dough isn’t chilled enough. Make sure you chill the dough for at least 2 hours and chill the cutouts for 15 minutes before baking. Also, check that your butter wasn’t too soft when you started. Over-creaming the butter and sugar can also cause spreading.
Can I freeze the decorated cookies?
I don’t recommend freezing decorated cookies. The royal icing can crack or become sticky when thawed. However, you can freeze the undecorated baked cookies for up to 3 months. Just thaw and decorate when you’re ready to serve.
How do I make the royal icing shiny?
For extra shine, add a teaspoon of light corn syrup or a drop of clear vanilla extract to the icing. Some bakers also use a tiny amount of glycerin. But honestly, a well-made royal icing with meringue powder is naturally glossy. Just make sure you beat it long enough—5 to 7 minutes is key.
Pin This Recipe!

Easy Frosted Halloween Sugar Cookies – Perfect Royal Icing Recipe

These Perfect Frosted Halloween Sugar Cookies with Royal Icing are soft, buttery, and hold their shape perfectly. The easy royal icing dries hard and glossy, making them ideal for decorating with kids or for Halloween parties.
- Prep Time: 30 minutes
- Cook Time: 10 minutes
- Total Time: 2 hours 40 minutes (includes chilling and drying time)
- Yield: 24 servings 1x
- Category: Dessert
- Cuisine: American
Ingredients
- 1 cup (226g) unsalted butter, softened
- 1 cup (200g) granulated sugar
- 1 large egg, room temperature
- 1 ½ teaspoons vanilla extract
- 2 ½ cups (312g) all-purpose flour
- 1 teaspoon baking powder
- ½ teaspoon salt
- 4 cups (480g) powdered sugar, sifted
- 3 tablespoons meringue powder
- 5–6 tablespoons warm water, plus more for thinning
- Gel food coloring (optional, for decorating)
- Sprinkles, sanding sugar, or edible glitter (optional)
Instructions
- In the bowl of a stand mixer, beat the softened butter and granulated sugar together on medium speed until light and fluffy, about 3 minutes. Scrape down the sides halfway through. Add the egg and vanilla extract, and beat until just combined.
- In a separate bowl, whisk together the flour, baking powder, and salt. Gradually add the dry ingredients to the wet mixture, mixing on low speed until the dough comes together. If too dry, add a teaspoon of milk; if too sticky, add a tablespoon of flour.
- Divide the dough into two disks, wrap each tightly in plastic wrap, and refrigerate for at least 2 hours (overnight is better).
- Preheat oven to 350°F (175°C). Line baking sheets with parchment paper. Lightly flour your work surface and rolling pin. Roll one disk of dough to about ¼-inch thickness. Cut out Halloween shapes and place cutouts about 2 inches apart on prepared baking sheets. Chill cutouts on the baking sheet for 15 minutes.
- Bake for 8-10 minutes, rotating the baking sheet halfway through, until edges are just barely golden. Let cool on the baking sheet for 5 minutes, then transfer to a wire rack to cool completely.
- In the bowl of a stand mixer, combine sifted powdered sugar and meringue powder. Add 5 tablespoons of warm water and mix on low until combined. Increase to medium-high speed and beat for 5-7 minutes until thick, glossy, and forms stiff peaks. Add more water, one teaspoon at a time, to reach desired consistency (thick for outlining, runny like honey for flooding). Divide and tint with gel food coloring if desired.
- Fit piping bags with small round tips. Outline each cookie with thicker icing, then flood the inside with thinner icing. Use a toothpick to spread icing into corners and pop air bubbles. Add sprinkles while icing is wet. Let dry at room temperature for at least 6 hours or overnight until hard to the touch.
Notes
Chill the dough for at least 2 hours to prevent spreading. For best results, chill cutouts on the baking sheet for 15 minutes before baking. Royal icing should be thick like toothpaste for outlining and runny like honey for flooding. Let decorated cookies dry at least 6 hours or overnight before stacking. Store in an airtight container at room temperature for up to 5 days; do not refrigerate.
Nutrition
- Serving Size: 1 cookie (2-inch cut
- Calories: 135
- Sugar: 12
- Sodium: 55
- Fat: 6
- Saturated Fat: 3.5
- Carbohydrates: 18
- Protein: 1
Keywords: Halloween sugar cookies, royal icing, frosted sugar cookies, easy sugar cookies, decorated cookies, Halloween baking