The first time I made peppermint bark, it was a total last-minute save. Christmas Eve, the kids were bouncing off the walls, and I realized I forgot to buy any holiday treats. I rummaged through the pantry, grabbed the chocolate and candy canes I had stashed for emergencies, and threw together what I hoped would be a decent sweet fix. Thirty minutes later, the whole family was tearing into this peppermint bark easy recipe, and honestly, it disappeared faster than the holiday movies on TV. Since then, this quick homemade Christmas treat has become my go-to for busy December nights when I want something festive but don’t have a lot of time. I’ve made and tweaked this peppermint bark easy recipe more than 15 times now, and it never fails to impress — plus, it’s just three simple steps. If you’re looking for a fast, no-fuss holiday treat, this recipe’s got your back.
Why You’ll Love This Recipe
This peppermint bark easy recipe has totally changed my holiday snack game. I’ve served it at family gatherings and handed out little bags to neighbors, and everyone asks for the recipe. Here’s why:
- 3-Step Simplicity — Seriously, it’s just melting, spreading, and sprinkling. Even my kids can help with this one, and that means less stress for me.
- Fast to Make — About 20 minutes from start to finish, including chilling time. Perfect for a quick homemade Christmas treat when you don’t have hours to bake.
- Ingredients You Probably Have — Chocolate, peppermint, and a little butter or coconut oil if you like. No obscure ingredients, no last-minute grocery store runs.
- Great for Gifting or Snacking — I love making extra to pop in festive bags for friends or to have on hand during holiday movie marathons.
- Customizable — You can swap out peppermint for any crushed candy or nuts if you want, making it a versatile quick homemade Christmas treat.
Whether you’re making this for a holiday party, a casual weeknight snack during the busy season, or a last-minute gift, this peppermint bark easy recipe fits right in. No complicated steps, no weird equipment — just reliable, festive flavor that’s ready fast.
Ingredients You’ll Need
Here’s the best part: you probably have most of this already. I’m picky about a couple of these ingredients because they really make a difference.
- White Chocolate Chips (12 oz / 340 g) — I always go for good-quality white chocolate chips, like Ghirardelli or Guittard. They melt smoothly and taste rich without being overly sweet.
- Dark or Semi-Sweet Chocolate Chips (8 oz / 225 g) — This adds a nice contrast to the white chocolate. I stick to chips because they melt evenly, but baking bars chopped up will work too.
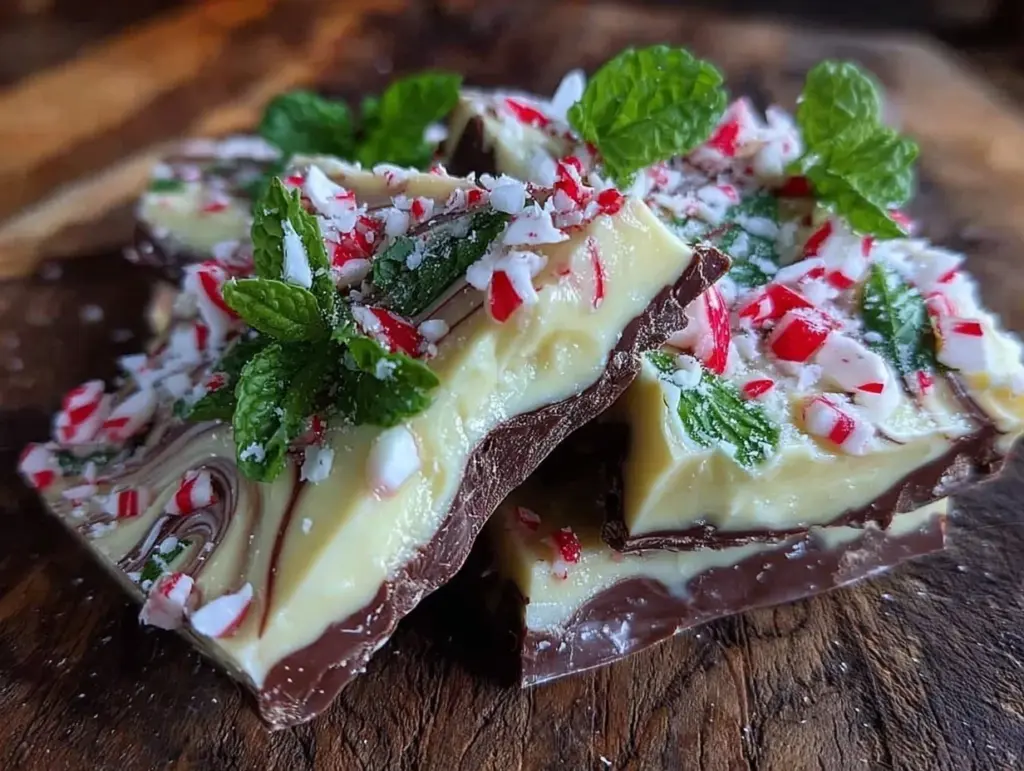
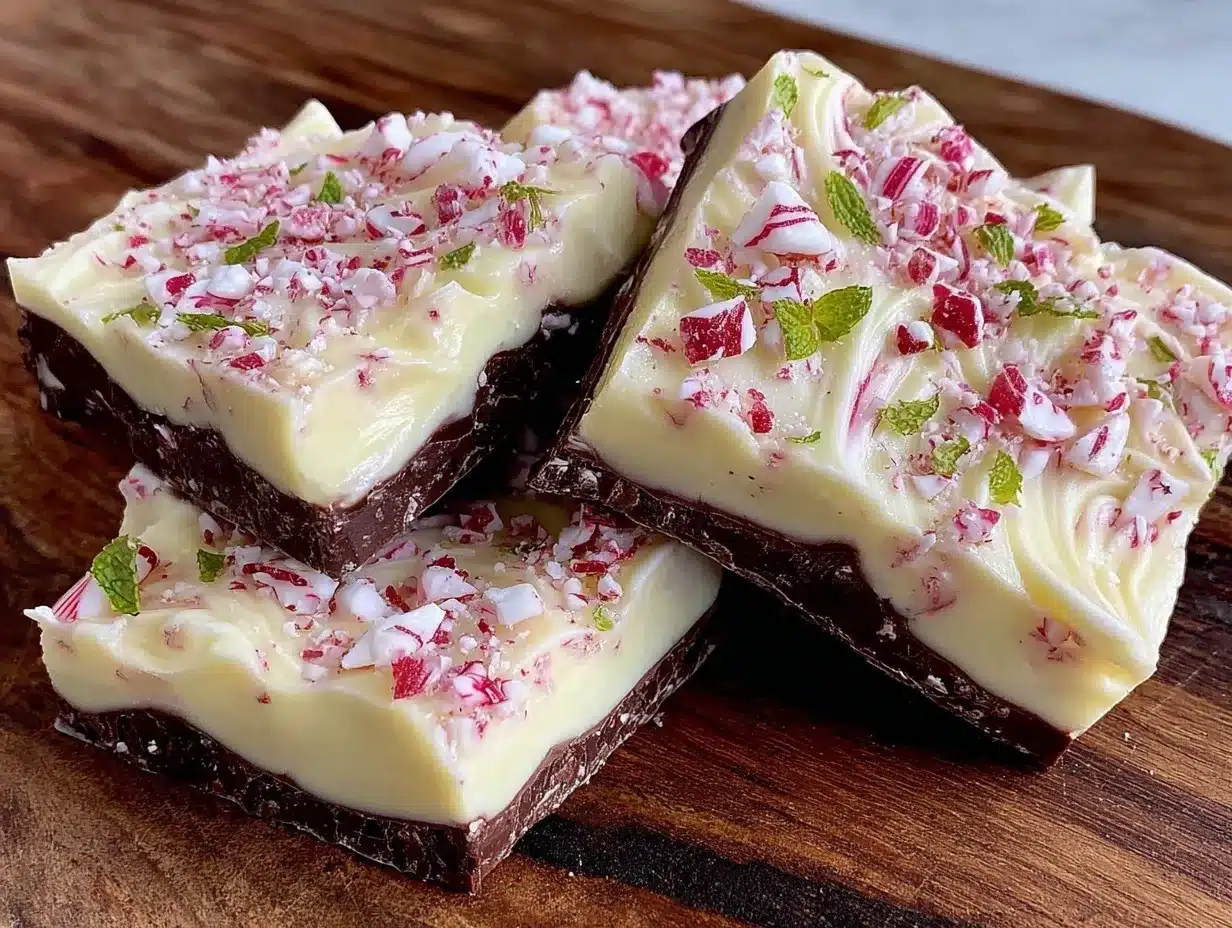
- Candy Canes (3-4, crushed / about ½ cup) — Fresh peppermint candy canes are best. I crush them myself with a rolling pin for uneven pieces — that texture is key.
- Coconut Oil or Butter (1 tablespoon / 14 g, optional) — Helps the chocolate melt smoothly and gives the bark a nice shine. I only add this if the chocolate seems too thick when melting.
Equipment Needed
You don’t need anything fancy for this. Here’s what I actually use:
- Microwave-Safe Bowl — For melting the chocolate. Glass or ceramic works best because it heats evenly.
- Baking Sheet — A standard 9×13 inch pan is perfect. I line it with parchment paper so the bark comes off easily.
- Rolling Pin or Meat Mallet — To crush the candy canes. If you don’t have one, a heavy pan works too.
- Spatula — For spreading the chocolate layers evenly. A silicone one is my favorite to get smooth edges.
- Optional: Food Processor — If you want finely crushed peppermint quickly. I prefer a rougher crush for texture, though.
How to Make Peppermint Bark Easy: Quick Homemade Christmas Treat
Alright, let’s get into it. I’ll walk you through exactly how I make this peppermint bark easy recipe, including the little tricks that make it come out perfect every time.
- Melt the Dark Chocolate Layer (5-7 minutes)
Place the dark or semi-sweet chocolate chips in a microwave-safe bowl. Add half a tablespoon of coconut oil or butter if you’re using it. Microwave in 30-second bursts, stirring well between each, until smooth and glossy. The chocolate should be fluid but not too hot — if it’s too hot, it can seize. This dark chocolate forms the bottom layer and sets the stage for the white chocolate — it needs to be smooth and even. - Spread and Chill (10 minutes)
Pour the melted dark chocolate onto your parchment-lined baking sheet. Use a spatula to spread it into an even layer about ¼-inch thick. Pop this into the fridge for about 10 minutes until it’s just firm to the touch but not fully hardened. This slight chill helps the white chocolate stick without mixing layers. - Melt and Spread White Chocolate (5 minutes)
While the dark layer chills, melt the white chocolate chips the same way — 30-second bursts, stirring well each time. Add the remaining half tablespoon of coconut oil or butter if needed for smoothness. Once melted, pour the white chocolate over the dark layer and spread it evenly with a spatula. - Sprinkle Crushed Candy Canes (1 minute)
Immediately sprinkle the crushed candy canes over the white chocolate layer. Press down lightly so they stick but don’t embed them too deeply — you want that crunch. - Final Chill (20-30 minutes)
Refrigerate the whole sheet until completely firm, usually about 20 to 30 minutes. Once set, break or cut the peppermint bark into pieces.
Total time: about 45 minutes, but only 15 minutes active. The fridge does most of the work.
Expert Tips & Tricks
Here’s everything I’ve figured out from making this peppermint bark easy recipe dozens of times. These tips will save you from the mistakes I already made.
- Don’t Overheat the Chocolate — Chocolate seizes if it gets too hot, turning grainy and unusable. Microwave in short bursts and stir often. If it does seize, adding a teaspoon of coconut oil can sometimes smooth it out.
- Chill the First Layer Just Right — If the dark chocolate layer is too soft when you add the white chocolate, the layers will swirl and mix. Too hard, and the white chocolate won’t stick. Aim for firm but not rock solid.
- Crush Candy Canes by Hand — Avoid pulverizing the peppermint into dust. I use a rolling pin to get uneven chunks that add texture and a little snap with every bite.
- Use Parchment Paper — This is a must for easy removal. Trying to peel bark off a bare baking sheet is a nightmare.
- Store Properly — Keep your peppermint bark in an airtight container in the fridge to prevent sweating or melting, especially if your kitchen is warm.
Common mistakes:
- Chocolate too thick or grainy: Usually overheated or stirred too fast. Lower the heat and stir gently.
- Layers mixing together: First layer wasn’t chilled enough. Patience here pays off.
- Stickiness after chilling: Not enough chocolate or candy canes pressed in properly. Make sure to spread layers evenly and press candy cane pieces gently into the white chocolate.
Variations & Substitutions
Once you’ve got the base version down, here’s how I mix it up. I’ve actually tried all of these.
- Milk Chocolate Version — Swap the dark chocolate for milk chocolate chips. It’s sweeter and creamier, perfect if you want a milder bark for kids.
- Holiday Nut Mix — Add chopped pistachios or almonds with the candy cane for a crunchy, nutty twist. Great for holiday gatherings when you want something a little fancier.
- Vegan Peppermint Bark — Use dairy-free white and dark chocolate alternatives (brands like Enjoy Life). Coconut oil helps smooth the melt. Perfect for dairy-free holiday treat trays.
- Spicy Peppermint Bark — Sprinkle a pinch of cayenne or chili powder on top with the candy canes. My sister swears by this unexpected kick for holiday parties.
Dietary modifications:
- Gluten-Free: Naturally gluten-free, just check your chocolate brand to be sure.
- Dairy-Free: Use vegan chocolate chips and coconut oil instead of butter.
Serving & Storage
I usually serve peppermint bark straight from the baking sheet, broken into rustic chunks. It looks festive and inviting, and it stays fresh on the counter for a couple of hours during parties.
Side suggestions? Honestly, peppermint bark is often the star, but if you want to round out a holiday snack spread:
- Soft homemade cookies, like these pink sugar cookies, balance the crunch nicely.
- A warm drink, like cocoa or mulled cider, pairs beautifully.
- If you’re in a savory mood first, I love serving this after a batch of cream cheese rangoon wontons for a fun holiday appetizer and dessert combo.
Storage:
- Fridge: Store in an airtight container up to 2 weeks. Keep it cold to avoid melting.
- Freezing: Not recommended. Chocolate can develop a white film and the texture changes.
- Room temperature: Fine for a few hours, but avoid warm spots or direct sunlight.
Nutrition Information
I’m not a nutritionist, but here’s the breakdown if you’re keeping track. This is based on about 12 servings.
| Calories | Protein | Carbs | Fiber | Sugar | Fat | Saturated Fat | Sodium |
|---|---|---|---|---|---|---|---|
| 160 | 2g | 18g | 1g | 16g | 9g | 6g | 10mg |
Look — this is a festive treat made with chocolate and peppermint, so it’s not a diet recipe and I’m not going to pretend it is. But it’s way better than store-bought candy, it costs less, and I know exactly what’s in it. When I want something lighter, I stick to smaller pieces and pair it with fruit. Most holidays though? I make the full thing and enjoy every bite.
Final Thoughts
Remember that Christmas Eve when I threw this together last-minute? That’s the kind of recipe this peppermint bark easy is — forgiving, fast, and crowd-pleasing. It’s not fancy, but it feels special. Make it yours. More peppermint? Yes, please. Different chocolates? Go for it. Add nuts or candy? Absolutely. The base recipe is forgiving and easy to customize.
If you make this, drop a comment and tell me how it went. And if something goes wrong, tell me that too — I genuinely want to help troubleshoot. That’s what the comments are for.
Happy cooking — I hope your kitchen smells amazing.
Frequently Asked Questions
Q: Can I make this peppermint bark easy recipe without candy canes?
A: Yes, you can skip the candy canes or swap them for crushed peppermint candies, nuts, or even sprinkles. I’ve made it without candy canes when I was out, and it still tastes great — just missing that classic peppermint crunch.
Q: Why did my peppermint bark turn out grainy or separated?
A: This usually happens when the chocolate overheats or is microwaved too quickly. I learned that stirring every 20-30 seconds and removing the bowl while the chocolate is still a bit thick helps prevent graininess. Adding a bit of coconut oil can also smooth things out if needed.
Q: Can I make this peppermint bark ahead for holiday parties?
A: Absolutely. You can make it up to two weeks ahead and store it in an airtight container in the fridge. I often prepare it early for Christmas cookie exchanges and it holds up perfectly.
Q: Is this peppermint bark recipe gluten-free and dairy-free?
A: The base peppermint bark is naturally gluten-free, but check your chocolate brand to be sure. For dairy-free, use vegan white and dark chocolate chips and substitute butter with coconut oil. I’ve made this a couple of times for my lactose-intolerant friend, and she loved it.
Q: Can I double or halve this peppermint bark recipe?
A: Yes, it scales really well. I usually double it for parties and halve it if I just want a small batch for family snacking. Just use a larger or smaller baking sheet and adjust chilling time accordingly.
Q: Can I add other flavors or toppings to this peppermint bark?
A: Yes! I’ve added chopped nuts, dried cranberries, or even a sprinkle of sea salt. For a festive twist, try swapping peppermint for orange zest or crushed gingerbread cookies. It’s fun to experiment, and the base recipe handles it all.
Pin This Recipe!
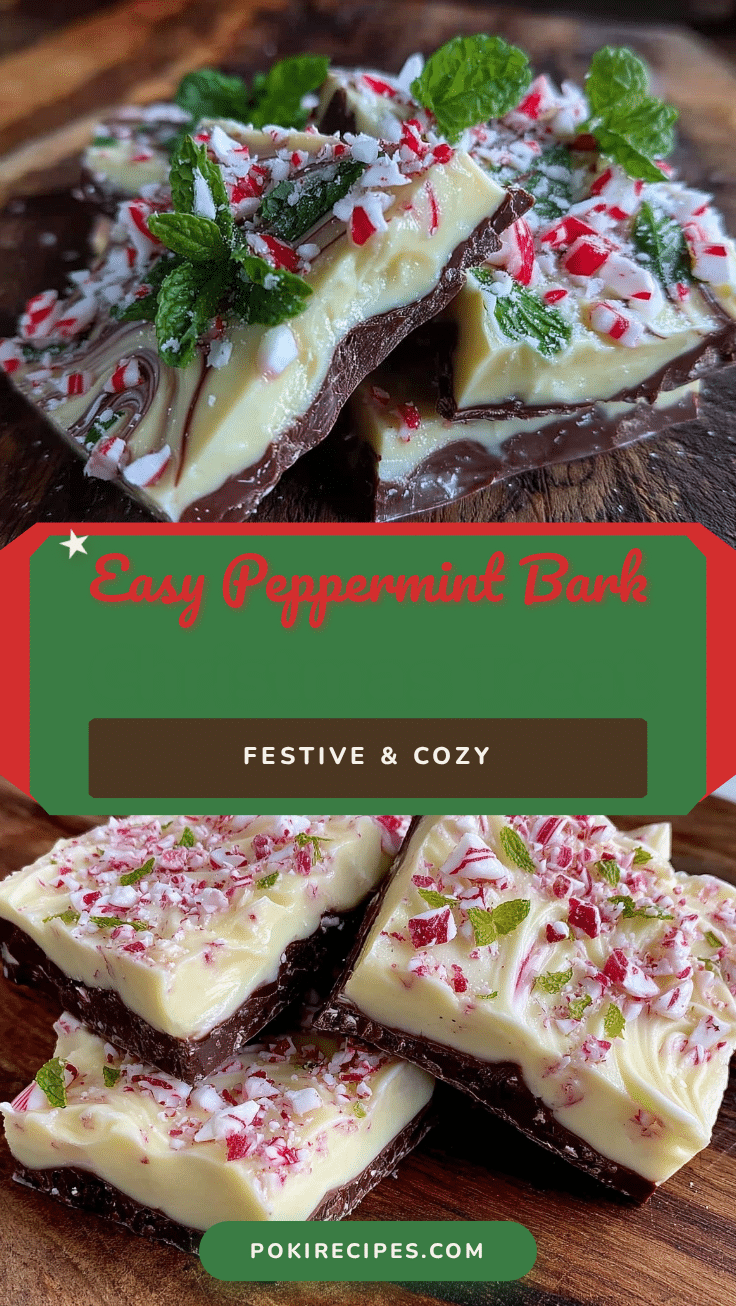
Peppermint Bark Easy Recipe 3-Step Quick Homemade Christmas Treat

A quick and easy peppermint bark recipe perfect for last-minute holiday treats, made with layers of dark and white chocolate topped with crushed candy canes.
- Prep Time: 15 minutes
- Cook Time: 0 minutes
- Total Time: 45 minutes
- Yield: 12 servings 1x
- Category: Dessert
- Cuisine: American
Ingredients
- 12 oz white chocolate chips
- 8 oz dark or semi-sweet chocolate chips
- 3–4 candy canes, crushed (about ½ cup)
- 1 tablespoon coconut oil or butter (optional)
Instructions
- Place the dark or semi-sweet chocolate chips in a microwave-safe bowl. Add half a tablespoon of coconut oil or butter if using. Microwave in 30-second bursts, stirring well between each, until smooth and glossy.
- Pour the melted dark chocolate onto a parchment-lined 9×13 inch baking sheet. Spread into an even ¼-inch thick layer. Refrigerate for about 10 minutes until firm to the touch but not fully hardened.
- Melt the white chocolate chips the same way, adding the remaining half tablespoon of coconut oil or butter if needed. Pour over the chilled dark chocolate layer and spread evenly.
- Immediately sprinkle the crushed candy canes over the white chocolate layer and press down lightly.
- Refrigerate the entire sheet for 20 to 30 minutes until completely firm. Break or cut into pieces before serving.
Notes
Do not overheat chocolate to avoid seizing. Chill the dark chocolate layer until firm but not rock solid before adding white chocolate to prevent layers from mixing. Use parchment paper for easy removal. Store in an airtight container in the fridge for up to 2 weeks. Avoid freezing to prevent texture changes.
Nutrition
- Serving Size: One piece (1/12 of t
- Calories: 160
- Sugar: 16
- Sodium: 10
- Fat: 9
- Saturated Fat: 6
- Carbohydrates: 18
- Fiber: 1
- Protein: 2
Keywords: peppermint bark, holiday treat, Christmas recipe, easy peppermint bark, quick dessert, homemade candy, peppermint chocolate