The moment you bite into these vibrant Dr. Seuss Silly Color Cookie Sandwiches, you’re hit with a burst of playful colors and sweet, creamy delight that instantly takes you back to childhood storytime. Honestly, it’s like the whimsy of Dr. Seuss leapt off the page and landed right on your plate. I first whipped up this recipe during a rainy afternoon when my kids were craving something fun and colorful to brighten their day, and it quickly became a household favorite.
What I love about these silly color cookie sandwiches is that they’re not just eye candy—they’re a cheerful treat that brings smiles all around. The way the bright hues mix with the classic cookie sandwich format makes them perfect for parties, school events, or just because you need a little extra fun in your day. After making these several times, I’ve learned a few tricks to keep the colors popping and the texture just right, so you’ll get that perfect balance of soft, chewy cookies and luscious filling every time.
If you’re someone who loves playful baking projects that deliver on both taste and wow factor, this vibrant Dr. Seuss silly color cookie sandwiches recipe will quickly become your go-to. Plus, it’s a fantastic way to sneak in some creativity and joy, whether you’re baking solo or with kids excited to mix up some magic.
Why You’ll Love This Recipe
- Quick & Easy: These cookie sandwiches come together in about 30 minutes, making them perfect for last-minute celebrations or colorful cravings.
- Simple Ingredients: No need for fancy or hard-to-find items—most are pantry staples, and you probably already have them on hand.
- Perfect for Parties: Whether it’s a Dr. Seuss themed birthday, a whimsical baby shower, or a fun bake sale, these cookies steal the show.
- Crowd-Pleaser: Kids and adults alike love the vibrant colors and the creamy filling. They’re the kind of treat that disappears fast!
- Unbelievably Delicious: The soft, chewy cookies paired with a rich, creamy filling create a flavor combo that’s playful yet satisfyingly sweet.
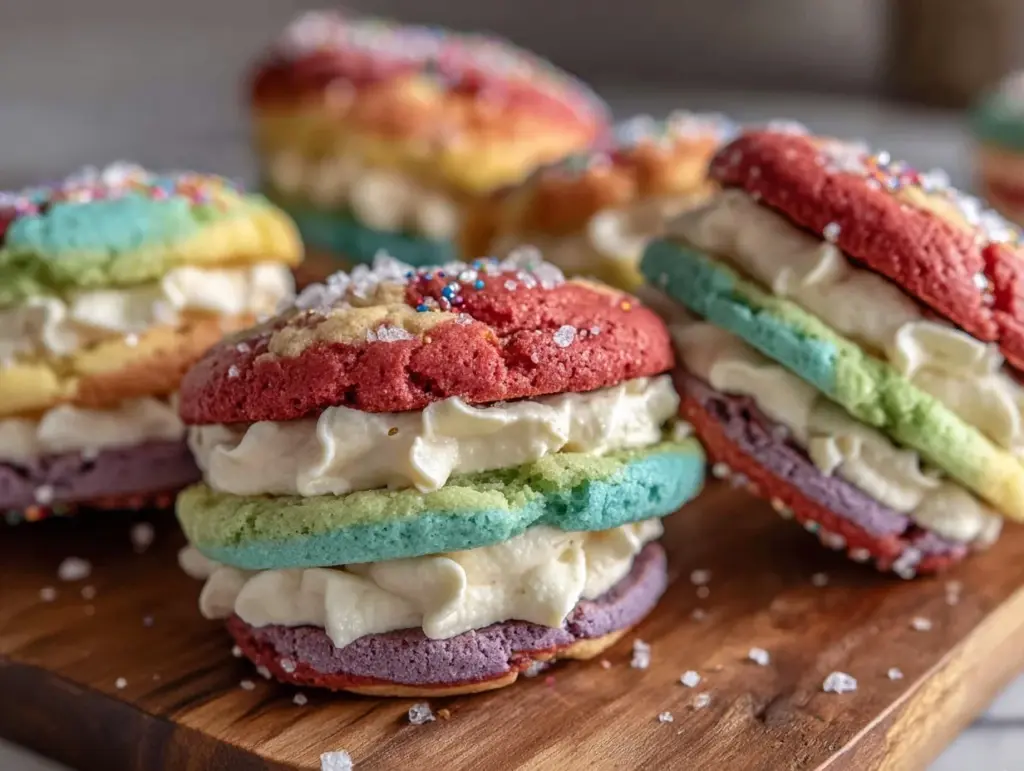
This recipe stands out because of the way it uses simple food coloring to create a rainbow of hues that truly pop without any artificial aftertaste. The technique of swirling the colored dough sections together creates a playful, marbled effect that’s so much fun to make and eat. Plus, the filling is a smooth, lightly sweetened cream cheese frosting that complements the cookies perfectly, adding a tangy twist you don’t get with ordinary cookie sandwiches.
Honestly, this isn’t just another cookie sandwich recipe; it’s a cheerful experience on a plate that makes you want to close your eyes and savor each bite. It’s colorful, fun, and just the right amount of silly—just like a Dr. Seuss story should be.
What Ingredients You Will Need
This recipe uses simple, wholesome ingredients to deliver bold color and satisfying flavor without the fuss. You don’t need any fancy extras, just a few pantry staples and some food coloring magic.
- All-purpose flour (2 ½ cups / 315g) – This creates the perfect soft but sturdy cookie base.
- Baking powder (1 tsp) – Helps the cookies rise slightly for that soft texture.
- Salt (½ tsp) – Balances the sweetness.
- Unsalted butter (1 cup / 227g, softened) – Adds richness and tenderness. I usually go for Land O’Lakes for consistent results.
- Granulated sugar (1 cup / 200g) – For sweetness and slight crisp on the edges.
- Large eggs (2, room temperature) – Bind everything together and add moisture.
- Vanilla extract (1 tbsp) – Gives a warm, comforting aroma.
- Gel food coloring (various colors) – Use vibrant gels for rich, true colors without watery dough. I recommend AmeriColor gels for best vibrancy.
- Cream cheese (8 oz / 226g, softened) – For the creamy filling that’s tangy and smooth.
- Powdered sugar (2 cups / 240g) – Sweetens and thickens the filling.
- Heavy cream (2-3 tbsp) – Adjusts filling consistency for spreadability.
- Optional sprinkles or edible glitter – For extra whimsical decoration on top.
For gluten-free versions, swap the all-purpose flour for a 1-to-1 gluten-free blend. If dairy-free is needed, try vegan butter substitutes and coconut cream instead of heavy cream. The gel food coloring is key here—liquid food coloring tends to make the dough too wet and dull the colors.
Equipment Needed
- Mixing bowls: At least two—one for cookie dough, one for filling.
- Electric mixer or stand mixer: Makes creaming butter and mixing filling a breeze. Hand mixers work too, but it takes a little more elbow grease.
- Measuring cups and spoons: Accurate measurements are key for consistent cookies.
- Baking sheets: Preferably rimmed to catch any spreading dough.
- Parchment paper or silicone baking mats: Prevent sticking and make cleanup easier.
- Rolling pin (optional): If you want to roll out the dough instead of scooping.
- Cookie scoop or spoon: For uniform cookie sizes.
- Spatula: Helpful for mixing and spreading the filling.
- Cooling racks: To let cookies cool evenly and prevent sogginess.
I’ve tried making these by hand before, but a stand mixer really saves time and effort, especially when creaming the butter and sugar. If you don’t have one, no worries—just mix thoroughly with a sturdy spoon. For a budget-friendly option, parchment paper and a cookie scoop can be found affordably online or in stores and make a huge difference.
Detailed Preparation Method

- Preheat your oven to 350°F (175°C). Line two baking sheets with parchment paper or silicone mats for easy cleanup.
- In a medium bowl, whisk together the all-purpose flour (315g), baking powder (1 tsp), and salt (½ tsp). Set this dry mix aside.
- In your mixer bowl, beat the softened butter (227g) and granulated sugar (200g) together on medium speed for about 3-4 minutes until light and fluffy. You’ll see the mixture lighten in color—that’s a good sign!
- Add the eggs (2, room temperature) one at a time, mixing well after each addition. Stir in the vanilla extract (1 tbsp).
- Gradually add the dry ingredients to the wet mix, mixing on low speed just until combined. Avoid overmixing to keep cookies tender.
- Divide the dough evenly into small bowls—one for each color you want to make. Use gel food coloring, adding a little at a time, mixing well until you get your desired vibrant hue. Remember, the colors will mellow slightly during baking.
- To create the silly, swirled effect, drop spoonfuls of each colored dough onto a parchment-lined baking sheet. Use a toothpick or skewer to gently swirl the colors together—don’t overdo it or the colors will blend too much.
- Bake in the preheated oven for 10-12 minutes, or until the edges are lightly golden but the centers still look soft. The smell at this point is honestly irresistible!
- Remove the cookies from the oven and allow them to cool completely on wire racks. This step is crucial to prevent the filling from melting.
- While cookies cool, prepare the filling: Beat softened cream cheese (226g) until smooth, then gradually add powdered sugar (240g). Add 2-3 tablespoons of heavy cream to reach a spreadable consistency. Taste and add a pinch of vanilla if you like.
- Once cookies are fully cooled, spread or pipe the cream cheese filling on the flat side of one cookie, then gently sandwich with a second cookie. For an extra fun touch, roll the edges in sprinkles or edible glitter.
- Chill the assembled sandwiches for 20-30 minutes before serving. This helps the filling set and flavors meld.
Keep an eye on your oven as baking times can vary. If cookies spread too much, chill dough for 15 minutes before baking next batch. The swirling step is where your creativity shines—have fun with it but don’t overmix!
Cooking Tips & Techniques
One trick I picked up is using gel food coloring instead of liquid to keep the dough from getting watery and losing its structure. Also, make sure your butter is softened—not melted—to achieve the perfect creamy texture when creaming with sugar.
When swirling colors, less is more. A light touch with a toothpick or skewer maintains the pretty color contrast without turning the dough into a muddy mess. Oh, and always chill your dough briefly if your kitchen is warm—this prevents the cookies from spreading too thin.
A common mistake is baking the cookies too long. The centers should look slightly soft and pale; they firm up as they cool. Overbaking leads to crisp, dry cookies, which don’t sandwich well.
Multitasking tip: While the cookies bake, start whipping up the filling. It saves time and keeps the momentum going. Lastly, always cool cookies completely before filling—warm cookies will melt the cream cheese filling and make a mess.
Variations & Adaptations
- Dairy-Free Version: Use vegan butter and dairy-free cream cheese alternatives. Substitute heavy cream with coconut cream for the filling.
- Seasonal Colors: Swap the rainbow colors for holiday themes—think red and green for Christmas, orange and black for Halloween, or pastel shades for Easter.
- Flavor Twists: Add lemon zest or a few drops of peppermint extract to the dough or filling for a fresh flavor boost.
- Gluten-Free Option: Replace all-purpose flour with a 1-to-1 gluten-free baking flour. The texture might be slightly different but still delicious.
- Personal Variation: Once, I tried adding mini chocolate chips to one color of dough—kids went wild for the surprise chocolate pockets inside the colorful cookies!
Serving & Storage Suggestions
These cookie sandwiches are best served chilled or at room temperature. The colors shine brightest when the filling is firm but creamy. Plate them on a bright platter for a playful presentation that guests will love.
They pair wonderfully with a glass of cold milk, a fruity iced tea, or even a fun mocktail if you’re serving at a party. For an afternoon treat, try them alongside fresh berries or sliced apples for a refreshing contrast.
Store the cookie sandwiches in an airtight container in the refrigerator for up to 5 days. They also freeze well—wrap individually in plastic wrap and place in a freezer bag for up to 2 months. To reheat, thaw in the fridge overnight and enjoy chilled or at room temperature.
Flavors deepen with a day or two in the fridge, making them even more delicious after resting. Just keep them covered tightly to prevent drying out.
Nutritional Information & Benefits
Each cookie sandwich contains approximately 220-250 calories, with about 10g of fat, 30g of carbohydrates, and 3g of protein. The cream cheese filling adds a nice dose of calcium and a bit of protein, making it a slightly more balanced treat than your average cookie.
The recipe can be adapted for dietary needs—gluten-free and dairy-free versions work well with simple ingredient swaps. While these treats are a sweet indulgence, the portion size keeps things reasonable for sharing.
From a wellness perspective, the recipe avoids artificial dyes by relying on gel colors, which are more concentrated and less likely to contain fillers. Plus, homemade treats like these let you control the ingredients, avoiding preservatives and unnecessary additives.
Conclusion
These vibrant Dr. Seuss Silly Color Cookie Sandwiches are more than just a fun baking project—they’re a joyful experience that brings color, creativity, and smiles to any occasion. Whether you’re making them for a themed party, a family treat, or just to brighten a regular day, they never fail to impress.
Feel free to customize the colors, flavors, and fillings to suit your tastes or dietary needs. Personally, I love how easy they are to make and how they bring out the kid in me every time I bake them!
If you give this recipe a try, please drop a comment below and share your colorful creations. Don’t forget to share this recipe with friends who need a little extra fun in their kitchens. Happy baking, and remember—the sillier, the better!
FAQs
Can I use liquid food coloring instead of gel?
You can, but liquid food coloring may make the dough too wet and dull the colors. Gel food coloring is best for vibrant, concentrated hues.
How should I store these cookie sandwiches?
Store them in an airtight container in the fridge for up to 5 days or freeze individually wrapped for up to 2 months.
Can I make the dough ahead of time?
Yes! You can prepare and color the dough, then refrigerate it wrapped for up to 24 hours before baking.
What if my cookies spread too much during baking?
Chill the dough for 15-20 minutes before baking to help cookies hold their shape better.
Can I use other fillings besides cream cheese?
Absolutely! Buttercream, marshmallow fluff, or even chocolate ganache work well for sandwich fillings.
Pin This Recipe!
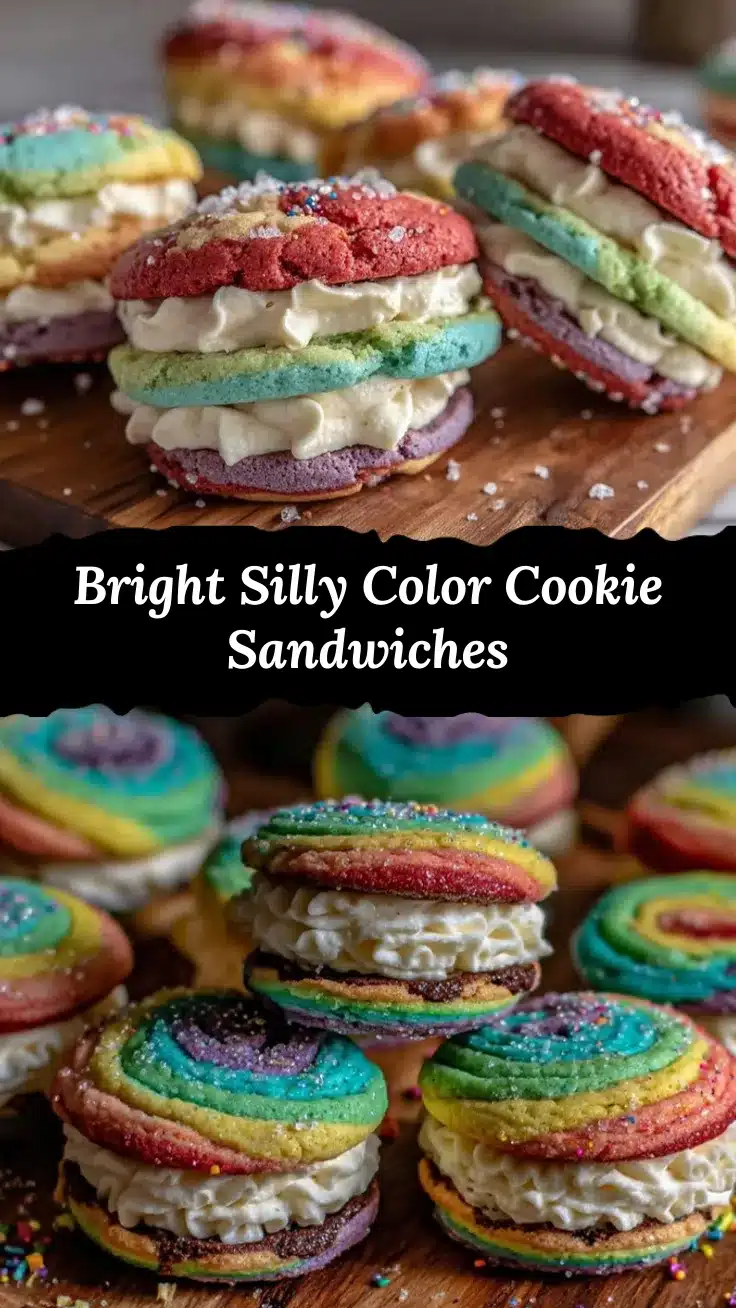
Vibrant Dr. Seuss Silly Color Cookie Sandwiches

These vibrant cookie sandwiches feature playful, swirled colors and a tangy cream cheese filling, perfect for parties or a fun treat that brings smiles to all ages.
- Prep Time: 15 minutes
- Cook Time: 12 minutes
- Total Time: 30 minutes
- Yield: 24 cookie sandwiches 1x
- Category: Dessert
- Cuisine: American
Ingredients
- 2 ½ cups (315g) all-purpose flour
- 1 tsp baking powder
- ½ tsp salt
- 1 cup (227g) unsalted butter, softened
- 1 cup (200g) granulated sugar
- 2 large eggs, room temperature
- 1 tbsp vanilla extract
- Gel food coloring (various colors)
- 8 oz (226g) cream cheese, softened
- 2 cups (240g) powdered sugar
- 2–3 tbsp heavy cream
- Optional sprinkles or edible glitter
Instructions
- Preheat your oven to 350°F (175°C). Line two baking sheets with parchment paper or silicone mats.
- In a medium bowl, whisk together the all-purpose flour, baking powder, and salt. Set aside.
- In a mixer bowl, beat the softened butter and granulated sugar on medium speed for 3-4 minutes until light and fluffy.
- Add the eggs one at a time, mixing well after each addition. Stir in the vanilla extract.
- Gradually add the dry ingredients to the wet mix, mixing on low speed just until combined. Avoid overmixing.
- Divide the dough evenly into small bowls—one for each color you want to make. Add gel food coloring to each bowl and mix until vibrant.
- Drop spoonfuls of each colored dough onto the prepared baking sheets. Use a toothpick or skewer to gently swirl the colors together without overmixing.
- Bake for 10-12 minutes until edges are lightly golden but centers remain soft.
- Remove cookies from oven and cool completely on wire racks.
- Prepare the filling by beating softened cream cheese until smooth. Gradually add powdered sugar and 2-3 tablespoons of heavy cream until spreadable. Optionally add a pinch of vanilla.
- Once cookies are cooled, spread or pipe filling on the flat side of one cookie and sandwich with another. Roll edges in sprinkles or edible glitter if desired.
- Chill the assembled sandwiches for 20-30 minutes before serving.
Notes
Use gel food coloring for vibrant colors without watery dough. Chill dough if cookies spread too much. Cool cookies completely before filling to prevent melting. Swirl colors lightly to maintain contrast. Overbaking leads to dry cookies that don’t sandwich well.
Nutrition
- Serving Size: 1 cookie sandwich
- Calories: 235
- Sugar: 18
- Sodium: 120
- Fat: 10
- Saturated Fat: 6
- Carbohydrates: 30
- Fiber: 1
- Protein: 3
Keywords: colorful cookies, cookie sandwiches, Dr. Seuss cookies, cream cheese filling, party treats, kid-friendly desserts, vibrant cookies


