The first time I made these Vibrant Dr. Seuss Rainbow Veggie Cups, I was trying to brighten up snack time for my kids—and honestly, it was a colorful game-changer. You know how veggies can sometimes feel a bit boring or like a chore to eat? Well, these little cups are like a party in every bite, bursting with fresh, crisp colors and flavors that make healthy snacking fun. I’ve whipped up this recipe countless times, tweaking it here and there, and it’s become a go-to for family gatherings, after-school snacks, or even a light lunch that feels special without fuss.
Inspired by the whimsical world of Dr. Seuss, where colors pop and imagination runs wild, these rainbow veggie cups are not just eye candy—they pack a nourishing punch. If you’re looking for a snack that’s vibrant, easy to assemble, and loved by kids and adults alike, this recipe fits the bill perfectly. Plus, it’s a great way to sneak in a variety of veggies while keeping things playful and delicious. Trust me, once you try these, you’ll be hooked on how simple and satisfying healthy snacking can be!
Whether you’re a busy parent, a health-conscious foodie, or just someone who enjoys bright, fresh flavors, these veggie cups bring a splash of color and crunch to your day. Ready to make snack time a little more magical? Let’s get into the details of this Vibrant Dr. Seuss Rainbow Veggie Cups recipe that’s as fun to look at as it is to eat.
Why You’ll Love This Recipe
- Quick & Easy: Comes together in about 15 minutes—perfect for those moments when you want a healthy snack without the hassle.
- Simple Ingredients: No need for specialty stores; most are pantry and fridge staples that you probably already have.
- Perfect for Any Occasion: Great for kid’s lunchboxes, potlucks, picnics, or a colorful addition to brunch tables.
- Crowd-Pleaser: The vibrant colors and fresh crunch always get compliments, even from veggie skeptics.
- Unbelievably Delicious: The combo of crisp veggies and a zesty dip is like a flavor party—simple but satisfying.
What really makes this recipe stand out is the playful nod to Dr. Seuss’s colorful imagination, turning veggies into an edible rainbow that kids can’t resist. Plus, blending a homemade dip that’s both creamy and tangy takes these cups from “just veggies” to crave-worthy treats. I’ve tested this recipe many times, and each iteration gets better at balancing freshness and flavor. You won’t find a more cheerful, nutritious snack that’s this easy to pull off. Honestly, it’s the kind of recipe that makes you close your eyes and smile after the first bite—comfort food with a guilt-free twist.
What Ingredients You Will Need
This recipe uses simple, wholesome ingredients to deliver bold flavor and satisfying texture without the fuss. Here’s what you’ll gather to make your Vibrant Dr. Seuss Rainbow Veggie Cups:
- Vegetables for the Rainbow:
- Red bell pepper, thinly sliced (adds sweetness and crunch)
- Orange carrot sticks, peeled and cut (natural sweetness and vibrant color)
- Yellow cherry tomatoes, halved (bright, juicy pops of flavor)
- Green cucumber, sliced into sticks (refreshing and crisp)
- Blue or purple cabbage, shredded (adds a fun, unexpected hue and crunch)
- Rainbow radishes, thinly sliced (peppery zing and visual interest)
- Dip Ingredients:
- Greek yogurt or dairy-free alternative (I recommend Fage or Forager Project for creaminess)
- Fresh lemon juice (for a bright, tangy kick)
- Garlic powder (just a pinch for depth)
- Dill or fresh parsley, finely chopped (adds a fresh herbal note)
- Salt and pepper to taste
- Extras (Optional):
- Chia seeds or hemp hearts for a nutritional boost
- Crushed nuts like almonds or walnuts for a little crunch
If you want a gluten-free snack, rest assured this recipe fits perfectly. Feel free to swap in seasonal vegetables—like green beans in summer or roasted beets in fall—to keep things fresh. I’ve found that using firm, fresh veggies makes a huge difference in texture, so avoid limp or watery produce when you can.
Equipment Needed
- Clear plastic or glass cups (6-8 oz / 180-240 ml) – perfect for showing off those rainbow layers
- Sharp chef’s knife for slicing veggies thin and even
- Cutting board – a sturdy one makes prep easier and safer
- Mixing bowl for preparing the dip
- Spoon or small spatula for layering the dip and veggies neatly
If you don’t have fancy cups, little mason jars or even small bowls work just fine. I once used repurposed jam jars when I ran out of cups, and it made for a charming rustic presentation. For slicing veggies quickly, a mandoline slicer can be handy—but it’s not necessary. Just take your time, and you’ll get those thin, colorful strips that really make the cups pop visually.
Detailed Preparation Method

- Prepare the Veggies: Wash all vegetables thoroughly. Peel the carrots and slice into sticks about 3 inches (7.5 cm) long. Thinly slice the red bell pepper into strips roughly the same length. Halve the cherry tomatoes, slice the cucumber into sticks, shred the purple cabbage finely, and slice the radishes thinly. This prep should take about 15 minutes.
- Make the Dip: In a mixing bowl, combine 1 cup (240 ml) of Greek yogurt with 1 tablespoon (15 ml) of fresh lemon juice. Add ½ teaspoon (2.5 ml) garlic powder, 1 tablespoon (15 ml) chopped fresh dill or parsley, and a pinch of salt and pepper. Stir well until smooth and creamy. Taste and adjust seasoning if needed. This takes about 5 minutes.
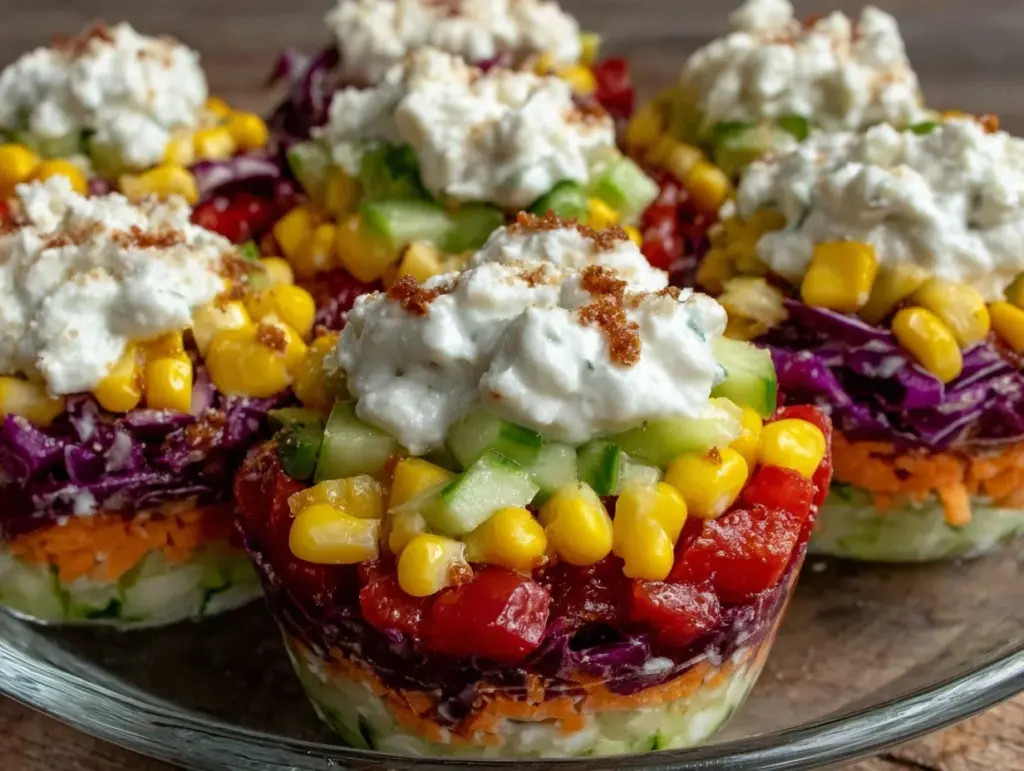
- Assemble the Cups: Spoon about 2 tablespoons (30 ml) of the dip into the bottom of each cup, spreading it evenly. Begin layering your veggies upright in rainbow order: start with red bell pepper, then carrot, yellow cherry tomato, cucumber, purple cabbage, and finish with radishes. Pack them tightly so they stand up well and look full. This step takes around 10 minutes.
- Optional Toppings: If using, sprinkle chia seeds, hemp hearts, or crushed nuts on top for texture and nutrition. These add a nice little surprise with each bite.
- Chill or Serve: You can serve immediately or chill for 30 minutes to let the flavors mingle. The cups keep well in the fridge for up to 2 days, but veggies are best fresh.
Pro tip: If your veggies feel a bit watery (especially tomatoes or cucumbers), pat them dry with a paper towel before assembling. This helps keep the dip from getting soggy. Also, don’t be shy about layering the dip thick enough at the bottom—it acts like glue, keeping the veggies upright and easy to grab.
Cooking Tips & Techniques
Though this isn’t a cooked recipe, there are some handy tips to get the best results. First, slicing your veggies uniformly makes the cups look polished and helps the veggies stand upright without tipping over. I learned the hard way that uneven lengths lead to a wobbly presentation (and a less fun eating experience!).
When mixing the dip, use fresh herbs whenever possible. They bring brightness that dried herbs just can’t match. Also, let the dip sit for a few minutes after mixing so the flavors meld nicely. You’ll notice the difference when you taste the final product.
Another trick: prepare all your veggies ahead of time and store them in airtight containers with a damp paper towel to keep them crisp. This makes assembly a breeze, especially if you’re prepping snacks for a party or busy week.
Lastly, layering the dip first isn’t just for looks—it stabilizes the veggies and keeps them from sliding around. You can even double the dip amount if you want to serve it on the side for dipping.
Variations & Adaptations
- Dietary Adjustments: For a vegan or dairy-free version, swap Greek yogurt with coconut or almond-based yogurt alternatives. I’ve tested this with Kite Hill almond milk yogurt, and it works well.
- Seasonal Spins: In the fall, try swapping out some veggies for roasted sweet potato sticks or steamed broccoli florets for a warm twist. It’s surprisingly tasty and adds a cozy vibe.
- Flavor Twists: Add a sprinkle of smoked paprika or a dash of hot sauce to the dip for a smoky or spicy kick. My family loves this variation when we want a little more excitement.
- Cooking Method Alternatives: You can roast some veggies like bell peppers or carrots for a sweeter, softer texture before assembling. Just cool them completely before layering.
- Personal Favorite Variation: I like adding thin slices of avocado on top for creaminess and a dose of healthy fats—makes the cups extra filling.
Serving & Storage Suggestions
Serve these veggie cups chilled or at room temperature for the best crunch and flavor. They make a fantastic appetizer or snack on their own but pair beautifully with grilled chicken or a light grain salad for a fuller meal. I often serve them alongside hummus or a tangy vinaigrette to add variety.
To store, cover the cups tightly with plastic wrap or use airtight containers, and keep refrigerated. The veggies stay crisp for up to two days, but I recommend eating them fresh for the best texture. When reheating isn’t an option here, just let chilled cups sit out for 10 minutes before serving to take the chill off.
Flavors tend to meld and deepen slightly if you prep the dip a day ahead, making the cups even tastier. Just keep the veggies separate until ready to assemble to avoid sogginess.
Nutritional Information & Benefits
Each cup packs roughly 80-100 calories depending on veggie size and dip amount, making it a light, nutrient-rich snack. The rainbow of veggies supplies a variety of vitamins, antioxidants, and fiber—great for digestion and immune support.
Greek yogurt provides protein and probiotics, supporting gut health and satiety. Plus, the fresh herbs add antioxidants and flavor without extra calories. This snack is naturally gluten-free, low-carb, and adaptable for vegan diets.
From a wellness perspective, these cups are a colorful way to boost daily veggie intake, helping you meet nutritional goals while delighting your senses. I often recommend them to clients looking for easy, wholesome snacks that don’t feel like a chore.
Conclusion
In a world where snack options can be dull or overly processed, these Vibrant Dr. Seuss Rainbow Veggie Cups stand out as a bright, cheerful alternative. They’re easy to make, visually stunning, and taste fresh and satisfying every time. I love how they bring a little whimsy to healthy eating, reminding me that nutritious food can be fun and flavorful.
Feel free to mix and match veggies or tweak the dip to suit your taste buds—this recipe is your canvas for creativity. I’d love to hear how you make it your own! Drop a comment below or share your colorful creations with friends and family. Here’s to more joyful, vibrant snacking ahead!
FAQs
Can I prepare the Rainbow Veggie Cups ahead of time?
Yes! You can slice the veggies and make the dip up to a day in advance. Store veggies separately in airtight containers with a damp paper towel to maintain crispness. Assemble the cups just before serving for best results.
What can I use if I don’t have Greek yogurt?
Plain yogurt, sour cream, or dairy-free yogurt alternatives like coconut or almond milk-based yogurts work well as dip bases. Adjust seasoning to taste.
Are these veggie cups kid-friendly?
Absolutely! The colorful presentation appeals to kids, and the fresh veggies are mild and crunchy. The creamy dip helps make veggies more approachable for picky eaters.
Can I substitute any veggies in this recipe?
Yes, feel free to swap veggies based on preference or season. Zucchini, snap peas, or roasted sweet potatoes can be great alternatives.
How long do the assembled cups last in the fridge?
Once assembled, the cups are best eaten within 1-2 days. The veggies stay crunchy longer if stored properly, but the dip can make them a tad soggy over time.
Pin This Recipe!
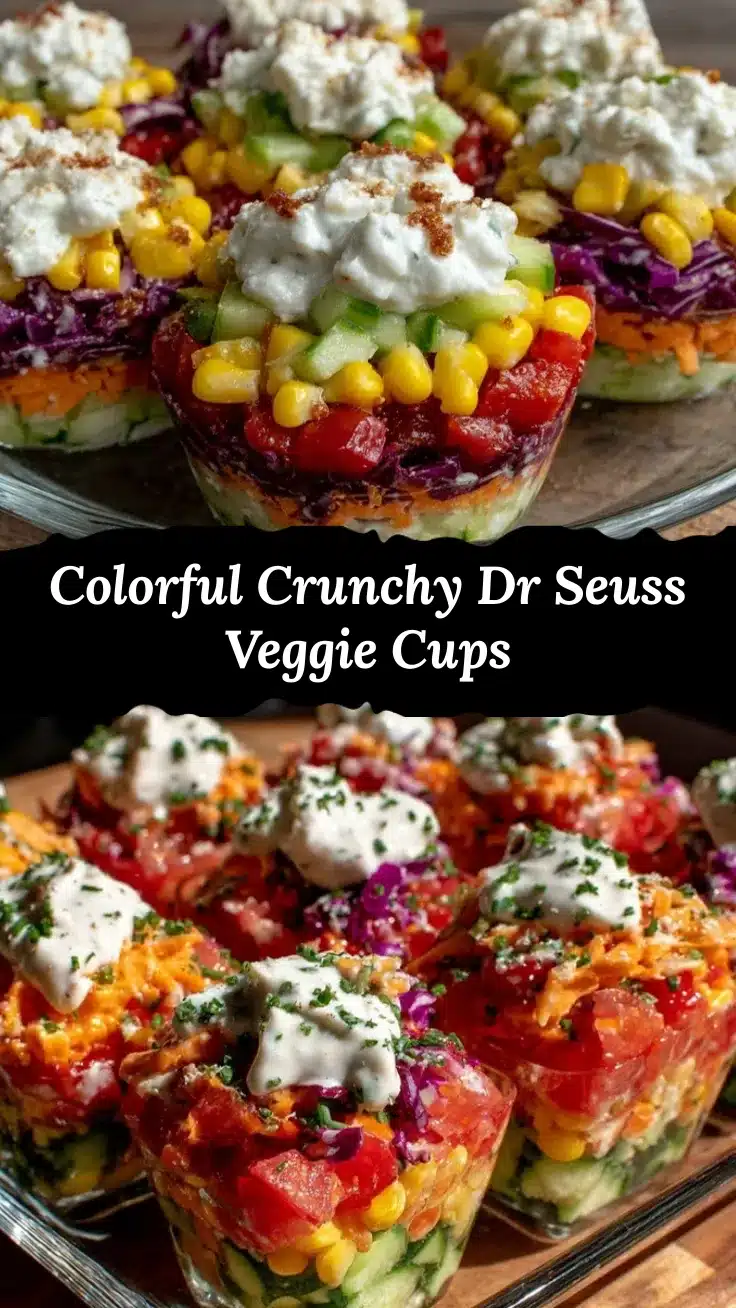
Vibrant Dr. Seuss Rainbow Veggie Cups Easy Healthy Snack Recipe

These colorful rainbow veggie cups are a fun, easy, and healthy snack perfect for kids and adults alike. Featuring fresh veggies layered with a creamy, tangy dip, they make nutritious snacking playful and delicious.
- Prep Time: 15 minutes
- Cook Time: 0 minutes
- Total Time: 15 minutes
- Yield: 6 servings 1x
- Category: Snack
- Cuisine: American
Ingredients
- Red bell pepper, thinly sliced
- Orange carrot sticks, peeled and cut
- Yellow cherry tomatoes, halved
- Green cucumber, sliced into sticks
- Blue or purple cabbage, shredded
- Rainbow radishes, thinly sliced
- 1 cup Greek yogurt or dairy-free alternative
- 1 tablespoon fresh lemon juice
- ½ teaspoon garlic powder
- 1 tablespoon chopped fresh dill or parsley
- Salt and pepper to taste
- Optional: chia seeds or hemp hearts
- Optional: crushed nuts like almonds or walnuts
Instructions
- Wash all vegetables thoroughly. Peel the carrots and slice into sticks about 3 inches long. Thinly slice the red bell pepper into strips roughly the same length. Halve the cherry tomatoes, slice the cucumber into sticks, shred the purple cabbage finely, and slice the radishes thinly.
- In a mixing bowl, combine 1 cup of Greek yogurt with 1 tablespoon of fresh lemon juice. Add ½ teaspoon garlic powder, 1 tablespoon chopped fresh dill or parsley, and a pinch of salt and pepper. Stir well until smooth and creamy. Taste and adjust seasoning if needed.
- Spoon about 2 tablespoons of the dip into the bottom of each cup, spreading it evenly. Begin layering your veggies upright in rainbow order: red bell pepper, carrot, yellow cherry tomato, cucumber, purple cabbage, and finish with radishes. Pack them tightly so they stand up well and look full.
- If using, sprinkle chia seeds, hemp hearts, or crushed nuts on top for texture and nutrition.
- Serve immediately or chill for 30 minutes to let the flavors mingle. Store covered in the fridge for up to 2 days.
Notes
Pat watery veggies like tomatoes and cucumbers dry before assembling to prevent sogginess. Use firm, fresh veggies for best texture. The dip can be doubled if you want extra for dipping. Veggies and dip can be prepared a day ahead but assemble just before serving for best freshness.
Nutrition
- Serving Size: One veggie cup
- Calories: 80100
- Sugar: 5
- Sodium: 150
- Fat: 2
- Saturated Fat: 0.5
- Carbohydrates: 10
- Fiber: 3
- Protein: 5
Keywords: rainbow veggie cups, healthy snack, kids snack, easy veggie recipe, gluten-free snack, dairy-free option, colorful vegetables, Dr. Seuss inspired


