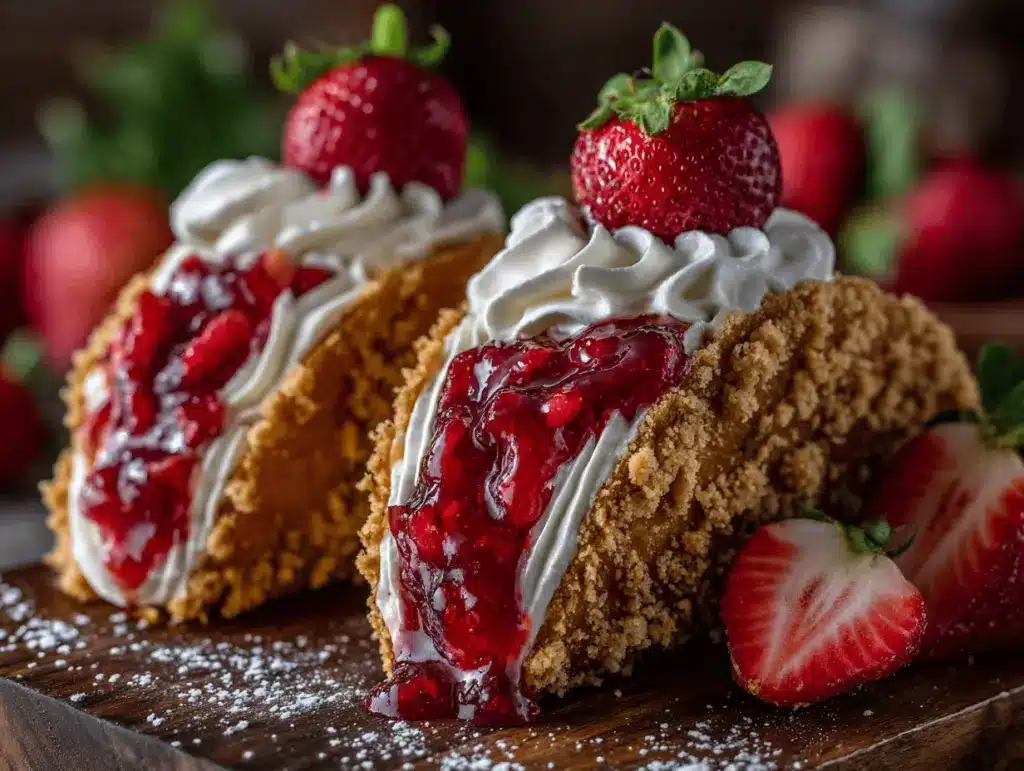
The first bite of a Strawberry Crunch Cheesecake Taco is pure bliss—crisp, buttery taco shell, creamy cheesecake filling, and a strawberry crunch topping that actually crackles between your teeth. Honestly, the smell alone is enough to get my family hovering around the kitchen. It’s like all the best parts of a strawberry shortcake and a New York cheesecake got together at a summer night food truck festival and decided to ditch the plates. I remember the first time I made these: the look on my kids’ faces was priceless. We ended up eating them right off the baking sheet, laughter echoing down the hall. If you’re hunting for a dessert that brings the fun of street food right into your kitchen, these Strawberry Crunch Cheesecake Tacos are the sweet magic you need. They’re perfect for parties, family nights, or when you just want to shake up your dessert routine. After testing and tweaking this recipe more times than I can count (yep, I even tried air-frying the shells for less mess!), I can tell you with confidence: you’re in for a treat that’s both playful and downright delicious. Whether you’re a busy parent, a dessert enthusiast, or just a lover of all things strawberry, this recipe hits every mark—crunch, creaminess, and just the right amount of nostalgia. Let’s get taco-ing!
Why You’ll Love This Recipe
If you’ve ever wished you could mash up a cheesecake and a strawberry shortcake into a grab-and-go dessert, these Strawberry Crunch Cheesecake Tacos are basically your dream come true. I’ve served these at birthday parties, summer barbecues, and even impromptu weeknight “treat yourself” moments, and the response is always the same: wide eyes, big smiles, and that “can I have another?” question before the first taco is even finished.
- Quick & Easy: You can pull this whole recipe together in under 40 minutes—less if you use store-bought shells. Perfect for spontaneous cravings or last-minute guests.
- Simple Ingredients: Most of what you need is probably already in your fridge or pantry—think cream cheese, strawberries, and graham crackers. Nothing fancy, just pure comfort.
- Perfect for Any Occasion: These are a hit at backyard BBQs, birthday parties, after-school snacks, or just a fun weeknight dessert. I even made a batch for my book club and they disappeared before we even got to chapter two.
- Crowd-Pleaser: Kids love them. Adults love them. Even my neighbor who claims not to like dessert asked for the recipe.
- Unbelievably Delicious: The combo of creamy cheesecake, bright strawberries, and the signature strawberry crunch coating is next-level fun. I’ve tried a lot of street food desserts, but these bring that magical, nostalgic flavor right to your table.
What really sets this recipe apart is the texture game: crispy shell, smooth filling, and that sweet, crunchy topping. I tested blending freeze-dried strawberries with shortbread cookies for the ultimate crunch, and let me tell you—it’s worth the extra minute. Plus, you’re not tied to the oven for hours; these come together fast, so you get all the wow-factor without the wait. Whether you’re impressing friends or just treating yourself, these Strawberry Crunch Cheesecake Tacos make every day feel a little like a festival. It’s dessert, but with a big side of fun.
What Ingredients You Will Need
This recipe uses simple, easy-to-find ingredients—most are pantry staples, and a few are fresh for that burst of strawberry flavor. I like to keep it flexible, so feel free to swap as needed!
- For the Taco Shells:
- 8 small flour tortillas (6-inch size works best)
- 3 tablespoons unsalted butter, melted
- 1/2 cup granulated sugar (for dusting)
- 1 teaspoon ground cinnamon (optional, for flavor)
- For the Cheesecake Filling:
- 8 ounces (225g) cream cheese, softened (full-fat for creaminess)
- 1/2 cup (60g) powdered sugar
- 1 teaspoon pure vanilla extract
- 1 cup (240ml) heavy whipping cream, cold
- Pinch of salt
- For the Strawberry Crunch Topping:
- 1 cup freeze-dried strawberries (about 20g, crushed)
- 1 cup shortbread cookies or golden Oreos, crushed
- 2 tablespoons unsalted butter, melted
- For the Strawberry Layer:
- 1 cup fresh strawberries, diced (or thawed frozen strawberries, drained)
- 2 tablespoons granulated sugar
- 1 teaspoon lemon juice (brightens flavor)
Ingredient Notes & Substitutions:
- Tortillas: You can use gluten-free tortillas for a GF version. Corn tortillas don’t work well here—they’re too stiff.
- Cream Cheese: For a lighter option, swap in whipped cream cheese or Neufchâtel. Dairy-free works too, but taste and texture may differ.
- Strawberry Crunch: Try graham crackers or vanilla wafers if you don’t have shortbread cookies. No freeze-dried strawberries? Use a little strawberry Jell-O powder for color and flavor.
- Strawberries: In winter, frozen berries are a great swap. Just thaw and drain well so you don’t get soggy tacos.
Honestly, I’ve tried just about every combo—you can get creative! The main thing is keeping that balance of crunch, creaminess, and fresh fruit.
Equipment Needed
- Mixing Bowls: At least two—one for the filling, one for the strawberry layer.
- Hand mixer or stand mixer: For whipping the cream and blending the filling. You could use a whisk and some elbow grease, but a mixer saves time.
- Baking sheet: For baking and shaping the taco shells. I use a rimmed sheet to keep things tidy.
- Rolling pin or glass: For gently flattening tortillas if needed.
- Small bowl: For mixing cinnamon sugar.
- Food processor or zip-top bag with rolling pin: For crushing cookies and freeze-dried strawberries. I’ve used both—if you’re not in the mood to haul out the processor, a bag and a rolling pin work just fine. Less cleanup!
- Spatula and spoon: For spreading and scooping the filling.
- Parchment paper: Keeps shells from sticking to the pan.
- Piping bag or zip-top bag (optional): Makes filling the tacos neater, but a spoon works too.
If you don’t have a mixer, a whisk and some muscle will do the trick. For the taco mold, I sometimes use a muffin pan turned upside down to create the shell shape—works like a charm! Keep your tools dry, especially for the crunch topping, or you’ll lose the crispy vibe. If you’re watching your kitchen budget, stick to the basics—no need for fancy gadgets.
How to Make Strawberry Crunch Cheesecake Tacos

- Prep the Taco Shells (10 minutes):
Preheat your oven to 375°F (190°C). Brush both sides of each tortilla with melted butter. In a small bowl, mix the sugar and cinnamon. Sprinkle both sides of each tortilla with the mixture.
Tip: To shape the shells, drape each tortilla over two bars of your oven rack, or balance between the cups of an upside-down muffin tin. Bake for 7-9 minutes, until golden and crisp. Watch closely—sugar can burn fast! Let cool completely. (If you overbake, they’ll get too hard to bite.) - Make the Strawberry Crunch Topping (5 minutes):
In a food processor (or zip-top bag), combine freeze-dried strawberries and cookies. Pulse or crush until you have small crumbs. Pour into a bowl and stir in melted butter. Set aside.
Personal Note: I like to leave some larger bits for extra crunch—don’t blitz it to powder. - Prepare the Strawberry Layer (5 minutes):
In another bowl, combine diced strawberries, sugar, and lemon juice. Stir gently and let sit for 5-10 minutes. The sugar will pull out the juices, making a quick “sauce.”
Warning: If your berries are super juicy, drain off a bit of liquid so your tacos don’t get soggy. - Make the Cheesecake Filling (10 minutes):
With a mixer, beat cream cheese until smooth. Add powdered sugar, vanilla, and a pinch of salt—beat until fluffy. In a separate bowl, whip the heavy cream to stiff peaks. Gently fold the whipped cream into the cream cheese mixture until well blended.
Troubleshooting: If your filling is too soft, chill it for 15 minutes to help it firm up. Don’t over-whip or it can go grainy. - Assemble the Tacos (10 minutes):
Spoon or pipe cheesecake filling into each cooled shell, spreading evenly. Add a spoonful of the strawberry mixture on top. Sprinkle generously with the strawberry crunch topping.
Sensory Cue: You want the filling to hold its shape but still be creamy—not runny. The crunch topping should stick, but not clump. - Serve and Enjoy:
Serve immediately for max crunch, or chill for up to 30 minutes if you like a colder, firmer filling. (Longer and the shells might soften.)
Efficiency Tip: Prep the shells and crunch topping ahead. The filling holds well in the fridge for a day—just assemble right before eating for the best texture.
Cooking Tips & Techniques
- Don’t Overbake the Shells: The difference between perfectly crisp and jaw-breaker hard is only a minute or two. Stay close and pull them once they’re just turning golden.
- Keep the Filling Cold: Warm cream cheese or over-whipped cream can lead to a runny filling. I always chill my bowl and beaters before whipping the cream, especially on hot days.
- Avoid Soggy Tacos: Don’t overfill with strawberries. If your berries are super juicy, strain off excess liquid. I learned the hard way when my first batch turned into strawberry soup tacos—still tasty, just a little messy!
- Crunch Topping Storage: Store extra topping in an airtight jar. It keeps for a week and is awesome on yogurt or ice cream.
- Multitasking: While the shells are baking, whip up the filling and crunch topping to save time. Lay out your assembly line for smooth taco building.
My biggest mistake early on was rushing the shell bake—they need to be fully cooled before filling or you’ll end up with a melted mess. If you’re making a big batch, keep the shells in a dry spot (humidity is their enemy). For perfect results every time, taste as you go—adjust sugar in the filling or lemon in the berries to match your preferences. And don’t worry about making them look bakery-perfect. A little mess is part of the charm!
Variations & Adaptations
- Gluten-Free Version: Use gluten-free tortillas and swap in gluten-free cookies for the crunch topping. I’ve made this for friends with celiac and it works great—just mind cross-contamination.
- Low-Sugar or Keto: Swap the sugar for a granular sugar substitute (like monk fruit) and use almond flour tortillas. For the filling, use a keto-friendly sweetener and skip the cookies in the crunch.
- Flavor Twists: Try blueberry or raspberry freeze-dried fruit for the crunch, or use chocolate sandwich cookies for a chocolate-strawberry vibe. Want something tropical? Swap strawberries for diced mango and add toasted coconut to the crunch.
- Cooking Methods: Air-fry the shells at 350°F (175°C) for 4-5 minutes for a lighter, less greasy shell. Works especially well if you’re avoiding the oven in summer.
- Dairy-Free: Use dairy-free cream cheese and coconut whipped topping. The filling will be a bit softer, but still super tasty.
One of my favorite personal spins was adding a splash of strawberry liqueur to the berries for an adults-only treat—talk about decadent! You can really make these your own, whether you want to cater to allergies, dietary needs, or just your favorite flavors.
Serving & Storage Suggestions
Strawberry Crunch Cheesecake Tacos are best served fresh, with the shells crispy and the filling cool and creamy. I love piling them on a big platter, sprinkled with extra crunch topping and a few mint leaves for color. Pair with fresh lemonade or a cold glass of milk for a classic summer treat, or go fancy with a sparkling rosé for brunch.
- Serving Temp: Chill for 15-30 minutes before serving for a firmer filling, or serve straight away for ultimate crunch.
- Storing: Store unfilled components separately. The shells keep for 2 days in an airtight container at room temp. The filling and berries last 2 days in the fridge.
- Freezer: You can freeze the cheesecake filling, but not the assembled tacos or shells (they get soggy). Defrost in the fridge before using.
- Reheating Shells: If shells soften, pop them in the oven at 350°F (175°C) for 2-3 minutes. Let cool fully before filling again.
- Flavor Note: The strawberry mixture deepens in flavor after a few hours in the fridge. If you like a punchier berry flavor, make it ahead!
Nutritional Information & Benefits
Each Strawberry Crunch Cheesecake Taco (based on 8 servings) is estimated to have around 270 calories, 17g fat, 27g carbs, and 4g protein. The real stars are the strawberries—packed with vitamin C, fiber, and antioxidants. Cream cheese and heavy cream bring a little protein and calcium, while the crunchy topping is pure joy (okay, and carbs).
This recipe is naturally egg-free and can be adapted for gluten-free or dairy-free diets. If you have nut allergies, stick with nut-free tortillas and cookies. Honestly, I love that these let me sneak in some real fruit while still feeling totally indulgent. A sweet treat that doesn’t leave you feeling weighed down is always a win in my book!
Conclusion
There’s just something about holding a Strawberry Crunch Cheesecake Taco in your hand—crunchy, creamy, fruity, and fun—that makes dessert feel like a celebration. Whether you’re making these for a party, a family treat night, or just because you want a little extra joy on a Tuesday, this recipe never disappoints. I love how easy they are to adapt, and how every bite is a perfect mix of nostalgia and novelty.
Don’t be afraid to make these your own: switch up the fruit, try a new crunch topping, or tweak the filling to your taste. If you try them, let me know how it goes—drop a comment, share a photo, or tag me on social! Honestly, I’m always excited to see your creative spins. Here’s to more delicious memories, one taco at a time. Happy taco-ing!
FAQs About Strawberry Crunch Cheesecake Tacos
How do I keep the taco shells crispy?
Let the shells cool completely before filling, and only assemble right before serving. Humidity or filling them too early can make them soften up!
Can I make these ahead of time?
You can prep all the components ahead—bake the shells, mix the filling, and make the crunch topping. Store separately and fill just before serving for best results.
What if I don’t have freeze-dried strawberries?
No problem! Swap in a little strawberry Jell-O powder for color and flavor, or just use extra fresh strawberries in the topping. The crunch will still be tasty!
What’s the best way to shape the taco shells?
Drape tortillas over the bars of your oven rack or use an upside-down muffin pan to create the taco shape. Just be sure to watch closely so they don’t burn.
Can I use other fruits?
Absolutely! Blueberries, raspberries, or peaches all work well. Mix and match your favorites for a fun twist on the classic strawberry version.
Pin This Recipe!

Strawberry Crunch Cheesecake Tacos

These Strawberry Crunch Cheesecake Tacos combine crispy, buttery taco shells with a creamy cheesecake filling and a crackly strawberry crunch topping. Perfect for parties or family nights, they bring the fun of street food right into your kitchen.
- Prep Time: 20 minutes
- Cook Time: 10 minutes
- Total Time: 40 minutes
- Yield: 8 tacos 1x
- Category: Dessert
- Cuisine: American
Ingredients
- 8 small flour tortillas (6-inch size works best)
- 3 tablespoons unsalted butter, melted
- 1/2 cup granulated sugar (for dusting)
- 1 teaspoon ground cinnamon (optional, for flavor)
- 8 ounces cream cheese, softened (full-fat for creaminess)
- 1/2 cup powdered sugar
- 1 teaspoon pure vanilla extract
- 1 cup heavy whipping cream, cold
- Pinch of salt
- 1 cup freeze-dried strawberries, crushed (about 0.7 oz)
- 1 cup shortbread cookies or golden Oreos, crushed
- 2 tablespoons unsalted butter, melted
- 1 cup fresh strawberries, diced (or thawed frozen strawberries, drained)
- 2 tablespoons granulated sugar
- 1 teaspoon lemon juice
Instructions
- Preheat oven to 375°F (190°C). Brush both sides of each tortilla with melted butter. In a small bowl, mix sugar and cinnamon. Sprinkle both sides of each tortilla with the mixture.
- To shape the shells, drape each tortilla over two bars of your oven rack, or balance between the cups of an upside-down muffin tin. Bake for 7-9 minutes, until golden and crisp. Let cool completely.
- In a food processor or zip-top bag, combine freeze-dried strawberries and cookies. Pulse or crush until you have small crumbs. Pour into a bowl and stir in melted butter. Set aside.
- In another bowl, combine diced strawberries, sugar, and lemon juice. Stir gently and let sit for 5-10 minutes. Drain off excess liquid if berries are very juicy.
- With a mixer, beat cream cheese until smooth. Add powdered sugar, vanilla, and a pinch of salt; beat until fluffy. In a separate bowl, whip heavy cream to stiff peaks. Gently fold whipped cream into the cream cheese mixture until well blended.
- Spoon or pipe cheesecake filling into each cooled shell, spreading evenly. Add a spoonful of the strawberry mixture on top. Sprinkle generously with the strawberry crunch topping.
- Serve immediately for maximum crunch, or chill for up to 30 minutes for a firmer filling.
Notes
Let taco shells cool completely before filling to keep them crisp. Prep shells and crunch topping ahead for efficiency. For gluten-free, use GF tortillas and cookies. Air-fry shells for a lighter version. Store unfilled components separately and assemble just before serving.
Nutrition
- Serving Size: 1 taco
- Calories: 270
- Sugar: 14
- Sodium: 180
- Fat: 17
- Saturated Fat: 10
- Carbohydrates: 27
- Fiber: 2
- Protein: 4
Keywords: strawberry crunch cheesecake tacos, dessert tacos, strawberry cheesecake, street food dessert, summer dessert, party dessert, easy cheesecake tacos, strawberry shortcake tacos


