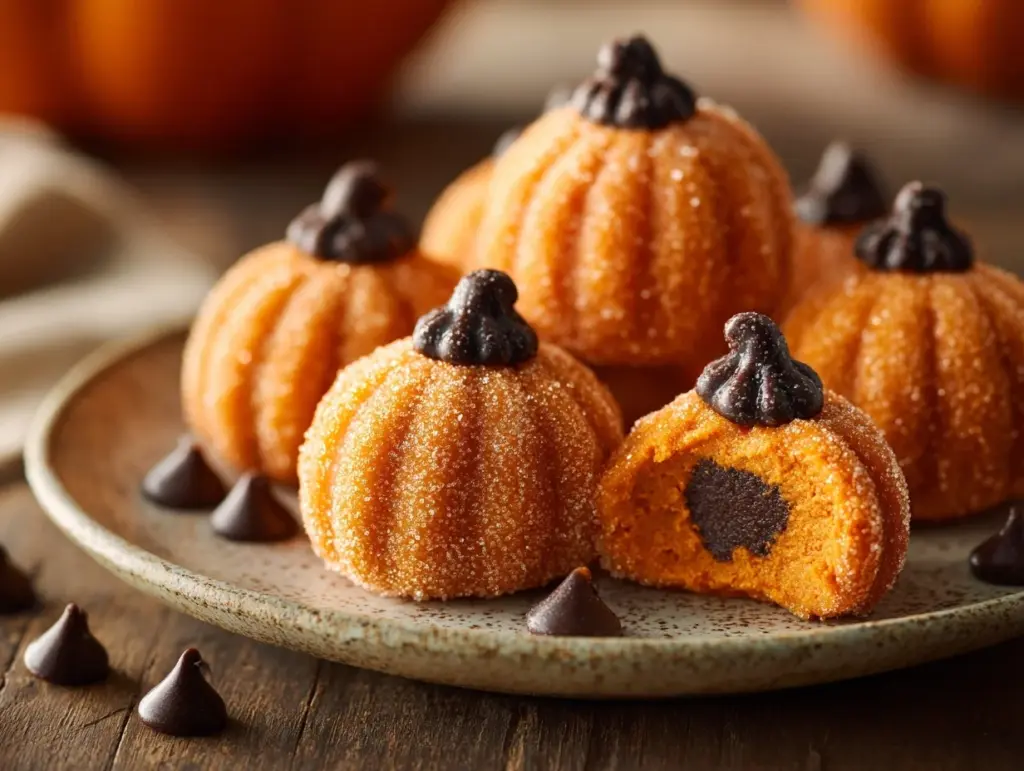
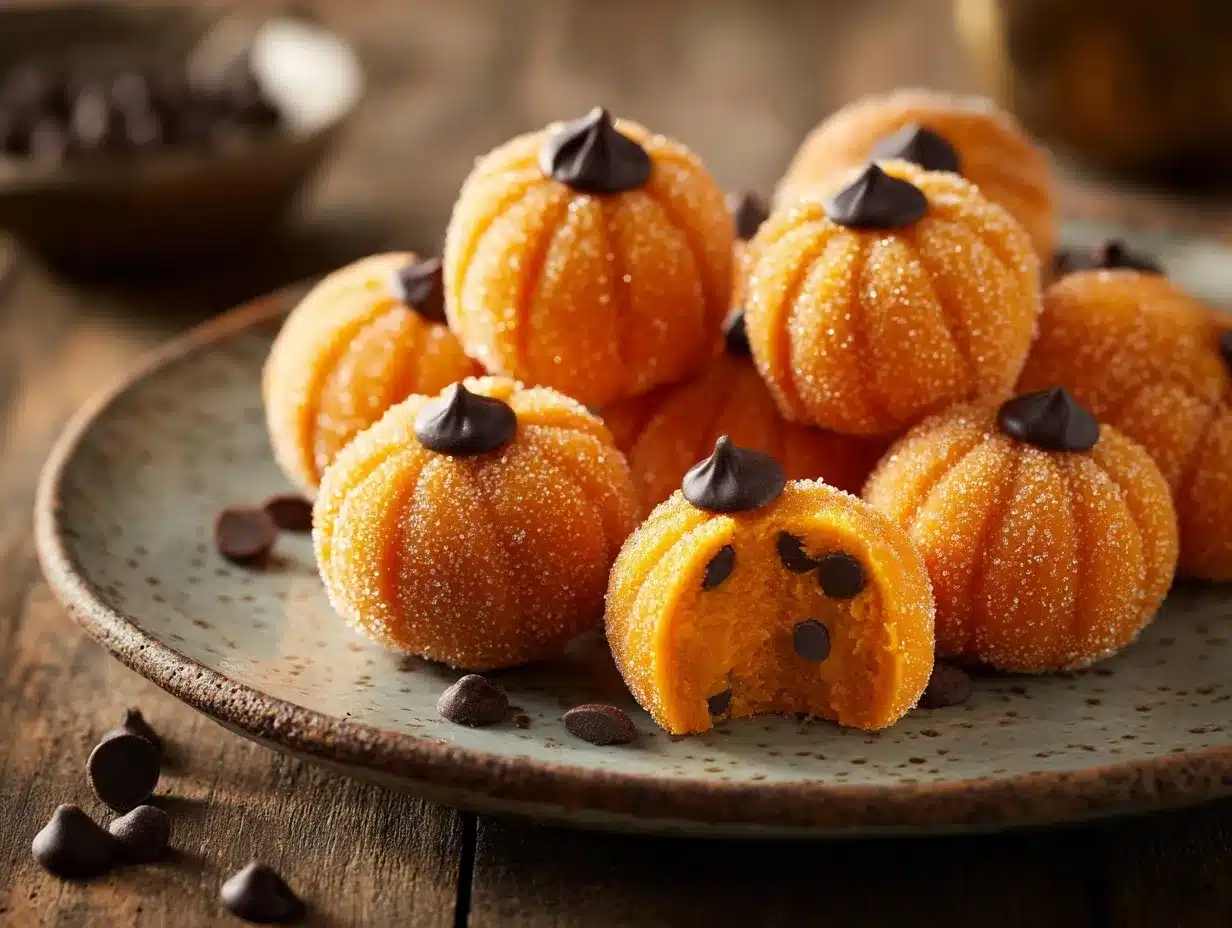
The first bite of these Pumpkin Cheesecake Truffles feels like autumn wrapped up in a perfect little ball. Creamy pumpkin-spiced cheesecake filling encased in a smooth chocolate shell—what could be better? I remember the first time I made these truffles for a family gathering; they were gone before I could even grab my second one! Whether you’re hosting a fall party or simply craving a cozy treat, this recipe is your go-to for seasonal indulgence.
What I love most about these truffles is how easy they are to make while looking so fancy that people think you spent hours in the kitchen. Plus, they’re perfect for gifting or adding a wow factor to any dessert table. Trust me, once you’ve tried these Pumpkin Cheesecake Truffles, you’ll want to make them every year.
Why You’ll Love This Recipe
- No-Bake Wonder: These truffles require no oven time, making them perfect for busy days.
- Fall Flavor Explosion: The pumpkin and spices are perfectly balanced with the creamy cheesecake filling.
- Simple Ingredients: Everything you need is readily available at most grocery stores.
- Great for Sharing: These truffles are bite-sized, easy to transport, and always a crowd-pleaser.
- Customizable: You can use dark chocolate, white chocolate, or even add toppings for a fun twist.
What makes these truffles stand out is their texture and flavor. The rich, velvety filling paired with the firm chocolate coating is pure perfection. Plus, they’re a fun and creative way to enjoy pumpkin cheesecake without committing to a full-sized dessert. You really can’t go wrong with these bite-sized treats!
What Ingredients You Will Need
This recipe uses simple, wholesome ingredients that you probably already have in your pantry or can easily find. Here’s the list:
- Cream cheese: Softened to room temperature (makes the filling smooth and creamy).
- Canned pumpkin: Pure pumpkin puree, not pumpkin pie filling!
- Powdered sugar: For sweetness and smooth texture.
- Graham cracker crumbs: Adds that classic cheesecake taste.
- Pumpkin pie spice: The heart of fall flavor—don’t skip this!
- Vanilla extract: Enhances all the flavors beautifully.
- Chocolate chips or melting wafers: For the coating (choose your favorite: dark, milk, or white chocolate).
- Coconut oil: Helps the chocolate shell set smoothly and adds shine.
If you’re missing an ingredient, don’t worry! You can swap graham cracker crumbs for crushed vanilla wafers or use almond extract instead of vanilla for a unique twist. These truffles are very forgiving and adaptable.
Equipment Needed
You don’t need fancy tools for this recipe, but a few key items will make the process smoother:
- Mixing bowls: For combining the filling ingredients.
- Hand mixer or stand mixer: Makes the filling light and fluffy.
- Cookie scoop: Ensures evenly-sized truffles (or use a spoon if you don’t have one).
- Baking sheet: For chilling the truffles.
- Microwave-safe bowl: For melting the chocolate.
- Fork or dipping tool: Helps coat the truffles in chocolate.
If you don’t have a cookie scoop, don’t stress—just use a spoon and roll the filling into balls with your hands. It might get a little messy, but that’s half the fun!
Preparation Method
- Make the filling: In a mixing bowl, beat 8 oz (225 g) of softened cream cheese until smooth. Add 1/2 cup (120 g) canned pumpkin, 1 cup (120 g) powdered sugar, 1/2 cup (50 g) graham cracker crumbs, 1 tsp pumpkin pie spice, and 1 tsp vanilla extract. Mix until fully combined and creamy.
- Chill the filling: Cover the bowl and refrigerate for 1-2 hours, or until the mixture is firm enough to roll into balls.
- Form the truffles: Using a cookie scoop or spoon, portion out the filling and roll it into bite-sized balls. Place them on a baking sheet lined with parchment paper.
- Freeze the truffles: Freeze the balls for 30 minutes to make them easier to dip in chocolate.
- Melt the chocolate: In a microwave-safe bowl, heat 2 cups (340 g) of chocolate chips or melting wafers with 2 tbsp (30 ml) coconut oil in 30-second intervals, stirring between each, until smooth.
- Coat the truffles: Using a fork or dipping tool, dip each truffle into the melted chocolate, allowing excess to drip off. Place them back on the parchment-lined baking sheet.
- Set the coating: Chill the coated truffles in the refrigerator for 15-20 minutes until the chocolate hardens.
Once the truffles are set, you can drizzle them with extra chocolate or sprinkle toppings like crushed graham crackers or sea salt for extra flair. Let your creativity shine!
Cooking Tips & Techniques
- Don’t rush the chilling steps: The filling needs to be firm enough to roll, and the chocolate coating sets better when the truffles are cold.
- Use quality chocolate: Melting wafers work great for a smooth coating, but high-quality chocolate chips will do the trick too.
- Keep your hands clean: Rolling the truffles can get messy, so keep a damp towel nearby to wipe your hands as needed.
- Work in small batches: Only take a few truffles out of the freezer at a time to keep them firm for dipping.
- Double-dip for thicker coating: If you love a thicker chocolate layer, dip each truffle twice, letting the first coating set before dipping again.
These tips will help you avoid common pitfalls and ensure your truffles turn out beautifully every time!
Variations & Adaptations
- Gluten-Free: Use gluten-free graham cracker crumbs instead of regular ones.
- Dairy-Free: Substitute cream cheese with a dairy-free alternative and use dairy-free chocolate chips.
- Flavor Twist: Add a splash of maple syrup or a pinch of nutmeg for a unique flavor profile.
- Seasonal Swaps: Try replacing pumpkin puree with mashed sweet potato for a fun variation.
- Toppings Galore: Roll the finished truffles in crushed nuts, shredded coconut, or sprinkles for extra texture and flavor.
Feel free to experiment and make these truffles your own. I once added a dash of espresso powder for a pumpkin spice latte vibe—it was incredible!
Serving & Storage Suggestions
These Pumpkin Cheesecake Truffles are best served chilled to keep the filling firm and the chocolate crisp. Arrange them on a pretty platter or in mini cupcake liners for a polished presentation. Pair them with a warm cup of coffee or tea for the ultimate fall treat.
For storage:
- Refrigerator: Store in an airtight container for up to 5 days.
- Freezer: Freeze for up to 2 months. Thaw in the refrigerator before serving.
If you’re making these ahead for a party or gift-giving, freezing is a great option to keep them fresh and ready to go.
Nutritional Information & Benefits
While these truffles are definitely a treat, they do have some redeeming qualities:
- Calories: Approximately 120 calories per truffle (depending on size).
- Rich in Vitamin A: Thanks to the pumpkin puree.
- Lower in Sugar: Compared to traditional desserts.
- Customizable: You can adjust sweetness or use dark chocolate for a slightly healthier option.
These truffles are great for satisfying your sweet tooth in a smaller portion, making them a mindful indulgence.
Conclusion
There’s something magical about these Pumpkin Cheesecake Truffles. They’re easy to make, packed with fall flavors, and perfect for sharing—or keeping all to yourself! Whether you’re celebrating the season or just in need of a pick-me-up, these truffles hit all the right notes.
I hope you enjoy making and eating these as much as I do. If you try them, let me know your favorite variation or how you customized them. Leave a comment below, share the recipe with friends, and spread the fall love!
Happy truffle-making!
FAQs
Can I use fresh pumpkin instead of canned?
Yes, but make sure to cook and puree it until smooth. Fresh pumpkin might have a slightly thinner consistency, so adjust the graham cracker crumbs if needed.
What’s the best chocolate for coating?
Melting wafers are ideal for a smooth finish, but quality chocolate chips work just as well. Dark chocolate adds a rich flavor, while white chocolate offers sweetness.
How do I prevent the filling from sticking to my hands?
Chill the filling thoroughly and lightly coat your hands with a bit of powdered sugar to make rolling easier.
Can I make these truffles ahead of time?
Absolutely! Refrigerate or freeze them, and they’ll be ready whenever you need them.
What should I do if my chocolate coating cracks?
This usually happens if the truffles are too cold. Let them sit at room temperature for a few minutes before dipping.
Pin This Recipe!
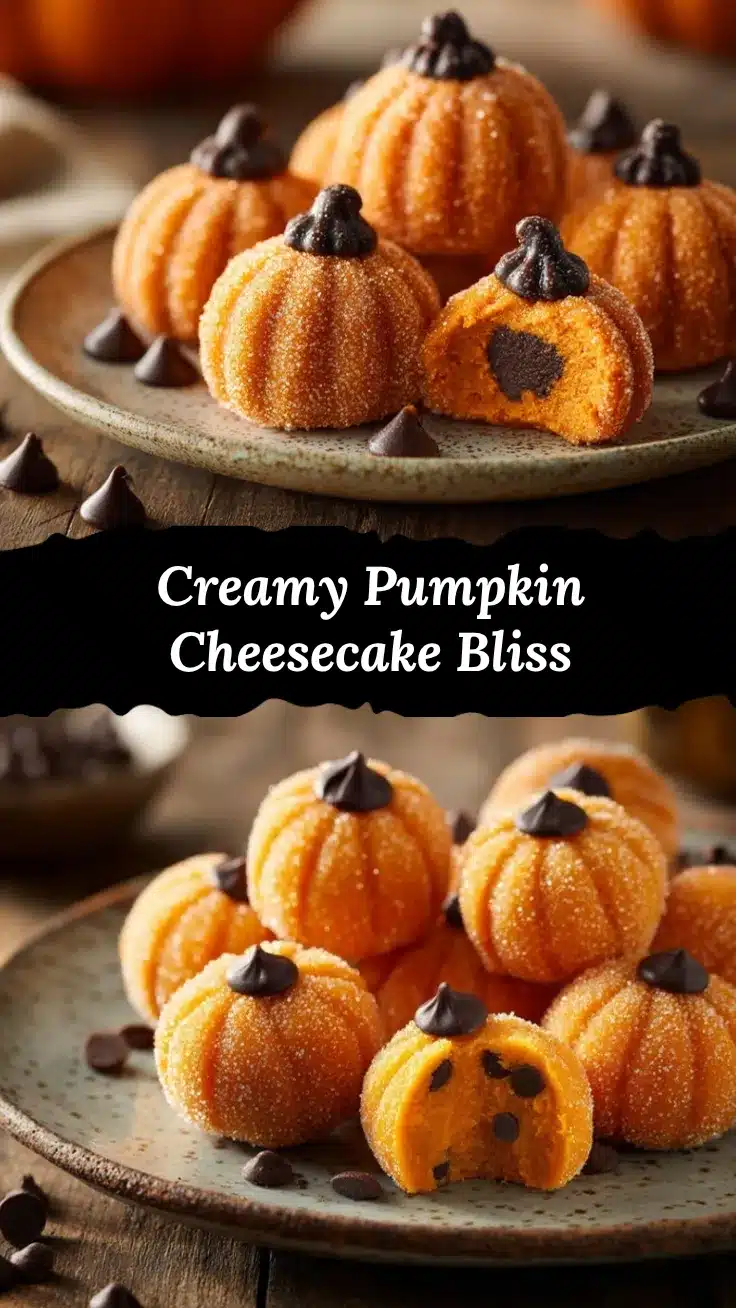
Pumpkin Cheesecake Truffles

Creamy pumpkin-spiced cheesecake filling encased in a smooth chocolate shell, perfect for fall parties or cozy treats.
- Prep Time: 15 minutes
- Cook Time: 0 minutes
- Total Time: 2 hours 5 minutes
- Yield: 24 truffles 1x
- Category: Dessert
- Cuisine: American
Ingredients
- 8 oz cream cheese, softened
- 1/2 cup canned pumpkin puree
- 1 cup powdered sugar
- 1/2 cup graham cracker crumbs
- 1 tsp pumpkin pie spice
- 1 tsp vanilla extract
- 2 cups chocolate chips or melting wafers
- 2 tbsp coconut oil
Instructions
- In a mixing bowl, beat 8 oz of softened cream cheese until smooth. Add 1/2 cup canned pumpkin, 1 cup powdered sugar, 1/2 cup graham cracker crumbs, 1 tsp pumpkin pie spice, and 1 tsp vanilla extract. Mix until fully combined and creamy.
- Cover the bowl and refrigerate for 1-2 hours, or until the mixture is firm enough to roll into balls.
- Using a cookie scoop or spoon, portion out the filling and roll it into bite-sized balls. Place them on a baking sheet lined with parchment paper.
- Freeze the balls for 30 minutes to make them easier to dip in chocolate.
- In a microwave-safe bowl, heat 2 cups of chocolate chips or melting wafers with 2 tbsp coconut oil in 30-second intervals, stirring between each, until smooth.
- Using a fork or dipping tool, dip each truffle into the melted chocolate, allowing excess to drip off. Place them back on the parchment-lined baking sheet.
- Chill the coated truffles in the refrigerator for 15-20 minutes until the chocolate hardens.
Notes
[‘Chill the filling thoroughly to make rolling easier.’, ‘Use high-quality chocolate for a smooth coating.’, ‘Double-dip the truffles for a thicker chocolate layer.’, ‘Experiment with toppings like crushed nuts or sprinkles for extra texture.’]
Nutrition
- Serving Size: 1 truffle
- Calories: 120
- Sugar: 10
- Sodium: 50
- Fat: 7
- Saturated Fat: 4
- Carbohydrates: 13
- Fiber: 1
- Protein: 2
Keywords: Pumpkin Cheesecake Truffles, Fall Dessert, No-Bake Treat, Pumpkin Spice, Chocolate Coated Truffles


