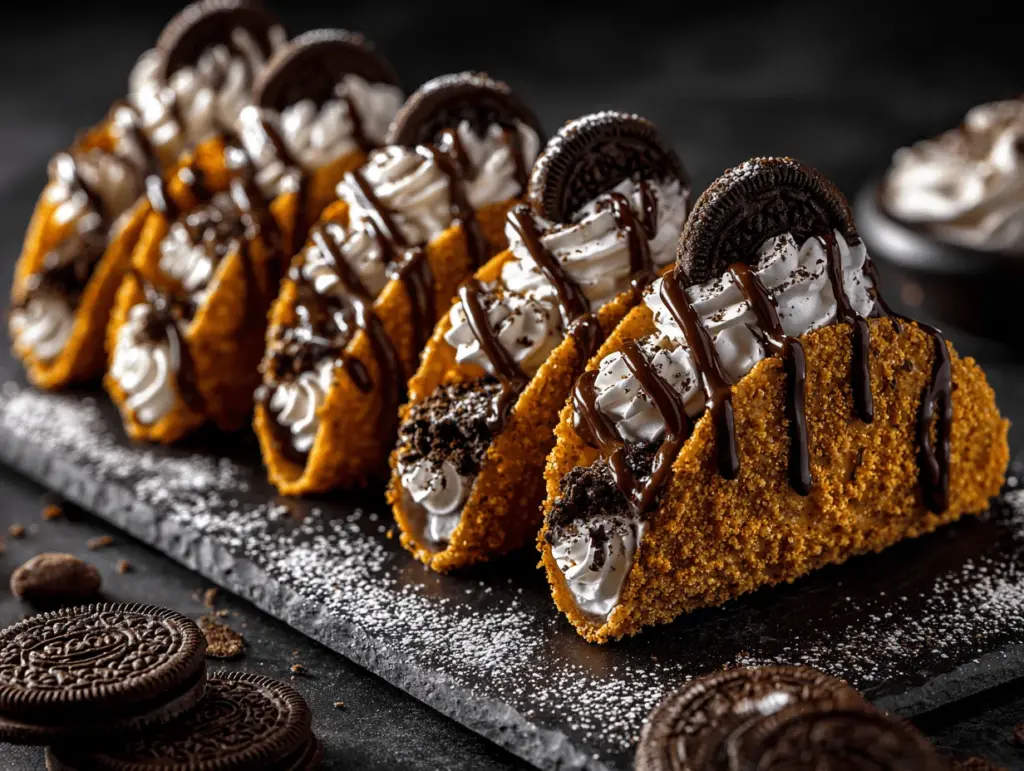
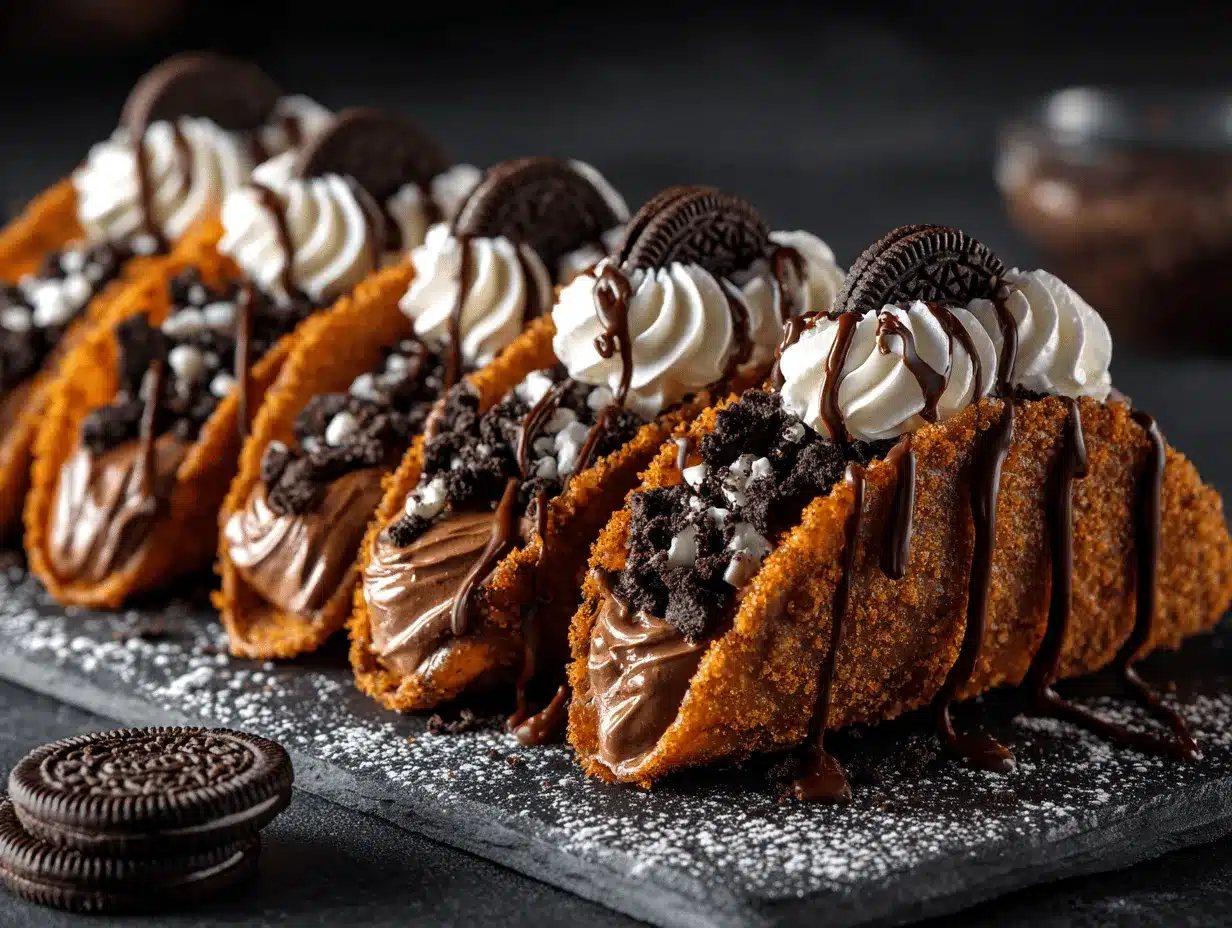
There’s something truly magical about the first bite of an Oreo Crunch Chocolate Cheesecake Taco—the snap of a chocolate shell, the creamy cheesecake filling, and that unmistakable Oreo crunch all at once. The first time I made these, my kitchen smelled like a chocolate lover’s daydream. You know those days when you want dessert, but you also want fun? This is the answer.
I stumbled onto this recipe when I had leftover tortillas and a half-empty package of Oreos begging to be finished. It’s a mashup of my favorite things: tacos (obviously), Oreo cookies, and no-bake cheesecake. These chocolate cheesecake tacos are the kind of treat that gets people talking at parties—they look wild, but they’re laughably easy to pull off. If you’re looking for a showstopper dessert with just the right hit of nostalgia, trust me, you’ve found it.
As a longtime home baker and self-confessed Oreo fanatic, I’ve tested this recipe at least a dozen times for birthdays, sleepovers, and those “just because” days. Honestly, these cheesecake tacos are what I’d call a sweet tooth’s secret weapon. They’re perfect for busy families (kids can help!), chocoholics, and anyone who likes their desserts a little outside the box. Whether you’re making these for a potluck or just to brighten up a Friday night, Oreo Crunch Chocolate Cheesecake Tacos always deliver—crunch, creaminess, and a little bit of joy in every bite.
Why You’ll Love This Recipe
Ever had a dessert that makes everyone pause and say, “Wait, what is THAT?” Oreo Crunch Chocolate Cheesecake Tacos are exactly that kind of treat. Here’s why this recipe stands out in a sea of desserts:
- Quick & Easy: You can whip these up in under 30 minutes. No oven time—no waiting forever for that cheesecake to set!
- Simple Ingredients: Most of what you need is probably already in your pantry or fridge. No fancy chocolate or rare cookies. Just the classics.
- Perfect for Parties: These are a hit at birthday parties, girls’ nights, family movie marathons, or any time you want to wow a crowd.
- Crowd-Pleaser: Kids go wild for the Oreo crunch, and adults can’t resist the creamy cheesecake filling. Trust me—no one eats just one.
- Unbelievably Delicious: That contrast between crisp taco shell, rich chocolate, and tangy cheesecake is just… next level. It’s like your favorite cookies and cream cheesecake went on vacation and came back as a taco.
What sets these apart from those viral dessert tacos you see all over social? The secret’s in the details: we dip the taco shells in chocolate and coat them in crushed Oreos—so every bite is chocolatey and crunchy. The cheesecake filling is super smooth (thanks to a little extra beating time and a splash of vanilla). And, if you want, you can load them up with extra toppings—think mini chocolate chips, whipped cream, or even a drizzle of caramel.
This isn’t just a fun dessert. It’s comfort food that happens to look gorgeous. They’re the kind of thing you bring to a potluck and leave with zero leftovers (true story). Plus, they’re low-stress and high-reward—a win for bakers and non-bakers alike.
What Ingredients You Will Need
This recipe keeps things simple but packs a huge flavor punch. The big win? You don’t need a laundry list of hard-to-find ingredients. Here’s what goes into each layer:
For the Chocolate Taco Shells:
- 6 small flour tortillas (6-inch/15cm rounds, soft taco size)
- 1 cup (170g) semisweet chocolate chips (or milk chocolate, if you like it sweeter)
- 2 teaspoons coconut oil (helps the chocolate melt smooth and shiny)
- 10 Oreo cookies, finely crushed (about 1 cup/100g, for coating shells)
For the Cheesecake Filling:
- 8 ounces (225g) cream cheese, softened (full-fat for best texture)
- 1/3 cup (65g) granulated sugar
- 1 teaspoon pure vanilla extract
- 1 cup (240ml) heavy whipping cream, cold
For the Oreo Crunch:
- 6 Oreo cookies, roughly chopped (for folding into filling and topping)
Optional Toppings:
- Mini chocolate chips
- Extra crushed Oreos
- Chocolate syrup or caramel drizzle
- Whipped cream
Ingredient Tips: I always reach for Philadelphia cream cheese for the smoothest filling, but store brands work in a pinch. For the tortillas, look for ones that are soft but not too thin—they hold their shape better. If you need a gluten-free option, grab GF tortillas and certified gluten-free chocolate chips. Want to skip the coconut oil? Vegetable oil does the trick, though the flavor is slightly different. And, for the Oreos, I’ve tried both classic and double-stuf—the classic gives a better crunch without making the filling too sweet.
Don’t be afraid to get creative! I’ve swapped in chocolate tortillas for an extra-decadent shell, and even used flavored Oreos (birthday cake, anyone?) for a fun twist. If you’re dairy-free, use vegan cream cheese and coconut-based whipped topping. There’s plenty of room to play here.
Equipment Needed
- Mixing bowls – At least two, one for the filling and one for melting chocolate.
- Hand mixer or stand mixer – For whipping up the creamy cheesecake filling. A sturdy whisk can work if you’re feeling strong.
- Baking sheet – For setting the taco shells after dipping them in chocolate.
- Microwave-safe bowl or double boiler – To melt the chocolate chips.
- Tongs or two forks – These make dipping and coating the tortillas way less messy.
- Rolling pin or large mug – To help shape and hold the taco shells as they set (I’ve even used a thick book spine in a pinch—just cover with foil!).
- Parchment paper or wax paper – For easy cleanup and to prevent sticking.
- Plastic bag or food processor – For crushing Oreo cookies. A rolling pin works just fine if you like a chunkier crunch.
If you don’t have a mixer, a sturdy balloon whisk and some elbow grease will get the job done. For melting chocolate, the microwave is fastest, but a simple saucepan with a heatproof bowl works too. I’ve tried shaping the shells over the handle of a wooden spoon—totally works if you’re short on space or equipment. And if you’re doing a big batch, line up mugs or glasses to support the shells while the chocolate sets. Cleanup tip: parchment paper is a lifesaver for catching stray chocolate drips!
How to Make Oreo Crunch Chocolate Cheesecake Tacos
-
Shape and Toast the Taco Shells (10 minutes):
- Preheat your oven to 350°F (175°C).
- Lightly brush both sides of the tortillas with a little melted butter or neutral oil (optional, but helps them crisp up).
- Fold each tortilla over two rungs of your oven rack (or drape over a thick rolling pin balanced between two mugs on a baking sheet). Bake for 6-8 minutes, checking at 5 minutes—they should be golden and crisp, not brittle.
- Let cool completely. They’ll firm up as they cool—if they’re still soft, give them another minute or two in the oven, but watch closely so they don’t burn!
-
Melt the Chocolate for Shells (5 minutes):
- In a microwave-safe bowl, combine chocolate chips and coconut oil. Microwave in 20-second bursts, stirring after each, until melted and smooth (about 1 minute total). Or use a double boiler on the stove.
- Set out your crushed Oreos on a plate or shallow bowl.
-
Dip and Coat the Taco Shells (5-10 minutes):
- Using tongs, dip the outer side of each taco shell in melted chocolate, letting excess drip off.
- Roll or sprinkle the chocolate-coated side in crushed Oreos until covered.
- Place shells (Oreo side up) on parchment paper to set. Pop them in the fridge if you want to speed this up—about 10 minutes.
-
Make the Cheesecake Filling (5 minutes):
- In a large bowl, beat softened cream cheese with sugar and vanilla until smooth—about 2 minutes on medium speed.
- In a separate bowl, whip cold heavy cream to stiff peaks (about 2-3 minutes). Fold whipped cream into the cream cheese mixture gently until fully combined and fluffy.
- Fold in half of the chopped Oreo cookies for extra crunch.
-
Fill and Finish the Tacos (5-10 minutes):
- Spoon or pipe the cheesecake filling into the cooled, chocolate-coated taco shells. I like to use a large zip-top bag with the corner snipped off for easy filling.
- Top with more chopped Oreos, mini chocolate chips, or any toppings you love. A little whipped cream is never a bad idea!
- Serve immediately for maximum crunch, or chill in the fridge for 10-15 minutes if you like a cooler, firmer filling.
Troubleshooting: If your shells break, don’t sweat it—just patch with a bit more melted chocolate (it’ll glue them together!). If your filling is too runny, try whipping the cream a bit longer before folding it in. And if the chocolate doesn’t set, pop the shells in the fridge for a few extra minutes.
Personal tip: I always make a little extra filling for “taste-testing” (it mysteriously disappears before taco assembly every single time).
Cooking Tips & Techniques
- Don’t Overbake the Shells: The taco shells should be golden and crisp but not dark brown. Overbaking makes them brittle and hard to fill. Watch them closely during the last minute or two.
- Melt Chocolate Gently: Chocolate can seize if overheated. I always melt in short bursts and stir often—if it gets thick, add a splash more coconut oil.
- Whip Cream Cold: For the fluffiest filling, use cold heavy cream straight from the fridge. If your kitchen is warm, chill your bowl and beaters too.
- Folding is Key: When combining the whipped cream and cream cheese, fold gently. Overmixing deflates the filling and makes it dense.
- Keep the Crunch: Assemble just before serving for maximum crunch. If you need to make ahead, store the shells and filling separately, then fill at the last minute.
- Multitasking Saves Time: While the shells bake and cool, make the filling. This way, everything comes together quickly and smoothly.
- Get Creative with Toppings: Sometimes I set up a little “taco bar” and let everyone choose their own toppings—kids especially love this.
- Learned the Hard Way: The very first time I made these, I overfilled the shells and they cracked right down the middle. Less is more—start with a little filling, then add more if you’ve got room.
Consistency tip: Always use softened cream cheese for the smoothest filling. If you forget to soften it, microwave it (unwrapped) for 10-15 seconds in a pinch—it works like a charm. The more you make these, the easier they get. Trust your instincts—the best desserts leave a little room for happy accidents!
Variations & Adaptations
Oreo Crunch Chocolate Cheesecake Tacos are endlessly customizable. Here are some of my favorite twists:
- Gluten-Free Option: Use gluten-free tortillas and certified GF chocolate chips. Swap Oreos for a gluten-free sandwich cookie (Kinnikinnick or Glutino are great!).
- Fruity Crunch: Add a handful of chopped strawberries or raspberries to the cheesecake filling. It’s like chocolate-covered fruit meets cheesecake taco—so good in summer.
- Peanut Butter Lovers: Mix 2 tablespoons of creamy peanut butter into the cheesecake filling, and sprinkle chopped peanut butter cups on top. It’s a little over-the-top, but no one complains.
- Vegan/Dairy-Free: Swap the cream cheese and whipped cream for coconut-based or nut-milk versions. Use dairy-free chocolate and vegan sandwich cookies.
- S’mores Style: Add mini marshmallows and a drizzle of melted chocolate inside the shell, then toast with a kitchen torch if you have one. Campfire vibes, no tent required.
- Personal Favorite: I sometimes add a pinch of instant espresso powder to the chocolate coating—it deepens the chocolate flavor and gives a subtle mocha note. Try it if you’re a coffee fan!
Whether you’re swapping in different cookies or mixing up the filling, these cheesecake tacos are a blank canvas for dessert creativity. Adjust the recipe for allergies by using safe brands and skipping the toppings that don’t work for you. If you’re feeling adventurous, try using flavored Oreos for a unique spin (birthday cake and mint are surprisingly delicious!).
Serving & Storage Suggestions
I love serving Oreo Crunch Chocolate Cheesecake Tacos chilled, straight from the fridge—the filling is cool and creamy, and the shells keep their crunch. Arrange them on a platter lined with parchment, and sprinkle with extra crushed Oreos for a picture-perfect finish. These look gorgeous on a cake stand or wooden board, especially if you let guests grab their own.
Pair with cold milk, hot coffee, or even a scoop of vanilla ice cream on the side (if you’re really going for it). They’re a fun addition to a dessert buffet or as a sweet surprise for Taco Tuesday.
Storage: Store assembled tacos in an airtight container in the fridge for up to 2 days. The shells will soften slightly over time, but honestly, they’re still delicious. For best crunch, keep the chocolate-coated shells and cheesecake filling separate, and assemble just before serving. You can freeze the chocolate taco shells (unfilled) for up to a month—just thaw and fill when ready.
To re-crisp shells, pop them in a low oven (250°F/120°C) for 3-4 minutes, then cool before filling. The flavors get even better after a short chill, so don’t be afraid to make the filling a few hours ahead!
Nutritional Information & Benefits
Here’s an approximate breakdown per taco (assuming 6 tacos, with filling and chocolate coating):
- Calories: 360
- Fat: 23g
- Carbs: 35g
- Sugar: 20g
- Protein: 5g
These are definitely a treat, but there are some bright spots! Cream cheese offers a bit of protein and calcium, and you can lighten things up by using reduced-fat cream cheese or swapping in Greek yogurt for some of the filling. For gluten-free diets, just choose GF tortillas and cookies. The recipe contains dairy, wheat, and soy (from the chocolate and Oreos), so take care if you have allergies in the house.
From a wellness angle, I believe in dessert as part of a balanced life—these tacos are pure joy food. Sometimes, happiness is the best ingredient!
Conclusion
Oreo Crunch Chocolate Cheesecake Tacos are the kind of dessert that brings out everyone’s inner kid. They’re easy, eye-catching, and ridiculously tasty—perfect for celebrations or just because you’re craving something fun. I love how customizable they are, and every time I make them, someone asks for the recipe.
Feel free to riff on the filling, coating, and toppings—make it your own, and don’t stress if they aren’t picture-perfect (mine rarely are, and they always disappear fast!). If you give these a try, let me know in the comments or tag me on social media—I love seeing your creations and hearing about your “taco night” dessert wins.
So go ahead—grab the Oreos and whip up a batch. These cheesecake tacos are the sweet treat you didn’t know you needed!
FAQs About Oreo Crunch Chocolate Cheesecake Tacos
Can I make these cheesecake tacos ahead of time?
Yes! You can make the chocolate-coated shells and cheesecake filling a day in advance. Store them separately and assemble just before serving to keep the shells crisp.
What’s the best way to crush Oreos for this recipe?
I like to put them in a zip-top bag and crush with a rolling pin for some big and small bits. For a finer crumb, use a food processor and pulse a few times.
Can I use a different kind of cookie instead of Oreos?
Absolutely. Try chocolate graham crackers, Biscoff cookies, or even vanilla wafers for a different flavor twist. Just swap them in for the Oreo crunch coating and topping.
How do I keep the taco shells from getting soggy?
Dip the shells in chocolate and let them set completely before filling. The chocolate acts as a moisture barrier, helping to keep everything crisp. Store unfilled shells at room temperature in an airtight container if making ahead.
Is there a way to make this recipe nut-free?
Yes! The classic recipe is already nut-free (just double-check your chocolate and tortillas). Skip any nut-based toppings or mix-ins, and you’re good to go.
Pin This Recipe!

Oreo Crunch Chocolate Cheesecake Tacos

Oreo Crunch Chocolate Cheesecake Tacos are a fun, no-bake dessert featuring crisp chocolate-dipped taco shells coated in crushed Oreos and filled with creamy cheesecake. This easy, crowd-pleasing treat is perfect for parties, potlucks, or whenever you want a playful twist on classic cheesecake.
- Prep Time: 15 minutes
- Cook Time: 10 minutes
- Total Time: 25 minutes
- Yield: 6 tacos 1x
- Category: Dessert
- Cuisine: American
Ingredients
- 6 small flour tortillas (6-inch rounds, soft taco size)
- 1 cup semisweet chocolate chips (or milk chocolate)
- 2 teaspoons coconut oil
- 10 Oreo cookies, finely crushed (about 1 cup, for coating shells)
- 8 ounces cream cheese, softened
- 1/3 cup granulated sugar
- 1 teaspoon pure vanilla extract
- 1 cup heavy whipping cream, cold
- 6 Oreo cookies, roughly chopped (for folding into filling and topping)
- Mini chocolate chips (optional topping)
- Extra crushed Oreos (optional topping)
- Chocolate syrup or caramel drizzle (optional topping)
- Whipped cream (optional topping)
Instructions
- Preheat oven to 350°F (175°C). Lightly brush both sides of tortillas with melted butter or neutral oil (optional). Fold each tortilla over two rungs of your oven rack or drape over a thick rolling pin balanced between two mugs on a baking sheet. Bake for 6-8 minutes, checking at 5 minutes, until golden and crisp. Let cool completely.
- In a microwave-safe bowl, combine chocolate chips and coconut oil. Microwave in 20-second bursts, stirring after each, until melted and smooth (about 1 minute total). Or use a double boiler on the stove. Set out crushed Oreos on a plate or shallow bowl.
- Using tongs, dip the outer side of each taco shell in melted chocolate, letting excess drip off. Roll or sprinkle the chocolate-coated side in crushed Oreos until covered. Place shells (Oreo side up) on parchment paper to set. Refrigerate for about 10 minutes to speed up setting.
- In a large bowl, beat softened cream cheese with sugar and vanilla until smooth (about 2 minutes on medium speed). In a separate bowl, whip cold heavy cream to stiff peaks (about 2-3 minutes). Fold whipped cream into the cream cheese mixture gently until fully combined and fluffy. Fold in half of the chopped Oreo cookies.
- Spoon or pipe the cheesecake filling into the cooled, chocolate-coated taco shells. Top with more chopped Oreos, mini chocolate chips, or any toppings you love. Serve immediately for maximum crunch, or chill in the fridge for 10-15 minutes for a firmer filling.
Notes
For best results, assemble tacos just before serving to keep the shells crisp. Store shells and filling separately if making ahead. Use gluten-free tortillas and cookies for a GF version. If shells break, patch with melted chocolate. Get creative with toppings and fillings—try flavored Oreos, fruit, or peanut butter. Always use softened cream cheese for a smooth filling.
Nutrition
- Serving Size: 1 taco
- Calories: 360
- Sugar: 20
- Sodium: 260
- Fat: 23
- Saturated Fat: 13
- Carbohydrates: 35
- Fiber: 2
- Protein: 5
Keywords: Oreo, cheesecake, tacos, dessert, no-bake, party, chocolate, easy, kid-friendly, potluck


