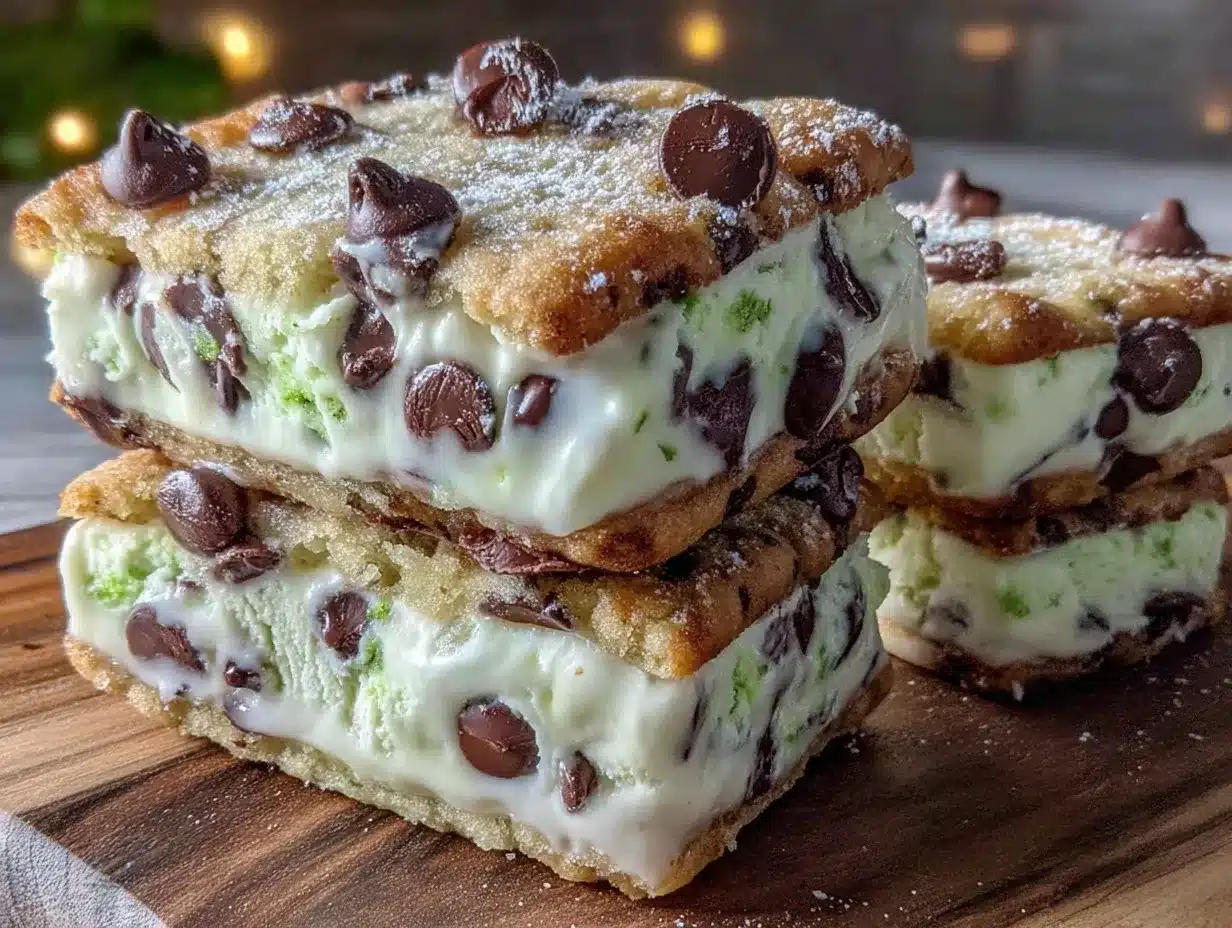
The cool, refreshing burst of mint paired with creamy chocolate chips sandwiched between soft cookies? Honestly, that’s summer happiness in every bite. I first made these mint chocolate chip ice cream sandwiches on a sweltering July afternoon when the heatwave was relentless, and my freezer was practically begging for some action. It quickly became a family favorite, not just for the kids but for anyone who loves a sweet, chilled treat that’s a little bit fancy but totally doable at home.
What I adore about this mint chocolate chip ice cream sandwiches recipe is how it balances the nostalgic charm of classic ice cream sandwiches with a fresh, minty twist. Plus, making them yourself means you can control the ingredients, tweak the sweetness, and get that perfect texture every single time. Whether you’re hosting a backyard BBQ, looking for a cool dessert after a long day, or just craving something indulgent yet refreshing, this recipe fits the bill.
After testing it multiple times (and yes, sneaking a few samples along the way), I’m confident this homemade version beats store-bought hands down. The cookie is soft but sturdy, the ice cream is creamy with just the right minty kick, and the chocolate chips add that delightful crunch. If you love mint chocolate chip ice cream or just want an easy summer treat that feels special, you’re going to want to bookmark this one.
Why You’ll Love This Recipe
- Quick & Easy: Comes together in under an hour, including chilling time — perfect for busy summer days when you want something cool, fast.
- Simple Ingredients: No unusual stuff here; just pantry staples and your favorite mint chocolate chip ice cream. I usually go for a brand with real mint extract for that authentic flavor.
- Perfect for Summer Occasions: Whether it’s a casual picnic, a kid’s birthday party, or a spontaneous weekend treat, these sandwiches impress without stress.
- Crowd-Pleaser: I’ve made these for friends and family gatherings, and honestly, they vanish within minutes. Kids love them, and adults keep coming back for more.
- Unbelievably Delicious: The combo of cool mint ice cream, melty chocolate chips, and chewy cookies is just pure joy. The cookie edges get a little crisp while the centers stay soft — perfection every time.
What sets this recipe apart? I like to blend a bit of fresh mint into the cookie dough for an extra hint of freshness, and chilling the dough before baking helps keep the cookies thick enough to hold the ice cream without melting too fast. Plus, using good-quality chocolate chips makes a noticeable difference. This isn’t just another mint chocolate chip ice cream sandwich — it’s the one you’ll come back to again and again.
So, if you’re after a summer dessert that’s both nostalgic and a little bit special, this recipe hits all the right notes. It’s comfort food, refreshingly cool, and downright delicious.
What Ingredients You Will Need
This recipe uses simple, wholesome ingredients to deliver bold flavor and satisfying texture without the fuss. Most of these are pantry staples, and you can easily find everything at your local grocery store.
- All-purpose flour (2 ½ cups / 315 grams) – forms the sturdy yet soft base for the cookies.
- Baking soda (1 teaspoon) – helps the cookies rise just right.
- Salt (½ teaspoon) – balances the sweetness.
- Unsalted butter, softened (1 cup / 227 grams) – adds richness and tenderness.
- Sugar (¾ cup / 150 grams) – for sweetness. You can swap half for brown sugar if you want a deeper flavor.
- Egg, large (1) – for binding and moisture.
- Vanilla extract (1 teaspoon) – brings warmth and rounds flavors.
- Mint extract (½ teaspoon) – the key for that refreshing minty punch. I recommend using pure mint extract for best results.
- Mini chocolate chips (1 cup / 175 grams) – the crunchy pockets of chocolate delight. I prefer semi-sweet for balance.
- Mint chocolate chip ice cream
Ingredient tips: For the cookies, if you’re gluten-sensitive, you can try a 1:1 gluten-free flour blend. For a dairy-free ice cream sandwich, pick a plant-based mint chocolate chip ice cream and swap butter for coconut oil in the cookies.
Pro tip: Using mini chocolate chips helps distribute the chocolate flavor evenly and keeps the texture more delicate inside the cookie.
Equipment Needed
- Mixing bowls: At least one large bowl for the cookie dough and one small bowl for wet ingredients.
- Electric mixer or hand whisk: Makes creaming butter and sugar easier and faster. I’ve used both, but an electric mixer saves some elbow grease.
- Measuring cups and spoons: For precise ingredient amounts. I always double-check these to keep the cookies consistent.
- Baking sheets: At least two, lined with parchment paper to prevent sticking—trust me, parchment is your best friend here.
- Cooling racks: To let cookies cool evenly without getting soggy bottoms.
- Ice cream scoop: For even, neat scoops of ice cream — makes assembly easier and sandwiches look pretty.
- Plastic wrap or wax paper: For wrapping sandwiches before freezing.
If you don’t have an electric mixer, no worries! Using a sturdy whisk and some elbow grease works just fine. For baking sheets, aluminum or non-stick pans both work, but I find the cookies brown more evenly on lighter-colored pans. And if you don’t have a cooling rack, just use a clean kitchen towel — it’s a handy hack I learned early on.
Detailed Preparation Method
- Preheat your oven to 350°F (175°C). Line two baking sheets with parchment paper. This helps the cookies bake evenly and makes cleanup easier. (Prep time: 10 minutes)
- Mix dry ingredients: In a medium bowl, whisk together 2 ½ cups (315 g) all-purpose flour, 1 teaspoon baking soda, and ½ teaspoon salt. Set aside. This ensures the rising agent is evenly distributed.
- Cream butter and sugar: In a large bowl, beat 1 cup (227 g) softened unsalted butter with ¾ cup (150 g) sugar until fluffy and pale, about 3-4 minutes. A good creaming technique traps air for lighter cookies.
- Add egg and extracts: Beat in 1 large egg, 1 teaspoon vanilla extract, and ½ teaspoon mint extract until combined. The mint extract is subtle but essential — don’t skip it!
- Combine wet and dry: Gradually add the dry ingredients to the wet, mixing on low speed just until incorporated. Overmixing can make cookies tough.
- Fold in mini chocolate chips: Gently stir in 1 cup (175 g) mini chocolate chips. This part is always fun because you see the chocolate pop through the dough.
- Chill the dough: Cover the bowl with plastic wrap and refrigerate for at least 30 minutes. This step helps the cookies hold their shape and develop flavor.
- Scoop and shape cookies: Using a tablespoon or cookie scoop, drop rounded balls of dough onto the prepared baking sheets, spaced about 2 inches apart. Flatten each ball slightly with your fingers or the back of a spoon — aim for about 2 ½ inches in diameter.
- Bake: Bake for 10-12 minutes until the edges are lightly golden but centers still look soft. It’s tempting to bake longer, but pulling them out at the right time keeps them chewy.
- Cool cookies: Let cookies cool on the sheets for 5 minutes, then transfer to cooling racks to cool completely. Patience here pays off — warm cookies won’t hold the ice cream well.
- Assemble sandwiches: Soften mint chocolate chip ice cream slightly (about 5 minutes at room temp). Scoop a generous tablespoon (about 30 g) onto the bottom of one cookie, then gently press another cookie on top to form a sandwich. Repeat for all cookies.
- Freeze sandwiches: Wrap each sandwich tightly in plastic wrap or wax paper. Freeze for at least 2 hours before serving to let the ice cream firm back up.
Tip: If your ice cream gets too soft while assembling, pop it back in the freezer for a few minutes to firm up — this helps keep the sandwiches neat and less messy.
Cooking Tips & Techniques
- Don’t skip chilling the dough: I’ve learned the hard way that skipping this makes cookies spread too thin and bake unevenly. Chilling firms up the fat, so cookies hold their shape better.
- Use room temperature butter: Softened butter blends more easily with sugar, giving you that perfect cookie texture — not greasy, not dry.
- Handle the ice cream carefully: Too hard and it’s tough to scoop; too soft and sandwiches get sloppy. Let it sit about 5 minutes at room temp before scooping.
- Timing is key: Bake one sheet at a time if your oven heats unevenly. This way, you avoid over- or underbaked cookies.
- Storage tip: Wrap sandwiches tightly before freezing to prevent freezer burn and ice crystals — trust me, it makes a difference in texture.
- Personal fail: Once, I used large chocolate chunks instead of chips, and the cookies spread too thin. Sticking with mini chips gives you that perfect melt-in-your-mouth bite.
Variations & Adaptations
- Dairy-free option: Swap butter for coconut oil in the cookies and use a plant-based mint chocolate chip ice cream. It’s surprisingly tasty and just as satisfying.
- Seasonal twist: In spring, add finely chopped fresh mint leaves to the cookie dough for an extra herbal note. Just reduce mint extract slightly to balance.
- Flavor swap: Try chocolate chip cookie dough with coffee ice cream for a mocha-inspired sandwich. I did this once for a friend who loves coffee — total hit!
- Gluten-free alternative: Use a 1:1 gluten-free flour blend and check your baking soda for gluten-free certification. The texture is a touch different but still delicious.
- Size customization: Make mini sandwiches for parties or full-sized ones for a hearty dessert. Mini ones freeze faster and are perfect for kids.
Serving & Storage Suggestions
Serve these mint chocolate chip ice cream sandwiches straight from the freezer for that satisfying chill and firmness. They’re perfect on a hot day when you want something refreshing but indulgent. For presentation, pop them on a plate lined with parchment paper and sprinkle a few extra chocolate chips or fresh mint leaves around — it’s a simple touch that makes them look extra inviting.
Pair the sandwiches with a cold glass of iced coffee or a refreshing mint lemonade for a complete summer vibe. They also work wonderfully as a fun dessert after a light meal or a picnic treat.
Store the sandwiches wrapped tightly in the freezer for up to two weeks. They keep their texture well, but I recommend eating them within that time for the best flavor. To reheat slightly, let them sit at room temperature for 5 minutes before eating — this softens the cookie just enough without melting the ice cream.
Over time, the flavors meld beautifully, especially if you leave them wrapped overnight in the freezer. The mint gets a little more pronounced, and the chocolate chips soften just the right amount. Honestly, it’s a little magic that makes these sandwiches even better the next day.
Nutritional Information & Benefits
Each mint chocolate chip ice cream sandwich roughly contains 250-300 calories, depending on ice cream brand and cookie size. They offer a nice balance of carbohydrates, fats, and a bit of protein from the eggs and milk in the ice cream.
Mint extract is known for its digestive benefits and adds flavor without calories. Using mini chocolate chips adds antioxidants from cocoa, while homemade cookies let you control sugar levels better than many store-bought options.
For dietary considerations, this recipe can be adapted for gluten-free and dairy-free needs, making it accessible to many. Just be mindful of potential allergens like eggs, dairy, and gluten, and adjust accordingly.
From my wellness viewpoint, this treat fits perfectly as a mindful indulgence — homemade, fresh, and made with care. It’s a sweet moment of joy that doesn’t feel like over-the-top junk food.
Conclusion
If you’re craving a summer treat that hits all the right notes — creamy, cool, minty, chocolaty, and just the right amount of chewy — these mint chocolate chip ice cream sandwiches are worth every bite. They’re easy to make, fun to share, and perfect for any occasion where you want a little something special without the fuss.
Feel free to experiment with flavors, sizes, and dietary tweaks to make this recipe your own. I’m confident you’ll enjoy making them as much as eating them — and your family or guests will definitely be asking for seconds.
Give this recipe a try, and don’t forget to let me know how your sandwiches turn out! Share your favorite variations or tricks in the comments below — I love hearing how you put your own spin on it.
Here’s to cool summers and sweet moments — happy baking and snacking!
FAQs
Can I use regular chocolate chips instead of mini chocolate chips?
Yes, but mini chips distribute chocolate more evenly and keep the cookie texture tender. Larger chips might cause the cookies to spread more, so watch your baking time closely.
How long can I store these ice cream sandwiches in the freezer?
Wrapped tightly, they last up to two weeks without losing quality. For best taste and texture, enjoy within this period.
Can I make these sandwiches ahead of time for a party?
Absolutely! Assemble them a day or two in advance, freeze well wrapped, and they’ll be ready to serve whenever you need.
What’s the best way to soften ice cream for assembling?
Take the ice cream out of the freezer about 5 minutes before scooping. It should be soft enough to scoop but not melting or runny.
Is there a way to make these sandwiches gluten-free?
Yes! Substitute the all-purpose flour with a 1:1 gluten-free baking flour blend and ensure your baking soda is gluten-free. The texture might be slightly different but still delicious.
Pin This Recipe!
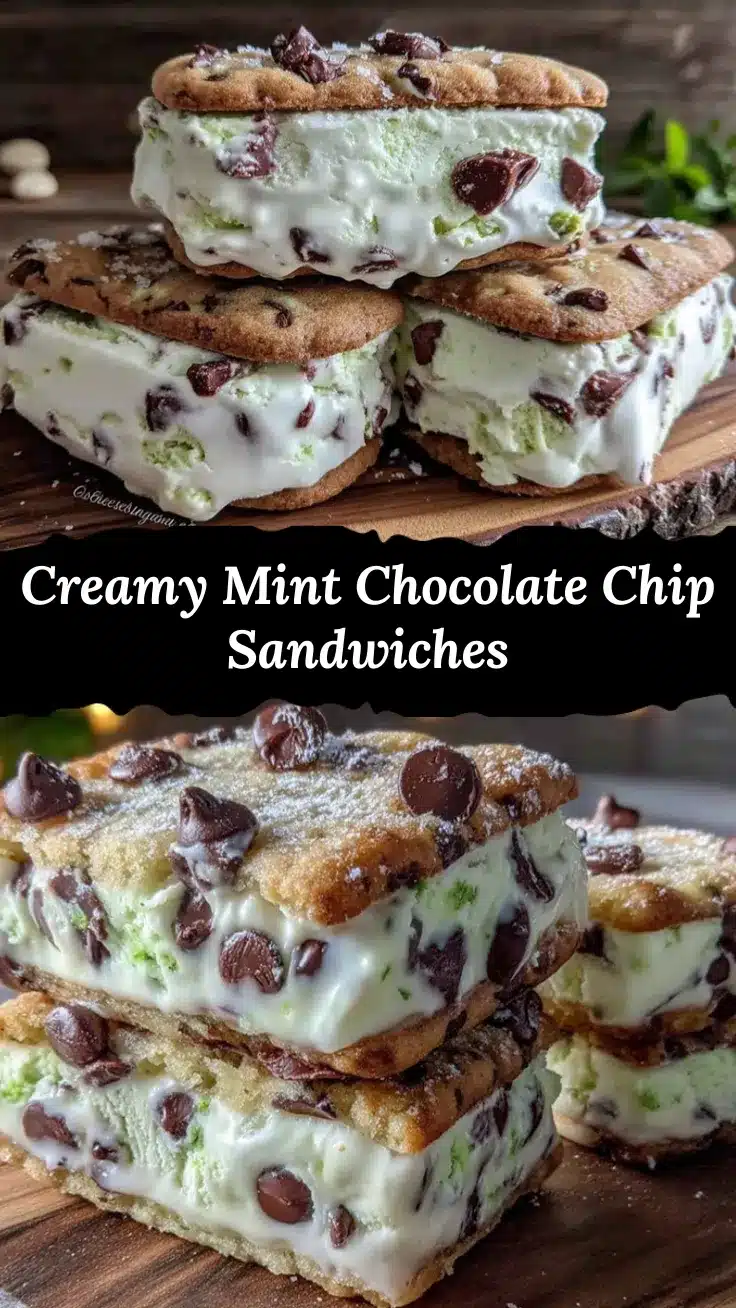
Mint Chocolate Chip Ice Cream Sandwiches

Cool, refreshing mint chocolate chip ice cream sandwiched between soft, chewy cookies. A perfect homemade summer treat that’s easy to make and loved by all ages.
- Prep Time: 15 minutes
- Cook Time: 12 minutes
- Total Time: 2 hours 27 minutes
- Yield: 12 sandwiches 1x
- Category: Dessert
- Cuisine: American
Ingredients
- 2 ½ cups (315 grams) all-purpose flour
- 1 teaspoon baking soda
- ½ teaspoon salt
- 1 cup (227 grams) unsalted butter, softened
- ¾ cup (150 grams) sugar (can substitute half with brown sugar)
- 1 large egg
- 1 teaspoon vanilla extract
- ½ teaspoon mint extract
- 1 cup (175 grams) mini chocolate chips
- About 1 quart (950 ml) mint chocolate chip ice cream, softened slightly
Instructions
- Preheat your oven to 350°F (175°C). Line two baking sheets with parchment paper.
- In a medium bowl, whisk together the flour, baking soda, and salt. Set aside.
- In a large bowl, beat the softened butter and sugar until fluffy and pale, about 3-4 minutes.
- Beat in the egg, vanilla extract, and mint extract until combined.
- Gradually add the dry ingredients to the wet ingredients, mixing on low speed just until incorporated.
- Fold in the mini chocolate chips gently.
- Cover the dough with plastic wrap and refrigerate for at least 30 minutes.
- Using a tablespoon or cookie scoop, drop rounded balls of dough onto the prepared baking sheets about 2 inches apart. Flatten each ball slightly to about 2 ½ inches in diameter.
- Bake for 10-12 minutes until edges are lightly golden but centers remain soft.
- Let cookies cool on the baking sheets for 5 minutes, then transfer to cooling racks to cool completely.
- Soften the mint chocolate chip ice cream for about 5 minutes at room temperature.
- Scoop about 1 tablespoon (30 grams) of ice cream onto the bottom of one cookie and gently press another cookie on top to form a sandwich. Repeat for all cookies.
- Wrap each sandwich tightly in plastic wrap or wax paper and freeze for at least 2 hours before serving.
Notes
Chilling the dough is essential to keep cookies thick and prevent spreading. Use mini chocolate chips for even chocolate distribution and better texture. Soften ice cream about 5 minutes before assembling to avoid mess. Wrap sandwiches tightly before freezing to prevent freezer burn. Can be adapted for gluten-free and dairy-free diets by substituting ingredients accordingly.
Nutrition
- Serving Size: 1 ice cream sandwich
- Calories: 275
- Sugar: 18
- Sodium: 150
- Fat: 14
- Saturated Fat: 8
- Carbohydrates: 33
- Fiber: 1
- Protein: 3
Keywords: mint chocolate chip, ice cream sandwiches, summer dessert, homemade ice cream sandwich, easy dessert, chocolate chip cookies, refreshing treat