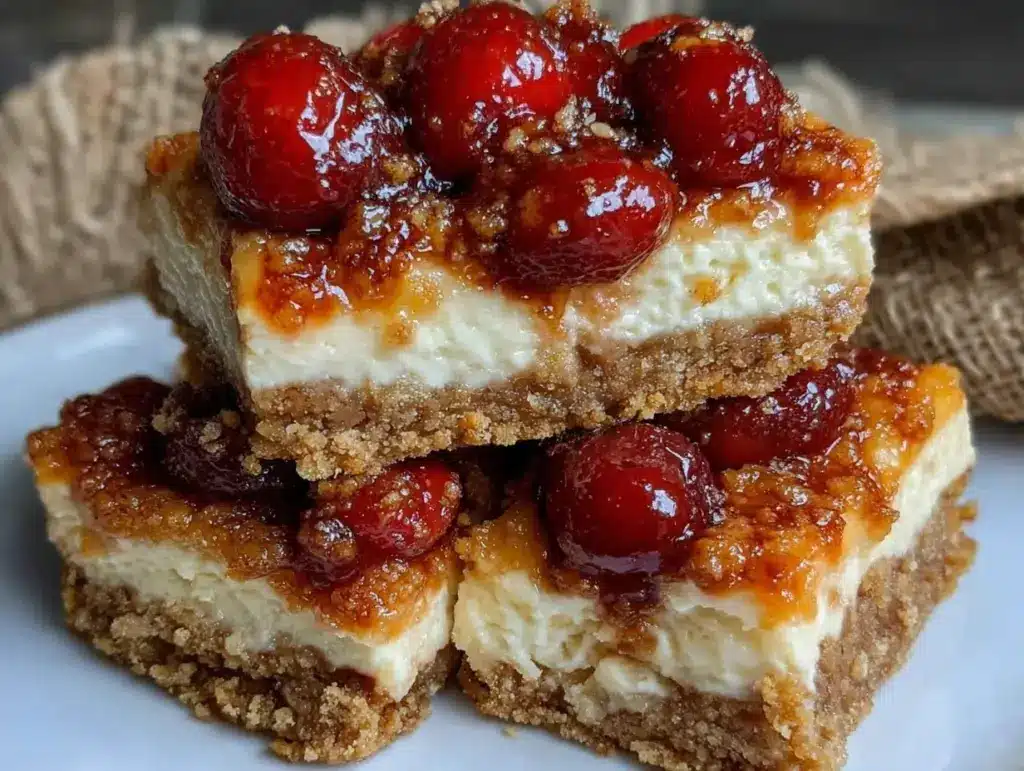
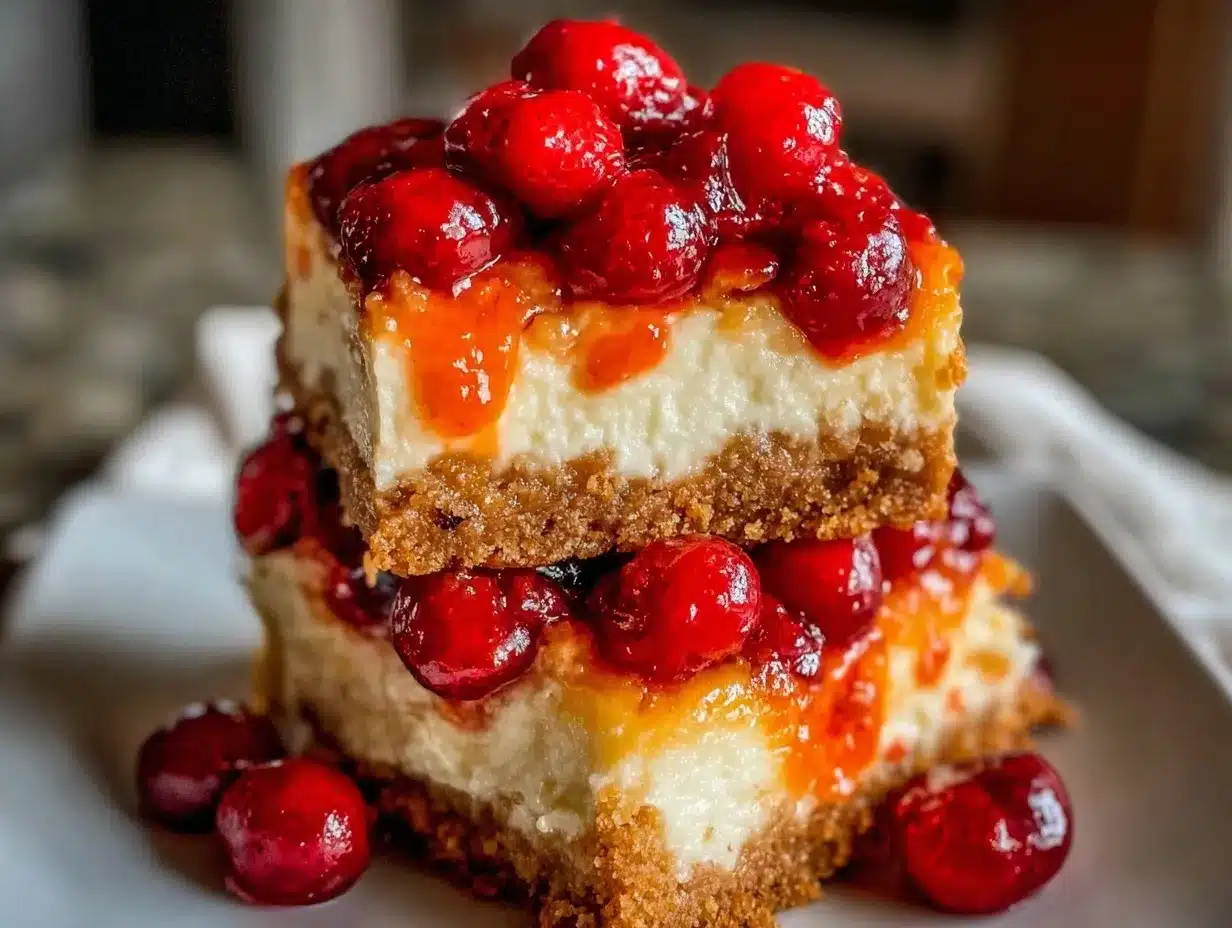
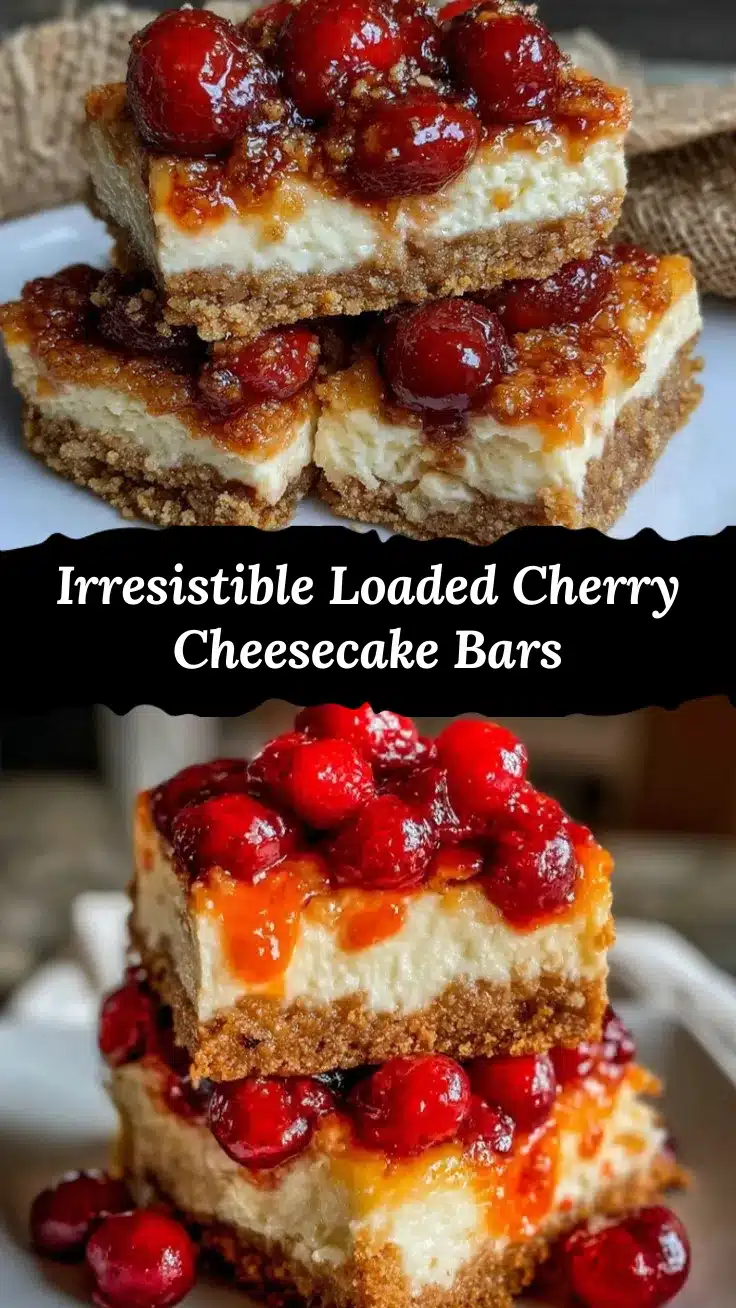
The smell of warm, buttery crust combined with sweet-tart cherries and creamy cheesecake filling is honestly one of life’s small pleasures. I still remember the first time I baked these Loaded Cherry Cheesecake Bars—it was a chilly weekend, and the house filled with that irresistible aroma that made everyone gather in the kitchen. You know that feeling when a dessert tastes like a special treat but comes together without too much fuss? That’s exactly what these bars deliver.
As someone who’s baked countless cheesecake variations over the years, I can say these bars hit a perfect balance between decadence and ease. The cherry topping bursts with flavor, while the cheesecake layer stays silky smooth. Plus, it’s all wrapped up in a crisp, golden crust that holds everything together beautifully. If you’re a fan of rich desserts but want something that’s easy to slice and share, these cherry cheesecake bars will quickly become your go-to.
Whether you’re making them for a family gathering, a holiday treat, or just because a sweet craving sneaked up on you, these bars are sure to impress. I’ve tested this recipe more times than I can count, tweaking it here and there to get it just right. It’s perfect for dessert lovers who want that homemade decadent feel without spending hours in the kitchen.
Why You’ll Love This Recipe
- Quick & Easy: Ready in under 1 hour, ideal for busy days when you want a homemade dessert fast.
- Simple Ingredients: No complicated or hard-to-find items—chances are you already have most of what you need in your pantry.
- Perfect for Any Occasion: Whether it’s a casual weekend treat, potluck, or festive celebration, these bars fit right in.
- Crowd-Pleaser: Kids and adults alike rave about the luscious cherry topping paired with creamy cheesecake.
- Unbelievably Delicious: The texture combo of crunchy crust, smooth cheesecake, and juicy cherries hits all the right notes.
This recipe stands out because I blend the cherry topping right onto the cheesecake layer before baking, so the flavors meld perfectly without watering down the texture. Plus, the crust is just the right thickness—not too thin that it falls apart, but not overly dense either. Honestly, it’s the kind of dessert that makes you close your eyes after the first bite and sigh happily. It’s comfort food at its finest, but with a fresh, fruity twist that keeps it from feeling too heavy.
What I love most is how effortlessly these bars turn a simple dessert into something that feels special. You don’t have to be a baking pro to nail it, and it’s great for anyone wanting a sweet indulgence that’s just as good the next day (if it lasts that long!).
What Ingredients You Will Need
This recipe uses straightforward, wholesome ingredients to create bold flavors and a satisfying texture without any fuss. Most are pantry staples, and many have easy substitutions if needed.
- For the Crust:
- 1 ½ cups (150g) graham cracker crumbs (or digestive biscuits crushed) – adds a buttery crunch
- ¼ cup (50g) granulated sugar
- 6 tablespoons (85g) unsalted butter, melted (I recommend Land O’Lakes for best flavor)
- ½ teaspoon ground cinnamon (optional, but it adds a warm note)
- For the Cheesecake Filling:
- 16 oz (450g) cream cheese, softened – make sure it’s room temperature for smooth mixing
- ⅔ cup (135g) granulated sugar
- 2 large eggs, room temperature
- 1 teaspoon pure vanilla extract
- ¼ cup (60ml) sour cream (adds creaminess, but Greek yogurt works too)
- For the Cherry Topping:
- 1 ½ cups (225g) pitted fresh or frozen cherries (if using frozen, thaw and drain excess liquid)
- 2 tablespoons cornstarch (helps thicken the cherry juices)
- ⅓ cup (65g) granulated sugar
- 1 teaspoon lemon juice (brightens the cherry flavor)
Ingredient Tips: Look for firm, bright cherries to avoid watery topping. If you can’t find graham crackers, crushed vanilla wafers or even pretzels (for a salty twist) can work. Unsalted butter is best here so you control the salt balance, but salted butter can be used in a pinch—just skip added salt elsewhere.
Equipment Needed
- 9×9-inch (23×23 cm) square baking pan – a metal pan works best for even baking; glass pans are fine but may require extra baking time.
- Mixing bowls – one large for crust and filling, one smaller for cherry topping.
- Electric hand mixer or stand mixer – makes cream cheese mixing easier and smoother.
- Measuring cups and spoons – accuracy is key for baking success!
- Rubber spatula – perfect for scraping down the bowl and folding ingredients gently.
- Whisk – for mixing the cherry topping ingredients.
- Aluminum foil or parchment paper (optional) – to line the pan for easy removal.
If you don’t have a mixer, you can whisk the cream cheese and sugar by hand, but expect a bit more elbow grease. I like to line my pan with parchment paper for easier lifting of the bars after baking, but greasing the pan well also works. Budget-wise, a sturdy 9×9 pan and hand mixer are worth the investment if you bake often.
Detailed Preparation Method
- Preheat your oven to 325°F (163°C). Grease your 9×9-inch baking pan or line it with parchment paper, leaving an overhang for easy removal later. This step saves you from any sticky situations after baking.
- Make the crust: In a medium bowl, combine the graham cracker crumbs, sugar, melted butter, and cinnamon (if using). Stir until the crumbs are evenly coated and look like wet sand. Press this mixture firmly and evenly into the bottom of your prepared pan. Use the bottom of a glass or measuring cup to pack it down tight—that helps the crust hold together nicely. Bake for 10 minutes, then remove from the oven and let cool slightly while you prepare the filling.
- Prepare the cheesecake filling: In a large bowl, beat the softened cream cheese with an electric mixer on medium speed until smooth and creamy—this should take about 2-3 minutes. Scrape down the sides with a spatula as needed. Add the sugar and beat until fully combined. One at a time, add the eggs, mixing well after each. Stir in the vanilla extract and sour cream, mixing until silky smooth. Be careful not to overmix; you don’t want too much air whipped in or the cheesecake might crack.
- Make the cherry topping: In a small bowl, toss the cherries with cornstarch, sugar, and lemon juice until coated well. This helps the topping thicken nicely during baking and balances the cherry sweetness with a touch of tartness.
- Assemble the bars: Pour the cheesecake filling over the warm crust and spread it evenly with a spatula. Spoon the cherry mixture evenly on top, gently pressing the cherries down into the filling but not mixing them in. They’ll naturally sink a bit as it bakes, creating that gorgeous layered look.
- Bake in the preheated oven for 40-45 minutes, or until the edges are set but the center still jiggles slightly when you gently shake the pan. Avoid overbaking; the bars will finish setting as they cool.
- Cool and chill: Let the bars cool completely at room temperature, then refrigerate for at least 4 hours or overnight. This step is essential for that creamy texture and clean slices.
- Slice and serve: Use a sharp knife dipped in hot water and wiped dry between cuts for neat squares. Serve chilled or at room temperature, and watch them disappear fast!
Cooking Tips & Techniques
A few tricks I’ve picked up from baking these Loaded Cherry Cheesecake Bars multiple times:
- Room temperature ingredients: Make sure your cream cheese, eggs, and sour cream are at room temp before mixing. This prevents lumps and gives you a luxuriously smooth filling.
- Don’t skip the pre-bake crust: It helps lock in that buttery crunch and keeps the crust from getting soggy under the cheesecake layer.
- Watch your baking time: Overbaking can lead to cracks or a dry texture. The center should still jiggle slightly when done—trust me on this one.
- Cooling is key: Let bars cool fully before refrigeration. Hot bars in the fridge can sweat and turn watery.
- Cherry topping consistency: If your cherries look watery, add a bit more cornstarch next time. You want them juicy but not soupy.
One lesson I learned the hard way: rushing the chilling time leads to crumbly bars. Patience pays off here! Also, if you want extra shine on your cherry topping, a light brush of warmed apricot jam after baking works wonders.
Variations & Adaptations
- Diet-friendly option: Swap the graham cracker crust for almond flour mixed with melted coconut oil for a gluten-free, paleo-friendly base.
- Seasonal twist: Substitute cherries with blueberries or mixed berries for a fresh summer vibe.
- Chocolate lover’s version: Add ½ cup (90g) mini chocolate chips sprinkled over the cheesecake layer before adding cherries.
- Lower sugar: Use a natural sweetener like maple syrup or monk fruit sweetener in the filling and cherry topping, adjusting quantities to taste.
- Dairy-free: Replace cream cheese with a plant-based cream cheese alternative and sour cream with coconut yogurt.
Personally, I once tried swirling in a bit of almond butter into the cheesecake layer for a nutty depth—it was surprisingly good and got rave reviews from my family. Don’t be afraid to experiment a little!
Serving & Storage Suggestions
These bars are best served chilled or at room temperature. If you want to impress guests, dust them lightly with powdered sugar or add a dollop of whipped cream on the side. A cup of coffee or a glass of cold milk pairs perfectly with their rich texture and fruity zing.
Store leftover bars in an airtight container in the fridge for up to 5 days. They actually taste even better after a day as the flavors meld beautifully. For longer storage, freeze bars in a single layer on a baking sheet, then transfer to a freezer-safe container for up to 3 months. Thaw overnight in the fridge before serving.
When reheating, avoid the microwave for melting the cheesecake filling; instead, bring to room temperature naturally or warm briefly in a low oven (about 300°F/150°C) wrapped loosely in foil.
Nutritional Information & Benefits
Each serving (1 bar, assuming 16 bars) roughly contains:
| Calories | Fat | Carbohydrates | Protein |
|---|---|---|---|
| 260 kcal | 16g | 22g | 4g |
The cream cheese provides a good dose of calcium and protein, while the cherries add antioxidants and vitamin C. This recipe isn’t low-calorie, but it’s made with real ingredients and no artificial fillers. If you’re watching carbs, swapping the crust for almond flour can cut down on sugars and make it more keto-friendly.
Potential allergens include dairy, eggs, and gluten (from the graham crackers). The variations section covers substitutions if you need to avoid any.
Conclusion
If you want a dessert that’s both indulgent and surprisingly easy, these Loaded Cherry Cheesecake Bars are a fantastic choice. I love how they bring together a crispy crust, smooth cheesecake, and vibrant cherry topping in a perfectly portable form. Whether you’re baking for a special occasion or just treating yourself on a random Tuesday, these bars never disappoint.
Feel free to tweak the recipe to suit your tastes—add nuts, try different fruits, or swap the crust. Baking should be fun, after all! And if you make these bars, please come back and tell me how they turned out. I’m always excited to hear your stories and see your delicious adaptations.
Go ahead, grab your mixing bowl, and get ready for some serious dessert happiness. You deserve it!
Frequently Asked Questions
Can I use frozen cherries for this recipe?
Yes, frozen cherries work well. Just thaw them fully and drain any excess liquid before mixing with the cornstarch and sugar to avoid a watery topping.
How do I prevent cracks in the cheesecake layer?
Use room temperature ingredients, avoid overmixing, and don’t overbake. The center should still jiggle slightly when you take it out of the oven.
Can I make these bars ahead of time?
Absolutely! They taste even better after chilling overnight, making them perfect for preparing a day in advance.
What’s the best way to cut cheesecake bars cleanly?
Run a sharp knife under hot water, wipe it dry, and slice. Repeat between cuts to get neat edges without crumbling.
Are these bars gluten-free?
Not with the traditional graham cracker crust, but you can use almond flour or gluten-free crackers as a substitute to make them gluten-free.
Pin This Recipe!
Loaded Cherry Cheesecake Bars

These bars combine a warm, buttery crust with a silky smooth cheesecake filling and a sweet-tart cherry topping, creating a decadent yet easy-to-make dessert perfect for any occasion.
- Prep Time: 20 minutes
- Cook Time: 50 minutes
- Total Time: 4 hours 70 minutes
- Yield: 16 bars 1x
- Category: Dessert
- Cuisine: American
Ingredients
- 1 ½ cups (150g) graham cracker crumbs or digestive biscuits crushed
- ¼ cup (50g) granulated sugar
- 6 tablespoons (85g) unsalted butter, melted
- ½ teaspoon ground cinnamon (optional)
- 16 oz (450g) cream cheese, softened
- ⅔ cup (135g) granulated sugar
- 2 large eggs, room temperature
- 1 teaspoon pure vanilla extract
- ¼ cup (60ml) sour cream (or Greek yogurt)
- 1 ½ cups (225g) pitted fresh or frozen cherries, thawed and drained if frozen
- 2 tablespoons cornstarch
- ⅓ cup (65g) granulated sugar
- 1 teaspoon lemon juice
Instructions
- Preheat oven to 325°F (163°C). Grease a 9×9-inch baking pan or line with parchment paper with an overhang.
- Make the crust: In a medium bowl, combine graham cracker crumbs, sugar, melted butter, and cinnamon if using. Stir until evenly coated. Press firmly and evenly into the bottom of the prepared pan. Bake for 10 minutes, then remove and let cool slightly.
- Prepare the cheesecake filling: Beat softened cream cheese with an electric mixer on medium speed until smooth (2-3 minutes). Add sugar and beat until combined. Add eggs one at a time, mixing well after each. Stir in vanilla extract and sour cream until silky smooth. Avoid overmixing.
- Make the cherry topping: Toss cherries with cornstarch, sugar, and lemon juice until well coated.
- Assemble bars: Pour cheesecake filling over warm crust and spread evenly. Spoon cherry mixture evenly on top, gently pressing cherries into filling without mixing.
- Bake for 40-45 minutes until edges are set but center jiggles slightly. Avoid overbaking.
- Cool bars completely at room temperature, then refrigerate for at least 4 hours or overnight.
- Slice using a sharp knife dipped in hot water and wiped dry between cuts. Serve chilled or at room temperature.
Notes
Use room temperature ingredients for smooth filling. Pre-bake crust to prevent sogginess. Avoid overbaking to prevent cracks; center should jiggle slightly. Chill bars fully before slicing for clean cuts. If cherry topping is watery, add more cornstarch. For extra shine, brush cherry topping with warmed apricot jam after baking.
Nutrition
- Serving Size: 1 bar (assuming 16 b
- Calories: 260
- Fat: 16
- Carbohydrates: 22
- Protein: 4
Keywords: cherry cheesecake bars, cheesecake bars, cherry dessert, easy cheesecake, homemade dessert bars, cherry topping, creamy cheesecake


