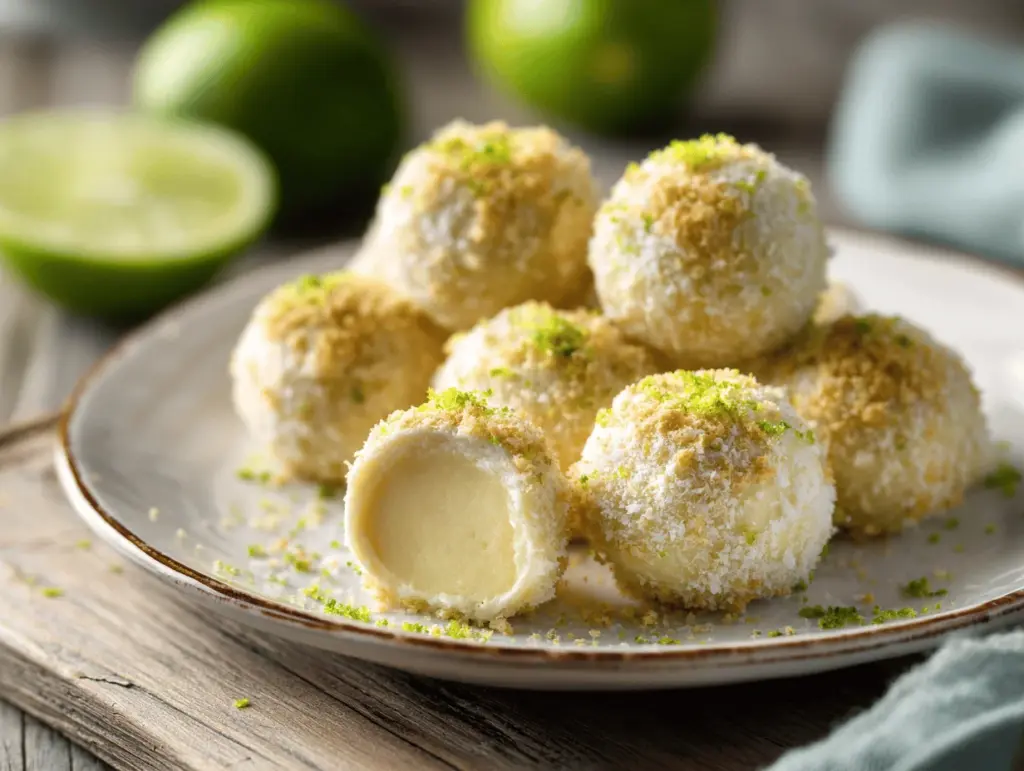
The first time I bit into a key lime truffle, I swear I heard tiny steel drums playing in my head. You know that bright, zingy flavor that instantly reminds you of palm trees, sunshine, and salty breezes? That’s exactly what these key lime truffles deliver. Each bite is creamy, citrusy, and just sweet enough to make you close your eyes and smile. It’s almost like someone took the heart of a key lime pie and wrapped it up in a dreamy, poppable treat you can share (or not—no judgment here).
I stumbled upon this recipe while planning a summer birthday bash, desperate for something tropical but still easy enough to whip up on a busy weeknight. After a few rounds of testing (and plenty of taste-testing, let’s be honest), I found the best way to capture that classic key lime punch—without fussing with pie crusts or water baths. Now, I make these key lime truffles for everything from pool parties to holiday cookie swaps. They’re always the first to vanish from the dessert table, and people are constantly asking for the recipe.
These truffles aren’t just ridiculously tasty—they’re easy, portable, and perfect for making ahead. Whether you’re hosting a backyard luau or just need a little pick-me-up on a gray day, this key lime truffles recipe brings a burst of sunshine right to your kitchen. Plus, they’re a huge hit with both kids and grown-ups, and you can dress them up with pretty sprinkles or coconut for any occasion. Trust me, after making these a dozen times, you’ll never look at store-bought truffles the same way again.
Why You’ll Love This Key Lime Truffles Recipe
Let’s get real—there are a lot of truffle recipes floating around the internet. But these key lime truffles? They’re in a league of their own. Here’s why you’ll want to make them again and again:
- Quick & Easy: The whole batch comes together in under an hour (plus chilling time). No oven, no drama, just mix, chill, roll, and dip.
- Simple Ingredients: You probably already have most of what you need. No fancy key lime liqueur or hard-to-find specialty chocolate—just good, honest pantry staples with a tropical twist.
- Perfect for Parties: Whether it’s a poolside bash, a holiday get-together, or just Tuesday night, these truffles look (and taste!) impressive enough for any celebration.
- Crowd-Pleaser: Adults love the punchy citrus zing, and kids can’t get enough of the sweet, creamy centers. Bonus: they’re naturally gluten-free!
- Unbelievably Delicious: The flavor combo is pure magic—tart key lime meets rich white chocolate, with a buttery, melt-in-your-mouth texture. It’s like a mini vacation for your tastebuds.
What really sets this recipe apart is how the key lime flavor shines. Instead of being lost in a sea of sugar, the fresh zest and juice bring a clean, natural brightness. I blend the zest right into the filling for that unmistakable citrusy aroma, and a quick dip in white chocolate seals the deal. I’ve tried a lot of truffle recipes, but none have quite the same balance of tangy, creamy, and sweet.
Honestly, these key lime truffles are my secret weapon for last-minute parties (or whenever I need to impress relatives who “don’t really like sweets”—until they try these). They’re comforting, tropical, and just a little bit indulgent—without being heavy or fussy. If you’re after a treat that feels special but won’t stress you out, this is the one.
What Ingredients You Will Need
This key lime truffles recipe is all about keeping things simple, but don’t let that fool you—the flavors are bold, bright, and downright irresistible. Here’s what you’ll need to make a batch:
- For the Truffle Center:
- White chocolate chips (12 oz / 340g) – Go for good quality; I like Ghirardelli or Guittard for smooth melting.
- Sweetened condensed milk (7 oz / 200g, about half a standard can) – Adds creaminess and just the right amount of sweetness.
- Unsalted butter (2 tbsp / 28g, softened) – Helps create that luscious, melt-in-your-mouth texture.
- Key lime juice (3 tbsp / 45ml, freshly squeezed if possible) – Bottled works in a pinch, but fresh is best for that zingy kick.
- Key lime zest (2 tsp / 4g, finely grated) – Don’t skip this! The zest brings all the fragrant, aromatic oils. If you can’t find key limes, use regular limes.
- Vanilla extract (1/2 tsp / 2.5ml) – Just a splash to round out the flavor.
- Pinch of salt – Balances the sweetness and makes the citrus pop.
- Graham cracker crumbs (1/2 cup / 60g, finely crushed) – Classic key lime pie vibes. For gluten-free, swap in GF graham-style cookies.
- For the Coating:
- White chocolate chips or melting wafers (8 oz / 225g) – For dipping. Melting wafers are easier, but chips work with a little patience.
- Coconut oil (1 tbsp / 15ml, optional) – Makes the coating extra smooth and shiny.
- Optional Toppings:
- Extra key lime zest – For a burst of color and flavor.
- Toasted coconut flakes – Adds a tropical crunch.
- Crushed graham crackers – For a pie-like finish.
- Festive sprinkles – Get creative for parties!
Ingredient Tips: When selecting white chocolate, check that cocoa butter is listed as a main ingredient—this melts better and tastes richer. For key lime juice, fresh is amazing, but I’ve used Nellie & Joe’s bottled juice for convenience and it works great. If you’re dairy-free, swap in vegan condensed milk and vegan white chocolate (they do exist!). And don’t stress—regular lime works if key limes are tricky to find.
Equipment Needed
You don’t need a fancy kitchen to whip up a batch of key lime truffles. Here’s what I use every time:
- Microwave-safe bowl (for melting chocolate) – Or use a double boiler if you prefer.
- Mixing bowl (medium-sized) – For combining all the truffle ingredients.
- Spatula or wooden spoon – I love a silicone spatula for scraping every last bit.
- Microplane or fine grater – For zesting your limes. If you don’t have one, a standard box grater works (just be careful with your knuckles!).
- Cookie scoop or small spoon – Helps keep the truffles even in size. I use a 1-tbsp scoop.
- Baking sheet – For chilling and setting the truffles.
- Wax paper or parchment paper – Makes cleanup so much easier.
- Fork or dipping tool – For coating the truffles in chocolate.
- Ziplock bag or piping bag (optional) – For drizzling extra chocolate on top.
If you don’t have a microwave, a simple heatproof bowl set over a pot of simmering water works perfectly for melting chocolate. I’ve even used a sturdy mug in the microwave for small batches. For budget-friendly tools, check your local dollar store—no need for anything fancy! Just make sure your utensils are bone-dry when melting chocolate; even a drop of water can make it seize up.
How to Make Key Lime Truffles: Step-by-Step
-
Melt the white chocolate:
Place 12 oz (340g) white chocolate chips in a microwave-safe bowl. Heat in 20-second bursts, stirring after each, until melted and smooth. This usually takes about 1–2 minutes total. (If using a double boiler, stir constantly over low heat.) Don’t overheat or the chocolate will scorch—keep a close eye!
-
Mix the filling:
Stir in 7 oz (200g) sweetened condensed milk, 2 tbsp (28g) unsalted butter (softened), 3 tbsp (45ml) key lime juice, 2 tsp (4g) key lime zest, 1/2 tsp (2.5ml) vanilla extract, and a pinch of salt. Mix well until everything is fully incorporated. The mixture should look glossy and thick. If it seems too runny, add a bit more melted chocolate or chill it for 10 minutes to firm up.
-
Add graham cracker crumbs:
Gently fold in 1/2 cup (60g) finely crushed graham cracker crumbs. This helps give the truffles structure and that “key lime pie” feeling. The dough will be thick but scoopable.
-
Chill the mixture:
Cover the bowl with plastic wrap and pop it in the fridge for 30–45 minutes, until firm enough to roll. If you’re in a rush, 15 minutes in the freezer does the trick. (I’ve definitely done this when impatient!)
-
Shape the truffles:
Line a baking sheet with parchment. Use a 1-tbsp scoop or spoon to portion the dough, then roll between your palms to form smooth balls. You should get about 20–24 truffles. (If the mixture gets sticky, dust your hands with a little powdered sugar.)
-
Chill again:
Place the rolled truffles back in the fridge (or freezer) for at least 15 minutes. This helps them hold up better when dipping.
-
Prepare the coating:
Melt 8 oz (225g) white chocolate chips or melting wafers with 1 tbsp (15ml) coconut oil (if using) in short bursts, stirring until smooth. Let cool for 2–3 minutes so it’s not scorching hot—it should flow easily but not burn your fingers.
-
Dip the truffles:
Working one at a time, drop each truffle into the melted chocolate. Use a fork to lift it out, tapping off excess coating. Place back on the lined baking sheet. (If the coating thickens, rewarm gently as needed.)
-
Add toppings:
While the coating is still wet, sprinkle with extra zest, toasted coconut, or graham cracker crumbs. Get creative—this is the fun part!
-
Set and enjoy:
Let the truffles set at room temperature for 30–40 minutes, or pop them in the fridge for 10–15 minutes to speed things up. Once the chocolate is firm, they’re ready to eat!
Troubleshooting: If your chocolate seizes (turns grainy), try stirring in a splash of coconut oil. If the truffle mixture is too soft to roll, chill longer or add a bit more graham cracker crumbs. Too firm? Let it sit at room temp for 5–10 minutes before scooping.
Personal Tip: I like to set up a little “dipping station” so I can coat, decorate, and transfer truffles quickly—less mess, more fun!
Cooking Tips & Techniques for Perfect Key Lime Truffles
After many (many) batches of key lime truffles, I’ve picked up a few tricks that make the process smoother and the results even dreamier:
- Use quality white chocolate: Pick a brand with real cocoa butter for the silkiest melt. Chips are convenient, but melting wafers are usually easier to work with for dipping.
- Don’t rush the chilling: The truffle mixture needs time to firm up. If you skip this step, the balls will be sticky and tough to dip. Trust me, I’ve tried to hurry and paid the price.
- Zest first, then juice: Always zest your limes before squeezing them—once they’re cut, zesting is nearly impossible (and a bit dangerous for your fingers!).
- Keep everything dry: Even a hint of water in your bowl or on your utensils can make melted chocolate seize up. Wipe everything down first—learned this the hard way.
- Work in batches: If your kitchen is warm or you’re making a big batch, keep half the truffles in the fridge while you dip the others. This prevents melting and sticky fingers.
- Decorate fast: Add toppings while the coating is still wet. If you wait, nothing will stick and you’ll end up with a sad, plain truffle (ask me how I know!).
- Practice makes perfect: Don’t stress about getting every truffle “Instagram-perfect.” A little drizzle or uneven edge just adds charm.
And here’s my favorite multitasking hack: While the truffle mixture chills, get your toppings and dipping chocolate ready. That way, once you’re rolling, it’s all smooth sailing to tropical paradise!
Variations & Adaptations
These key lime truffles are crazy versatile. Here’s how you can make them your own:
- Gluten-Free: Swap regular graham crackers for gluten-free ones or use almond flour for a nutty twist. I’ve done both and no one ever notices the difference.
- Dairy-Free/Vegan: Use coconut condensed milk and vegan white chocolate chips (look for brands like Enjoy Life). The coconut flavor actually plays super well with the lime!
- Flavor Twists: Try swapping half the lime juice for passion fruit or mango puree for a more tropical flavor. You can even add a pinch of ground ginger or cardamom for a subtle, spicy warmth.
- Coconut Coating: Roll the finished truffles in toasted coconut flakes instead of dipping in white chocolate. It’s less sweet, but still super satisfying.
- Chocolate Shell: Dip the truffles in dark or milk chocolate for a richer, less sweet finish. I made a batch with dark chocolate for a friend’s birthday and they disappeared in minutes.
Don’t be afraid to experiment! I once added a spoonful of raspberry jam to the filling and it was a total hit. If you have nut allergies, just skip the almond flour or use GF cookies. The base recipe is super forgiving—perfect for kitchen improvisers.
Serving & Storage Suggestions
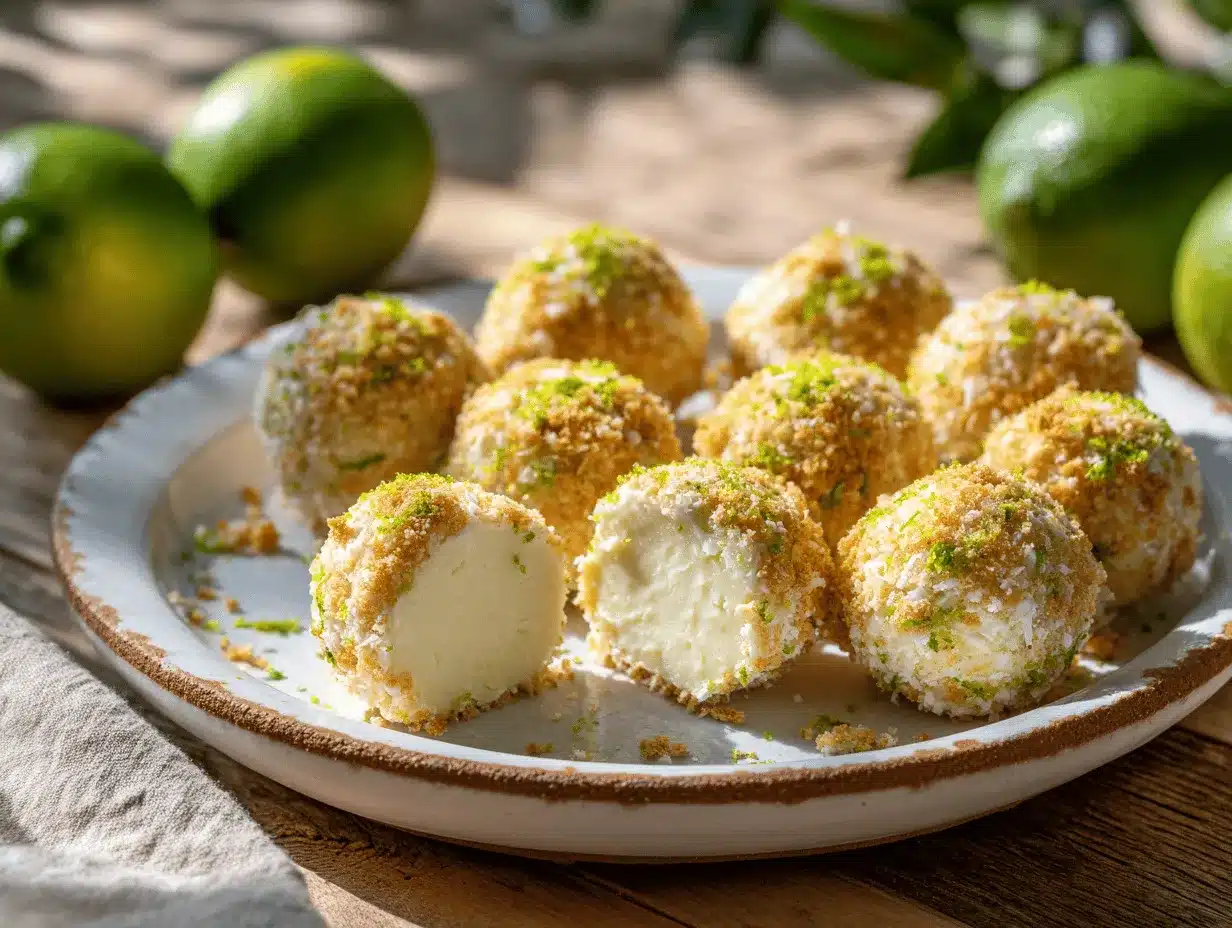
Key lime truffles are best enjoyed slightly chilled. I love serving them on a pretty platter with a sprinkle of extra zest or coconut on top—they look like little jewels! They pair beautifully with iced tea, sparkling water, or even a tropical cocktail if you’re feeling fancy.
For storage, keep the truffles in an airtight container in the fridge for up to one week. If you want to make them ahead, they freeze wonderfully—just layer with parchment and freeze for up to two months. Thaw in the fridge overnight before serving.
To reheat (if you want them a touch softer), let the truffles sit at room temperature for 10–15 minutes before serving. I find that the lime flavor actually gets brighter after a day or two in the fridge, so they’re perfect for making ahead for parties.
Nutritional Information & Benefits
Each key lime truffle is about 110 calories, with roughly 5g fat, 14g carbohydrates, and 1g protein. They’re naturally gluten-free (if you use GF grahams) and can be dairy-free with the right swaps. The real star here is the lime—packed with vitamin C, it brings a refreshing brightness and a bit of immune support to every bite.
If you’re watching sugar, you can use sugar-free white chocolate and condensed milk—though the texture will change slightly. There are nuts in some variations, so if you have allergies, stick to the classic recipe. Personally, I love these as a portion-controlled treat—one or two is all you need to satisfy a sweet craving, and they feel so much more special than a standard cookie!
Conclusion
If you’re craving a taste of the tropics—no plane ticket required—this key lime truffles recipe is honestly a must-try. They’re easy enough for beginners, dazzling enough for parties, and just the right mix of creamy, tangy, and sweet. I keep coming back to this recipe because it’s fun, fuss-free, and never fails to put a smile on my face (and my family’s, too).
Feel free to play around with flavors, toppings, or presentation—these truffles are endlessly customizable. Whether you’re whipping them up for a birthday, brunch, or just because, they’ll bring a little sunshine to your day. Let me know in the comments if you try them, and don’t forget to share your own twists—I love seeing what other creative cooks dream up. Go on, treat yourself to a taste of party bliss!
FAQs About Key Lime Truffles Recipe
Can I use regular limes instead of key limes?
Absolutely! Regular lime juice and zest work perfectly. The flavor is a little less floral, but still deliciously tart and fresh.
How do I prevent the white chocolate from seizing?
Make sure all your tools and bowls are completely dry, and melt the chocolate in short bursts, stirring often. If it seizes, stir in a bit of coconut oil to loosen it up.
Can I make key lime truffles ahead of time?
Yes! They keep well in the fridge for up to a week or in the freezer for two months. Just thaw before serving and they’ll taste fresh as ever.
What if I don’t have graham crackers?
You can use vanilla wafers, digestive biscuits, or even almond flour for a gluten-free option. The texture will change slightly but they’ll still be tasty!
Are these truffles suitable for kids?
Definitely! They’re sweet and tangy, with no alcohol or strong flavors. Just be mindful of small kids with the round shape (and possible nut ingredients if you use almond flour).
Pin This Recipe!
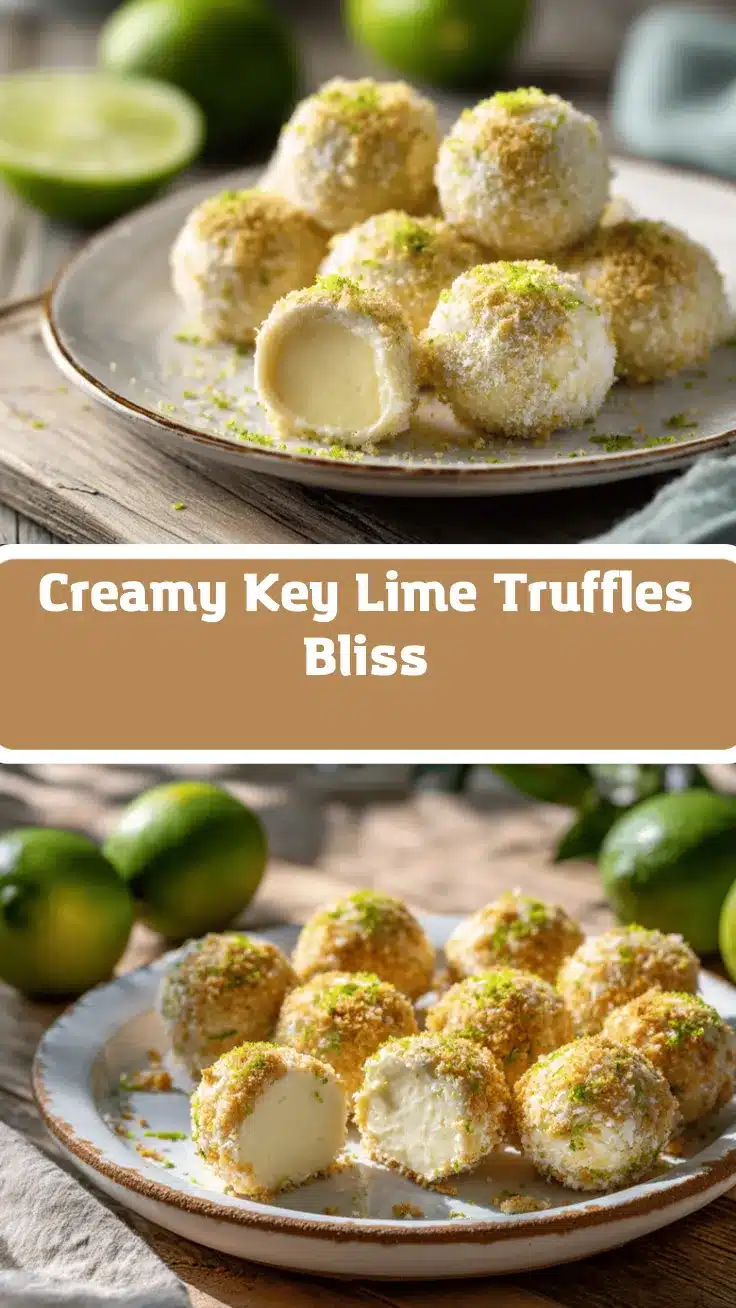
Key Lime Truffles

These easy homemade key lime truffles are creamy, citrusy, and sweet, capturing all the tropical flavor of key lime pie in a poppable party treat. Perfect for parties, cookie swaps, or whenever you need a burst of sunshine in your kitchen.
- Prep Time: 20 minutes
- Cook Time: 0 minutes
- Total Time: 1 hour (including chilling time)
- Yield: 20-24 truffles 1x
- Category: Dessert
- Cuisine: American
Ingredients
- 12 oz white chocolate chips (about 2 cups), good quality
- 7 oz sweetened condensed milk (about 1/2 standard can)
- 2 tbsp unsalted butter, softened
- 3 tbsp key lime juice (fresh preferred, bottled okay)
- 2 tsp key lime zest (or regular lime zest)
- 1/2 tsp vanilla extract
- Pinch of salt
- 1/2 cup graham cracker crumbs (gluten-free if needed)
- 8 oz white chocolate chips or melting wafers (for coating)
- 1 tbsp coconut oil (optional, for coating)
- Extra key lime zest (optional, for topping)
- Toasted coconut flakes (optional, for topping)
- Crushed graham crackers (optional, for topping)
- Festive sprinkles (optional, for topping)
Instructions
- Place 12 oz white chocolate chips in a microwave-safe bowl. Melt in 20-second bursts, stirring after each, until smooth (about 1–2 minutes total). Alternatively, melt over a double boiler on low heat.
- Stir in sweetened condensed milk, softened butter, key lime juice, key lime zest, vanilla extract, and a pinch of salt. Mix until fully incorporated and glossy.
- Fold in graham cracker crumbs until the mixture is thick but scoopable.
- Cover and chill the mixture in the fridge for 30–45 minutes (or 15 minutes in the freezer) until firm enough to roll.
- Line a baking sheet with parchment. Scoop 1-tbsp portions and roll into balls (about 20–24 truffles).
- Chill the rolled truffles for at least 15 minutes in the fridge or freezer.
- Melt 8 oz white chocolate chips or melting wafers with 1 tbsp coconut oil (if using) in short bursts, stirring until smooth. Let cool for 2–3 minutes.
- Dip each truffle in the melted chocolate, using a fork to lift out and tap off excess. Place on the lined baking sheet.
- While the coating is wet, sprinkle with extra zest, toasted coconut, graham cracker crumbs, or sprinkles as desired.
- Let truffles set at room temperature for 30–40 minutes, or chill in the fridge for 10–15 minutes until firm. Enjoy!
Notes
For best results, use high-quality white chocolate with cocoa butter. Chill the mixture thoroughly before rolling and dipping. Decorate truffles while the coating is still wet for toppings to stick. Store in an airtight container in the fridge for up to 1 week or freeze for up to 2 months. For gluten-free, use GF graham crackers; for dairy-free, use vegan condensed milk and white chocolate.
Nutrition
- Serving Size: 1 truffle
- Calories: 110
- Sugar: 12
- Sodium: 25
- Fat: 5
- Saturated Fat: 3
- Carbohydrates: 14
- Protein: 1
Keywords: key lime truffles, key lime dessert, tropical truffles, party treats, no bake dessert, white chocolate truffles, gluten free dessert, summer dessert, easy truffles, homemade truffles


