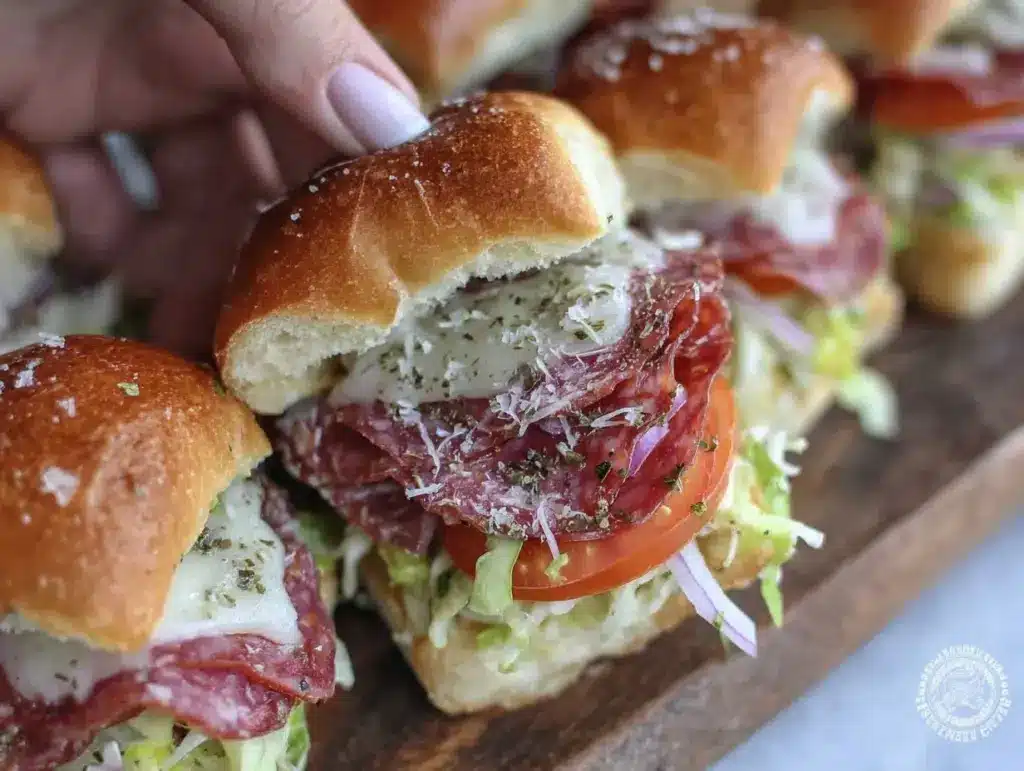
The smell of freshly baked bread mingling with layers of savory Italian meats and tangy pickles is honestly one of the best things about game day. I first whipped up these Super Bowl Italian Sub Sliders during a last-minute party prep, and let me tell you—they disappeared faster than the halftime show started. There’s just something about these little handheld sandwiches that makes everyone gather around and keep coming back for more.
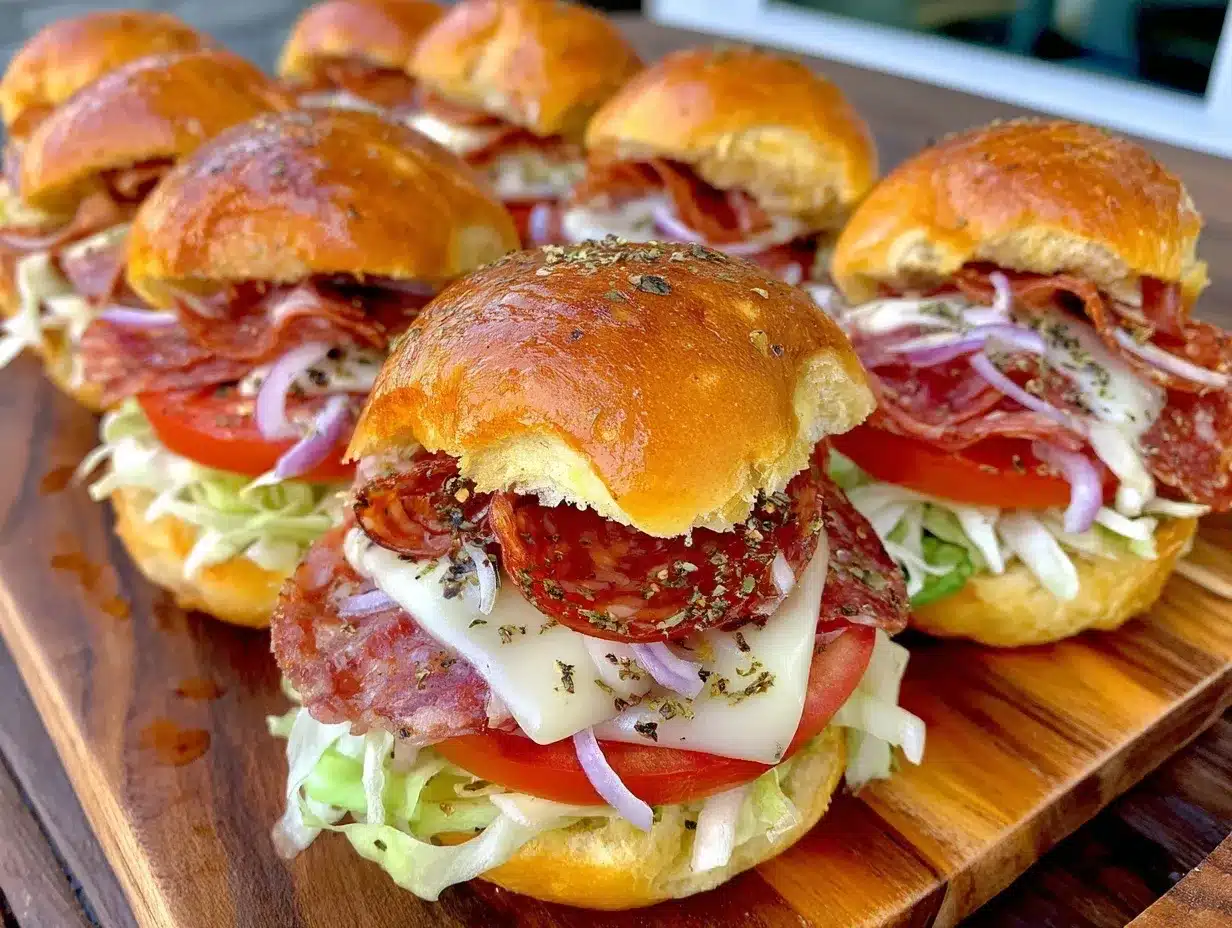
What I love most about this recipe is how it brings that classic Italian sub flavor into perfectly sized sliders, ideal for snacking between touchdowns. It’s a recipe I’ve tested more times than I can count, tweaking the meat-to-cheese ratio, adjusting the dressing just right, and swapping veggies based on what’s fresh at the market. As someone who’s hosted countless game day parties, these sliders are my go-to for crowd-pleasing, fuss-free snacking.
Whether you’re feeding a hungry family, impressing friends, or just craving a flavorful bite while watching the big game, these Super Bowl Italian Sub Sliders fit the bill. They’re packed with layers of deliciousness, offer a satisfying texture combo, and bring a little Italian deli magic right to your table. Trust me, once you try this Italian sub slider recipe, you’ll wonder why you ever settled for boring chips and dip.
Why You’ll Love This Recipe
- Quick & Easy: These sliders come together in about 30 minutes, leaving you more time to enjoy the game and less time in the kitchen.
- Simple Ingredients: No need for specialty stores—grab deli meats, fresh veggies, and slider buns from your local grocery store.
- Perfect for Parties: These sliders are made for sharing, ideal for Super Bowl parties, casual get-togethers, or anytime you want a tasty snack.
- Crowd-Pleaser: Kids and adults agree—this Italian sub slider recipe is a winner every single time.
- Unbelievably Delicious: The combination of savory meats, melted cheese, crisp veggies, and zesty dressing creates a flavor explosion that feels both classic and fresh.
This isn’t just any Italian sub recipe, either. I’ve found that blending a little olive oil with red wine vinegar for the dressing instead of store-bought gives these sliders a tangy punch that’s unbeatable. Plus, layering the meats and veggies just right means every bite has a perfect balance of flavors and textures. Honestly, it’s like having a little slice of your favorite deli right at home.
So if you want a snack that feels special but is ridiculously easy to make, these Super Bowl Italian Sub Sliders are your new best friend. They’re comfort food with a kick, perfect for impressing guests or just treating yourself during game day.
What Ingredients You Will Need
This recipe calls for simple, fresh ingredients that come together to create that classic Italian sub taste and texture. Most of these are pantry or fridge staples for me, making this slider recipe super convenient.
- Slider buns (12 count) – Soft, slightly sweet buns work best; I love using King’s Hawaiian for that perfect pillowy texture.
- Italian deli meats – 6 oz sliced Genoa salami, 6 oz sliced pepperoni, and 6 oz sliced ham; feel free to grab these from your local deli for the freshest taste.
- Provolone cheese – 12 slices, one for each slider, adds that mild, melty goodness.
- Shredded lettuce – About 2 cups, shredded finely for a crisp bite.
- Tomatoes – 2 medium tomatoes, thinly sliced; Roma tomatoes are my go-to for consistent flavor.
- Red onion – ½ small onion, thinly sliced for a slight sharpness.
- Pickles – Dill pickle slices, about 12, add a bright zesty crunch.
- Italian dressing – ½ cup homemade or store-bought; I usually mix 3 tablespoons olive oil, 2 tablespoons red wine vinegar, 1 teaspoon dried oregano, ½ teaspoon garlic powder, salt, and pepper to taste for a quick, fresh dressing.
- Mayonnaise – ¼ cup, for spreading on the buns; adds creaminess and binds everything together.
- Salt and pepper – To taste, especially for seasoning the tomatoes and onions.
Feel free to swap out the meats for turkey or roast beef if you want a different twist. And if you’re aiming for a lighter version, swapping mayo for Greek yogurt works surprisingly well without sacrificing creaminess. For a gluten-free option, any good-quality gluten-free slider bun will do the trick.
Equipment Needed
- Baking sheet or oven-safe dish: For warming the sliders if you like them hot and melty.
- Mixing bowl: To whisk up the Italian dressing quickly.
- Sharp knife and cutting board: Essential for slicing tomatoes, onions, and pickles thinly.
- Measuring cups and spoons: To keep the dressing and mayo spread just right.
- Optional: aluminum foil: If you want to cover the sliders while warming to keep them moist.
Honestly, you don’t need any fancy gadgets here. A good sharp knife really makes a difference when prepping veggies, so if you can invest in one, it’s worth it. I’ve tried warming these sliders in both a toaster oven and a conventional oven—both work fine, just watch closely so the buns don’t get too crunchy.
Detailed Preparation Method
- Prep your veggies: Thinly slice tomatoes, red onion, and pickles. Shred the lettuce finely so it doesn’t overpower the sliders. This should take about 10 minutes.
- Make the dressing: In a small bowl, whisk together olive oil, red wine vinegar, oregano, garlic powder, salt, and pepper. Taste and adjust seasoning. This homemade Italian dressing packs a fresh punch and takes 2-3 minutes.
- Prep the slider buns: Slice the buns horizontally but keep them hinged if possible to hold the fillings better. Spread a thin layer of mayonnaise on the bottom half of each bun to add creaminess and prevent sogginess. This step takes about 5 minutes.
- Layer the meats: Place one slice each of Genoa salami, pepperoni, and ham on every bun bottom. The layers add a satisfying, meaty flavor burst. This should take roughly 5 minutes.
- Add cheese: Top the meats with a slice of provolone cheese, spreading the flavor evenly. If you want melted cheese, you can warm the assembled sliders later.
- Add veggies: Layer shredded lettuce, tomato slices, red onion, and pickle slices over the cheese. Lightly season the tomato and onion with salt and pepper for extra flavor.
- Drizzle dressing: Spoon about a teaspoon of Italian dressing over the veggies on each slider. This tangy drizzle brings all the flavors together.
- Close the sliders: Gently press the top buns down to hold everything in place.
- Optional warming step: If you prefer warm sliders, place them in a baking dish, cover loosely with foil, and warm in a preheated 350°F (175°C) oven for 8-10 minutes, or until cheese melts slightly.
- Serve immediately: These sliders taste best fresh, but if you need to hold them, keep covered at room temperature for up to 30 minutes.
One tip: don’t overload the sliders with too many fillings or they’ll get messy fast. Keeping everything thinly sliced helps with neat assembly and easier eating. Also, making the dressing fresh keeps it from tasting too vinegary or store-bought.
Cooking Tips & Techniques
When you assemble these sliders, balance is everything. You want enough meat and cheese to satisfy, but too much filling can make the buns soggy or the sliders hard to handle. Trust me, I learned that the hard way during my first big game party.
Use fresh, crisp lettuce and thin slices of tomato and onion so the texture is light and refreshing. If your tomatoes are particularly juicy, pat them dry with a paper towel to avoid sogginess. It’s a little trick I picked up after a few soggy slider mishaps.
If warming, keep an eye on the sliders so the buns don’t dry out. Covering with foil helps keep moisture in, and warming just long enough to melt the cheese enhances the flavor without turning your sliders into a mess.
Another handy tip: Assemble sliders just before serving to keep the bread from getting soggy. If prepping ahead, keep the components separate and put it all together last minute.
Multitasking during game day is a skill—while the sliders warm, you can prep drinks or set out other snacks. These sliders really shine when they’re fresh and warm but are still good at room temperature if needed.
Variations & Adaptations
- Vegetarian Option: Swap the meats for grilled veggies like zucchini, eggplant, and roasted red peppers. Add marinated artichoke hearts for extra flavor.
- Spicy Kick: Add sliced pepperoncini peppers or a drizzle of spicy giardiniera to turn up the heat.
- Low-Carb Version: Use lettuce wraps instead of slider buns or opt for keto-friendly bread alternatives.
- Different Cheeses: Try swapping provolone for mozzarella or sharp cheddar for a different cheese profile.
- Cooking Method: Instead of warming in the oven, you can use a panini press to crisp the buns and melt the cheese slightly in about 5 minutes.
Personally, I once made a batch with turkey and cranberry chutney for a seasonal twist that was surprisingly delicious. Don’t be afraid to get creative with your favorite sandwich toppings to make this recipe your own.
Serving & Storage Suggestions
These Super Bowl Italian Sub Sliders are best served warm or at room temperature. Serve them on a platter lined with parchment paper for easy grab-and-go snacking during the game. They pair wonderfully with classic sides like kettle chips, pickles, or a simple pasta salad.
If you have leftovers (though rare!), wrap individual sliders tightly in plastic wrap and refrigerate for up to 2 days. To reheat, unwrap and warm in a 350°F (175°C) oven for about 8 minutes or until heated through. Avoid microwaving if you want to keep the buns from getting soggy.
Flavors actually deepen a bit after resting, so if you don’t mind a cold slider, letting them sit for 30 minutes can mellow the vinegar bite in the dressing and blend all those Italian flavors together.
Nutritional Information & Benefits
Each slider roughly contains 250-300 calories, depending on meat and cheese quantities. The Italian meats provide protein and iron, while the fresh veggies add fiber and vitamins. Using fresh tomatoes and onions also adds antioxidants like lycopene and quercetin.
This recipe can fit into many diets with easy swaps: gluten-free buns, low-carb wraps, or vegetarian fillings. Keep in mind the deli meats contain sodium, so balance with plenty of fresh veggies and enjoy sliders as a treat rather than an everyday meal.
From a wellness perspective, layering fresh veggies and choosing quality deli meats can make this snack both satisfying and nourishing. It’s a fun way to enjoy a flavorful bite without compromising on taste or texture.
Conclusion
These Super Bowl Italian Sub Sliders are the perfect blend of classic flavors, ease, and party-ready fun. Whether you’re feeding a crowd or just craving a satisfying snack, this recipe hits all the right notes. I love how customizable it is and how it brings people together with every bite.
Give this recipe a try, tweak it to your taste, and watch it become a game day staple in your house. I’d love to hear your favorite variations or how you serve them up—drop a comment or share your slider stories! Remember, good food and good company make any game more memorable.
Here’s to tasty snacks, happy gatherings, and plenty of slider love!
FAQs
Can I make these Italian sub sliders ahead of time?
It’s best to assemble the sliders right before serving to avoid soggy buns. You can prep all ingredients separately a few hours ahead and put them together just before your party.
What’s the best way to keep the sliders from getting soggy?
Spread mayonnaise on the buns to create a moisture barrier and pat dry juicy veggies like tomatoes before adding. Also, avoid making them too far in advance.
Can I freeze these sliders?
Freezing isn’t ideal as the buns and fresh veggies don’t thaw well. If you want to prep ahead, freeze just the meats and cheese, then assemble fresh later.
What if I don’t have slider buns? Can I use regular sandwich bread?
You can use regular sandwich rolls or small hoagie rolls sliced to size. Just keep in mind the sliders might be a bit bigger and less hand-held.
How can I make these sliders vegetarian?
Replace the meats with grilled or roasted vegetables, marinated mushrooms, or plant-based deli slices. Add extra cheese or a flavorful spread to keep the taste satisfying.
Pin This Recipe!

Irresistible Super Bowl Italian Sub Sliders

These Super Bowl Italian Sub Sliders bring classic Italian sub flavors into perfectly sized sliders, ideal for game day snacking. Packed with savory meats, melted cheese, crisp veggies, and zesty homemade dressing, they are quick, easy, and crowd-pleasing.
- Prep Time: 15 minutes
- Cook Time: 10 minutes
- Total Time: 25 minutes
- Yield: 12 sliders 1x
- Category: Snack
- Cuisine: Italian-American
Ingredients
- 12 slider buns (soft, slightly sweet, e.g., King’s Hawaiian)
- 6 oz sliced Genoa salami
- 6 oz sliced pepperoni
- 6 oz sliced ham
- 12 slices provolone cheese
- 2 cups shredded lettuce
- 2 medium Roma tomatoes, thinly sliced
- ½ small red onion, thinly sliced
- 12 dill pickle slices
- ½ cup Italian dressing (homemade or store-bought)
- – 3 tablespoons olive oil
- – 2 tablespoons red wine vinegar
- – 1 teaspoon dried oregano
- – ½ teaspoon garlic powder
- – salt and pepper to taste
- ¼ cup mayonnaise
- Salt and pepper to taste (for seasoning tomatoes and onions)
Instructions
- Thinly slice tomatoes, red onion, and pickles. Shred lettuce finely. (About 10 minutes)
- In a small bowl, whisk together olive oil, red wine vinegar, oregano, garlic powder, salt, and pepper to make the Italian dressing. Adjust seasoning to taste. (2-3 minutes)
- Slice slider buns horizontally, keeping them hinged if possible. Spread a thin layer of mayonnaise on the bottom half of each bun. (5 minutes)
- Layer one slice each of Genoa salami, pepperoni, and ham on the bottom half of each bun. (5 minutes)
- Top the meats with a slice of provolone cheese.
- Add shredded lettuce, tomato slices, red onion, and pickle slices over the cheese. Lightly season the tomato and onion with salt and pepper.
- Drizzle about a teaspoon of Italian dressing over the veggies on each slider.
- Gently press the top buns down to hold everything in place.
- Optional: Place sliders in a baking dish, cover loosely with foil, and warm in a preheated 350°F (175°C) oven for 8-10 minutes to melt the cheese slightly.
- Serve immediately for best taste. If holding, keep covered at room temperature for up to 30 minutes.
Notes
To avoid soggy buns, spread mayonnaise on buns and pat dry juicy veggies like tomatoes before assembling. Assemble sliders just before serving. For warming, cover with foil to keep moisture and warm only until cheese melts. Variations include vegetarian fillings, spicy additions, low-carb wraps, and different cheeses.
Nutrition
- Serving Size: 1 slider
- Calories: 275
- Sugar: 3
- Sodium: 650
- Fat: 18
- Saturated Fat: 7
- Carbohydrates: 18
- Fiber: 1
- Protein: 12
Keywords: Italian sub sliders, Super Bowl snacks, game day food, slider recipe, Italian sandwich, easy party food, homemade sliders


