
The bright, minty aroma of these St. Patrick’s Grasshopper Cheesecake Squares instantly brings a festive vibe to any gathering. Honestly, the first time I made this recipe, it was for a casual get-together, and I wasn’t expecting such rave reviews. The creamy cheesecake, combined with the refreshing grasshopper flavors and that subtle chocolate crunch, just clicked perfectly. It’s one of those treats that feels both indulgent and fun, you know?
I’ve made variations of this cheesecake square recipe more times than I can count, tweaking it just enough to get that flawless balance of sweet, minty, and rich. It’s become my go-to for St. Patrick’s Day parties, but honestly, it’s great any time you want a dessert that’s a little different yet crowd-pleasing. What I love most is how easy it is to whip up, despite looking like something that belongs in a fancy bakery window.
If you’ve been hunting for a festive dessert that’s as flavorful as it is eye-catching, these irresistible St. Patrick’s Grasshopper Cheesecake Squares are exactly what you need. They’re perfect for impressing guests without the stress, and the vibrant green swirl always gets the kids excited too. Trust me, once you try this recipe, it’ll become a staple in your dessert rotation!
Why You’ll Love This Recipe
- Quick & Easy: You can have these cheesecake squares ready in under an hour, which is perfect when you need a last-minute party hit.
- Simple Ingredients: No need to hunt down obscure items. Most of what you need is probably already in your pantry or fridge.
- Perfect for Parties: Whether it’s St. Patrick’s Day, a birthday, or a casual get-together, these cheesecake squares bring a festive pop of color and flavor.
- Crowd-Pleaser: Adults love the sophisticated mint-chocolate combo, while kids are drawn to the fun green hue—everyone wins.
- Unbelievably Delicious: The creamy texture combined with the chocolatey crust and minty kick is pure, irresistible comfort food.
This isn’t just another cheesecake recipe. The secret is in the grasshopper mint liqueur (or extract if you prefer non-alcoholic), which gives it that authentic mint flavor without overwhelming sweetness. Plus, blending the cheesecake filling until ultra-smooth makes these squares melt in your mouth. I’ve tested this recipe over a dozen times to nail the perfect texture and flavor balance, so you’re getting the tried-and-true version here!
It’s the kind of dessert that makes you pause and savor each bite—the perfect blend of festive fun and classic indulgence. Honestly, it’s my little celebration in dessert form.
What Ingredients You Will Need
This recipe calls for straightforward ingredients that come together to create a mint-chocolate masterpiece. Here’s what you’ll need:
- For the Crust:
- Chocolate wafer cookies, crushed (about 1 ½ cups or 150g) – I like using Nabisco Famous Chocolate Wafers for the best snap and flavor
- Unsalted butter, melted (6 tablespoons / 85g) – adds richness and helps bind the crust
- Granulated sugar (2 tablespoons / 25g) – balances the bitter chocolate notes
- For the Cheesecake Filling:
- Cream cheese, softened (16 ounces / 450g) – the star of the show, go for full-fat for the creamiest texture
- Granulated sugar (¾ cup / 150g) – sweetens the filling without overpowering
- Large eggs (2, room temperature) – help set the cheesecake
- Grasshopper mint liqueur (⅓ cup / 80ml) or peppermint extract (1 teaspoon) for a non-alcoholic version – this gives the iconic mint flavor
- Sour cream (½ cup / 120ml) – adds a slight tang and smoothness
- Vanilla extract (1 teaspoon) – rounds out the flavors
- Green food coloring (a few drops) – optional, but it really brings out the festive look
- For Garnish (Optional):
- Whipped cream – for serving
- Chocolate shavings or mini chocolate chips – adds texture and extra chocolate goodness
- Fresh mint leaves – a pretty, fresh touch
When selecting your ingredients, I recommend using a good quality cream cheese like Philadelphia for that smooth, tangy base. For the crust, chocolate wafer cookies really create a perfect crunchy contrast. And if you’re using grasshopper liqueur, measure carefully—it packs a punch, so a little goes a long way. If you’re avoiding alcohol, peppermint extract works just as well and keeps things family-friendly.
Equipment Needed
- 8×8-inch (20x20cm) square baking pan – I prefer glass for even heat distribution, but metal works fine too
- Mixing bowls – one for crust, one for filling
- Electric mixer or stand mixer – makes beating cream cheese smooth and easy
- Food processor or plastic bag and rolling pin – to crush the cookies
- Spatula – for scraping the bowl and smoothing batter
- Measuring cups and spoons – for accuracy
- Whisk – handy for mixing sour cream and eggs
If you don’t have a food processor, simply place the chocolate wafers in a sturdy plastic bag and crush them with a rolling pin or even a heavy pan. I’ve done this many times, and it works perfectly. Also, if you’re on a budget, a handheld mixer works just fine instead of a stand mixer. Just be sure to beat the cream cheese until super smooth to avoid lumps.
Detailed Preparation Method

- Preheat your oven to 325°F (163°C). Line your 8×8-inch baking pan with parchment paper, leaving an overhang on two sides for easy removal later. This little prep step saves you from cheesecake struggles later!
- Make the crust: In a medium bowl, combine the crushed chocolate wafer cookies (about 1 ½ cups / 150g), melted butter (6 tablespoons / 85g), and sugar (2 tablespoons / 25g). Mix until the crumbs are evenly coated and feel like wet sand. Press the mixture firmly into the bottom of your prepared pan using the back of a spoon or your fingers. I find pressing firmly helps the crust hold together once baked.
- Bake the crust for 8-10 minutes, just until set. This helps it hold up under the creamy filling. Remove from oven and set aside to cool slightly while you prepare the filling.
- Prepare the cheesecake filling: In a large mixing bowl, beat the softened cream cheese (16 ounces / 450g) with an electric mixer on medium speed until smooth and creamy—no lumps! This usually takes about 2-3 minutes. Add the granulated sugar (¾ cup / 150g) and beat again until combined.
- Add eggs one at a time, beating on low speed after each addition until just combined. Don’t overbeat here; you want to avoid too much air in the batter, which can cause cracks.
- Mix in the grasshopper mint liqueur (⅓ cup / 80ml) or peppermint extract (1 teaspoon), sour cream (½ cup / 120ml), and vanilla extract (1 teaspoon). Stir gently until smooth. If you want that festive green color, add a few drops of green food coloring and mix until evenly colored.
- Pour the filling over the cooled crust and smooth the top with a spatula. For a marbled effect, you can swirl in a little melted chocolate or extra green coloring with a toothpick, but this is totally optional.
- Bake at 325°F (163°C) for 35-40 minutes, or until the edges are set but the center still jiggles slightly when you shake the pan. This jiggle means it will set perfectly as it cools — trust me on this one.
- Cool completely at room temperature, then refrigerate for at least 3 hours or overnight. This chilling step is crucial for that creamy, firm texture you’re after.
- When ready to serve, lift the cheesecake out using the parchment paper overhang and cut into 16 squares. Garnish with whipped cream, chocolate shavings, or fresh mint if you like.
Pro tip: If your cream cheese lumps up or feels grainy, give it a quick zap in the microwave (about 10 seconds) before beating to soften it further. Also, don’t rush cooling—the texture improves dramatically with patience.
Cooking Tips & Techniques
One of the trickiest parts of cheesecake making is avoiding cracks and achieving that silky texture. Here’s what I’ve learned from many baking sessions:
- Room temperature ingredients: Always bring cream cheese and eggs to room temp. It helps the batter blend smoothly and prevents lumps.
- Don’t overmix: Once you add eggs, mix just enough to combine. Overbeating introduces air bubbles that cause cracks.
- Baking temperature matters: Low and slow is the motto here. Baking at 325°F (163°C) gently cooks the cheesecake for a creamy finish.
- Water bath optional: While some swear by a water bath for cheesecakes, I find this recipe bakes just fine without. Just make sure to avoid overbaking.
- Check for doneness: The cheesecake should still jiggle slightly in the center when done. It firms up perfectly as it chills.
- Use parchment paper: This makes removing the squares super easy and keeps edges neat.
Honestly, I’ve had my share of cracked cheesecakes over the years. The biggest lesson? Patience during cooling is key. Trying to rush it always leads to crumbly squares. Also, don’t skip the sour cream—it adds a subtle tang that balances the mint and chocolate beautifully.
Variations & Adaptations
Want to switch things up or cater to different tastes? Here are a few ways to customize this recipe:
- Non-alcoholic option: Swap grasshopper liqueur for peppermint extract (1 teaspoon) to keep the mint flavor without the booze.
- Gluten-free crust: Use gluten-free chocolate wafer cookies or grind gluten-free brownies for the crust. Just check your cookie brand carefully.
- Chocolate lovers’ twist: Fold mini chocolate chips into the cheesecake batter or drizzle melted chocolate on top before chilling.
- Seasonal adaptation: For a springtime version, swirl in pureed fresh strawberries or raspberries instead of green coloring.
- Dairy-free substitute: Use dairy-free cream cheese and butter alternatives. Just keep in mind the texture might be slightly different but still tasty!
Personally, I’ve tried adding crushed Andes mints to the crust for an extra minty surprise, and it was a hit at my last party. Feel free to experiment and make it your own!
Serving & Storage Suggestions
Serve these cheesecake squares chilled or at cool room temperature for the best texture. I like to add a dollop of whipped cream and a sprinkle of chocolate shavings to make them feel extra festive.
They pair wonderfully with a cup of hot coffee or a light minty cocktail if you’re celebrating. For parties, arranging them on a decorative platter with fresh mint leaves adds a gorgeous touch.
To store, keep the squares in an airtight container in the refrigerator for up to 4 days. You can also freeze them for up to 2 months—just thaw overnight in the fridge before serving. A quick tip: cheesecake flavors deepen and mellow after a day or two, so making them ahead is a great idea.
Nutritional Information & Benefits
Each square (assuming 16 servings) contains approximately 250 calories, 18g fat, 15g carbohydrates, and 4g protein. The cream cheese provides a good source of calcium, while the mint flavor offers a refreshing palate cleanser that aids digestion.
This recipe isn’t exactly low-calorie, but it’s a special treat that balances indulgence with relatively simple ingredients. For those watching gluten or dairy intake, there are easy substitutions to make it fit your needs.
I find that enjoying a small square satisfies my sweet tooth without making me feel heavy or sluggish—the mint really freshens things up! It’s a perfect way to celebrate with a little dessert joy.
Conclusion
These irresistible St. Patrick’s Grasshopper Cheesecake Squares are a festive, flavorful way to celebrate any occasion. They’re easy to make, fun to serve, and loved by everyone who tries them. Whether you’re new to cheesecake or a seasoned baker, this recipe hits that sweet spot between rich comfort and refreshing minty brightness.
Feel free to tweak the recipe to suit your tastes—add more mint, swap crusts, or go dairy-free. I love how versatile and forgiving this recipe is, making it perfect for bakers of all skill levels.
If you try making these cheesecake squares, drop a comment below and share your experience! I’d love to hear how you made it your own or what tricks you discovered. Here’s to many delicious celebrations ahead—cheers!
FAQs
Can I make these cheesecake squares ahead of time?
Absolutely! They actually taste better after chilling overnight, making them perfect for parties or prepping in advance.
What if I don’t have grasshopper liqueur?
No worries! Peppermint extract is a great substitute and keeps the mint flavor without alcohol.
Can I use a different crust?
Yes, graham cracker crust or even crushed Oreos work well if you want to mix it up.
How do I prevent cracks in my cheesecake?
Use room temperature ingredients, don’t overmix, bake at a low temperature, and chill thoroughly before cutting.
Is this recipe gluten-free?
It can be, if you use gluten-free chocolate wafer cookies for the crust. Always check your ingredients to be sure.
Pin This Recipe!
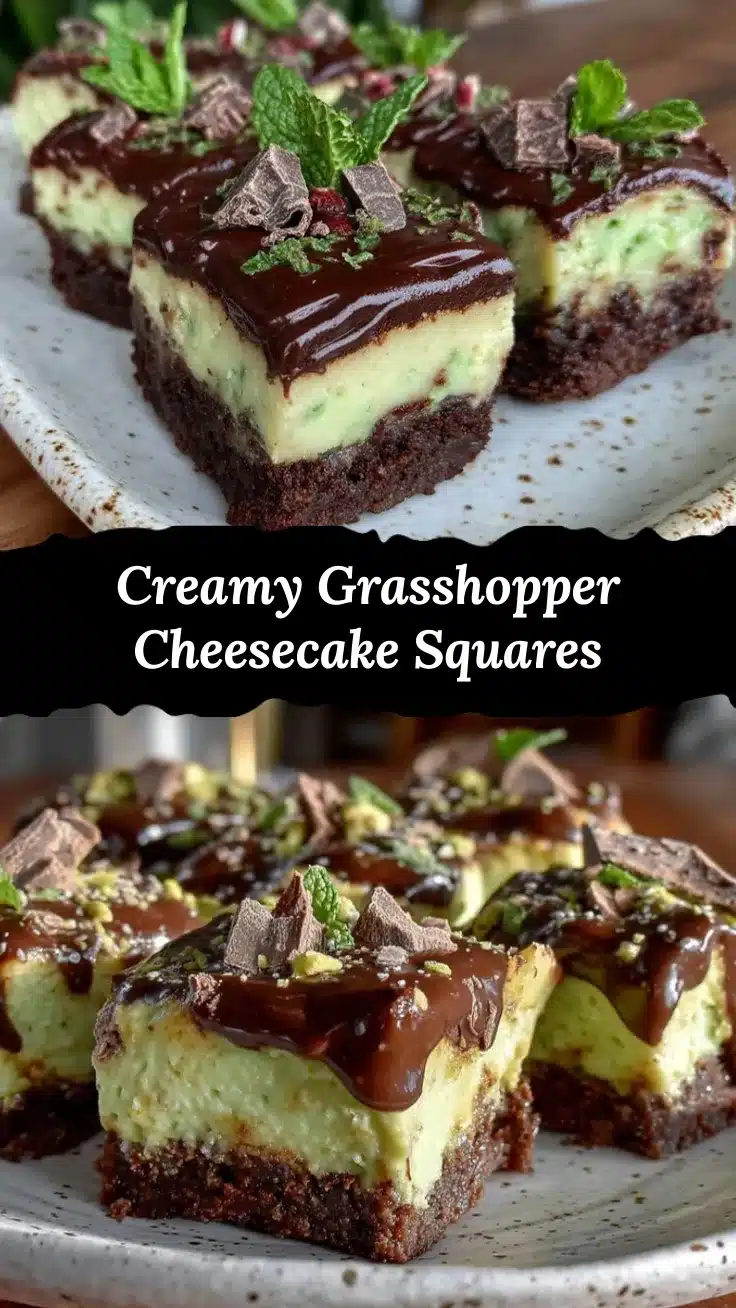
Irresistible St. Patrick’s Grasshopper Cheesecake Squares

These festive cheesecake squares combine creamy cheesecake with refreshing mint and a chocolate wafer crust, perfect for St. Patrick’s Day or any party. Easy to make and crowd-pleasing with a vibrant green swirl and subtle chocolate crunch.
- Prep Time: 15 minutes
- Cook Time: 45 minutes
- Total Time: 3 hours 45 minutes
- Yield: 16 servings 1x
- Category: Dessert
- Cuisine: American
Ingredients
- 1 ½ cups (150g) chocolate wafer cookies, crushed
- 6 tablespoons (85g) unsalted butter, melted
- 2 tablespoons (25g) granulated sugar
- 16 ounces (450g) cream cheese, softened
- ¾ cup (150g) granulated sugar
- 2 large eggs, room temperature
- ⅓ cup (80ml) grasshopper mint liqueur or 1 teaspoon peppermint extract
- ½ cup (120ml) sour cream
- 1 teaspoon vanilla extract
- A few drops green food coloring (optional)
- Whipped cream (optional, for garnish)
- Chocolate shavings or mini chocolate chips (optional, for garnish)
- Fresh mint leaves (optional, for garnish)
Instructions
- Preheat oven to 325°F (163°C). Line an 8×8-inch baking pan with parchment paper, leaving an overhang on two sides.
- In a medium bowl, combine crushed chocolate wafer cookies, melted butter, and sugar. Mix until crumbs feel like wet sand.
- Press the crust mixture firmly into the bottom of the prepared pan. Bake for 8-10 minutes until set. Remove and cool slightly.
- In a large bowl, beat softened cream cheese with an electric mixer on medium speed until smooth and creamy.
- Add granulated sugar and beat until combined.
- Add eggs one at a time, beating on low speed after each addition until just combined. Avoid overmixing.
- Mix in grasshopper mint liqueur or peppermint extract, sour cream, and vanilla extract until smooth.
- Add green food coloring if desired and mix until evenly colored.
- Pour filling over cooled crust and smooth the top with a spatula. Optionally, swirl in melted chocolate or extra green coloring for a marbled effect.
- Bake at 325°F (163°C) for 35-40 minutes, until edges are set but center jiggles slightly.
- Cool completely at room temperature, then refrigerate for at least 3 hours or overnight.
- Lift cheesecake out using parchment overhang and cut into 16 squares.
- Garnish with whipped cream, chocolate shavings, or fresh mint if desired.
Notes
Use room temperature cream cheese and eggs to avoid lumps. Do not overmix after adding eggs to prevent cracks. Baking at a low temperature ensures creamy texture. Cooling completely and refrigerating overnight is crucial for firm texture. Peppermint extract can substitute grasshopper liqueur for a non-alcoholic version. Gluten-free crust options are available. Use parchment paper for easy removal.
Nutrition
- Serving Size: 1 square (1/16 of re
- Calories: 250
- Fat: 18
- Carbohydrates: 15
- Protein: 4
Keywords: St. Patrick's Day, cheesecake squares, grasshopper liqueur, mint cheesecake, party dessert, chocolate crust, festive dessert


