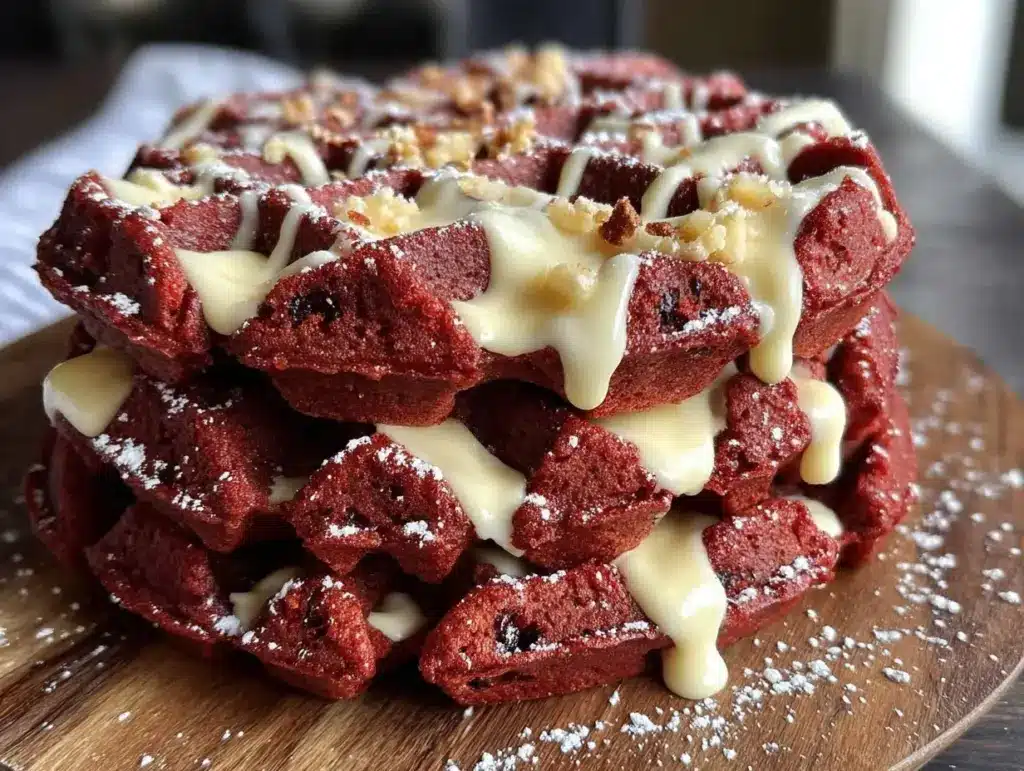
The moment I cracked open the waffle iron and caught that sweet, chocolatey aroma swirling through the kitchen, I knew these red velvet waffles were something special. Honestly, it’s not every day you get to enjoy the classic charm of red velvet cake in the form of crispy, fluffy waffles topped with a luscious cream cheese glaze. I first stumbled upon this recipe during a Sunday brunch experiment when I wanted to mix things up from the usual pancakes. Since then, it’s become a staple whenever I crave something both indulgent and comforting.
What’s cool about this recipe is how it blends that deep cocoa flavor with the vibrant red color and tangy cream cheese drizzle—it’s like a party on your plate. These waffles aren’t just for holidays or special occasions; they’re quick enough for busy mornings yet fancy enough to impress guests. I’ve tested this recipe multiple times to get the balance just right, making sure it’s moist inside with crispy edges and that the glaze hits the perfect note of sweetness and tang. If you love red velvet cake but want a fun twist, you’ll definitely want to give these red velvet waffles with cream cheese glaze a try.
Plus, who doesn’t want a breakfast that looks as good as it tastes? The bright red waffles topped with creamy white drizzle have that wow factor that makes mornings feel a little more magical. Stick around—I’ll walk you through every step, from ingredients to serving ideas, so you can nail this recipe on your first go.
Why You’ll Love This Recipe
After making these waffles over a dozen times, I can say this recipe really hits the sweet spot for several reasons. It’s not just another waffle recipe—it’s one that brings a burst of flavor and fun to your breakfast or brunch table. Here’s why you’ll be hooked:
- Quick & Easy: The batter comes together in about 10 minutes, and cooking each waffle takes roughly 4-5 minutes. Perfect for last-minute weekend brunches or when you need a delicious treat fast.
- Simple Ingredients: You don’t need any rare ingredients—everything is likely sitting in your pantry or fridge right now. That’s convenience that tastes amazing.
- Perfect for Special Occasions: Whether it’s Valentine’s Day, Christmas morning, or just a cozy weekend, these waffles bring a festive flair that everyone will appreciate.
- Crowd-Pleaser: Kids, adults, picky eaters—you name it. The cream cheese glaze smooths out the cocoa richness with a tang that keeps people coming back for more.
- Unbelievably Delicious: The waffles have that crisp exterior and soft, tender inside that you usually expect from a good waffle, but with the added bonus of velvety cocoa and a gorgeous red hue.
What makes this recipe stand out is the little things, like folding in just the right amount of cocoa powder and using buttermilk or milk with a splash of vinegar to keep that tender crumb. And the cream cheese glaze? It’s blended so smoothly you won’t believe it’s homemade. I’ve also swapped out regular flour for a gluten-free mix before, and it still turned out fantastic—so there’s some wiggle room here. Honestly, it’s the kind of recipe you’ll want to share, bookmark, and make again and again.
What Ingredients You Will Need
This recipe relies on simple, wholesome ingredients that come together to create a bold flavor and satisfying texture without much fuss. Here’s what you’ll need for the batter and the cream cheese glaze:
- All-purpose flour: 2 cups (240 g) – the base for the waffles, provides structure.
- Cocoa powder: 2 tablespoons (15 g), unsweetened – adds that rich red velvet chocolate flavor. I prefer Dutch-processed cocoa for a smoother taste.
- Granulated sugar: 1/2 cup (100 g) – balances the cocoa bitterness.
- Baking powder: 1 teaspoon – helps the waffles rise and fluff up.
- Baking soda: 1/2 teaspoon – reacts with the acidic ingredients for leavening.
- Salt: 1/4 teaspoon – enhances the flavors.
- Buttermilk: 1 3/4 cups (420 ml) – the acidity tenderizes the batter and adds tang. If you don’t have buttermilk, add 1 tablespoon vinegar or lemon juice to milk and let sit 5 minutes.
- Vegetable oil: 1/4 cup (60 ml) – keeps the waffles moist and crisp.
- Eggs: 2 large, room temperature – bind the ingredients and add richness.
- Vanilla extract: 1 teaspoon – rounds out the flavor.
- Red food coloring: 2 tablespoons – this is what gives the waffles their signature vibrant red color. You can use gel or liquid; gel tends to be more concentrated.
For the cream cheese glaze:
- Cream cheese: 4 oz (115 g), softened – the star of the glaze, bringing tang and creaminess.
- Powdered sugar: 1 cup (120 g) – sweetens and thickens the glaze.
- Milk: 2-3 tablespoons (30-45 ml) – adjusts the glaze consistency.
- Vanilla extract: 1/2 teaspoon – adds aroma and depth.
When choosing cream cheese, I usually go for a full-fat brand for the best texture and flavor. Also, if you want to make these waffles dairy-free, swapping buttermilk for almond or oat milk with vinegar works well, and you can try a dairy-free cream cheese for the glaze.
Equipment Needed
- Waffle iron: A non-stick Belgian or classic waffle maker works best. I personally use a Belgian waffle iron because I love the thick, fluffy texture it creates. If you only have a classic waffle maker, that’s totally fine too!
- Mixing bowls: One large bowl for dry ingredients and another for wet.
- Whisk: For combining wet ingredients smoothly and incorporating air.
- Spatula: To fold ingredients together gently without overmixing.
- Measuring cups and spoons: For precise ingredient amounts—especially important for baking recipes like this one.
- Electric mixer or hand mixer: Optional but helpful for whipping the cream cheese glaze until silky smooth.
If you’re on a budget, you can find affordable waffle irons online or at local stores. Just make sure it heats evenly and has a non-stick surface to prevent sticking. Also, cleaning your waffle iron right after use keeps it in great shape — trust me, I’ve learned that the hard way when batter got stuck and was a pain to scrape off!
Detailed Preparation Method

- Preheat your waffle iron. This step is crucial to get that perfect crispiness. Most waffle irons have an indicator light; wait for it to signal readiness. It usually takes about 5-7 minutes.
- Combine dry ingredients. In a large bowl, sift together 2 cups (240 g) of all-purpose flour, 2 tablespoons (15 g) cocoa powder, 1/2 cup (100 g) granulated sugar, 1 teaspoon baking powder, 1/2 teaspoon baking soda, and 1/4 teaspoon salt. Sifting helps avoid lumps and ensures even baking.
- Mix wet ingredients. In a separate bowl, whisk 1 3/4 cups (420 ml) of buttermilk, 1/4 cup (60 ml) vegetable oil, 2 large eggs (room temperature), 1 teaspoon vanilla extract, and 2 tablespoons red food coloring until fully combined. The batter will look bright and inviting.
- Combine wet and dry mixtures. Pour the wet ingredients into the dry and gently fold with a spatula until just combined. The batter should be slightly lumpy—don’t overmix, or the waffles may turn tough.
- Cook the waffles. Lightly grease your waffle iron with non-stick spray or a bit of oil. Pour about 1/2 to 3/4 cup (120-180 ml) of batter onto the center of the iron, spreading slightly but not too thin. Close the lid and cook for 4-5 minutes, or until the waffles are deep red, crisp on the outside, and spring back to the touch.
- Make the cream cheese glaze. While the waffles cook, beat 4 oz (115 g) softened cream cheese with 1 cup (120 g) powdered sugar, 2-3 tablespoons (30-45 ml) milk, and 1/2 teaspoon vanilla extract until smooth and creamy. Adjust milk to get your desired drizzle consistency.
- Serve immediately. Stack your warm red velvet waffles on a plate and generously drizzle the cream cheese glaze on top. You can add fresh berries or a sprinkle of powdered sugar for an extra touch.
If your waffles stick to the iron, try brushing the plates with a little more oil before the next batch. Also, don’t peek too early—opening the lid too soon can cause the waffles to break apart. Look for that subtle steam reduction as a sign they’re done.
Cooking Tips & Techniques
One thing I’ve learned is that the key to perfect red velvet waffles lies in the mixing and cooking process. For starters, always use room temperature eggs and buttermilk; cold ingredients can slow down the rising process and affect texture. When combining the batter, folding gently is your best friend—mixing vigorously will develop gluten, making waffles chewy instead of tender.
Also, don’t skimp on preheating your waffle iron. A properly heated iron crisps the exterior while keeping the inside soft and light. If you notice your waffles are too pale, try increasing the cooking time by a minute or so. On the flip side, darker waffles mean richer flavor but watch out for burning.
For the cream cheese glaze, soften your cream cheese thoroughly to avoid lumps. Beat it until silky and add the milk gradually to control thickness. If it gets too runny, add a bit more powdered sugar. I like to keep the glaze chilled until serving—it thickens slightly and holds its shape better when drizzled over hot waffles.
Timing is everything here. While the first waffle cooks, prepare the glaze and get your toppings ready. This way, you can serve everything warm and fresh. Trust me, waffles lose their charm if they sit too long and get soggy.
Variations & Adaptations
One of the best things about this recipe is its flexibility. Here are a few ways I’ve tweaked it depending on the occasion or my pantry status:
- Gluten-Free Red Velvet Waffles: Swap out all-purpose flour for a gluten-free blend. Make sure your baking powder is gluten-free too. I’ve tried this with a 1:1 gluten-free flour mix and got amazing results—still fluffy and tender.
- Vegan Version: Replace eggs with flax eggs (1 tablespoon ground flax + 3 tablespoons water per egg) and use a plant-based milk with a splash of vinegar for buttermilk. Use vegan cream cheese for the glaze. The waffles won’t be quite as rich but still delicious!
- Chocolate Chip Red Velvet: Add 1/2 cup (90 g) mini chocolate chips to the batter for a melty surprise inside each bite. This is a fun twist my kids adore.
- Different Toppings: Instead of cream cheese glaze, try whipped cream with fresh strawberries or a drizzle of maple syrup and powdered sugar for a simpler approach.
- Cooking Methods: If you don’t have a waffle iron, you can try making these as pancakes—just adjust cooking time and thickness accordingly.
Personally, I once tried swapping red food coloring with beet juice for a natural alternative, and while the color was less vibrant, the flavor was still spot-on. It’s a great option if you want to avoid artificial dyes.
Serving & Storage Suggestions
These red velvet waffles are best served fresh and warm, straight off the waffle iron. The contrast between the crispy edges and the tender interior is at its peak when hot. I like to drizzle the cream cheese glaze right before serving so it melts slightly into the waffle’s nooks and crannies.
For a pretty presentation, stack waffles on a plate, drizzle generously with glaze, and sprinkle with fresh berries or a dusting of powdered sugar. A side of crisp bacon or fresh fruit pairs wonderfully if you want a full brunch spread.
If you have leftovers (which is rare in my house!), store them in an airtight container in the refrigerator for up to 2 days. Reheat in a toaster or oven at 350°F (175°C) for about 5 minutes to bring back the crispiness. Avoid microwaving if you want to keep that texture intact.
These waffles actually taste pretty good cold too, but the glaze firms up when chilled. You can also freeze cooked waffles between parchment paper sheets in a freezer-safe bag for up to 2 months. Toast or oven-reheat straight from frozen for a quick treat.
Nutritional Information & Benefits
Each serving (about 2 waffles) contains roughly 350-400 calories, depending on portion size and glaze amount. The recipe balances indulgence with some nutritional perks thanks to the buttermilk and eggs, which provide protein and calcium.
Cocoa powder adds antioxidants, and the cream cheese glaze, while rich, has some calcium and protein too. You can adjust sugar quantities if you want a lighter version. This recipe is not gluten-free or dairy-free unless you swap ingredients as mentioned earlier.
From a wellness standpoint, I love that this recipe brings joy and comfort without too much fuss. It’s a treat that doesn’t feel overwhelming and can fit into a balanced eating plan when enjoyed in moderation.
Conclusion
To wrap it up, this irresistible red velvet waffles recipe with cream cheese glaze is a fantastic way to shake up your breakfast or brunch routine. It’s simple, fast, and seriously delicious, with flavors that bring a smile every single time. Whether you’re cooking for family, friends, or just treating yourself, these waffles deliver on taste and presentation.
Feel free to play around with the toppings, try the variations, or tweak the sugar to suit your preferences. I keep coming back to this recipe because it’s reliable and always a hit. If you give it a try, I’d love to hear how it went or what creative spins you added!
Don’t forget to share this recipe, leave a comment, and tag your waffle adventures on social media. Happy cooking and even happier eating!
FAQs
Can I make the red velvet waffles ahead of time?
Yes! You can prepare the batter the night before and keep it covered in the fridge. Just give it a gentle stir before cooking. Cooked waffles can be stored in the fridge for 2 days or frozen for longer.
What if I don’t have red food coloring?
You can skip it for a more subtle look or use natural alternatives like beet juice, but the color won’t be as bright. The flavor remains delicious either way.
How do I prevent waffles from sticking to my waffle iron?
Make sure your waffle iron is well preheated and lightly greased before each batch. Using non-stick spray or a brush of oil helps a lot.
Can I use regular milk instead of buttermilk?
Yes, simply add 1 tablespoon of vinegar or lemon juice to 1 3/4 cups of milk and let it sit for 5 minutes to create a buttermilk substitute.
Is it possible to make these waffles gluten-free?
Absolutely! Replace the all-purpose flour with a gluten-free baking flour blend and check your baking powder is gluten-free. The texture will be slightly different but still tasty.
Pin This Recipe!
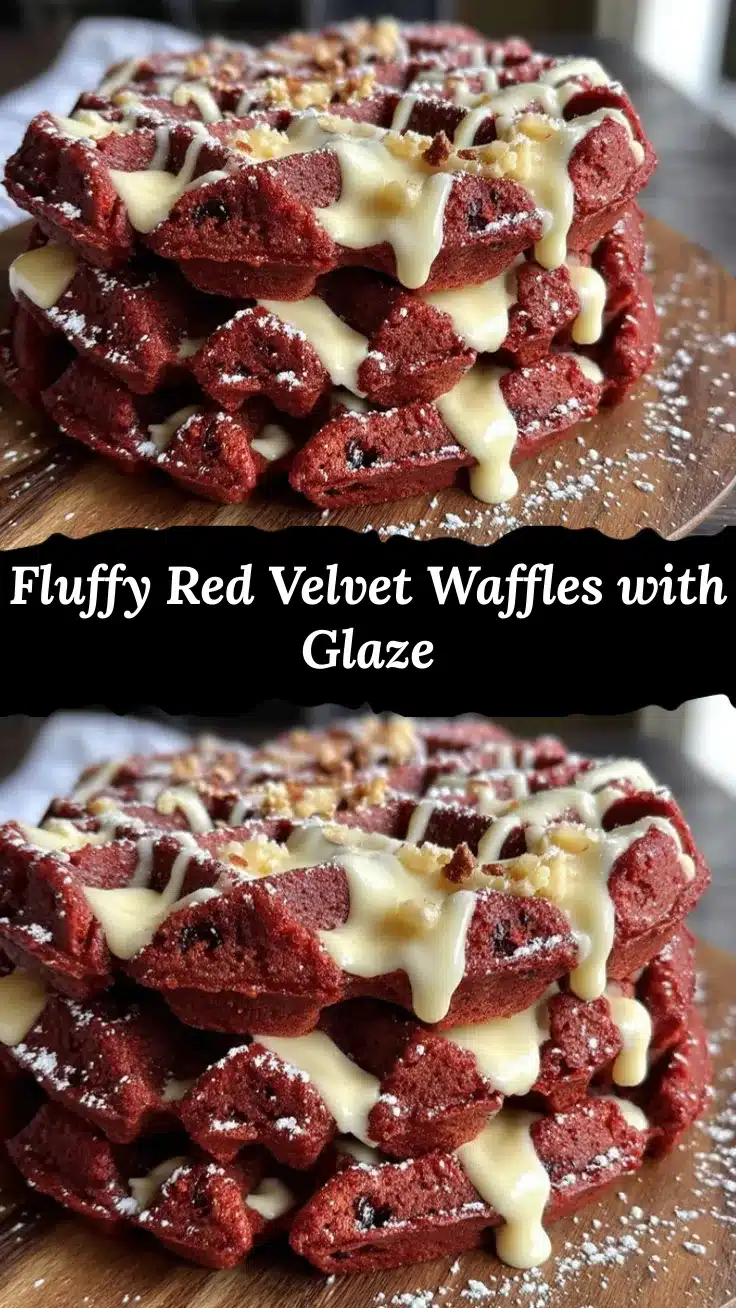
Irresistible Red Velvet Waffles Recipe Easy Homemade with Cream Cheese Glaze

These red velvet waffles combine the classic charm of red velvet cake with crispy, fluffy waffles topped with a luscious cream cheese glaze. Perfect for quick, indulgent breakfasts or special occasions.
- Prep Time: 10 minutes
- Cook Time: 20 minutes
- Total Time: 30 minutes
- Yield: 4 servings 1x
- Category: Breakfast
- Cuisine: American
Ingredients
- 2 cups (240 g) all-purpose flour
- 2 tablespoons (15 g) unsweetened cocoa powder (preferably Dutch-processed)
- 1/2 cup (100 g) granulated sugar
- 1 teaspoon baking powder
- 1/2 teaspoon baking soda
- 1/4 teaspoon salt
- 1 3/4 cups (420 ml) buttermilk (or milk with 1 tablespoon vinegar/lemon juice, let sit 5 minutes)
- 1/4 cup (60 ml) vegetable oil
- 2 large eggs, room temperature
- 1 teaspoon vanilla extract
- 2 tablespoons red food coloring (gel or liquid)
- For the cream cheese glaze:
- 4 oz (115 g) cream cheese, softened
- 1 cup (120 g) powdered sugar
- 2–3 tablespoons (30–45 ml) milk
- 1/2 teaspoon vanilla extract
Instructions
- Preheat your waffle iron until ready, about 5-7 minutes.
- In a large bowl, sift together the flour, cocoa powder, sugar, baking powder, baking soda, and salt.
- In a separate bowl, whisk together the buttermilk, vegetable oil, eggs, vanilla extract, and red food coloring until fully combined.
- Pour the wet ingredients into the dry ingredients and gently fold with a spatula until just combined; batter should be slightly lumpy.
- Lightly grease the waffle iron with non-stick spray or oil. Pour 1/2 to 3/4 cup (120-180 ml) batter onto the center of the iron, spread slightly but not too thin.
- Close the lid and cook for 4-5 minutes until waffles are deep red, crisp outside, and spring back to the touch.
- While waffles cook, beat the softened cream cheese with powdered sugar, milk, and vanilla extract until smooth and creamy. Adjust milk for desired consistency.
- Serve waffles immediately, stacked and generously drizzled with cream cheese glaze. Optionally add fresh berries or powdered sugar.
Notes
Use room temperature eggs and buttermilk for best texture. Do not overmix batter to avoid tough waffles. Preheat waffle iron fully and grease lightly to prevent sticking. Soften cream cheese thoroughly for smooth glaze. Store leftovers in airtight container in fridge up to 2 days or freeze up to 2 months.
Nutrition
- Serving Size: About 2 waffles per
- Calories: 375
- Sugar: 22
- Sodium: 350
- Fat: 18
- Saturated Fat: 6
- Carbohydrates: 48
- Fiber: 2
- Protein: 7
Keywords: red velvet waffles, cream cheese glaze, breakfast waffles, homemade waffles, easy waffle recipe, brunch recipe, red velvet cake waffles