Introduction
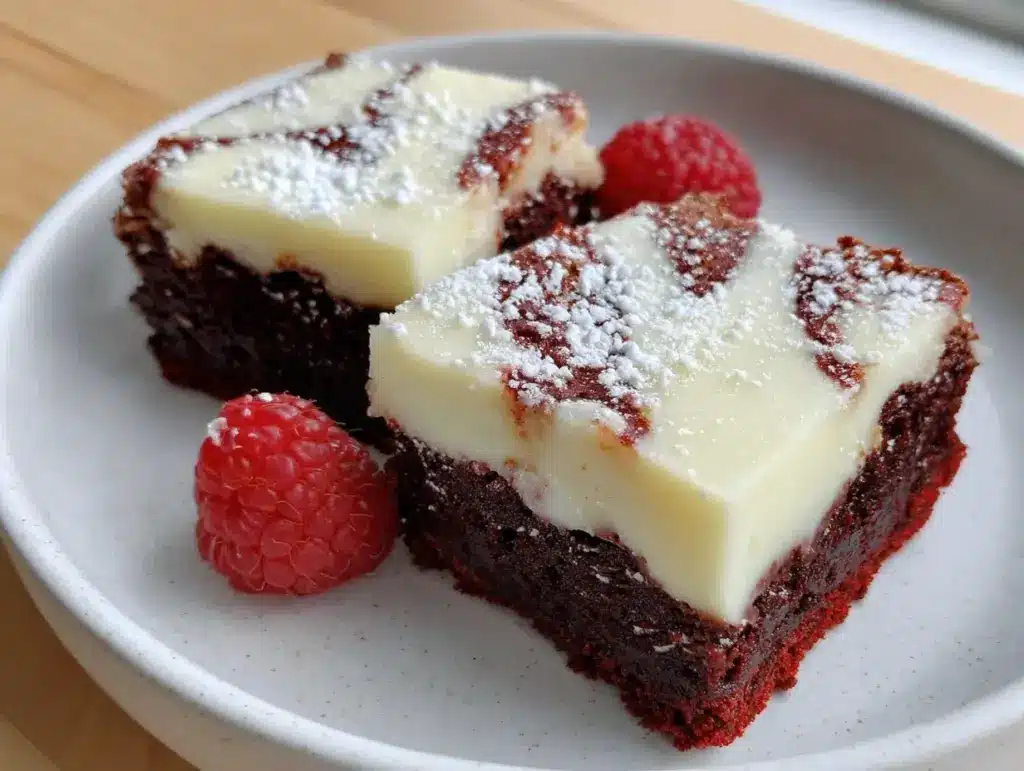
The sight of a rich, red velvet brownie topped with creamy cheesecake swirls shaped into perfect hearts just makes my heart skip a beat. Honestly, I first baked these irresistible red velvet heart-shaped cheesecake brownies on a whim during a Valentine’s Day baking session, and they quickly became my go-to sweet treat for special occasions. The smell alone — that warm, cocoa-infused aroma mingling with the tangy sweetness of cream cheese — takes me right back to cozy afternoons spent with loved ones.
This recipe is more than just a dessert; it’s a little act of love you can whip up in your own kitchen. I’ve made these brownies countless times, tweaking and testing to get the texture just right — dense yet fudgy brownies paired with a velvety cheesecake top that melts in your mouth. If you’re looking for a show-stopping, crowd-pleasing treat that stands out at any Valentine’s Day gathering (or honestly, any day), these red velvet cheesecake brownies are your answer.
You’ll find this recipe wonderfully approachable, even if you’re not a baking pro. Plus, the heart-shaped swirl? It’s a charming touch that’s sure to make anyone smile. Trust me, you’ll want to keep this recipe handy for whenever you need an irresistibly sweet pick-me-up that feels both fancy and homey.
Why You’ll Love This Recipe
- Quick & Easy: Comes together in under an hour, which is perfect when you’re short on time but want to impress.
- Simple Ingredients: No fancy grocery store trips — most of these ingredients are pantry staples you probably already have hanging out in your kitchen.
- Perfect for Valentine’s Day: The red velvet and cheesecake combo screams romance and indulgence, making it ideal for cozy celebrations or gifting.
- Crowd-Pleaser: Kids, adults, picky eaters — everyone asks for seconds. It’s that good.
- Unbelievably Delicious: The rich, fudgy brownie meets the smooth, tangy cheesecake topping in a perfect marriage of flavors and textures.
What sets this recipe apart? Well, the secret is in the cheesecake swirl — I blend the cream cheese filling until ultra-smooth for that silky finish. Plus, the heart shapes are made by swirling the batter with a toothpick, creating a beautiful design that’s as delightful to look at as it is to eat. It’s not just another red velvet brownie; it’s a special dessert with a personal touch, perfect for making memories.
Honestly, after baking these over a dozen times, I can say this recipe is a winner in my book — it’s the kind of treat that makes you close your eyes after the first bite and savor every moment.
What Ingredients You Will Need
This recipe uses simple, wholesome ingredients to deliver bold flavor and satisfying texture without the fuss. Most are easy to find and affordable, so you won’t have to hunt for anything exotic.
- For the Red Velvet Brownie Batter:
- Unsalted butter, ½ cup (113g), melted (adds richness and moistness)
- Granulated sugar, 1 cup (200g)
- Large eggs, 2, room temperature
- Vanilla extract, 1 teaspoon
- All-purpose flour, ¾ cup (95g)
- Cocoa powder, 2 tablespoons (unsweetened)
- Red food coloring, 2 tablespoons (for that signature vibrant color)
- Baking powder, ½ teaspoon
- Salt, ¼ teaspoon
- For the Cheesecake Swirl:
- Cream cheese, 8 oz (225g), softened (I prefer Philadelphia for its smooth texture)
- Granulated sugar, ⅓ cup (65g)
- Large egg, 1, room temperature
- Vanilla extract, 1 teaspoon
- All-purpose flour, 1 tablespoon (helps stabilize the filling)
If you want a gluten-free option, you can swap the all-purpose flour with a gluten-free blend of equal measure. For a dairy-free twist, try replacing the cream cheese with a plant-based cream cheese alternative, although the texture will be slightly different.
Look for firm cream cheese and avoid whipped types to get the best swirl effect. If you don’t have red food coloring, you can use beet powder for a natural alternative, but expect a more subtle hue.
Equipment Needed
- 9×9 inch (23×23 cm) square baking pan — a metal pan works best for even heat distribution, but glass pans are fine too.
- Mixing bowls — one large for the brownie batter and one medium for the cheesecake filling.
- Electric mixer or hand mixer — I find these make blending the cheesecake filling super smooth and easy.
- Rubber spatula for folding and scraping bowls.
- Measuring cups and spoons — accuracy matters here to keep the texture just right.
- Toothpick or skewer for creating the heart-shaped swirls (a small offset spatula can help with spreading batter evenly).
- Parchment paper — to line the pan for easy removal and cleanup.
If you’re on a budget, you can substitute a hand whisk for an electric mixer, but beating the cream cheese filling will take a little more elbow grease. Also, make sure your mixing bowls aren’t too deep — shallow bowls make swirling the batter easier and less messy.
Detailed Preparation Method
- Preheat your oven to 350°F (175°C). Line your 9×9 inch pan with parchment paper, leaving an overhang on two sides to lift the brownies out easily later. This step saves you from any sticky situations!
- Prepare the brownie batter: In a large bowl, whisk together the melted butter and sugar until well combined and shiny, about 1-2 minutes. Add the eggs one at a time, mixing after each until smooth. Stir in the vanilla extract.
- In a separate bowl, sift together the flour, cocoa powder, baking powder, and salt. Gradually fold the dry ingredients into the wet mixture, just until no streaks remain. Be careful not to overmix — you want tender brownies, not tough ones.
- Add the red food coloring: Mix in 2 tablespoons of red food coloring to the batter, stirring until the color is vibrant and uniform. If the batter looks too thick, a splash of milk (about 1 tablespoon) can help loosen it a bit.
- Make the cheesecake filling: Beat the softened cream cheese in a medium bowl until smooth and creamy, about 2 minutes with a mixer. Add sugar and beat until fluffy. Then add the egg and vanilla, mixing until combined. Finally, fold in the tablespoon of flour to help stabilize the filling.
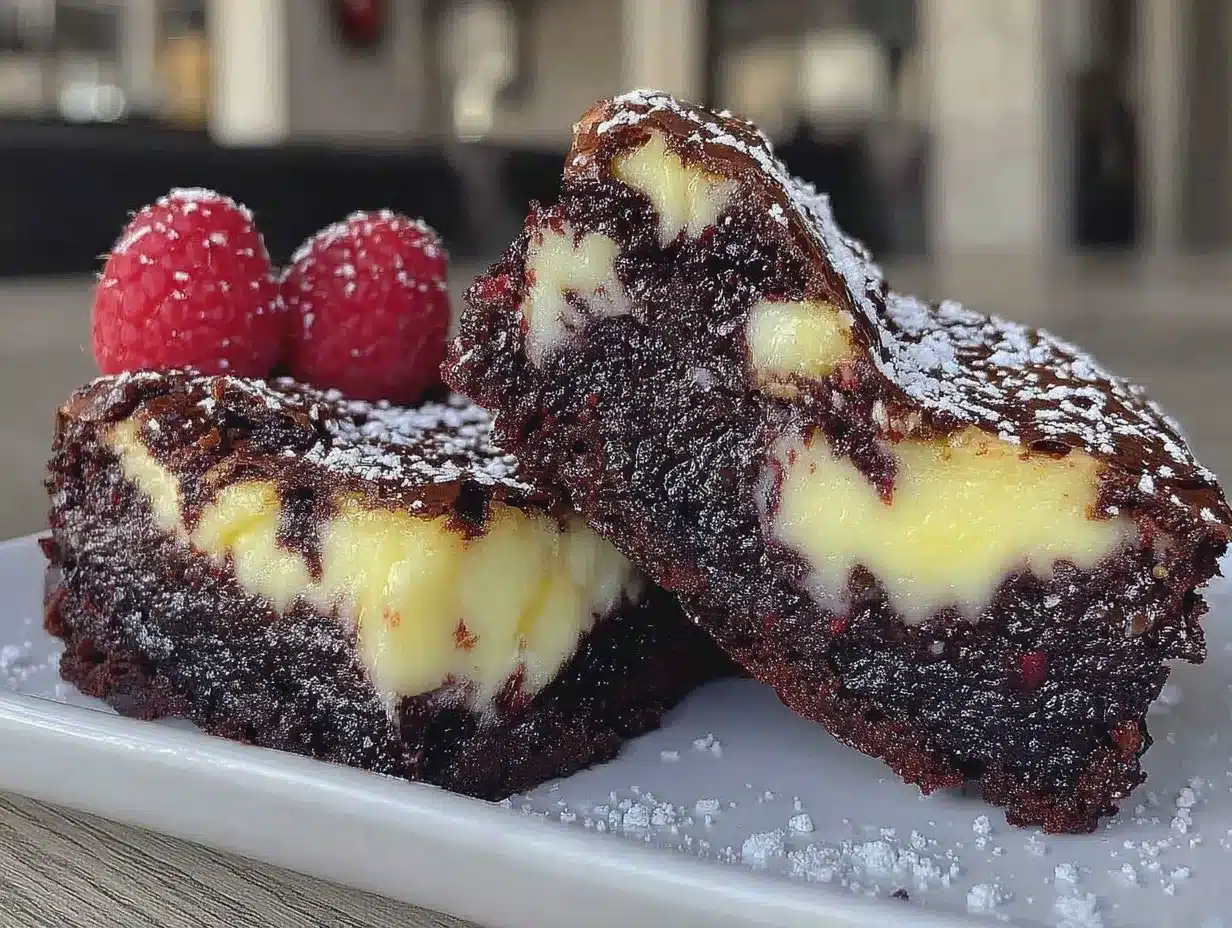
- Assemble the brownies: Pour half of the red velvet batter into the prepared pan, smoothing it into an even layer with a spatula. Dollop the cheesecake filling over the batter in spoonfuls, then top with the remaining red velvet batter.
- Create the heart-shaped swirls: Using a toothpick or skewer, drag through the batter and filling in a series of small “U” shapes followed by a point at the bottom to form hearts. It sounds tricky, but a steady hand and slow movements work wonders. You’ll see the lovely red and white pattern form — that’s your cue!
- Bake: Place the pan in the preheated oven and bake for 35-40 minutes. Insert a toothpick into the brownie portion (avoid the cheesecake spots) — it should come out with a few moist crumbs but not wet batter. The cheesecake will be set but still soft.
- Cool completely: Let the brownies cool in the pan on a wire rack for at least an hour before lifting out and slicing. This step is crucial to keep those beautiful swirls intact and prevent crumbling.
- Slice and serve: Use a sharp knife wiped clean between cuts for the best presentation. Serve at room temperature or slightly chilled.
Pro tip: If your cheesecake filling cracks a bit on top, don’t worry — it still tastes delicious! For extra smooth swirls, make sure the cream cheese is fully softened before mixing.
Cooking Tips & Techniques
One thing I learned the hard way is not to overbake these brownies. The cheesecake topping can dry out quickly, so keep a close eye after the 30-minute mark. The brownies should be fudgy, not cakey.
When mixing the red velvet batter, folding the dry ingredients gently helps keep that tender crumb. And don’t skip sifting your cocoa and flour — it prevents lumps and uneven baking.
For the heart swirl, practice on parchment paper first if you’re nervous. The motion is basically a “V” shape dragged from top to bottom, repeated across the pan. It’s surprisingly easy once you get the hang of it.
Multitasking tip: While the brownies bake, clean your workspace and prep your serving plates. That way, once cooled, you’re ready to enjoy immediately.
Lastly, if you want extra shine on your cheesecake topping, a quick brush of simple syrup after baking can add a lovely gloss and a hint of sweetness.
Variations & Adaptations
- Seasonal Twist: Swap red food coloring for natural beet juice or puree to get a subtle, earthy red hue and add a touch of nutrition.
- Flavor Boost: Add ½ teaspoon of espresso powder to the brownie batter for a deeper chocolate flavor that complements the cheesecake beautifully.
- Dietary Swap: Use almond flour and coconut sugar for a gluten-free and lower glycemic index version. Replace cream cheese with dairy-free alternatives for a vegan-friendly take.
- Texture Variation: Fold in ½ cup of white chocolate chips or chopped pecans for some added crunch and richness.
- Personal Favorite: One time, I stirred in a tablespoon of orange zest into the cheesecake filling — it gave such a fresh pop that everyone loved. Try it if you want something unexpected!
Serving & Storage Suggestions
These red velvet heart-shaped cheesecake brownies are best served slightly chilled or at room temperature. I like to present them on a pretty platter with a dusting of powdered sugar or a drizzle of white chocolate for extra flair.
They pair wonderfully with a hot cup of coffee or a glass of cold milk — honestly, it’s like a cozy hug in dessert form. You can also serve them alongside fresh berries or a scoop of vanilla ice cream for an indulgent treat.
Store leftover brownies in an airtight container in the refrigerator for up to five days. They keep their moist texture surprisingly well! For longer storage, wrap tightly and freeze for up to three months.
When reheating, pop a portion in the microwave for about 15 seconds to soften the cheesecake topping without drying out the brownie. Flavors actually deepen over a day or two, so if you can wait, the next-day taste is even better.
Nutritional Information & Benefits
One serving of these brownies (about a 2×2 inch square) provides roughly 280 calories, with moderate protein from the cream cheese and eggs. While they’re a dessert treat, the cream cheese adds some calcium and protein, balancing out the indulgence a bit.
Using real butter and sugar means you’re enjoying a classic, rich flavor, but you can lighten it up by swapping some sugar for coconut sugar or using lower-fat cream cheese varieties if you prefer.
Gluten-free and dairy-free adaptations make this recipe accessible to many dietary needs, making it a versatile choice for gatherings.
From a wellness perspective, sharing these brownies with friends or family adds an emotional boost — food really is love on a plate. Just savor in moderation, and enjoy the moments!
Conclusion
These irresistible red velvet heart-shaped cheesecake brownies are the perfect blend of show-stopping and simple, sweet and tangy, rich and tender. They make a fantastic dessert for Valentine’s Day, anniversaries, or whenever you want to treat yourself and others to something truly special.
Don’t hesitate to customize the swirl patterns or try out the variations I shared — baking is all about making recipes your own. I love this recipe because it feels like a little celebration every time I bake it, and I hope it brings that same joy to your kitchen.
If you give this recipe a try, I’d love to hear how it turns out — drop a comment below or share your own creative twists. Happy baking, and may your treats be as sweet as your moments!
FAQs
Can I make these brownies ahead of time?
Absolutely! These brownies actually taste better after resting for a day, so feel free to bake them a day early and store them covered in the fridge.
What if I don’t have red food coloring?
You can substitute with beet juice or beet powder for a natural red tint, but the color will be less vibrant.
How do I prevent the cheesecake from cracking?
Make sure your cream cheese is fully softened and mix just until smooth to avoid overbeating. Also, avoid opening the oven door mid-bake to keep the temperature steady.
Can I use a different pan size?
Yes, but bake times will vary. For a smaller pan, check for doneness earlier; for a larger pan, add a few extra minutes. Adjust accordingly and watch closely.
How do I store leftover brownies?
Keep them in an airtight container in the fridge for up to five days or freeze tightly wrapped for longer storage. Reheat gently before serving.
Pin This Recipe!
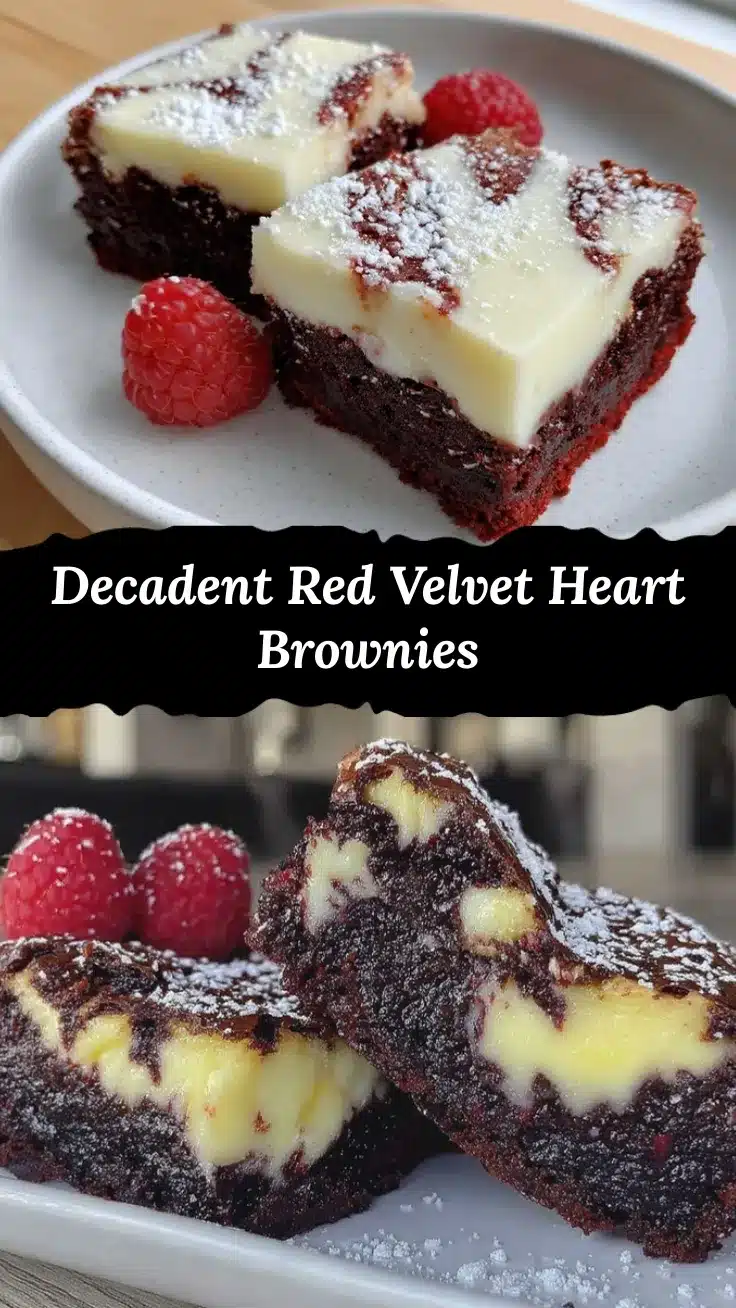
Irresistible Red Velvet Heart-Shaped Cheesecake Brownies

Rich, fudgy red velvet brownies topped with creamy cheesecake swirls shaped into perfect hearts, ideal for Valentine’s Day or any special occasion.
- Prep Time: 15 minutes
- Cook Time: 35-40 minutes
- Total Time: 50-55 minutes
- Yield: 16 servings 1x
- Category: Dessert
- Cuisine: American
Ingredients
- ½ cup (113g) unsalted butter, melted
- 1 cup (200g) granulated sugar
- 2 large eggs, room temperature
- 1 teaspoon vanilla extract
- ¾ cup (95g) all-purpose flour
- 2 tablespoons unsweetened cocoa powder
- 2 tablespoons red food coloring
- ½ teaspoon baking powder
- ¼ teaspoon salt
- 8 oz (225g) cream cheese, softened
- ⅓ cup (65g) granulated sugar
- 1 large egg, room temperature
- 1 teaspoon vanilla extract
- 1 tablespoon all-purpose flour
Instructions
- Preheat your oven to 350°F (175°C). Line a 9×9 inch pan with parchment paper, leaving an overhang on two sides.
- In a large bowl, whisk together melted butter and sugar until shiny, about 1-2 minutes. Add eggs one at a time, mixing after each. Stir in vanilla extract.
- In a separate bowl, sift together flour, cocoa powder, baking powder, and salt. Gradually fold dry ingredients into wet mixture until no streaks remain. Do not overmix.
- Mix in red food coloring until color is vibrant and uniform. If batter is too thick, add about 1 tablespoon milk to loosen.
- Beat softened cream cheese in a medium bowl until smooth, about 2 minutes. Add sugar and beat until fluffy. Add egg and vanilla, mixing until combined. Fold in flour to stabilize filling.
- Pour half of the red velvet batter into the prepared pan and smooth evenly. Dollop cheesecake filling over batter in spoonfuls, then top with remaining red velvet batter.
- Using a toothpick or skewer, drag through batter and filling in small ‘U’ shapes followed by a point to form heart shapes.
- Bake for 35-40 minutes. Insert a toothpick into brownie portion; it should come out with a few moist crumbs but not wet batter. Cheesecake should be set but soft.
- Cool brownies completely in pan on a wire rack for at least one hour before lifting out and slicing.
- Slice with a sharp knife wiped clean between cuts. Serve at room temperature or slightly chilled.
Notes
Do not overbake to keep cheesecake topping moist and brownies fudgy. Use fully softened cream cheese for smooth swirls. Practice heart swirl on parchment paper if needed. For extra shine, brush cheesecake topping with simple syrup after baking.
Nutrition
- Serving Size: 1 piece (about 2x2 i
- Calories: 280
- Sugar: 25
- Sodium: 180
- Fat: 15
- Saturated Fat: 8
- Carbohydrates: 34
- Fiber: 1
- Protein: 4
Keywords: red velvet brownies, cheesecake brownies, Valentine's Day dessert, heart-shaped brownies, fudgy brownies, cream cheese swirl


