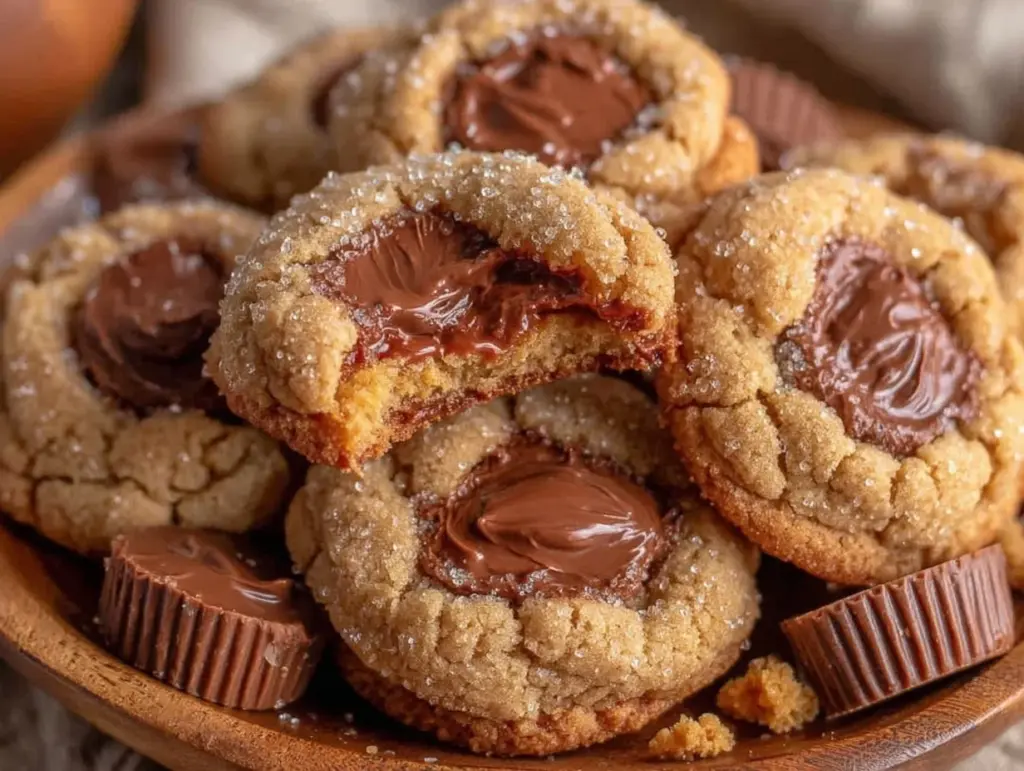
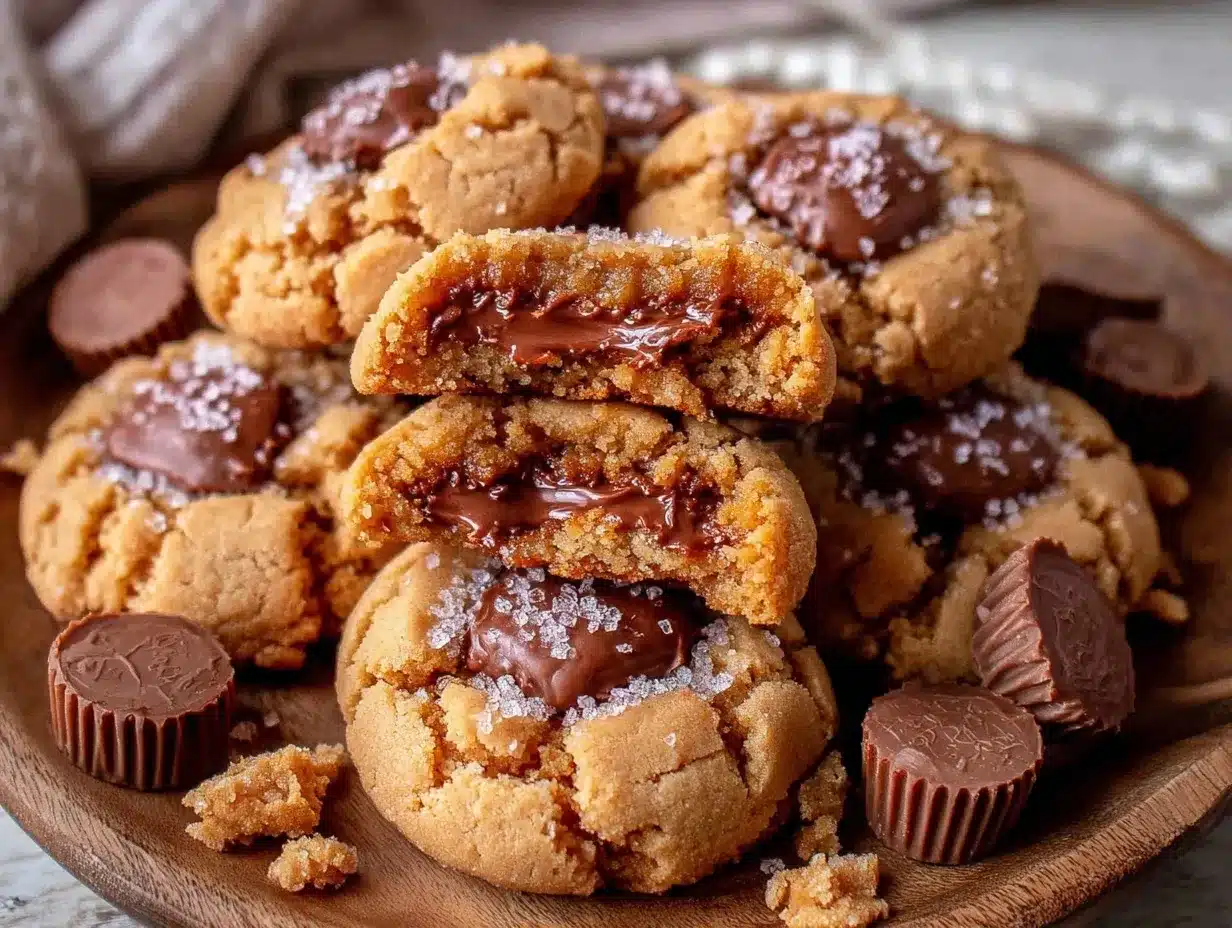
The moment you bite into a warm, gooey cookie hiding a melted peanut butter cup, your taste buds throw a little party. Honestly, I can’t get enough of these peanut butter cup stuffed cookies. The smell when they’re baking—sweet dough mingled with rich chocolate and peanut butter—is simply unforgettable. I remember my first batch; I was skeptical about stuffing candy inside cookie dough, but after one bite, it was game over. Now, these cookies have become my go-to when I want to impress friends or just treat myself after a long day.
These cookies aren’t just delicious; they’re a fun twist on classic peanut butter cookies that anyone can make at home. I’ve tested this recipe countless times, tweaking the dough to get that perfect balance of chewy and soft, while making sure the peanut butter cups stay wonderfully melty inside. Whether you’re baking for a family gathering, a cozy night in, or just because you need a sweet pick-me-up, these peanut butter cup stuffed cookies are a winner every time.
What’s great is how straightforward the ingredients are—nothing fancy, nothing intimidating. If you’ve ever hesitated to bake cookies because you thought it might be complicated, this recipe will change your mind. I promise, you’ll love how satisfying it is to pull these fresh, warm cookies out of the oven. Plus, the surprise peanut butter cup center? Pure magic!
Why You’ll Love This Recipe
- Quick & Easy: Ready in about 30 minutes from start to finish, perfect for last-minute dessert cravings.
- Simple Ingredients: Uses pantry staples like peanut butter, sugar, and a few eggs—no need for specialty shopping trips.
- Perfect for Any Occasion: Great for birthday parties, holiday treats, or just a weekend baking session.
- Crowd-Pleaser: Kids and adults alike can’t resist these cookies; they always disappear fast!
- Unbelievably Delicious: The soft cookie dough combined with the gooey peanut butter cup inside delivers that perfect sweet and salty combo.
This recipe stands out because of the way the peanut butter cup melts inside the cookie, creating a soft, almost molten center. I found that chilling the dough for just the right amount of time helps the chocolate hold its shape while still being perfectly gooey when you bite in. Also, using a blend of brown and white sugars gives the cookie a deep, caramel-like flavor that pairs amazingly with the peanut butter.
Honestly, this isn’t just your average peanut butter cookie stuffed with candy. It’s the kind of treat that makes you close your eyes and savor every bite. It’s comforting, nostalgic, and yet fresh—all rolled into one delightful cookie. If you want to impress guests without stressing in the kitchen, this recipe has got your back.
What Ingredients You Will Need
This recipe uses simple, wholesome ingredients that come together to create a rich, soft cookie with a surprise center. Most of these are pantry staples, which means you probably have everything on hand already.
- Unsalted butter (1 cup / 227 g) – softened (adds richness and moisture)
- Granulated sugar (1/2 cup / 100 g) – for sweetness and crisp edges
- Brown sugar (1 cup / 220 g) – packed, for that deep caramel note
- Large eggs (2) – room temperature (helps bind and adds softness)
- Vanilla extract (2 tsp) – pure, for flavor depth
- All-purpose flour (2 1/2 cups / 315 g) – for structure
- Baking soda (1 tsp) – for a perfect rise and chewy texture
- Salt (1/2 tsp) – balances sweetness
- Peanut butter (1/2 cup / 128 g) – creamy or chunky, your choice (adds peanutty richness)
- Peanut butter cups (12 standard-size) – unwrapped (the star of the show!)
If you want to switch things up, you can use natural peanut butter, but I recommend a creamy variety for easier mixing. For the peanut butter cups, I prefer Reese’s for that perfect balance of chocolate and peanut butter, but any brand will do. Also, if you’re looking for a gluten-free option, swapping all-purpose flour for a gluten-free blend works well, just check baking soda quantities might need slight adjustments.
Equipment Needed
- Mixing bowls – medium and large (glass or stainless steel preferred)
- Electric mixer or stand mixer – helps cream butter and sugars smoothly; hand mixing is possible but takes more elbow grease
- Measuring cups and spoons – for precise ingredient amounts
- Baking sheets – lined with parchment paper or silicone mats (non-stick is key for easy removal)
- Cooling rack – lets cookies cool evenly without sogginess
- Spoon or cookie scoop – to portion dough evenly (I love using a medium-sized cookie scoop for uniform cookies)
- Optional: plastic wrap or airtight container – for chilling dough and storing cookies
Honestly, you don’t need anything fancy here. I’ve baked these cookies with just a hand mixer and a basic baking sheet, and they turned out fantastic. If you don’t have a mixer, just make sure to cream your butter and sugars really well by hand—it might take a bit longer but totally worth it. As a tip, I always keep my baking sheets clean and use fresh parchment each time to avoid sticking.
Detailed Preparation Method
- Preheat your oven to 350°F (175°C). Line two baking sheets with parchment paper or silicon mats to prevent sticking. This usually takes about 10 minutes.
- Cream the butter and sugars: In a large bowl, use an electric mixer to beat 1 cup (227 g) softened unsalted butter with 1/2 cup (100 g) granulated sugar and 1 cup (220 g) packed brown sugar until light and fluffy. This should take around 3-4 minutes. The mixture should look pale and airy.
- Add eggs and vanilla: Crack in 2 large eggs (room temp) one at a time, beating well after each addition. Stir in 2 teaspoons pure vanilla extract. The batter will be smooth and glossy.
- Combine dry ingredients: In a separate bowl, whisk together 2 1/2 cups (315 g) all-purpose flour, 1 teaspoon baking soda, and 1/2 teaspoon salt. Make sure the baking soda is well distributed to avoid uneven rising.
- Mix dry ingredients into wet: Gradually add the dry mix into the wet batter, mixing on low speed until just combined. Overmixing can make cookies tough, so stop as soon as you don’t see flour.
- Fold in peanut butter: Stir in 1/2 cup (128 g) creamy peanut butter until the dough is uniform with a lovely nutty scent.
- Chill dough: Cover the dough with plastic wrap and chill in the refrigerator for at least 30 minutes. This helps the dough firm up, making it easier to handle and preventing excessive spreading while baking.
- Prepare to stuff: Using a medium cookie scoop or spoon, scoop about 2 tablespoons (30 g) of dough. Flatten it slightly in your palm, place a peanut butter cup (unwrapped) in the center, then fold the dough around it, sealing completely to form a ball. Place the stuffed dough balls on the prepared baking sheets, spaced about 2 inches (5 cm) apart.
- Bake: Place the baking sheets in the preheated oven and bake for 12-14 minutes. Cookies should be golden around the edges but still soft in the center. The peanut butter cup inside will melt but not leak out if sealed well.
- Cool: Let cookies cool on the baking sheet for 5 minutes before transferring them to a wire rack to cool fully. This step helps set the shape and keeps the cookie soft.
If you notice the peanut butter cups leaking, try chilling the dough a bit longer next time or press the dough edges tighter when sealing. The dough might feel sticky, but a quick dusting of flour on your hands helps a lot.
Cooking Tips & Techniques
One of the keys to perfect peanut butter cup stuffed cookies is dough temperature. Chilling the dough for at least 30 minutes makes it easier to handle and helps maintain that gooey center without the peanut butter cup melting too quickly in the oven.
Another tip: don’t overbake! The cookies look slightly underdone when you pull them out, but they will continue cooking on the hot baking sheet. This is what keeps them chewy and soft.
When sealing the dough around the peanut butter cups, use gentle but firm pressure to ensure no gaps exist. I learned this the hard way—once I had peanut butter oozing all over my oven (not fun!). Rolling the dough balls gently between your palms helps smooth out cracks.
If you want evenly sized cookies, use a cookie scoop and keep your peanut butter cups similarly sized. Smaller candy pieces can work, but the melt factor changes, so adjust baking time accordingly.
Lastly, if you find your cookies spreading too much, refrigerate the dough balls right on the baking sheet for 10 minutes before baking. This little pause can save your cookie shape.
Variations & Adaptations
- Chocolate lovers’ twist: Add chocolate chips to the dough for extra melty pockets of chocolate along with the peanut butter cup center.
- Nut-free version: Swap peanut butter for sunflower seed butter and use allergy-friendly chocolate cups to accommodate nut allergies.
- Seasonal flavor: Mix in a teaspoon of cinnamon or pumpkin spice for fall vibes, or add a pinch of chili powder for a surprising kick.
- Double stuffed: Place two mini peanut butter cups inside for an extra indulgent treat, but beware of longer baking times to ensure the dough cooks through.
- Gluten-free: Use a 1:1 gluten-free baking flour blend. The texture will be slightly different but still delicious.
Personally, I once tried adding a sprinkle of sea salt on top before baking—it brought out the peanut butter flavor beautifully and gave the cookies a little sophisticated twist that guests loved.
Serving & Storage Suggestions
Serve these cookies warm or at room temperature for the best melty experience. They pair wonderfully with a cold glass of milk or a cup of black coffee to balance the sweetness.
If you’re bringing them to a party, arrange them on a platter with some fresh fruit or nuts for a nice contrast. These cookies also make a fantastic homemade gift when wrapped in parchment and tied with twine.
Store leftovers in an airtight container at room temperature for up to 3 days. For longer storage, freeze the cookies in a single layer on a baking sheet, then transfer to a freezer-safe bag for up to 3 months. Thaw at room temperature or warm gently in a microwave for 10-15 seconds to bring back that gooey center.
Interestingly, the flavors meld even more after resting overnight, so if you can wait, that’s the sweet spot for eating these cookies.
Nutritional Information & Benefits
Each cookie generally contains about 250-300 calories, depending on size. They offer a good amount of protein thanks to the peanut butter and eggs, making them a satisfying treat that can curb sweet cravings without empty calories.
Peanut butter provides healthy fats and vitamin E, which are great for heart health, while the moderate sugar content keeps it indulgent but not overwhelming. If you’re watching allergens, remember these cookies contain nuts, dairy, and gluten (unless adapted).
From a wellness perspective, I appreciate that these cookies combine comfort and nutrition modestly—perfect for when you want a treat that feels a bit more thoughtful.
Conclusion
These peanut butter cup stuffed cookies are truly a must-make if you love the combo of chocolate and peanut butter in a soft, chewy cookie. They’re easy enough for beginners but impressive enough to wow guests. I love how customizable they are and how every bite offers that delightful surprise of melty peanut butter cups inside.
Give this recipe a try, and feel free to tweak the fillings or flavors to your liking. Don’t be shy about sharing your variations or questions—I always love hearing from fellow cookie enthusiasts! Happy baking, and remember: sometimes, the best kitchen moments come from a little mess and a lot of love.
FAQs About Peanut Butter Cup Stuffed Cookies
Can I use homemade peanut butter cups for stuffing?
Absolutely! Homemade peanut butter cups work great as long as they’re firm enough to handle stuffing. Just chill them before wrapping in dough for best results.
How do I prevent the peanut butter cup from melting out during baking?
Chilling the dough thoroughly and sealing the dough tightly around the candy helps prevent leaks. Also, don’t overbake the cookies.
Can I freeze the cookie dough before baking?
Yes, you can freeze the dough balls (with peanut butter cups inside) on a baking sheet and then store them in a freezer bag. Bake straight from frozen, adding a couple of extra minutes to the baking time.
What’s the best way to store leftover cookies?
Store at room temperature in an airtight container for up to 3 days or freeze for longer storage. Warm gently before serving to enjoy that melty center.
Can I substitute peanut butter with another nut or seed butter?
Yes! Almond butter, cashew butter, or sunflower seed butter work well. Just keep in mind the flavor and texture might change slightly.
Pin This Recipe!

Irresistible Peanut Butter Cup Stuffed Cookies

These peanut butter cup stuffed cookies feature a soft, chewy dough with a gooey melted peanut butter cup center, perfect for any occasion and easy to make at home.
- Prep Time: 15 minutes
- Cook Time: 14 minutes
- Total Time: 30 minutes
- Yield: 12 servings 1x
- Category: Dessert
- Cuisine: American
Ingredients
- 1 cup (227 g) unsalted butter, softened
- 1/2 cup (100 g) granulated sugar
- 1 cup (220 g) packed brown sugar
- 2 large eggs, room temperature
- 2 teaspoons pure vanilla extract
- 2 1/2 cups (315 g) all-purpose flour
- 1 teaspoon baking soda
- 1/2 teaspoon salt
- 1/2 cup (128 g) creamy or chunky peanut butter
- 12 standard-size peanut butter cups, unwrapped
Instructions
- Preheat your oven to 350°F (175°C). Line two baking sheets with parchment paper or silicone mats.
- In a large bowl, cream 1 cup softened unsalted butter with 1/2 cup granulated sugar and 1 cup packed brown sugar until light and fluffy, about 3-4 minutes.
- Add 2 large eggs one at a time, beating well after each addition. Stir in 2 teaspoons vanilla extract.
- In a separate bowl, whisk together 2 1/2 cups all-purpose flour, 1 teaspoon baking soda, and 1/2 teaspoon salt.
- Gradually add the dry ingredients to the wet mixture, mixing on low speed until just combined.
- Fold in 1/2 cup peanut butter until uniform.
- Cover dough with plastic wrap and chill in the refrigerator for at least 30 minutes.
- Using a medium cookie scoop, scoop about 2 tablespoons of dough. Flatten slightly, place a peanut butter cup in the center, then fold dough around it, sealing completely to form a ball. Place on baking sheets spaced 2 inches apart.
- Bake for 12-14 minutes until edges are golden but centers remain soft.
- Cool on baking sheet for 5 minutes, then transfer to a wire rack to cool completely.
Notes
Chill dough for at least 30 minutes to prevent spreading and keep peanut butter cups from melting out. Do not overbake; cookies should look slightly underdone when removed. Seal dough tightly around peanut butter cups to avoid leaks. For gluten-free, use a 1:1 gluten-free flour blend and adjust baking soda if needed. Refrigerate dough balls on baking sheet for 10 minutes before baking if cookies spread too much.
Nutrition
- Serving Size: 1 cookie
- Calories: 275
- Sugar: 18
- Sodium: 150
- Fat: 15
- Saturated Fat: 7
- Carbohydrates: 30
- Fiber: 2
- Protein: 5
Keywords: peanut butter cup cookies, stuffed cookies, peanut butter cookies, chocolate peanut butter, easy cookie recipe, homemade treats


