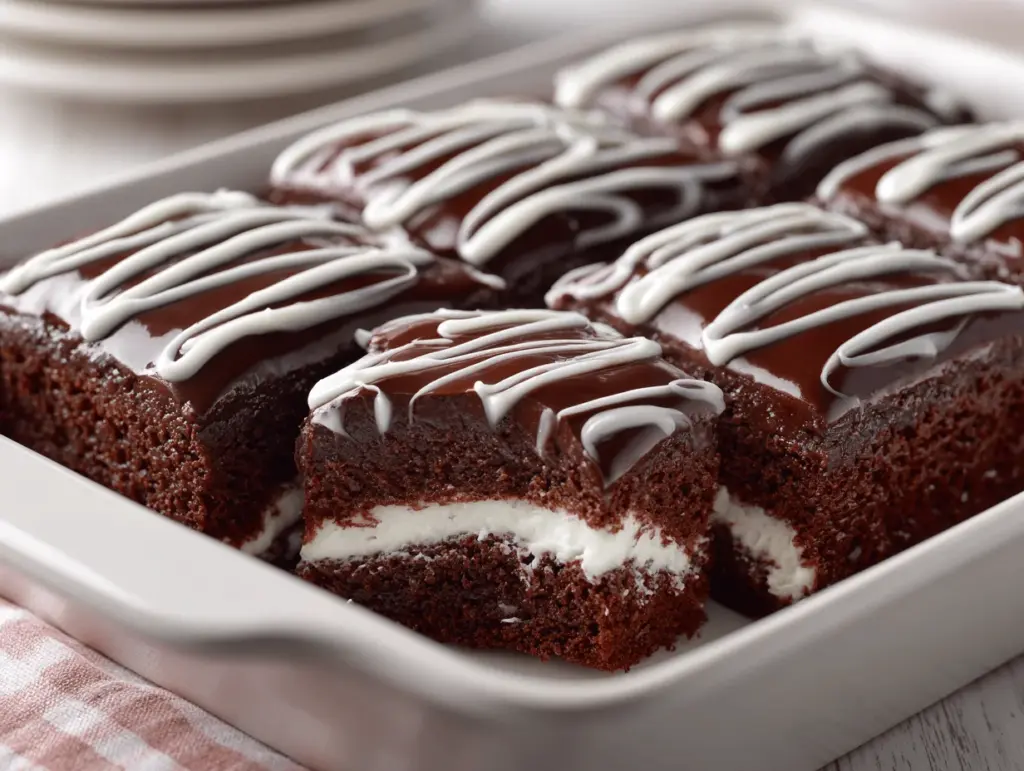
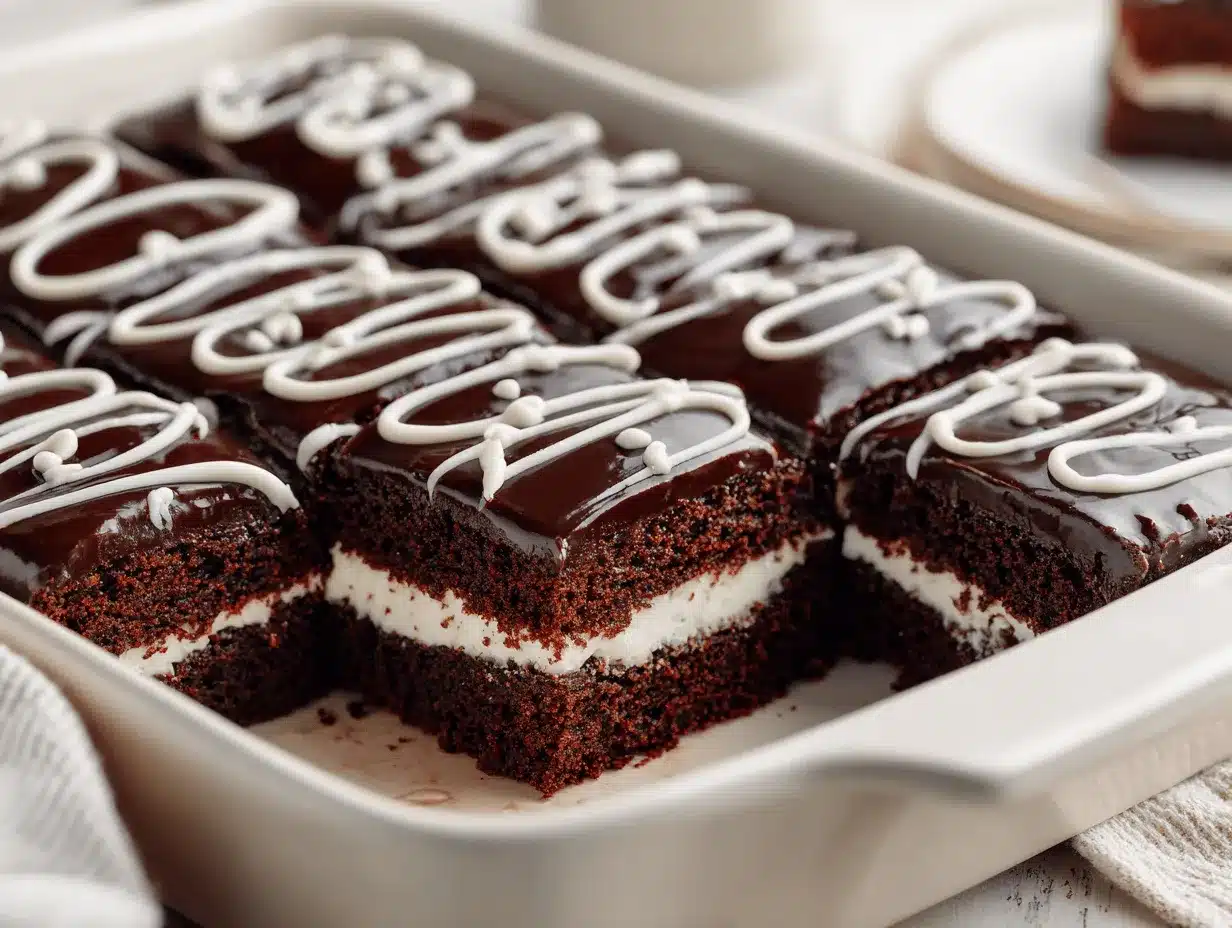
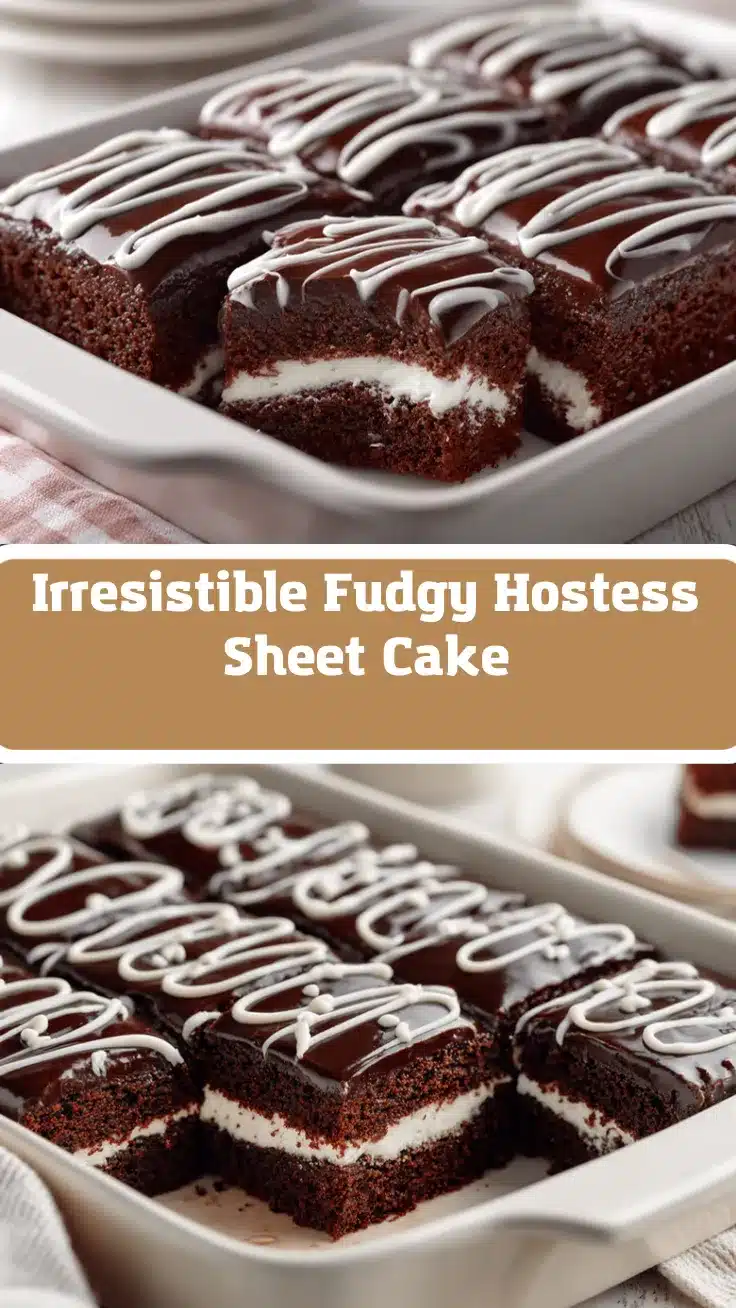
The first time I pulled this Hostess sheet cake recipe out of the oven, my whole kitchen smelled like the inside of my childhood lunchbox—rich chocolate, a hint of vanilla, and that unmistakable Hostess nostalgia. You know that moment when you bite into a classic Hostess cupcake and the creamy filling oozes out? Well, imagine that, but in bar form, baked for a crowd, and (dare I say) even better. These chocolate cake bars are my go-to secret weapon for potlucks and birthdays, mostly because they disappear faster than I can slice them!
I stumbled on the idea for these ultimate chocolate cake bars when I wanted a dessert that was easy to serve but still gave everyone that “wow” feeling. Sheet cakes are just so practical—you don’t fuss with layers, and you can decorate them however you like. After a few test runs (and a couple of late-night taste tests), I landed on a recipe that’s fudgy, moist, and topped with that signature creamy filling and glossy chocolate glaze. It’s the kind of treat that makes people ask for the recipe before their plates are even clean.
Honestly, these Hostess sheet cake bars are perfect for busy families, bake sales, or anyone craving a hit of chocolate nostalgia. I’ve baked this cake more times than I can count, and every single time, someone tells me it tastes just like the iconic snack cake—but even more irresistible. If you love chocolate, creamy fillings, and easy desserts that impress without stress, this is for you!
Why You’ll Love This Hostess Sheet Cake Recipe
- Quick & Easy: You can whip up this Hostess sheet cake recipe in under an hour, including the luscious filling and glossy chocolate topping. It’s honestly perfect for last-minute gatherings or late-night cravings.
- Simple Pantry Ingredients: No fancy store runs required. Most of the ingredients are probably already in your pantry or fridge—think cocoa, flour, eggs, and a few basics for the filling.
- Perfect for Parties and Potlucks: Sheet cakes are made for sharing, and these chocolate cake bars cut beautifully into neat squares that everyone can grab—no forks required!
- Crowd-Pleaser: Kids, adults, and even picky eaters rave about this cake. It’s nostalgic, familiar, and just plain delicious.
- Unbelievably Delicious: The combo of fluffy chocolate cake, creamy filling, and smooth chocolate glaze is pure comfort food. You might even find yourself sneaking an extra square after everyone’s gone to bed (speaking from experience here).
What makes this Hostess sheet cake recipe different? For starters, I blend cocoa powder with hot coffee to bring out a deeper, richer chocolate flavor. The filling is a simple whipped vanilla cream—no weird aftertaste, just sweet, cloud-like goodness. And the glossy chocolate glaze sets up perfectly for slicing (no sticky messes here).
This isn’t just another chocolate sheet cake; it’s the kind that makes you stop and savor every bite. It’s the kind of dessert that brings friends together and sparks memories of lunchbox treats and after-school snacks. Whether you’re baking for a birthday, a holiday, or just because, these bars make any day feel special. If you’re a fan of the classic Hostess flavor, but want something homemade and extra satisfying, you’ll fall in love with this recipe—promise.
What Ingredients You Will Need
This irresistible Hostess sheet cake recipe comes together with simple, familiar ingredients that bring maximum flavor and that signature snack cake texture. I love that you don’t need anything fancy—just a few pantry staples and a bit of love.
- For the Chocolate Cake Base:
- All-purpose flour (2 cups/250g) – gives structure; I use King Arthur for consistent results
- Granulated sugar (2 cups/400g) – for sweetness and moisture
- Unsweetened cocoa powder (3/4 cup/65g) – Dutch-process gives a deeper chocolate flavor
- Baking soda (1 tsp/5g) – helps the cake rise and stay tender
- Salt (1/2 tsp/3g) – balances all the sweetness
- Unsalted butter (1 cup/226g), melted – adds richness; if you’re out, use neutral oil
- Hot coffee (1 cup/240ml) – don’t skip this! It intensifies the chocolate (you won’t taste the coffee, promise)
- Buttermilk (1 cup/240ml) – keeps the crumb super moist; use whole-milk yogurt thinned with milk if needed
- Large eggs (2) – room temperature for best mixing
- Pure vanilla extract (2 tsp/10ml) – adds warm, bakery-style flavor
- For the Creamy Filling:
- Unsalted butter (1/2 cup/113g), softened – makes the filling light
- Powdered sugar (2 cups/240g) – for sweetness and a smooth texture
- Heavy cream (2-3 tbsp/30-45ml) – gives the filling its signature fluffiness
- Pure vanilla extract (1 tsp/5ml) – classic Hostess flavor
- Pinch of salt – brings out the vanilla
- For the Chocolate Glaze:
- Semisweet chocolate chips (1 cup/170g) – I love Ghirardelli for the best melt
- Unsalted butter (1/4 cup/57g) – gives the glaze a beautiful shine
- Light corn syrup (1 tbsp/15ml) – optional, but helps the glaze set with a glossy finish
- Milk (2-3 tbsp/30-45ml) – to thin the glaze, as needed
Ingredient Tips: If you want to make this cake gluten-free, swap in a 1:1 gluten-free flour blend. For a dairy-free version, use plant-based butter and oat milk (plus vegan chocolate chips). And if you’re out of buttermilk, just add a tablespoon of vinegar or lemon juice to regular milk and let it sit for 5 minutes—it works like a charm.
Equipment Needed
- Large sheet pan or jelly roll pan (about 10×15 inches/25×38 cm) – this gives you the perfect cake thickness and makes clean-up easy. If you don’t have one, you can use a 9×13-inch pan but bake a bit longer and expect thicker bars.
- Mixing bowls – at least two (one for dry, one for wet ingredients). Stainless steel bowls are my go-to: they’re light, easy to clean, and sturdy.
- Electric mixer or stand mixer – for whipping the filling. You can do it by hand, but it’s a workout!
- Whisk and spatula – for mixing and scraping every last bit of batter.
- Saucepan – for melting the chocolate glaze. A small nonstick pot works beautifully here.
- Parchment paper – for lining the pan (less sticking, easier removal).
- Offset spatula or butter knife – helps spread the filling and glaze evenly.
- Wire cooling rack – optional but helps the cake cool faster.
If you’re on a budget, no worries—use a regular glass baking dish, and just grease it well. I’ve even made this using a borrowed hand mixer and a thrifted cake pan. Just keep your tools clean, and your cake will turn out great. If you want your pans to last, hand-wash them and avoid metal utensils to keep the nonstick coating happy!
How to Make Hostess Sheet Cake Bars (Step-by-Step)
-
Prep Your Pan: Preheat your oven to 350°F (175°C). Line a 10×15-inch (25×38 cm) sheet pan with parchment paper, letting it hang over the sides for easy lifting. Lightly grease the paper.
Tip: Don’t skip the parchment! It saves you from sticky cake disasters. -
Make the Chocolate Batter: In a large bowl, whisk together 2 cups (250g) flour, 2 cups (400g) sugar, 3/4 cup (65g) cocoa powder, 1 tsp (5g) baking soda, and 1/2 tsp (3g) salt.
In another bowl, whisk together 1 cup (226g) melted butter, 1 cup (240ml) hot coffee, 1 cup (240ml) buttermilk, 2 eggs, and 2 tsp (10ml) vanilla.
Pour wet ingredients into dry, whisk until just combined (batter will be thin). Don’t overmix—just until smooth!
Note: Batter should look glossy and pourable, like brownie batter. -
Bake the Cake: Pour batter into your prepared pan and gently tap to settle. Bake for 20-24 minutes, or until a toothpick in the center comes out with a few crumbs (not wet batter).
Cool in the pan on a wire rack for at least 30 minutes.
Warning: Don’t rush the cooling, or your filling will melt! -
Make the Creamy Filling: Beat 1/2 cup (113g) softened butter with 2 cups (240g) powdered sugar on medium speed until light and fluffy, about 2-3 minutes. Add 2-3 tbsp (30-45ml) heavy cream, 1 tsp (5ml) vanilla, and a pinch of salt. Beat until you have a creamy, spreadable filling.
Personal tip: If it’s too thick, add a splash more cream. Too thin? More powdered sugar does the trick. -
Spread the Filling: Once the cake is completely cool, gently lift it out using the parchment. Spread the vanilla filling evenly over the cake with an offset spatula or butter knife.
Pro tip: Chill the cake for 10-15 minutes after spreading the filling—it makes the glaze easier to handle. -
Make the Chocolate Glaze: In a small saucepan, melt 1 cup (170g) chocolate chips, 1/4 cup (57g) butter, and 1 tbsp (15ml) corn syrup (if using) over low heat. Stir until smooth and shiny. Add 2-3 tbsp (30-45ml) milk as needed to thin to a pourable consistency.
Smells like heaven—try not to eat it all with a spoon. -
Top and Chill: Pour the warm glaze over the filling and gently spread to cover. Let it set at room temp for 30 minutes, or pop it in the fridge for 15 for faster results.
Warning: Cutting too soon means a messy slice! -
Slice and Serve: Lift the cake out and slice into bars or squares. Wipe your knife between cuts for clean edges.
Personal favorite: The corner pieces are the best—just sayin’.
Cooking Tips & Techniques for Perfect Chocolate Cake Bars
- Room Temperature Ingredients: Using room temp eggs and dairy means your batter mixes up smoother and bakes evenly. Cold ingredients can make the butter seize up and lead to lumpy filling—learned that the hard way!
- Don’t Overmix: Once you add the wet to dry, mix until just combined. Overmixing will make your cake tough instead of tender. The batter should be a little loose and glossy.
- Test for Doneness: Ovens are sneaky—check at 20 minutes. If the toothpick comes out with just a few moist crumbs, you’re golden. If it’s clean, you might have gone a smidge too far (but it’ll still be tasty!).
- Cool Completely Before Filling: I’ve tried to rush this, and trust me, the filling just melts and slides right off. Patience pays off—wait until the cake is fully cool.
- Glaze Consistency: If your glaze is too thick, add a splash of milk. Too thin? More chocolate chips. It should pour easily but stay put when spread.
- Sharp Knife for Cutting: Run your knife under hot water and wipe dry between slices. You’ll get those bakery-style, crisp-edged bars that look amazing on a platter.
- Making Ahead: You can bake the cake a day ahead, then assemble the next day for ultimate party prep. I love having one less thing to worry about before guests arrive!
I’ve had my share of cake fails—once I used cold butter in the filling, and it never whipped up properly. Another time, I forgot to line the pan, and half the cake stuck. Now, I always double-check prep before starting, and my results are way more reliable. Trust me, these little details make all the difference!
Variations & Adaptations
- Gluten-Free Chocolate Cake Bars: Substitute a 1:1 gluten-free flour blend (like Bob’s Red Mill) for the all-purpose flour. Everything else stays the same, and the bars come out just as moist and chocolatey.
- Dairy-Free Version: Swap the butter for plant-based margarine, use almond or oat milk in place of dairy, and choose dairy-free chocolate chips. The texture and taste are still dreamy—my vegan friends give it two thumbs up!
- Peanut Butter Twist: Swirl 1/2 cup (120g) creamy peanut butter into the vanilla filling before spreading. Adds a sweet-salty kick that’s honestly irresistible.
- Holiday Flavors: Add 1/2 teaspoon peppermint extract to the glaze for a festive, minty finish. Or sprinkle the top with crushed candy canes for winter parties.
- Smaller Batch: Halve the recipe and bake in an 8×8-inch (20×20 cm) square pan. Great for small families or dessert for two.
- Allergy Adaptations: For egg-free, use a flax egg (1 tbsp ground flax + 3 tbsp water per egg, let sit for 5 minutes). For nut-free, this recipe is already safe—just double-check your chocolate chips.
My favorite twist? I sometimes use a layer of raspberry jam between the cake and filling—sounds wild, but it’s like a Hostess cake meets a truffle bar. Play around and see what flavors your family loves most!
Serving & Storage Suggestions
These Hostess sheet cake bars taste best served at room temperature—the filling is creamy, and the glaze is perfectly soft. If you’re feeling fancy, sprinkle with mini chocolate chips or a dusting of powdered sugar before slicing for that “Pinterest-worthy” look.
Pair with a tall glass of cold milk, a mug of coffee, or even a scoop of vanilla ice cream if you’re going all out. For parties, I arrange them on a big platter lined with parchment, so folks can grab and go. They’re also great for lunchboxes or as a late-night treat (no judgment here!).
For storage, cover tightly with foil or plastic wrap and keep at room temp for up to 2 days. For longer storage, refrigerate for up to 5 days—let them come to room temp before serving for the best texture. To freeze, wrap slices individually and store in a zip-top bag for up to 2 months. Thaw overnight in the fridge and enjoy.
Reheating isn’t usually needed, but if you crave that just-baked taste, pop a bar in the microwave for 8-10 seconds—just enough to soften the filling. Over time, the flavors meld and the cake actually gets fudgier (if it lasts that long)!
Nutritional Information & Benefits
Each Hostess sheet cake bar (based on 24 bars) has roughly 230 calories, 12g fat, 30g carbs, and 3g protein. They’re not exactly diet food, but hey, everyone deserves a treat now and then!
The good news? Cocoa powder delivers antioxidants, and if you use real butter and quality chocolate, you get a little boost of calcium and healthy fats. For gluten-free and dairy-free eaters, this recipe adapts easily—just check your ingredient swaps.
Potential allergens include wheat, dairy, and eggs. Always check your chocolate chips for hidden allergens if baking for sensitive folks. Personally, I love how one square satisfies my sweet tooth without needing a giant slice—portion control without even trying!
Conclusion
This Hostess sheet cake recipe is pure comfort food magic—classic chocolate, creamy vanilla filling, and a shiny glaze all in one bite. It’s easy, nostalgic, and always a hit, whether you’re serving kids or grown-ups.
Don’t be afraid to play around with flavors, fillings, or toppings to make it your own. Every time I bake this, it brings back sweet memories and creates new ones too. If you love quick, crowd-pleasing desserts that look as good as they taste, you owe it to yourself to give these bars a try!
When you make this Hostess sheet cake, I’d love to hear how it went—leave a comment, share your photos, or tell me your favorite twist! Happy baking, and here’s to more sweet moments, one chocolate bar at a time.
Frequently Asked Questions
Can I make this Hostess sheet cake recipe ahead of time?
Absolutely! You can bake the cake base a day in advance and assemble with filling and glaze the next day. The flavors meld and get even better overnight.
What’s the best way to cut clean bars without making a mess?
Chill the cake for 15-20 minutes after glazing, then use a hot, dry knife and wipe between cuts. This keeps the layers neat and tidy.
Can I freeze Hostess sheet cake bars?
Yes! Once cooled and set, cut into bars, wrap individually, and freeze for up to 2 months. Thaw overnight in the fridge or at room temp before serving.
Is there a way to make this recipe nut-free?
This recipe doesn’t include nuts, but double-check your chocolate chips and butter for cross-contamination if allergies are a concern.
How do I adapt this if I don’t have buttermilk?
Mix 1 cup (240ml) regular milk with 1 tablespoon vinegar or lemon juice, let it sit for 5 minutes, and use in place of buttermilk. Works great every time!
Pin This Recipe!
Hostess Sheet Cake Recipe: Best Easy Chocolate Cake Bars Ever

This Hostess sheet cake recipe transforms the nostalgic flavors of classic Hostess cupcakes into easy-to-serve chocolate cake bars with a creamy vanilla filling and glossy chocolate glaze. Perfect for parties, potlucks, or whenever you crave a crowd-pleasing, fudgy chocolate treat.
- Prep Time: 20 minutes
- Cook Time: 24 minutes
- Total Time: 1 hour
- Yield: 24 bars 1x
- Category: Dessert
- Cuisine: American
Ingredients
- 2 cups (250g) all-purpose flour
- 2 cups (400g) granulated sugar
- 3/4 cup (65g) unsweetened cocoa powder (Dutch-process preferred)
- 1 tsp (5g) baking soda
- 1/2 tsp (3g) salt
- 1 cup (226g) unsalted butter, melted
- 1 cup (240ml) hot coffee
- 1 cup (240ml) buttermilk
- 2 large eggs, room temperature
- 2 tsp (10ml) pure vanilla extract
- For the Creamy Filling:
- 1/2 cup (113g) unsalted butter, softened
- 2 cups (240g) powdered sugar
- 2–3 tbsp (30-45ml) heavy cream
- 1 tsp (5ml) pure vanilla extract
- Pinch of salt
- For the Chocolate Glaze:
- 1 cup (170g) semisweet chocolate chips
- 1/4 cup (57g) unsalted butter
- 1 tbsp (15ml) light corn syrup (optional)
- 2–3 tbsp (30-45ml) milk
Instructions
- Preheat oven to 350°F (175°C). Line a 10×15-inch sheet pan with parchment paper, letting it hang over the sides. Lightly grease the paper.
- In a large bowl, whisk together flour, sugar, cocoa powder, baking soda, and salt.
- In another bowl, whisk together melted butter, hot coffee, buttermilk, eggs, and vanilla.
- Pour wet ingredients into dry ingredients and whisk until just combined and smooth. Do not overmix.
- Pour batter into prepared pan and gently tap to settle. Bake for 20-24 minutes, or until a toothpick inserted in the center comes out with a few moist crumbs.
- Cool cake in the pan on a wire rack for at least 30 minutes until completely cool.
- For the filling: Beat softened butter with powdered sugar on medium speed until light and fluffy, about 2-3 minutes. Add heavy cream, vanilla, and a pinch of salt. Beat until creamy and spreadable. Adjust consistency with more cream or powdered sugar as needed.
- Lift cooled cake from pan using parchment. Spread vanilla filling evenly over the cake with an offset spatula or butter knife. Chill for 10-15 minutes.
- For the glaze: In a small saucepan, melt chocolate chips, butter, and corn syrup (if using) over low heat, stirring until smooth and shiny. Add milk as needed to reach a pourable consistency.
- Pour warm glaze over the filling and gently spread to cover. Let set at room temperature for 30 minutes or refrigerate for 15 minutes.
- Lift cake out and slice into bars or squares, wiping the knife between cuts for clean edges.
- Serve at room temperature. Store covered at room temp for up to 2 days, or refrigerate for up to 5 days.
Notes
For gluten-free, use a 1:1 gluten-free flour blend. For dairy-free, substitute plant-based butter and milk, and use vegan chocolate chips. Let cake cool completely before adding filling to prevent melting. For clean slices, chill after glazing and use a hot, dry knife. Cake can be made ahead and assembled the next day. Store at room temp for 2 days or refrigerate for up to 5 days. Freeze individually wrapped bars for up to 2 months.
Nutrition
- Serving Size: 1 bar (1/24 of cake)
- Calories: 230
- Sugar: 20
- Sodium: 120
- Fat: 12
- Saturated Fat: 7
- Carbohydrates: 30
- Fiber: 2
- Protein: 3
Keywords: Hostess sheet cake, chocolate cake bars, easy dessert, potluck dessert, creamy filling, chocolate glaze, nostalgic dessert, homemade Hostess, party dessert, lunchbox treat


