“You’re not really making jam with those?” my neighbor asked with a raised eyebrow as I stood in my tiny kitchen surrounded by a modest pile of mulberries, their deep purple hues staining my fingers. Honestly, I was skeptical at first too—mulberries aren’t exactly the most common fruit in my grocery store, and I wasn’t sure if a small batch would be worth the effort. But when the vanilla bean pod arrived in the mail, a gift from a friend who swore by its magic, I figured, why not give it a shot?
That evening, with nothing but my stubbornness and a craving for something homemade, I set about crafting this Homemade Mulberry Jam with Vanilla Bean. The scent of simmering berries and warm vanilla filled the kitchen, cutting through the quiet hum of a late afternoon. It was simple, intimate—just the right kind of project when you don’t want to fuss over complicated recipes or haul in a dozen ingredients.
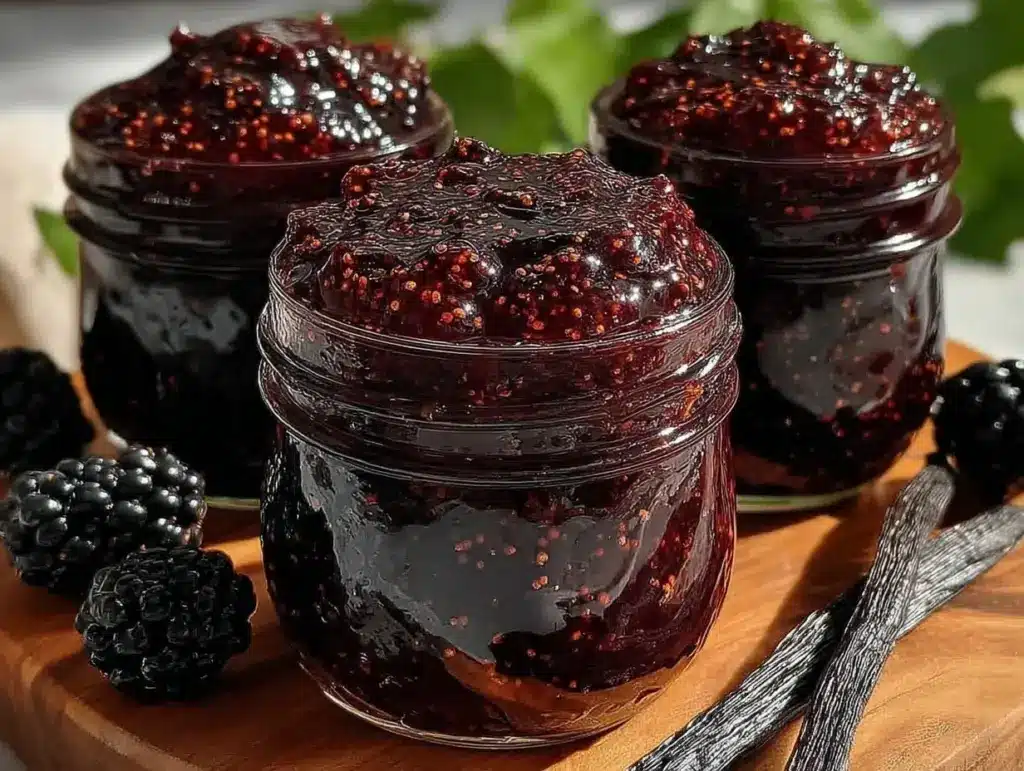
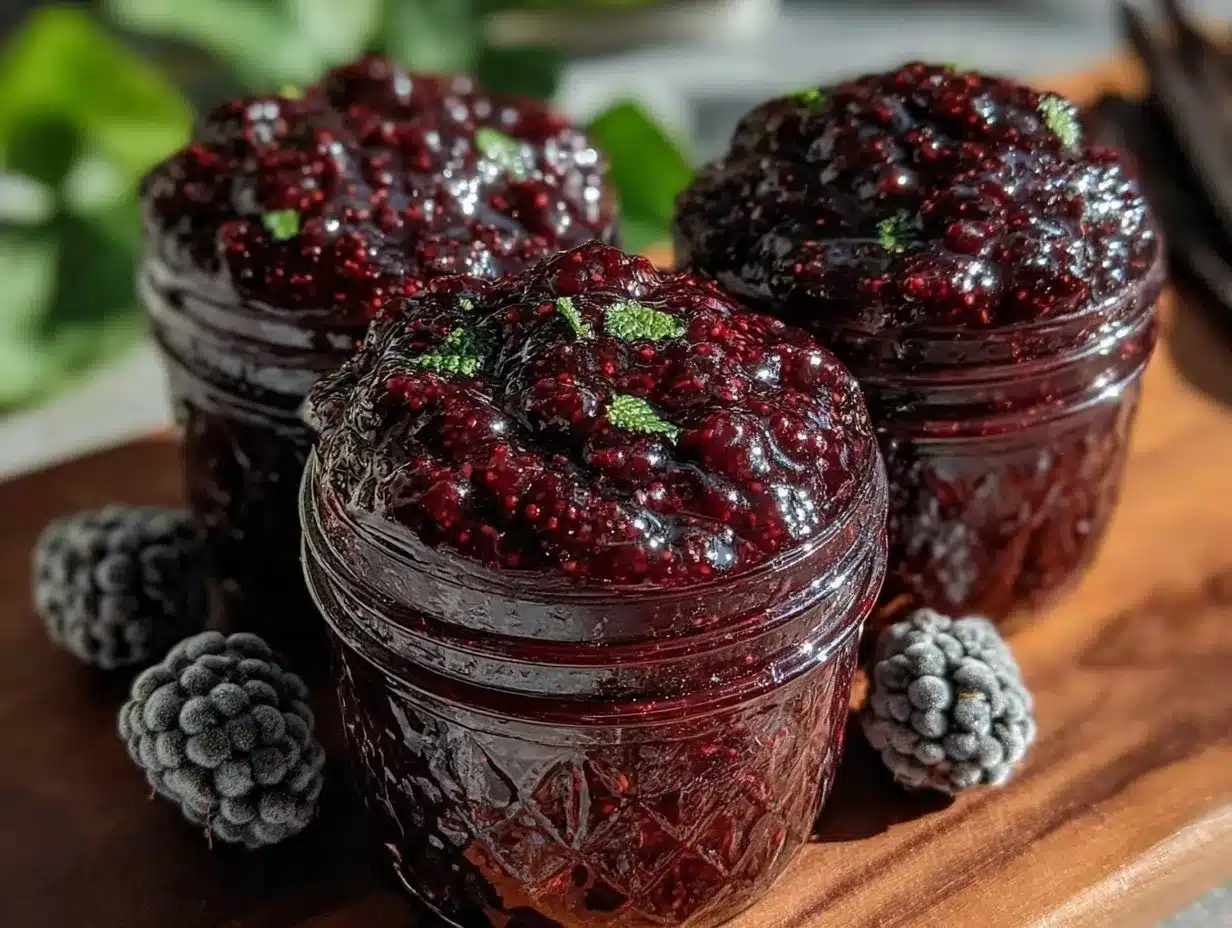
Fast forward a few hours, and the jam was thick and glossy, a small jar of purple treasure that felt like a personal victory. It wasn’t just any jam—it was the kind that invites you back for just one more spoonful, the kind that transforms an ordinary morning toast or a dollop on creamy ricotta into something quietly special. I realized then why this small batch delight had stuck around in my rotation; it’s honest, unpretentious, and downright comforting.
Why You’ll Love This Recipe
After testing this homemade mulberry jam recipe several times, I can confidently say it’s become my go-to when I want a quick, flavorful spread that doesn’t demand a whole afternoon in the kitchen. Here’s why you’ll want to keep this recipe on hand:
- Quick & Easy: Takes less than an hour from start to finish, making it perfect for those spontaneous baking urges or last-minute breakfast fixes.
- Simple Ingredients: No need for fancy or hard-to-find items; most are pantry staples or easy to source, with the vanilla bean adding a subtle twist.
- Perfect for Small Batches: Ideal for when you don’t want to commit to making a huge pot of jam—great for fresh mulberries that need using up.
- Crowd-Pleaser: The gentle sweetness and vanilla aroma win over both kids and adults, making it a hit at brunches or casual get-togethers.
- Unbelievably Delicious: The rich, fruity depth of mulberries balanced by a whisper of vanilla sets this apart from your typical jam—think smooth, fragrant, and deeply satisfying.
This recipe isn’t just about cooking fruit down with sugar—it’s about coaxing out the natural flavors with a touch of vanilla bean sophistication. Unlike many jam recipes that rely on pectin packets or artificial flavorings, this one leans on patience and quality ingredients. That little vanilla bean infusion? It’s the secret that turns simple mulberries into something that feels almost gourmet. Honestly, it’s the kind of jam that makes you close your eyes after the first bite and smile quietly to yourself.
If you love cozy breakfasts, you might also appreciate the delicate fluffiness of Japanese souffle pancakes or the creamy texture of soft scrambled eggs, both of which pair beautifully with a spoonful of this jam.
What Ingredients You Will Need
This recipe uses simple, wholesome ingredients to deliver bold flavor and satisfying texture without the fuss. Most are pantry staples, with fresh mulberries and a vanilla bean adding that seasonal, fresh-picked touch.
- Fresh mulberries (about 2 cups or 300 grams) – Choose ripe, plump berries for maximum sweetness. If fresh aren’t available, frozen can work too, but fresh is best.
- Granulated sugar (3/4 cup or 150 grams) – Balances the tartness and helps with preservation; feel free to adjust slightly based on your berry’s sweetness.
- Fresh lemon juice (1 tablespoon or 15 ml) – Adds brightness and natural pectin, helping the jam set nicely.
- Vanilla bean (1 whole pod) – Scrape the seeds for a warm, floral aroma that pairs beautifully with the mulberries. If unavailable, pure vanilla extract (1 teaspoon) can substitute, though the bean is worth seeking out.
- Water (1/4 cup or 60 ml) – Just enough to help the berries break down without watering down the flavor.
For the vanilla bean, I usually order from a trusted brand like Nielsen-Massey for consistent quality and fragrance. Selecting firm, plump beans with no cracks ensures the best flavor release. This recipe also lends itself well to experimentation—try adding a pinch of cinnamon or swapping lemon for lime juice for a different zing.
Note: If you want a lower-sugar version, you can reduce the sugar slightly, but keep in mind it might affect the jam’s thickness and shelf life. Using honey or maple syrup isn’t recommended here because it changes the texture and flavor balance quite a bit.
Equipment Needed
You don’t need fancy tools for this jam—just the basics many home cooks already have. Here’s what I use:
- Medium saucepan: A heavy-bottomed one works best for even heat distribution, preventing scorching.
- Wooden spoon or heatproof spatula: For stirring the jam gently without scratching your pan.
- Small bowl: To scrape and hold the vanilla bean seeds before adding them.
- Fine mesh strainer (optional): If you prefer a smoother jam without seeds or berry skins.
- Glass jars or small canning jars: For storing the jam. I recommend sterilizing them beforehand.
For budget-friendly options, you can find good quality saucepans at thrift stores or discount kitchen shops. I’ve tried both stainless steel and enameled cast iron pans for this jam, and both work just fine—just watch your heat levels closely.
If you want to make this a regular habit, investing in a small candy thermometer can be handy for achieving the perfect jam consistency, but it’s not required.
Preparation Method
- Prep the mulberries: Rinse the mulberries gently under cold water and drain. Remove any stems or leaves. This should take about 5 minutes.
- Scrape the vanilla bean: Using a sharp knife, split the vanilla bean pod lengthwise and scrape out the tiny seeds into a small bowl. Set aside the pod for adding to the pot later. (2 minutes)
- Combine ingredients: In your medium saucepan, add the mulberries, sugar, water, lemon juice, vanilla seeds, and the pod itself. Stir gently to mix. (3 minutes)
- Cook the jam: Place the pan over medium heat. Let the mixture come to a gentle boil, stirring frequently to prevent sticking. Once boiling, reduce heat to medium-low and simmer uncovered for 25-30 minutes. The jam should thicken and coat the back of a spoon. (Watch for bubbling and listen for a change in the sound—that’s when it’s nearing set.)
- Test for doneness: Place a small spoonful of jam on a cold plate and let it sit for a minute. Push it lightly with your finger; if it wrinkles, it’s ready. If not, simmer a few more minutes and test again.
- Remove vanilla pod: Take out the vanilla bean pod and discard it. If you want a smoother texture, you can strain the jam through a fine mesh strainer now.
- Jar the jam: Carefully spoon the hot jam into sterilized jars, leaving about 1/4 inch (6 mm) headspace. Wipe rims clean with a damp cloth, seal tightly, and let cool to room temperature.
- Store properly: Refrigerate once cooled. The jam will thicken further as it cools and can be kept refrigerated for up to three weeks.
Pro tip: Stir gently as the jam simmers to keep the mulberries from sticking or burning, but don’t over-stir; you want some berry chunks for texture. And if you’re impatient like me, don’t rush the simmer—good jams take their time.
Cooking Tips & Techniques
Jam-making isn’t rocket science, but a few tricks make all the difference between a bland spread and a jar of fruity gold.
- Don’t rush the simmer: Low and slow helps the sugars and fruit break down evenly, developing a rich flavor and proper thickness.
- Use fresh lemon juice: Bottled juice can have additives that affect pectin activity and flavor.
- Test the set early and often: The cold plate test is your best friend. If you wait too long, the jam can become too thick and hard to spread.
- Keep the vanilla pod in while cooking: This releases a more intense aroma than just adding the seeds alone.
- Beware of scorching: Stir regularly, especially toward the end, and use a heavy-bottomed pan to prevent hot spots.
One time, I left the jam unattended for a few minutes—big mistake. It scorched on the bottom, leaving a burnt smell that you just can’t mask. Learned my lesson there: stay close and stir gently!
If you want a smoother jam, strain it once off heat. But honestly, I enjoy the little berry bits—it feels rustic and homemade.
Variations & Adaptations
This mulberry jam recipe is quite flexible, and you can tweak it to suit your tastes or dietary needs.
- Low-sugar version: Cut the sugar by up to half and add a natural pectin source like crushed apple or a commercial pectin suited for low-sugar jams.
- Spiced twist: Add a cinnamon stick or a few crushed cardamom pods during cooking for a warm, cozy flavor profile.
- Other berries: Try substituting blackberries or raspberries for mulberries if those are more accessible; the vanilla bean pairs wonderfully with these too.
- Vegan/Allergen-friendly: This recipe is naturally vegan and gluten-free.
Once, I experimented with adding a splash of balsamic vinegar near the end—oddly enough, it made the jam’s flavor pop in a way I didn’t expect. Just a dash, though, or it can overpower.
Serving & Storage Suggestions
Serve your homemade mulberry jam at room temperature to best enjoy the complex vanilla notes. It’s perfect spooned over morning toast or swirled into yogurt or oatmeal.
For a special breakfast treat, try pairing it with fluffy Japanese souffle pancakes or even a simple cream cheese spread. The jam also makes a delightful addition to cheese boards or dolloped on vanilla ice cream.
Store the jam in the refrigerator for up to three weeks. If you want to keep it longer, freezing in small containers works well—just thaw overnight in the fridge before using.
Reheating isn’t necessary, but if you want a looser consistency, warm gently in a microwave-safe bowl or on the stovetop, stirring carefully.
The flavors actually mellow and deepen after a day or two, so if you can resist, let it sit before diving in.
Nutritional Information & Benefits
This homemade mulberry jam is a tasty way to get a hit of antioxidants, vitamins, and minerals naturally found in mulberries. Each small jar packs a good dose of vitamin C, iron, and fiber, making it a wholesome addition to your diet.
With controlled sugar amounts and no preservatives, it’s a cleaner alternative to many store-bought jams. Plus, the vanilla bean adds flavor without calories.
It’s naturally gluten-free and vegan, so it fits nicely into many diets. Just watch the sugar if you’re monitoring intake.
Personally, I appreciate how this jam brings a little wellness into indulgence—a sweet treat that feels a little less guilty and a lot more satisfying.
Conclusion
This Homemade Mulberry Jam with Vanilla Bean recipe is a small-batch delight that’s more than just a spread—it’s a quiet celebration of fresh fruit, simple ingredients, and a bit of patience. Whether you’re looking to use up a handful of mulberries or want a thoughtful gift jar, this jam fits the bill.
Feel free to tweak the sweetness, try different spices, or even experiment with other berries. The kitchen is your playground after all.
I keep coming back to this recipe because it’s straightforward, comforting, and honestly, a little bit special. It pairs beautifully with everything from crisp toast to creamy eggs like the egg muffins for meal prep I love making on busy mornings.
Give it a try, and if you have your own favorite jam twist, I’d love to hear about it in the comments. Happy preserving!
FAQs
Can I use frozen mulberries for this jam?
Yes, frozen mulberries work well if fresh aren’t available. Just thaw and drain excess liquid before cooking to avoid watery jam.
Do I need to use a vanilla bean, or can I substitute extract?
You can substitute 1 teaspoon of pure vanilla extract if you don’t have a vanilla bean. The flavor won’t be quite as rich, but it still adds a lovely aroma.
How long will this jam keep in the refrigerator?
Stored in a clean, airtight jar in the fridge, the jam will stay fresh for about three weeks.
Can I make this recipe sugar-free?
Reducing sugar significantly affects texture and preservation. For a low-sugar version, consider adding natural pectin and adjust cooking time, but it won’t set as firmly.
Is it necessary to sterilize jars for small batches?
For short-term refrigerated storage, thoroughly washed jars are usually fine. Sterilizing is recommended if you plan to preserve the jam longer or do water-bath canning.
Pin This Recipe!
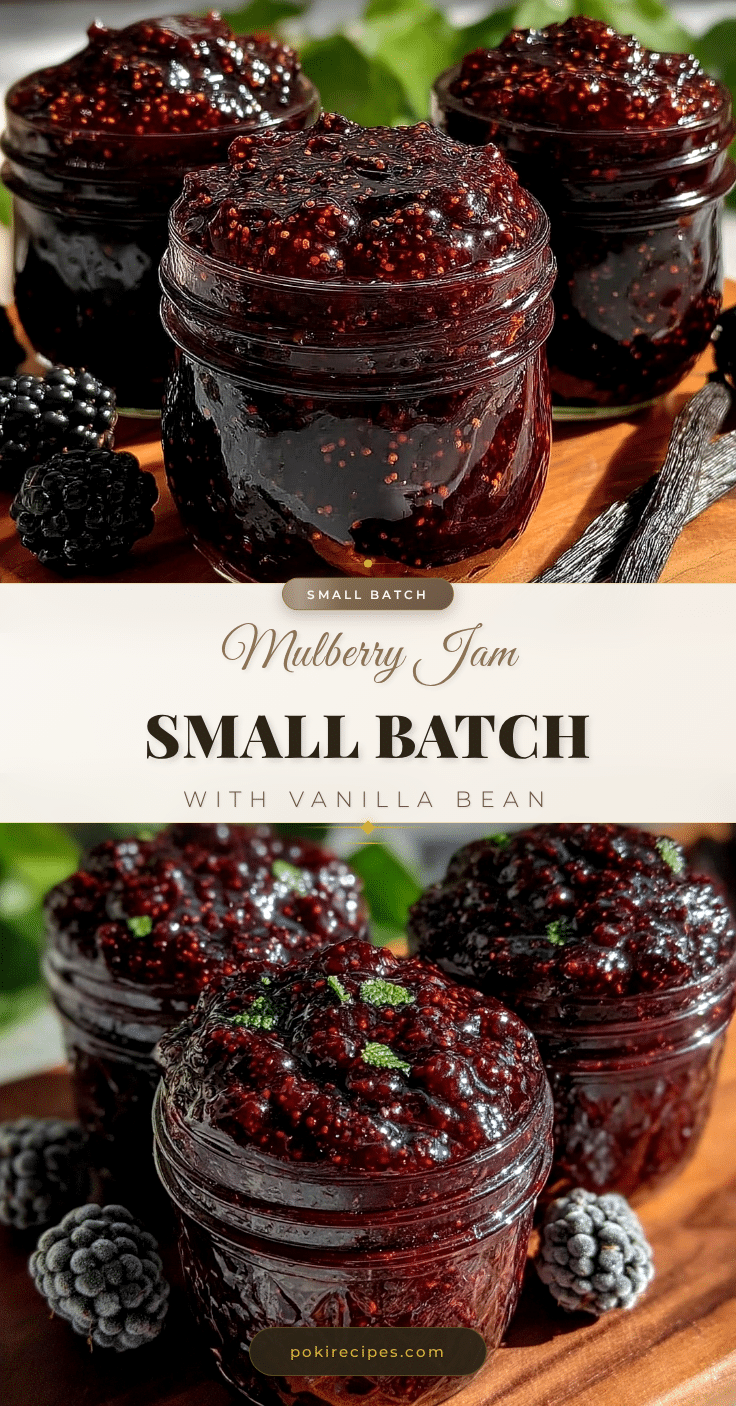
Homemade Mulberry Jam with Vanilla Bean

A quick and easy small-batch mulberry jam infused with the warm aroma of vanilla bean, perfect for fresh mulberries and simple ingredients.
- Prep Time: 10 minutes
- Cook Time: 30 minutes
- Total Time: 40 minutes
- Yield: About 1 cup (8 ounces) of jam 1x
- Category: Preserves
- Cuisine: American
Ingredients
- 2 cups fresh mulberries (about 300 grams)
- 3/4 cup granulated sugar (150 grams)
- 1 tablespoon fresh lemon juice (15 ml)
- 1 whole vanilla bean pod (seeds scraped)
- 1/4 cup water (60 ml)
Instructions
- Rinse the mulberries gently under cold water and drain. Remove any stems or leaves.
- Split the vanilla bean pod lengthwise and scrape out the seeds into a small bowl. Set aside the pod.
- In a medium saucepan, combine mulberries, sugar, water, lemon juice, vanilla seeds, and the vanilla pod. Stir gently to mix.
- Place the pan over medium heat and bring to a gentle boil, stirring frequently to prevent sticking.
- Reduce heat to medium-low and simmer uncovered for 25-30 minutes until the jam thickens and coats the back of a spoon.
- Test doneness by placing a spoonful of jam on a cold plate; if it wrinkles when pushed, it is ready.
- Remove and discard the vanilla pod. Optionally, strain the jam through a fine mesh strainer for a smoother texture.
- Spoon the hot jam into sterilized jars, leaving about 1/4 inch headspace. Wipe rims clean, seal tightly, and let cool to room temperature.
- Refrigerate once cooled. The jam will thicken further and can be kept refrigerated for up to three weeks.
Notes
Stir gently during simmering to prevent scorching and maintain berry chunks for texture. Use fresh lemon juice for best pectin activity. Test jam set with cold plate test. Vanilla bean pod enhances aroma more than seeds alone. For smoother jam, strain after cooking. Reduce sugar cautiously to maintain texture and shelf life.
Nutrition
- Serving Size: 2 tablespoons
- Calories: 60
- Sugar: 14
- Carbohydrates: 15
- Fiber: 1
Keywords: mulberry jam, homemade jam, vanilla bean jam, small batch jam, easy jam recipe, fruit preserves, vegan jam, gluten-free jam


