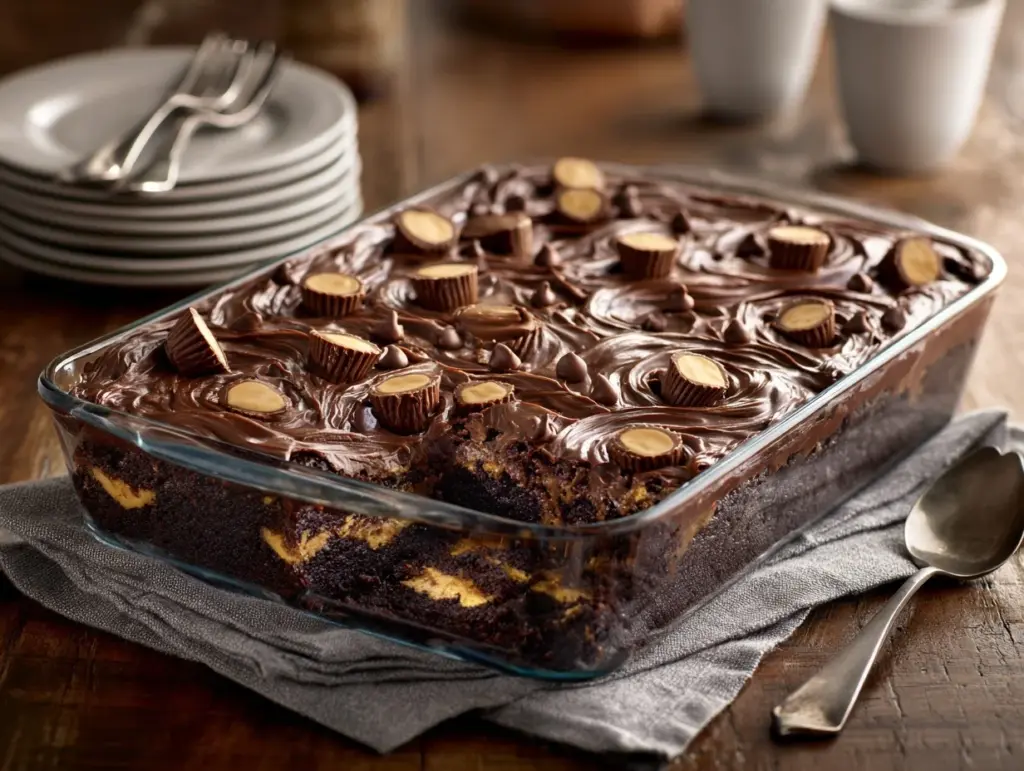
The first time I made this Earthquake Cake with Reese’s Peanut Butter Cups, I knew it was something special. Imagine a rich, gooey chocolate cake layered with shredded coconut, pecans, and irresistible chunks of Reese’s Peanut Butter Cups. It’s a dessert that looks like it’s been through a delicious “earthquake” with swirls of cream cheese frosting cracking through the surface. Trust me, this cake is pure magic—messy, indulgent, and absolutely unforgettable!
Whether you’re baking for a party, a casual weekend treat, or just because you’re craving something over-the-top, this recipe will delight everyone who takes a bite. It’s got that perfect balance of texture—soft, creamy, crunchy—and it’s surprisingly easy to make. If you love Reese’s, chocolate, and buttercream vibes, you’re in for a real treat. Let’s dive into this decadent recipe together!
Why You’ll Love This Recipe
- Layered Flavor Explosion: With chocolate, peanut butter, coconut, and pecans all in one bite, this cake is a dessert lover’s dream.
- No Fancy Techniques: You don’t need to be a master baker to make this cake—it’s approachable for everyone!
- Perfect for Any Occasion: Whether it’s a birthday celebration, potluck, or just a sweet indulgence, this cake suits every event.
- Reese’s Bliss: The addition of Reese’s Peanut Butter Cups takes this cake to the next level of deliciousness.
- Visually Stunning: The “earthquake” cracks and swirls make it look like a showstopper straight out of a bakery.
- Customizable: You can tweak the layers or toppings based on your favorite flavors or dietary needs.
This isn’t just another dessert—it’s the kind of cake that makes people ask for seconds. The cream cheese frosting melts into the chocolate, the peanut butter cups add pops of flavor, and that hidden coconut layer is just the right surprise. If you’re a fan of rich, gooey cakes that are as fun to eat as they are to make, this recipe is calling your name.
What Ingredients You Will Need
This Earthquake Cake uses pantry staples and a few indulgent ingredients to create its unique texture and flavor. Here’s what you’ll need:
- For the base layer:
- 1 cup sweetened shredded coconut (adds a chewy layer of sweetness)
- 1 cup chopped pecans (optional, but adds a delightful crunch)
- For the cake:
- 1 box chocolate cake mix (any brand you love works perfectly)
- 3 large eggs (room temperature)
- 1/3 cup vegetable oil
- 1 cup water
- For the cream cheese filling:
- 8 oz cream cheese (softened)
- 1/2 cup unsalted butter (softened)
- 2 1/2 cups powdered sugar
- 1 tsp vanilla extract
- For the mix-ins:
- 1 cup Reese’s Peanut Butter Cups, chopped (the star of the show!)
- 1/2 cup chocolate chips
If you’re missing an ingredient, don’t worry—I’ll share some substitutions and variations later. This cake is forgiving and easy to adapt!
Equipment Needed
- A 9×13-inch baking pan (glass or metal works great)
- Mixing bowls (one large, one medium)
- Hand mixer or stand mixer (to make the cream cheese filling creamy and smooth)
- Spatula (for spreading layers evenly)
- Cooking spray or parchment paper (to prevent sticking)
If you don’t have a hand mixer, you can use a whisk and some elbow grease—it’ll take a bit longer, but it gets the job done! For budget-friendly options, any basic baking pan and mixing bowls will work well.
Preparation Method
- Preheat your oven to 350°F (175°C). Grease your 9×13-inch baking pan generously or line it with parchment paper for easy cleanup.
- Spread the shredded coconut evenly across the bottom of the pan, followed by the chopped pecans.
- In a large mixing bowl, prepare the chocolate cake batter by combining the cake mix, eggs, vegetable oil, and water. Mix according to the package instructions until smooth.
- Pour the cake batter over the coconut and pecans in the pan, spreading it out evenly.
- In a separate medium bowl, beat together the softened cream cheese and butter until creamy. Add the powdered sugar and vanilla extract, and continue mixing until smooth and fluffy.
- Drop spoonfuls of the cream cheese mixture over the cake batter. Use a knife or spatula to swirl it lightly into the batter (don’t overmix—leave some visible swirls).
- Sprinkle the chopped Reese’s Peanut Butter Cups and chocolate chips evenly over the top.
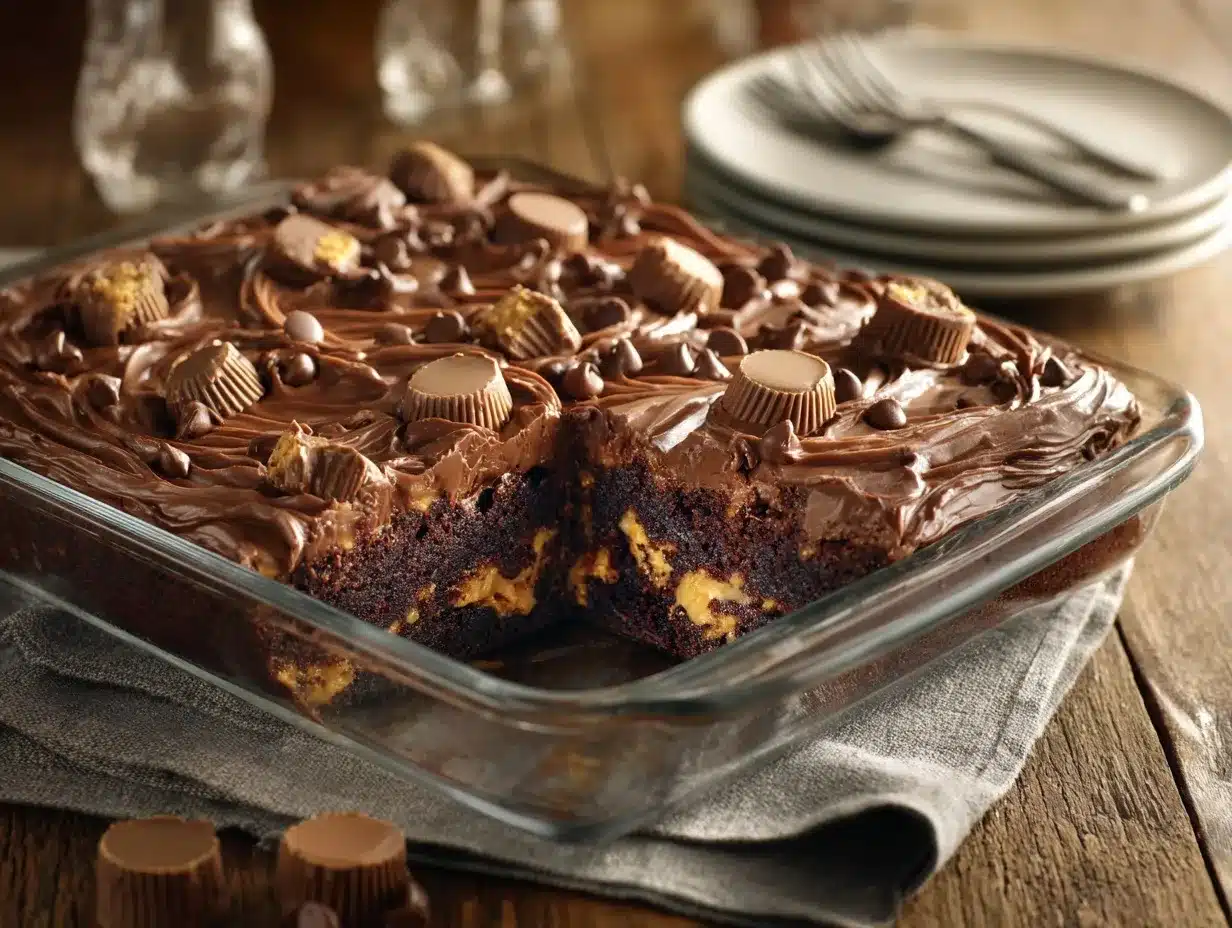
- Bake for 40-45 minutes, or until the edges are set and the middle is slightly gooey. The “earthquake” cracks will appear as it bakes!
- Let the cake cool in the pan for at least 20 minutes before slicing and serving. Enjoy the layers of flavor and texture with every bite!
If your cake seems too gooey in the center, don’t panic—it’s part of the charm! Just let it cool longer, and the layers will settle beautifully.
Cooking Tips & Techniques
- Use room temperature ingredients: This helps the cake batter and cream cheese filling mix more evenly.
- Don’t over-swirl: The cream cheese mixture should be visible for those signature “earthquake” cracks.
- Watch the baking time: The edges should be firm, but the center should still have a slight jiggle for that gooey texture.
- Cool before serving: This allows the layers to set and makes slicing easier.
- Customize the mix-ins: Swap Reese’s for your favorite candy or add white chocolate chips for extra sweetness.
Pro tip: If you want cleaner slices, chill the cake in the fridge for 30 minutes before cutting. The flavors are incredible warm or cold!
Variations & Adaptations
- Gluten-Free Option: Use a gluten-free chocolate cake mix and double-check your Reese’s are gluten-free.
- Seasonal Twist: Add crushed candy canes during the holidays or pastel-colored candies for Easter.
- Nut-Free Version: Skip the pecans and add more shredded coconut or chocolate chips.
- Dairy-Free Adaptation: Use dairy-free cream cheese and butter alternatives, and make sure your chocolate chips are dairy-free.
- Flavor Boost: Add a teaspoon of espresso powder to the cake batter for a mocha vibe.
I once tried swapping the Reese’s for chopped Snickers bars, and it was a huge hit. Don’t be afraid to experiment with your favorite candies!
Serving & Storage Suggestions
Earthquake Cake is best served slightly warm or at room temperature. Here are a few serving ideas:
- Pair with: A scoop of vanilla ice cream or a drizzle of caramel sauce.
- Presentation: Sprinkle extra chopped Reese’s or chocolate chips on top for a polished look.
- Storage: Cover the cake tightly and store at room temperature for up to 2 days or in the refrigerator for up to 5 days.
- Freezing: Wrap individual slices in plastic wrap and store in an airtight container for up to 2 months. Thaw overnight in the fridge.
- Reheating: Warm slices in the microwave for 10-15 seconds for that gooey texture.
The flavors deepen over time, making leftovers even more delicious. Trust me, you’ll want to save a piece for yourself!
Nutritional Information & Benefits
Here’s a rough estimate for one serving of Earthquake Cake:
- Calories: 420
- Fat: 22g
- Sugar: 34g
- Protein: 5g
This cake is definitely a treat, but it’s worth every bite. Packed with indulgent flavors like peanut butter and chocolate, it’s a fun way to celebrate or satisfy a serious sweet tooth.
Conclusion
If you’re looking for an unforgettable dessert, this Earthquake Cake with Reese’s Peanut Butter Cups checks all the boxes. It’s rich, gooey, and visually stunning, with layers of flavor that surprise and delight. Plus, it’s easy to customize and perfect for sharing—or keeping all to yourself!
I love how this cake brings people together, whether it’s at a party or just gathered around the kitchen table. It’s messy, indulgent, and full of personality—just like the best desserts should be.
Give this recipe a try and let me know how it turns out! Share your variations or tips in the comments below, and don’t forget to snap a picture before diving in. Happy baking!
FAQs
Can I use a homemade chocolate cake instead of a mix?
Absolutely! Just make sure you use a recipe designed for a 9×13-inch pan to get the proportions right.
Do I have to use Reese’s Peanut Butter Cups?
Nope! You can swap them for any candy you love—Snickers, Kit Kats, or even chopped Oreos work great.
Why is my cake still gooey in the middle?
This is normal for Earthquake Cake! Let it cool completely, and the layers will set beautifully.
Can I make this cake ahead of time?
Yes! You can bake it the day before and store it covered in the fridge. Bring it to room temperature before serving.
Is this recipe kid-friendly?
Definitely! Kids love the mix-ins and swirled cream cheese layer—it’s a hit every time!
Pin This Recipe!

Earthquake Cake Recipe with Reese’s Peanut Butter Cups

A rich, gooey chocolate cake layered with shredded coconut, pecans, and Reese’s Peanut Butter Cups, topped with swirls of cream cheese frosting for a visually stunning and indulgent dessert.
- Prep Time: 15 minutes
- Cook Time: 45 minutes
- Total Time: 1 hour
- Yield: 12 servings 1x
- Category: Dessert
- Cuisine: American
Ingredients
- 1 cup sweetened shredded coconut
- 1 cup chopped pecans
- 1 box chocolate cake mix
- 3 large eggs
- 1/3 cup vegetable oil
- 1 cup water
- 8 oz cream cheese, softened
- 1/2 cup unsalted butter, softened
- 2 1/2 cups powdered sugar
- 1 tsp vanilla extract
- 1 cup Reese’s Peanut Butter Cups, chopped
- 1/2 cup chocolate chips
Instructions
- Preheat your oven to 350°F (175°C). Grease your 9×13-inch baking pan generously or line it with parchment paper.
- Spread the shredded coconut evenly across the bottom of the pan, followed by the chopped pecans.
- In a large mixing bowl, prepare the chocolate cake batter by combining the cake mix, eggs, vegetable oil, and water. Mix according to the package instructions until smooth.
- Pour the cake batter over the coconut and pecans in the pan, spreading it out evenly.
- In a separate medium bowl, beat together the softened cream cheese and butter until creamy. Add the powdered sugar and vanilla extract, and continue mixing until smooth and fluffy.
- Drop spoonfuls of the cream cheese mixture over the cake batter. Use a knife or spatula to swirl it lightly into the batter, leaving visible swirls.
- Sprinkle the chopped Reese’s Peanut Butter Cups and chocolate chips evenly over the top.
- Bake for 40-45 minutes, or until the edges are set and the middle is slightly gooey. The “earthquake” cracks will appear as it bakes.
- Let the cake cool in the pan for at least 20 minutes before slicing and serving.
Notes
[‘Use room temperature ingredients for even mixing.’, ‘Don’t over-swirl the cream cheese mixture to maintain visible cracks.’, ‘Cool the cake before serving to allow the layers to set.’, ‘Customize the mix-ins with your favorite candies or chocolate chips.’, ‘Chill the cake in the fridge for cleaner slices.’]
Nutrition
- Serving Size: 1 slice
- Calories: 420
- Sugar: 34
- Fat: 22
- Protein: 5
Keywords: Earthquake Cake, Reese’s Peanut Butter Cups, Chocolate Cake, Cream Cheese Frosting, Gooey Dessert


