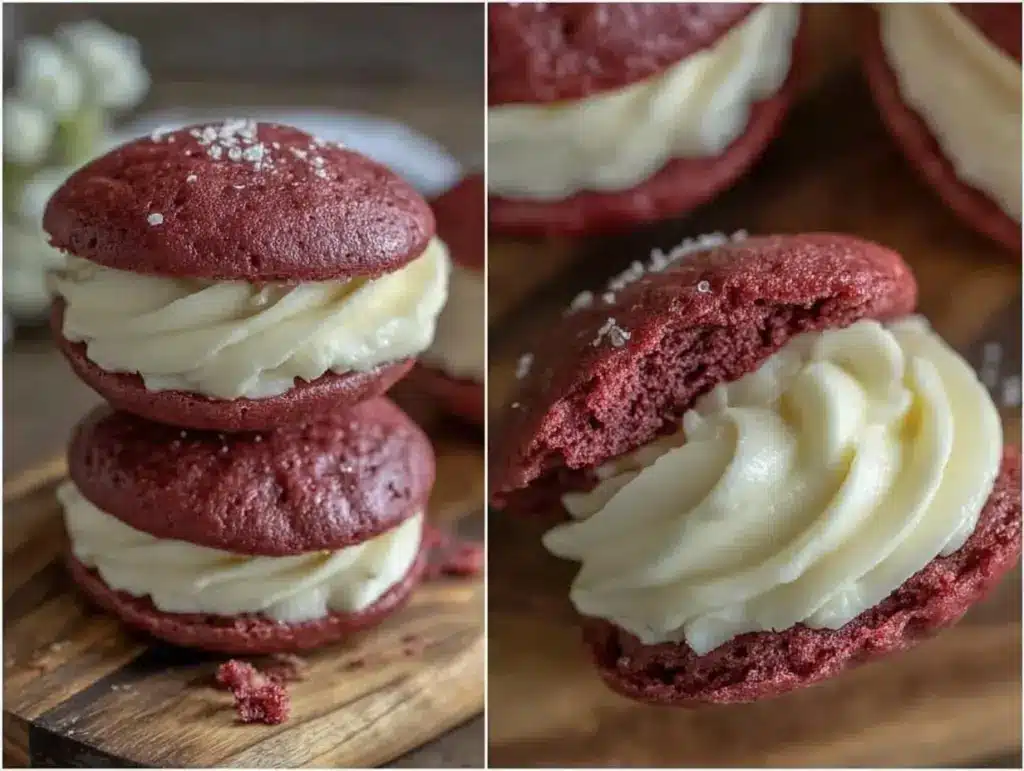
The sweet smell of freshly baked pink velvet whoopie pies always gets me right in the nostalgia. I remember the first time I made these treats—it was a rainy afternoon, and I wanted something that felt like a hug in dessert form. Honestly, the vibrant pink color and the soft, cakey texture combined with that luscious cream filling made me grin from ear to ear. This decadent pink velvet whoopie pies recipe has since become a favorite in my kitchen, perfect for celebrations or just a cozy weekend indulgence. Whether you’re baking for a birthday, a baby shower, or simply because you deserve a special treat, these whoopie pies never fail to impress.
What makes this recipe stand out is the balance between the rich, tender pink velvet cakes and the smooth, sweet cream filling that’s just the right amount of fluffy and creamy. I’ve tested this recipe multiple times to get the filling just right—fluffy but not too sweet, so it complements rather than overwhelms the cake. If you’ve never tried pink velvet whoopie pies before, you’re in for a real treat. Plus, making them at home means you can control the ingredients and play with the flavors a bit—trust me, it’s worth every minute spent!
These decadent pink velvet whoopie pies with cream filling are a crowd-pleaser. Kids love the fun color and adults appreciate the nostalgic taste with a modern twist. I often get asked for this recipe at family gatherings, and it’s become a bit of a signature dessert in my circle. If you want a recipe that’s both impressive and surprisingly easy, this is the one to keep close.
Why You’ll Love This Recipe
- Quick & Easy: Comes together in under an hour, making it a perfect last-minute dessert for unexpected guests or sweet cravings.
- Simple Ingredients: Uses everyday pantry staples—you probably have everything on hand already, no fancy shopping required.
- Perfect for Special Occasions: The vibrant pink hue and elegant cream filling make it ideal for birthdays, Valentine’s Day, or baby showers.
- Crowd-Pleaser: Kids and adults alike rave about the soft, melt-in-your-mouth texture paired with the creamy filling.
- Unbelievably Delicious: The balance of subtle cocoa flavor with a hint of vanilla in the cake and the smooth cream filling is comforting yet indulgent.
This isn’t your average whoopie pie recipe. The trick is in the cream filling—I use a whipped cream cheese and butter blend that’s silky smooth and just a touch tangy, which cuts through the sweetness beautifully. Also, the pink velvet cake batter is gently flavored with cocoa and vanilla, giving it depth without overpowering the softness. I’ve tried other versions, but this one hits the sweet spot every time.
Honestly, this recipe feels like a special occasion in every bite, but it’s simple enough to whip up on a regular day when you need a little pick-me-up. If you want a dessert that makes people pause and smile, these decadent pink velvet whoopie pies with cream filling are the way to go.
What Ingredients You Will Need
This recipe uses simple, wholesome ingredients to deliver bold flavor and a satisfyingly soft texture without the fuss. Most of these are pantry staples, and if you’re missing anything, I’ve got easy swaps to keep you covered.
- For the Pink Velvet Cake:
- All-purpose flour (2 ½ cups / 315g) – I prefer Gold Medal for consistent results
- Cocoa powder (2 tablespoons) – use Dutch-processed for a smoother taste
- Baking soda (1 teaspoon)
- Salt (½ teaspoon)
- Unsalted butter (¾ cup / 170g), softened – Land O’Lakes is my go-to
- Sugar (1 ¾ cups / 350g)
- Large eggs (2), room temperature
- Buttermilk (1 cup / 240ml), room temperature – if you don’t have buttermilk, mix 1 cup milk with 1 tablespoon lemon juice and let sit 5 minutes
- Vanilla extract (1 teaspoon)
- Red food coloring (1 tablespoon) – gel or liquid works fine, just be sure to get a vibrant pink
- White vinegar (1 teaspoon) – helps activate the baking soda for a tender crumb
- For the Cream Filling:
- Cream cheese (8 ounces / 225g), softened – I recommend Philadelphia for its smoothness
- Unsalted butter (½ cup / 115g), softened
- Powdered sugar (3 cups / 360g) – sifted for smooth filling
- Vanilla extract (1 teaspoon)
- Heavy cream (2 tablespoons) – adds lightness and fluffiness
Feel free to swap all-purpose flour with a gluten-free blend if needed, though texture may vary slightly. For a dairy-free version, try coconut cream cheese and vegan butter substitutes. If you want to skip the red food coloring, natural beet powder can give a subtle pink tint.
Equipment Needed
- Mixing bowls – a large one for wet ingredients and a medium one for dry works well
- Electric mixer – stand or hand mixer makes creaming butter and sugar easier, but whisking by hand is doable if you’re up for it
- Measuring cups and spoons – for precise ingredient amounts
- Spatula – for folding and scraping the batter
- Baking sheets (2) – lined with parchment paper or silicone mats to prevent sticking
- Cookie scoop (about 2 tablespoons size) – helps make uniform rounds
- Cooling racks – to cool the cakes evenly and prevent sogginess
- Optional: piping bag for cream filling – neat but not necessary, you can spread with a knife
Honestly, you don’t need fancy equipment to make these decadent pink velvet whoopie pies with cream filling. I once baked them using just a whisk and spoon when my mixer was out of commission, and they still turned out great! If you want to keep it budget-friendly, silicone baking mats are reusable and save money in the long run compared to parchment paper.
Detailed Preparation Method
- Preheat your oven to 350°F (175°C). Line two baking sheets with parchment paper or silicone mats.
- Mix dry ingredients: In a medium bowl, sift together 2 ½ cups (315g) of all-purpose flour, 2 tablespoons cocoa powder, 1 teaspoon baking soda, and ½ teaspoon salt. Set aside.
- Cream butter and sugar: In a large bowl, use an electric mixer to beat ¾ cup (170g) softened unsalted butter with 1 ¾ cups (350g) sugar until light and fluffy, about 3-4 minutes. This step is key to a tender crumb.
- Add eggs: Beat in 2 large eggs, one at a time, mixing well after each addition. You’ll notice the batter start to look smooth and glossy.
- Combine wet ingredients: In a small bowl or measuring cup, mix 1 cup (240ml) buttermilk, 1 teaspoon vanilla extract, 1 tablespoon red food coloring, and 1 teaspoon white vinegar.
- Alternate adding dry and wet ingredients: Gradually add the dry flour mixture and the wet buttermilk mixture to the butter mixture, starting and ending with the dry ingredients. Mix gently on low speed or fold with a spatula after each addition until just combined. Don’t overmix—you want a soft, thick batter.
- Portion the batter: Using a 2-tablespoon cookie scoop, drop rounded mounds spaced about 2 inches apart on the prepared baking sheets. If you want perfectly round cakes, gently smooth the tops with a damp fingertip.
- Bake: Place baking sheets in the preheated oven and bake for 12-14 minutes. The whoopie pies should spring back lightly when touched and start pulling away from the parchment paper edges.
- Cool completely: Transfer the cakes to cooling racks and let them cool fully before filling. This prevents the cream filling from melting.
- Prepare the cream filling: Beat 8 ounces (225g) softened cream cheese and ½ cup (115g) softened unsalted butter together until smooth and creamy. Gradually add 3 cups (360g) sifted powdered sugar, one cup at a time, mixing well after each addition. Stir in 1 teaspoon vanilla extract and 2 tablespoons heavy cream. Beat on medium-high speed for 2-3 minutes until light and fluffy.
- Assemble the whoopie pies: Pair similar-sized cakes. Using a piping bag or a knife, spread about 2 tablespoons of cream filling onto the flat side of one cake and sandwich it with its partner. Gently press together to spread the filling evenly to the edges.
- Serve or chill: Serve immediately or refrigerate for 30 minutes to let the filling set. These whoopie pies keep well in an airtight container in the fridge for up to 3 days.
Pro tip: If the batter seems too thick, add a splash more buttermilk, but be careful not to overdo it. Also, I find that letting the cakes cool completely on a wire rack keeps them from becoming soggy underneath.
Cooking Tips & Techniques
When making these decadent pink velvet whoopie pies with cream filling, a few tricks can make all the difference. First, don’t skip softening your butter and cream cheese properly; cold ingredients won’t blend smoothly, leading to lumps in your batter or filling. I usually set them out about an hour before baking.
Also, be gentle when mixing the batter after adding the flour. Overmixing develops gluten and can make your whoopie pies tough instead of tender. I like to fold the dry ingredients in by hand at the end for better control.
One mistake I made early on was baking the cakes too close together on the sheet. Give them enough space to spread evenly. And watch your oven carefully near the end—whoopie pies can go from perfectly baked to dry in a flash.
Timing is key! While the cakes bake, I prepare the cream filling so everything is ready to assemble right away. Multitasking this way keeps the cakes fresh and the filling light. If your kitchen’s warm, keep the filling chilled until assembly to prevent it from melting.
Variations & Adaptations
These pink velvet whoopie pies are versatile and easy to tweak to your taste or dietary needs. Here are some ideas I’ve tried or recommend:
- Chocolate Lovers’ Twist: Add mini chocolate chips to the batter or swirl melted chocolate into the cream filling for extra richness.
- Gluten-Free Version: Swap all-purpose flour for a gluten-free blend like Bob’s Red Mill 1-to-1. The texture is slightly different but still delicious.
- Vegan Adaptation: Use dairy-free cream cheese and vegan butter, replace eggs with flax eggs (1 tablespoon flaxseed meal + 3 tablespoons water per egg), and use plant-based milk with vinegar instead of buttermilk.
- Seasonal Flavor: In spring, I like folding in fresh raspberries into the batter or mixing a bit of lemon zest into the cream filling for a bright note.
One variation I adore is adding a hint of almond extract to the cream filling—just ¼ teaspoon adds a lovely depth. Feel free to experiment; that’s part of the fun!
Serving & Storage Suggestions
The best way to enjoy these decadent pink velvet whoopie pies with cream filling is at room temperature, so the filling is soft and creamy. They’re perfect for afternoon tea, birthday parties, or as a sweet treat after dinner. I often serve them alongside a cup of coffee or a glass of milk—classic pairing.
Store leftover whoopie pies in an airtight container in the refrigerator for up to 3 days. If you want to keep them longer, wrap individually in plastic wrap and freeze for up to 2 months. Thaw in the fridge overnight and let them warm to room temperature before serving.
Reheating gently in the microwave for 10-15 seconds softens the filling nicely if chilled. Over time, the flavors meld beautifully, making these treats taste even better the next day, if you can wait that long!
Nutritional Information & Benefits
Each decadent pink velvet whoopie pie (one sandwich) contains approximately 320 calories, 18g fat, 35g carbohydrates, and 4g protein. The cream cheese adds a bit of calcium and protein, while the butter provides richness.
This dessert is not low-calorie, but it’s made with real ingredients, no artificial preservatives or additives. Using buttermilk adds a slight tang and tender crumb, and you can make it gluten-free or dairy-free to suit your dietary needs.
From a wellness perspective, I find that making treats like this at home means I control the quality, which makes indulging a little more satisfying and guilt-free. Moderation is key, but every bite feels like a special occasion.
Conclusion
If you’re looking for a dessert that’s both delightful to eat and fun to make, these decadent pink velvet whoopie pies with cream filling should be your next baking project. They’re simple enough for a beginner but impressive enough to serve at gatherings. You can tweak the flavors and colors to fit your style or occasion, which makes them even more enjoyable to experiment with.
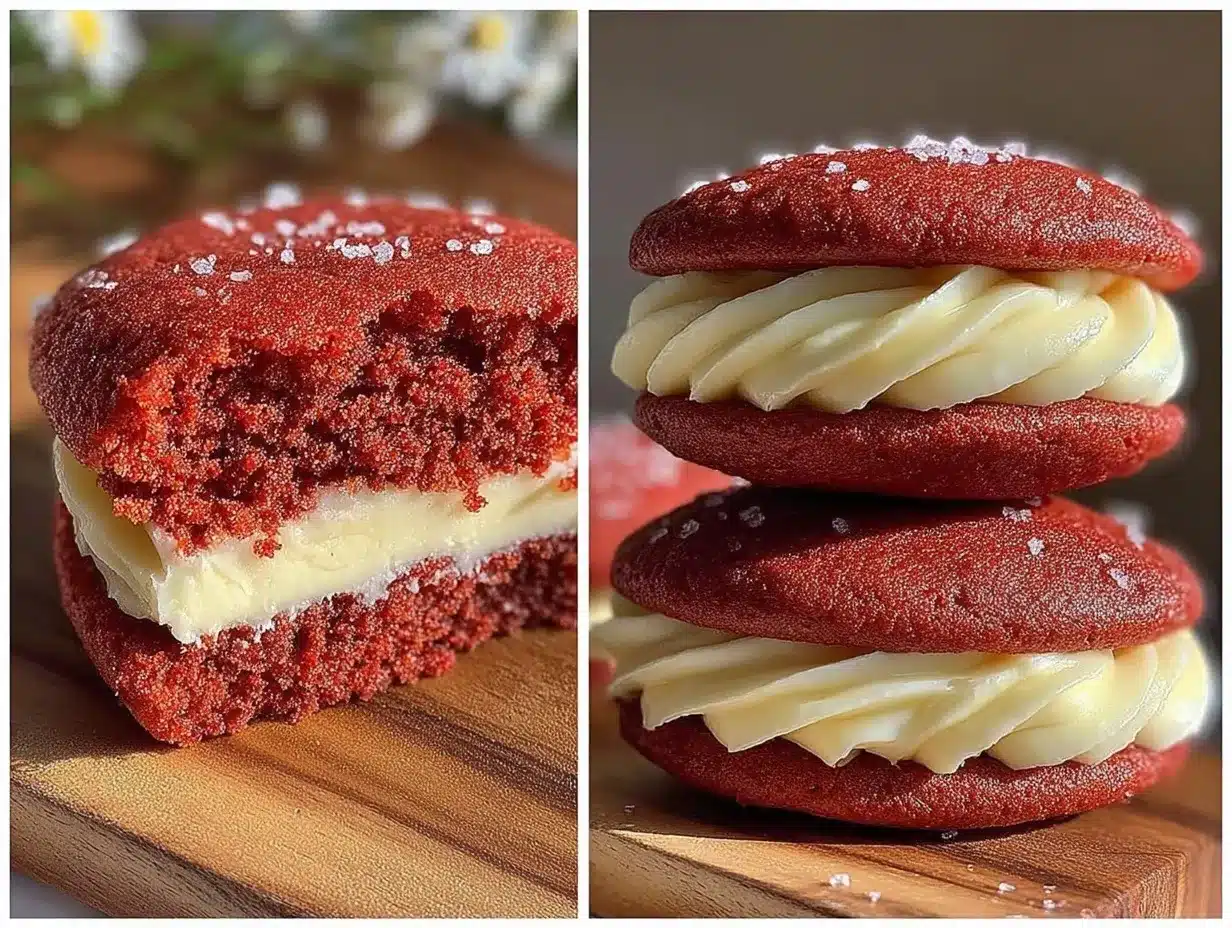
I personally love how the pink velvet cakes are soft and slightly chocolatey, paired with that smooth cream filling—it’s a combo that never gets old. Give this recipe a try, and I bet it will become a favorite in your kitchen too.
Don’t forget to leave a comment if you try the recipe or have your own unique spin on these whoopie pies. Sharing your baking stories always makes my day!
FAQs About Decadent Pink Velvet Whoopie Pies
Can I make the whoopie pies ahead of time?
Yes! You can bake the cakes a day ahead and store them in an airtight container at room temperature. Prepare the filling the next day and assemble just before serving for the freshest taste.
What can I use instead of red food coloring?
Natural beet powder or juice works well for a pink tint, though the color will be softer. Alternatively, you can skip coloring for a light cocoa cake.
How do I prevent the cream filling from melting?
Keep the filling refrigerated until ready to use, and assemble the whoopie pies in a cool kitchen. If your kitchen is warm, refrigerate the assembled pies before serving.
Can I freeze the assembled whoopie pies?
Yes, wrap them individually in plastic wrap and freeze for up to 2 months. Thaw in the fridge overnight before serving.
What’s the best way to make the filling fluffy?
Beat the cream cheese and butter until very smooth before gradually adding powdered sugar. Adding a bit of heavy cream and beating on high speed at the end helps achieve that light, fluffy texture.
Pin This Recipe!

Decadent Pink Velvet Whoopie Pies Recipe Easy Homemade Cream Filling

Soft, cakey pink velvet whoopie pies paired with a luscious, fluffy cream cheese filling. Perfect for celebrations or cozy indulgence.
- Prep Time: 20 minutes
- Cook Time: 14 minutes
- Total Time: 34 minutes
- Yield: 12 servings 1x
- Category: Dessert
- Cuisine: American
Ingredients
- 2 ½ cups (315g) all-purpose flour
- 2 tablespoons Dutch-processed cocoa powder
- 1 teaspoon baking soda
- ½ teaspoon salt
- ¾ cup (170g) unsalted butter, softened
- 1 ¾ cups (350g) sugar
- 2 large eggs, room temperature
- 1 cup (240ml) buttermilk, room temperature (or 1 cup milk + 1 tablespoon lemon juice, let sit 5 minutes)
- 1 teaspoon vanilla extract
- 1 tablespoon red food coloring (gel or liquid)
- 1 teaspoon white vinegar
- 8 ounces (225g) cream cheese, softened
- ½ cup (115g) unsalted butter, softened
- 3 cups (360g) powdered sugar, sifted
- 1 teaspoon vanilla extract
- 2 tablespoons heavy cream
Instructions
- Preheat your oven to 350°F (175°C). Line two baking sheets with parchment paper or silicone mats.
- In a medium bowl, sift together 2 ½ cups (315g) all-purpose flour, 2 tablespoons cocoa powder, 1 teaspoon baking soda, and ½ teaspoon salt. Set aside.
- In a large bowl, beat ¾ cup (170g) softened unsalted butter with 1 ¾ cups (350g) sugar until light and fluffy, about 3-4 minutes.
- Beat in 2 large eggs, one at a time, mixing well after each addition.
- In a small bowl or measuring cup, mix 1 cup (240ml) buttermilk, 1 teaspoon vanilla extract, 1 tablespoon red food coloring, and 1 teaspoon white vinegar.
- Gradually add the dry flour mixture and the wet buttermilk mixture to the butter mixture, starting and ending with the dry ingredients. Mix gently on low speed or fold with a spatula until just combined. Do not overmix.
- Using a 2-tablespoon cookie scoop, drop rounded mounds spaced about 2 inches apart on the prepared baking sheets. Smooth tops gently with a damp fingertip if desired.
- Bake for 12-14 minutes until the whoopie pies spring back lightly when touched and start pulling away from the parchment edges.
- Transfer the cakes to cooling racks and let cool completely before filling.
- For the cream filling, beat 8 ounces (225g) softened cream cheese and ½ cup (115g) softened unsalted butter until smooth and creamy.
- Gradually add 3 cups (360g) sifted powdered sugar, one cup at a time, mixing well after each addition.
- Stir in 1 teaspoon vanilla extract and 2 tablespoons heavy cream. Beat on medium-high speed for 2-3 minutes until light and fluffy.
- Pair similar-sized cakes. Spread about 2 tablespoons of cream filling onto the flat side of one cake and sandwich with its partner. Press gently to spread filling evenly to edges.
- Serve immediately or refrigerate for 30 minutes to let the filling set. Store in an airtight container in the fridge for up to 3 days.
Notes
Softening butter and cream cheese properly is key to smooth batter and filling. Avoid overmixing the batter to keep cakes tender. Let cakes cool completely before filling to prevent melting. If batter is too thick, add a splash more buttermilk. Store assembled pies in fridge up to 3 days or freeze up to 2 months.
Nutrition
- Serving Size: One whoopie pie sand
- Calories: 320
- Fat: 18
- Carbohydrates: 35
- Protein: 4
Keywords: pink velvet whoopie pies, whoopie pies recipe, cream filling, homemade dessert, pink velvet cake, easy dessert, celebration dessert


