The moment you take a forkful of this decadent peanut butter lasagna dessert, you’ll know you’ve stumbled onto something truly special. Honestly, it’s like a creamy, crunchy, peanut buttery dream layered into one no-bake masterpiece. I first made this peanut butter lasagna dessert for a family gathering, and let me tell you, it vanished faster than I expected. The rich peanut butter flavor combined with cool layers of cream cheese and whipped topping made it an instant hit.
This dessert feels indulgent without being overly complicated, which is why I keep coming back to it. Plus, it’s perfect when you want a show-stopping treat without turning on the oven. If you’re a peanut butter fan or just love no-fuss desserts that taste like they took hours, this recipe is for you. I’ve tested this peanut butter lasagna dessert multiple times, tweaking the layers to get just the right balance of sweetness and texture, so you’re in good hands here.
Whether you’re planning a party, a potluck, or just craving something irresistible after dinner, this peanut butter lasagna dessert will become your go-to. It’s creamy, crunchy, and delightfully easy to put together — trust me, your friends and family will be asking for the recipe!
Why You’ll Love This Recipe
After making this peanut butter lasagna dessert recipe over and over, I can confidently say it hits all the right notes. Here’s why it might just become your new favorite:
- Quick & Easy: No baking required! You can whip this up in about 20 minutes, then just let it chill.
- Simple Ingredients: You probably already have most of these staples in your pantry and fridge.
- Perfect for Parties: It’s a crowd-pleaser, ideal for potlucks, birthdays, or family get-togethers.
- Crowd-Pleaser: Both kids and adults rave about the creamy peanut butter and crunchy cookie layers.
- Unbelievably Delicious: The layers of peanut butter, cream cheese, and cool whip create a luscious, melt-in-your-mouth experience.
This isn’t your average peanut butter dessert. What makes this peanut butter lasagna dessert so special is the layering technique — the crunchy cookie base, the tangy cream cheese layer, and that dreamy peanut butter filling all stacked up like a lasagna. It’s comfort food in dessert form, but with a fresh, no-bake twist that’s just perfect when you want something quick and satisfying.
What Ingredients You Will Need
This peanut butter lasagna dessert recipe keeps things straightforward but packs in flavor and texture. Here’s what you’ll need:
- For the base:
- 1 package of chocolate sandwich cookies (about 36 cookies) — crushed (I like using Oreo brand for that classic crunch)
- 6 tablespoons unsalted butter, melted (adds richness and helps bind the base)
- For the peanut butter layer:
- 1 cup creamy peanut butter (natural or regular, just make sure it’s smooth for easy spreading)
- 8 oz cream cheese, softened (brings tang and creaminess)
- 2 cups powdered sugar (for sweetness and structure)
- 1 teaspoon vanilla extract (adds depth)
- For the whipped topping layers:
- 2 cups heavy whipping cream, chilled (for fresh whipped cream, or substitute with 2 tubs of whipped topping for easier prep)
- 1/4 cup powdered sugar (if making fresh whipped cream)
- 1 teaspoon vanilla extract (if making fresh whipped cream)
- For garnish (optional):
- Chocolate shavings or mini chocolate chips (adds a nice finish)
- Chopped peanuts (for extra crunch)
For a gluten-free option, you can swap out the sandwich cookies with gluten-free chocolate cookies. If you want to make it vegan, try using dairy-free cream cheese and whipped topping alternatives. The key is smooth peanut butter and a sturdy cookie base to hold those layers together.
Equipment Needed
To make this peanut butter lasagna dessert, you won’t need anything fancy, which is part of the charm.
- 9×13 inch baking dish: A glass or ceramic dish works best for layering and serving.
- Mixing bowls: At least two — one for the peanut butter mixture, one for whipping cream.
- Electric mixer or stand mixer: Essential for whipping the cream and blending the cream cheese smoothly.
- Spatula: For spreading layers evenly.
- Food processor or rolling pin: To crush the cookies. If you don’t have a food processor, a sturdy plastic bag and rolling pin work just fine.
Personally, I find using an electric hand mixer saves time and gives you the fluffiest whipped cream. If you’re on a budget, a manual whisk and some elbow grease can do the trick too, but it’ll take longer. Glass dishes are great because you can see all the beautiful layers through the sides — it’s almost too pretty to eat!
Detailed Preparation Method

- Prepare the cookie base: Crush the chocolate sandwich cookies finely using a food processor or place them in a sealed plastic bag and crush with a rolling pin. Mix the crushed cookies with 6 tablespoons of melted butter until the mixture resembles wet sand. Press this mixture firmly and evenly into the bottom of your 9×13 inch baking dish. This creates a crunchy, buttery foundation. Chill in the refrigerator while preparing the next layers (about 10 minutes).
- Make the peanut butter layer: In a medium bowl, combine softened cream cheese and creamy peanut butter. Use an electric mixer on medium speed until smooth and creamy (about 2-3 minutes). Add powdered sugar and vanilla extract, then beat again until well combined and fluffy. This layer should be thick but spreadable. Spread the peanut butter mixture evenly over the chilled cookie base. Return to the fridge for about 15 minutes to set slightly.
- Whip the cream topping: If making fresh whipped cream, chill your mixing bowl and beaters in the freezer for 15 minutes first. Pour the heavy whipping cream into the chilled bowl, add powdered sugar and vanilla extract, and whip on medium-high speed until stiff peaks form (about 5-7 minutes). If using store-bought whipped topping, simply thaw as per package instructions.
- Layer the whipped topping: Spread half of the whipped cream evenly over the peanut butter layer. This lightens the rich peanut butter and adds a cool, creamy texture.
- Add a second cookie layer (optional): For extra texture, sprinkle a thin, even layer of crushed cookies over the whipped cream. This is optional but highly recommended for a delightful crunch.
- Final whipped cream layer: Top with the remaining whipped cream, spreading it evenly to seal all the layers inside.
- Chill and garnish: Cover the dish tightly with plastic wrap and refrigerate for at least 4 hours, preferably overnight. This helps the layers meld together beautifully. Just before serving, garnish with chocolate shavings or mini chocolate chips and chopped peanuts for that extra wow factor.
Pro tip: When spreading layers, use a gentle hand with your spatula to keep the layers neat and distinct. If the peanut butter layer feels too thick to spread, let it sit at room temperature for a few minutes to soften.
Cooking Tips & Techniques
Making a no-bake peanut butter lasagna dessert sounds easy, but a few tricks will guarantee success every time.
- Softening the cream cheese: Take it out of the fridge ahead of time to avoid lumps. I’ve made the mistake of rushing this step and it made mixing a pain.
- Whipping cream consistency: Watch carefully as you whip your cream. Stop as soon as stiff peaks form, or you risk turning it into butter — nobody wants that!
- Cookie crushing consistency: Aim for finely crushed crumbs, but leave a few small chunks for texture. Too powdery and the base won’t hold; too chunky and it won’t compact well.
- Chilling time matters: Don’t skimp on resting this dessert in the fridge. The flavors marry and the layers firm up, making it easier to slice and serve.
- Layer spreading: Use a rubber spatula or the back of a spoon in smooth, even strokes to keep layers tidy.
Also, keep your mixing bowls cold when whipping cream — I learned this the hard way after a few failed batches. A cold bowl means quicker whipping and better volume. Lastly, when serving, let the dessert sit out for 5-10 minutes so it’s not too cold; the flavors open up nicely once it’s a little less chilled.
Variations & Adaptations
This peanut butter lasagna dessert is versatile and adapts well to different tastes and dietary needs:
- Chocolate lovers, unite: Add a layer of chocolate pudding between the peanut butter and whipped cream layers for an extra chocolate punch.
- Nut-free option: Swap peanut butter for sunflower seed butter or almond butter if allergies are a concern.
- Seasonal twist: In summer, add fresh sliced bananas or strawberries between layers for a fruity surprise.
- Vegan adaptation: Use dairy-free cream cheese, coconut whipped topping, and check your cookies are vegan-friendly.
- Crispier base: Try mixing crushed pretzels into the cookie base for a salty crunch contrast.
One personal favorite variation I’ve tried is swirling in a little honey into the peanut butter layer for a subtle floral sweetness. It’s a simple change that really adds depth without overpowering the peanut butter flavor. Feel free to customize based on what you have or what your guests prefer — this dessert is pretty forgiving!
Serving & Storage Suggestions
This peanut butter lasagna dessert is best served chilled but not ice-cold. Let it sit at room temperature for about 10 minutes before slicing to make cutting easier and to let those flavors shine.
Serve it as is or pair with a scoop of vanilla ice cream or a drizzle of chocolate sauce for extra indulgence. It’s perfect alongside a cup of strong coffee or milk — honestly, the combo is unbeatable.
Store leftovers covered tightly in the refrigerator for up to 4 days. The flavors actually deepen over time, so it can taste even better the next day. If you want to freeze it, cover well with plastic wrap and foil, then freeze for up to 2 months. Thaw overnight in the fridge before serving.
When reheating, I recommend just letting it come to room temperature rather than microwaving, to keep the texture intact — you want that creamy lasagna feel, not a melted mess!
Nutritional Information & Benefits
While this peanut butter lasagna dessert is indulgent, it also packs a bit of nutritional goodness thanks to the peanut butter and cream cheese.
- Each serving offers a good amount of protein from the peanut butter and cream cheese, helping to keep you satisfied.
- Peanut butter provides heart-healthy fats and essential vitamins like vitamin E and magnesium.
- The dessert is gluten-friendly if you choose gluten-free cookies, and can be adapted for dairy-free diets as well.
Keep in mind, this is definitely a treat — but it’s one that brings joy and satisfies those peanut butter cravings with a balance of creamy and crunchy textures. Moderation is key, but I’ve found this dessert fits well into a balanced lifestyle when enjoyed occasionally.
Conclusion
So there you have it — a peanut butter lasagna dessert that’s easy to make, irresistibly creamy, and perfect for any occasion. It’s the kind of recipe you’ll want to save and pull out whenever you want to impress without stress. I love how the layers come together to create a dessert that feels fancy but is super approachable.
Go ahead and tweak it to your liking — add some fresh fruit, swap out cookies, or try that chocolate pudding layer I mentioned. Whatever you do, this peanut butter lasagna dessert will make your taste buds happy and your guests impressed.
If you try this recipe, I’d love to hear how it went! Drop a comment below, share your favorite variations, or just tell me what you thought. Happy no-baking and even happier eating!
FAQs
Can I make this peanut butter lasagna dessert ahead of time?
Absolutely! In fact, it tastes better after chilling overnight as the layers set and flavors blend perfectly.
What if I don’t have cream cheese? Can I substitute it?
You could try mascarpone or even Greek yogurt for a tangy twist, but cream cheese gives the best texture and richness.
Is this dessert freezer-friendly?
Yes, you can freeze it for up to 2 months. Just wrap it well and thaw in the fridge overnight before serving.
Can I use crunchy peanut butter instead of creamy?
Certainly! Crunchy peanut butter adds extra texture, just be sure to mix it well to keep the layer smooth enough to spread.
How do I get the layers to stay neat when slicing?
Chilling the dessert well is key. Use a sharp knife warmed in hot water for clean cuts, wiping the blade between slices helps too.
Pin This Recipe!

Decadent Peanut Butter Lasagna

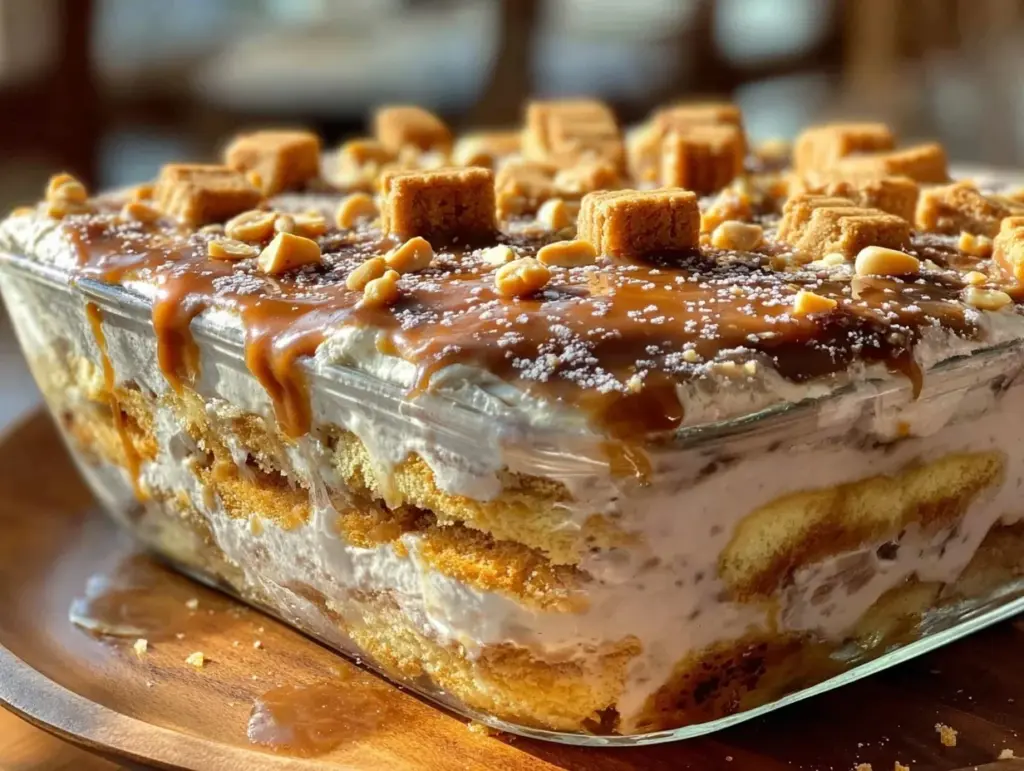
A creamy, crunchy, no-bake peanut butter dessert layered like a lasagna, perfect for parties and potlucks. It combines a crunchy cookie base with rich peanut butter, cream cheese, and whipped topping layers.
- Prep Time: 20 minutes
- Cook Time: 0 minutes
- Total Time: 4 hours 20 minutes
- Yield: 12 servings 1x
- Category: Dessert
- Cuisine: American
Ingredients
- 1 package chocolate sandwich cookies (about 36 cookies), crushed (Oreo recommended)
- 6 tablespoons unsalted butter, melted
- 1 cup creamy peanut butter (smooth)
- 8 oz cream cheese, softened
- 2 cups powdered sugar
- 1 teaspoon vanilla extract
- 2 cups heavy whipping cream, chilled (or 2 tubs whipped topping)
- 1/4 cup powdered sugar (if making fresh whipped cream)
- 1 teaspoon vanilla extract (if making fresh whipped cream)
- Chocolate shavings or mini chocolate chips (optional garnish)
- Chopped peanuts (optional garnish)
Instructions
- Crush chocolate sandwich cookies finely using a food processor or place in a sealed plastic bag and crush with a rolling pin.
- Mix crushed cookies with 6 tablespoons melted butter until mixture resembles wet sand.
- Press mixture firmly and evenly into the bottom of a 9×13 inch baking dish. Chill in refrigerator for about 10 minutes.
- In a medium bowl, combine softened cream cheese and creamy peanut butter. Beat with electric mixer on medium speed until smooth and creamy (2-3 minutes).
- Add powdered sugar and vanilla extract, beat again until well combined and fluffy.
- Spread peanut butter mixture evenly over chilled cookie base. Return to fridge for about 15 minutes to set slightly.
- If making fresh whipped cream, chill mixing bowl and beaters for 15 minutes. Pour heavy whipping cream into bowl, add powdered sugar and vanilla extract, whip on medium-high speed until stiff peaks form (5-7 minutes). If using store-bought whipped topping, thaw as per package instructions.
- Spread half of the whipped cream evenly over peanut butter layer.
- Optionally, sprinkle a thin, even layer of crushed cookies over the whipped cream for extra texture.
- Top with remaining whipped cream, spreading evenly to seal layers.
- Cover dish tightly with plastic wrap and refrigerate for at least 4 hours or overnight.
- Before serving, garnish with chocolate shavings or mini chocolate chips and chopped peanuts.
Notes
Use a gentle hand when spreading layers to keep them neat. Let cream cheese soften before mixing to avoid lumps. Chill dessert well for clean slicing. Let dessert sit at room temperature for 5-10 minutes before serving to enhance flavors. For gluten-free, use gluten-free cookies; for vegan, use dairy-free cream cheese and whipped topping alternatives.
Nutrition
- Serving Size: 1 slice (1/12th of t
- Calories: 420
- Sugar: 25
- Sodium: 220
- Fat: 28
- Saturated Fat: 12
- Carbohydrates: 35
- Fiber: 2
- Protein: 8
Keywords: peanut butter dessert, no-bake dessert, peanut butter lasagna, party dessert, easy dessert, creamy dessert, layered dessert


