The rich aroma of red velvet mingling with creamy hot chocolate is honestly one of those cozy moments you didn’t know you needed. I first stumbled upon this decadent layered red velvet hot chocolate recipe during a chilly December evening when I wanted a festive twist on my usual mug of cocoa. It instantly became my go-to holiday treat—comforting, indulgent, and just a little bit fancy.
Making this layered red velvet hot chocolate at home is surprisingly straightforward, and it feels like a mini celebration in a cup. You know, there’s something magical about the vibrant red hue paired with luscious chocolate that just makes you stop and savor the moment. I’ve tested this recipe countless times, tweaking the layers and sweetness to hit that perfect balance between velvet smooth and chocolatey richness.
This recipe isn’t just about flavor; it’s about the experience. Whether you’re curling up with a book, hosting a cozy Christmas gathering, or simply treating yourself after a long day, this homemade red velvet hot chocolate brings both warmth and festive cheer. Plus, it’s a delightful way to surprise your loved ones with something unique and indulgent during the holidays or any cold evening.
Why You’ll Love This Recipe
- Quick & Easy: Comes together in under 20 minutes—perfect for those last-minute cravings or holiday hustle.
- Simple Ingredients: No need for specialty stores; you’ll find everything in your pantry or local supermarket.
- Perfect for the Holidays: Ideal for Christmas mornings, winter evenings, or festive gatherings with friends and family.
- Crowd-Pleaser: Kids and adults alike rave about the smooth, velvety layers and rich chocolate hit.
- Unbelievably Delicious: The balance between creamy cocoa and subtle red velvet flavor is pure comfort in a mug.
What sets this layered red velvet hot chocolate apart from your typical cocoa is the attention to layering textures and flavors. Instead of just mixing everything at once, each step adds depth—a velvety red velvet base, a rich chocolate middle, and a fluffy whipped topping that almost melts into the drink. Plus, I use a bit of cream cheese whipped in the topping for that authentic red velvet cake vibe without the fuss.
This isn’t just another hot chocolate recipe. It’s the kind that makes you pause, close your eyes after the first sip, and think, “Yep, this is holiday magic.” It’s indulgent but approachable, festive but simple, and honestly, one of the best homemade treats you can whip up when the temperature drops.
What Ingredients You Will Need
This decadent layered red velvet hot chocolate recipe uses simple, wholesome ingredients that come together to create a lush, festive drink without any complicated prep.
- For the Red Velvet Base:
- Whole milk or your favorite milk (2 cups / 480 ml) – I prefer whole milk for creaminess, but almond or oat milk works well too
- Unsweetened cocoa powder (2 tablespoons / 15 g) – use a high-quality brand like Ghirardelli for best flavor
- Granulated sugar (3 tablespoons / 38 g) – adjust to taste
- Red food coloring (1-2 teaspoons) – gel type offers deeper color without extra liquid
- Vanilla extract (1 teaspoon / 5 ml) – adds warmth
- Salt (a pinch) – enhances all the flavors
- For the Chocolate Layer:
- Semi-sweet or dark chocolate chips (1/2 cup / 90 g) – chopped chocolate also works
- Heavy cream (1/2 cup / 120 ml) – creates that silky, rich chocolate layer
- For the Whipped Topping:
- Heavy whipping cream (3/4 cup / 180 ml) – chilled for best whipping results
- Cream cheese (2 tablespoons / 30 g), softened – for that classic red velvet cream cheese frosting flavor
- Powdered sugar (2 tablespoons / 15 g) – sweetens and stabilizes the topping
- Vanilla extract (1/2 teaspoon / 2.5 ml)
- Optional Garnishes:
- White chocolate shavings
- Mini marshmallows
- Red sprinkles or edible glitter
When picking your cocoa powder and chocolate, I find that brands like Valrhona or Ghirardelli really make a difference in richness. For the red food coloring, gel-based varieties pack a punch without watering down the mixture. And if you want to make a dairy-free version, swap the heavy cream with coconut cream and use a dairy-free cream cheese alternative in the topping.
Equipment Needed
- Medium saucepan – for heating the milk and making the red velvet base
- Small saucepan or microwave-safe bowl – to melt chocolate for the middle layer
- Mixing bowl – chilled, for whipping the cream topping
- Electric hand mixer or stand mixer – makes whipping cream and cream cheese topping easier and fluffier
- Whisk – for mixing the cocoa and milk base smoothly
- Measuring cups and spoons – for precise ingredient amounts
- Heatproof mugs or glasses – to serve your layered red velvet hot chocolate
If you don’t have an electric mixer, a sturdy whisk and some muscle will work to whip the topping, just expect it to take a bit longer. A double boiler setup can be handy for melting the chocolate gently without burning. Also, I recommend using a small ladle to layer the hot chocolate carefully—it helps keep those beautiful layers distinct.
Detailed Preparation Method
- Prepare the Red Velvet Base: In a medium saucepan, combine 2 cups (480 ml) of whole milk, 2 tablespoons (15 g) unsweetened cocoa powder, 3 tablespoons (38 g) granulated sugar, a pinch of salt, and 1-2 teaspoons of red food coloring. Whisk over medium heat until the mixture is warm and the cocoa and sugar have dissolved completely—about 5 minutes. Avoid boiling; you want it hot but not scorching. Stir in 1 teaspoon (5 ml) vanilla extract and remove from heat. The color should be a vibrant red with a subtle chocolatey aroma.
- Melt the Chocolate Layer: While the base is warming, melt 1/2 cup (90 g) of semi-sweet chocolate chips with 1/2 cup (120 ml) heavy cream in a small saucepan over low heat. Stir continuously until smooth and glossy—this will take about 3-4 minutes. If using a microwave, heat in 20-second bursts, stirring between each. Set aside, keeping it warm but not hot.
- Make the Cream Cheese Whipped Topping: In a chilled mixing bowl, beat 3/4 cup (180 ml) heavy whipping cream with 2 tablespoons (30 g) softened cream cheese using a hand or stand mixer. Once it starts to thicken, add 2 tablespoons (15 g) powdered sugar and 1/2 teaspoon (2.5 ml) vanilla extract. Continue whipping until soft peaks form—this usually takes 3-5 minutes. The texture should be fluffy but stable.
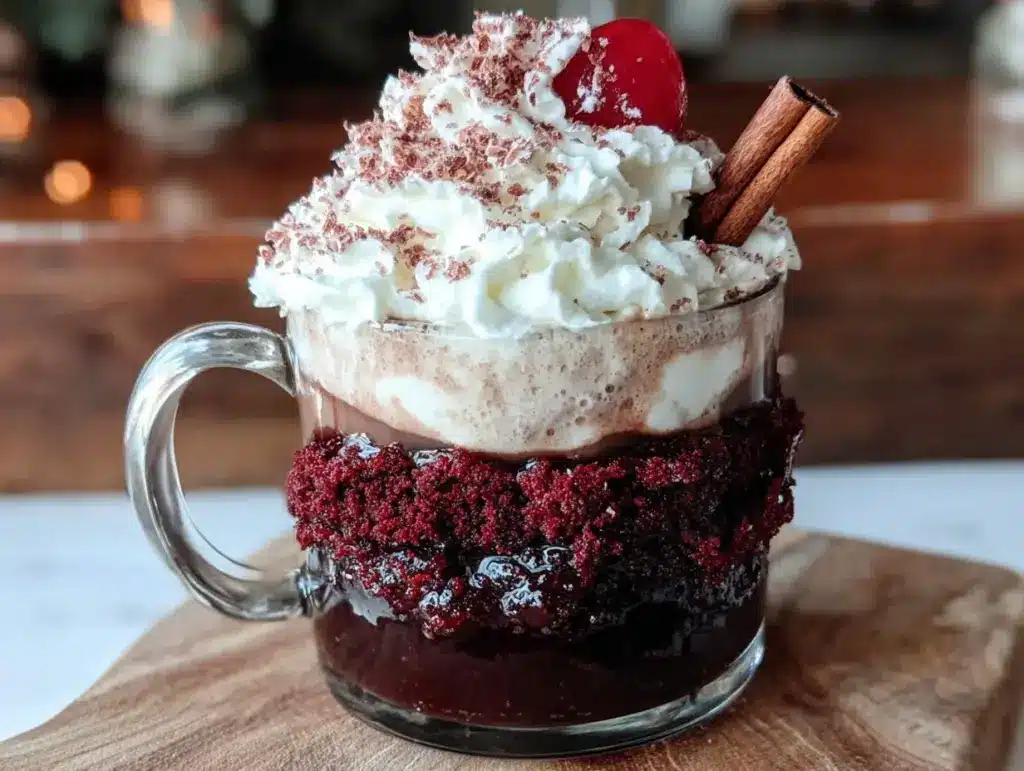
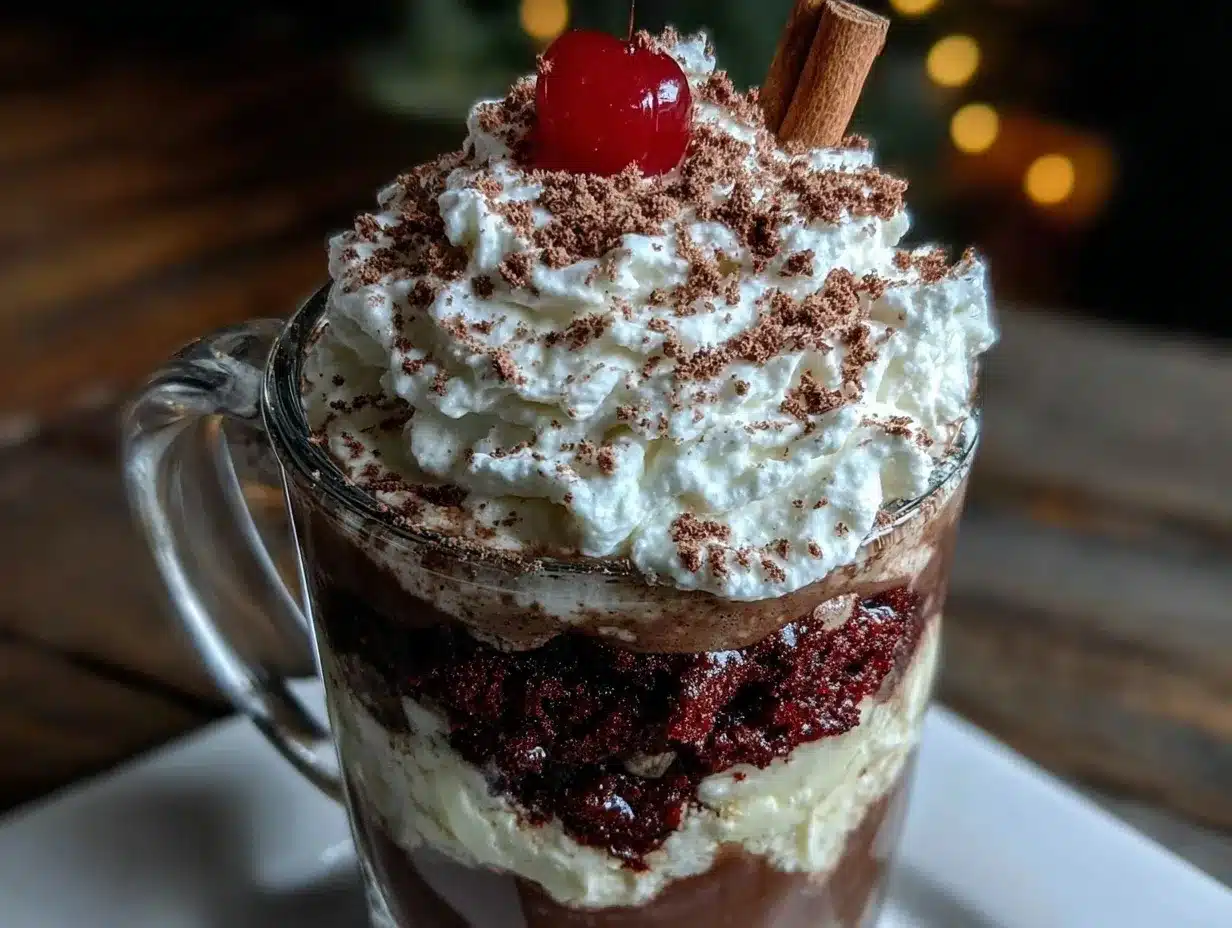
- Layer Your Hot Chocolate: Pour the red velvet base into your serving mugs, filling about half the mug. Next, gently ladle the melted chocolate and cream mixture over the back of a spoon to create a separate layer—fill the mugs to about three-quarters full. Finally, spoon or pipe the cream cheese whipped topping on top. The contrast between the layers should be visible and inviting.
- Add Garnishes and Serve: Sprinkle with white chocolate shavings, mini marshmallows, or red sprinkles if you like. Serve immediately while warm, and enjoy the festive flavors mingling in each sip!
Pro tip: To keep the layers distinct, pour slowly and let each layer settle before adding the next. If the melted chocolate starts to firm up before layering, gently rewarm it.
Cooking Tips & Techniques
One trick I’ve learned is to keep your cream cheese and heavy cream well chilled before whipping—that helps the topping hold its shape better. Also, when mixing your red velvet base, whisk constantly to prevent any lumps of cocoa powder; this keeps the texture silky smooth.
Be careful not to boil the milk mixture; overheating can cause it to scorch or separate, ruining the velvety texture. When layering, pouring the chocolate layer over the back of a spoon slows the flow and helps keep those layers from blending too much.
Sometimes, the whipped cream topping can deflate quickly if overmixed or left out too long. I recommend making it just before serving. If you’re short on time, you can prepare the red velvet base and chocolate layer ahead and whip the topping fresh.
Lastly, don’t rush the melting chocolate step. Low and slow heat ensures a glossy, smooth finish that really enhances the drink’s texture. I’ve burned chocolate more times than I’d like to admit, so trust me—it’s worth the patience!
Variations & Adaptations
- Vegan Version: Use almond or oat milk, dairy-free dark chocolate, and coconut cream whipped topping. Swap cream cheese with a vegan cream cheese alternative for the topping.
- Spicy Twist: Add a pinch of cayenne pepper or cinnamon to the red velvet base for a warming kick that pairs beautifully with chocolate.
- Mocha Layer: Mix a teaspoon of instant espresso into the melted chocolate layer for a subtle coffee flavor that deepens the chocolate notes.
- Seasonal Flair: In fall, add a splash of pumpkin spice into the red velvet base, or top with crushed peppermint candies during Christmas for extra festivity.
- Personal Variation: I often add a drizzle of salted caramel sauce between the chocolate and whipped topping layers for a salty-sweet surprise that my family adores.
Serving & Storage Suggestions
This layered red velvet hot chocolate is best enjoyed warm and fresh, right after assembling. Serve it in clear glass mugs to showcase those gorgeous layers—trust me, it’s a feast for the eyes as much as the palate.
Pair it with simple holiday cookies, like ginger snaps or sugar cookies, or enjoy it solo as a decadent treat. For beverages, a light, fruity tea or even a sparkling cranberry mocktail complements the richness.
If you have leftovers (though unlikely!), store the red velvet base and chocolate layer separately in airtight containers in the fridge for up to 2 days. The whipped cream topping is best made fresh but can be stored for a day if needed. Reheat the liquid layers gently on the stove or microwave, then whip fresh cream topping before serving.
Interestingly, letting the drink sit for a few minutes allows the flavors to meld slightly, making the red velvet notes even more pronounced. Just give it a gentle stir before sipping, and you’re set!
Nutritional Information & Benefits
Each serving of this decadent layered red velvet hot chocolate packs roughly 320–350 calories, depending on milk and chocolate choices. It provides a comforting dose of calcium and some antioxidants from the cocoa powder and dark chocolate.
The cream cheese in the whipped topping adds a bit of protein and that classic red velvet tang, while the milk offers vitamin D and essential nutrients. Using whole milk and heavy cream means it’s definitely an indulgence—not an everyday drink—but perfect for special moments.
If you prefer, swapping to plant-based milks and dairy-free alternatives can reduce saturated fat and cater to vegan or lactose-intolerant diets. Just keep in mind the texture and flavor will shift slightly.
Overall, this recipe combines festive flavor with a touch of nutritional value—because sometimes, holiday treats are about joy as much as health!
Conclusion
So, if you’re looking for a festive, comforting drink that’s a bit out of the ordinary, this decadent layered red velvet hot chocolate recipe is your answer. It’s simple enough to make on a weeknight yet special enough to wow guests during the holidays. I love how it brings the cozy flavors of red velvet cake into a warm, drinkable form that feels like a hug in a mug.
Feel free to tweak the layers, add your favorite garnishes, or try one of the variations to make it your own. Honestly, every time I make this, it surprises me how something so simple can feel so luxurious.
Give it a try, and don’t forget to drop a comment sharing your favorite twist or how it turned out. Sharing recipes like this with friends and family is part of what makes the season magical. Happy sipping!
FAQs
Can I make this red velvet hot chocolate ahead of time?
You can prepare the red velvet base and chocolate layer up to 2 days in advance and store them refrigerated. Whip the topping fresh before serving for best texture.
What if I don’t have red food coloring?
You can use natural alternatives like beet juice or powder, but the color will be less vibrant and may slightly alter the flavor.
Is there a dairy-free version of this recipe?
Yes! Use plant-based milk, dairy-free dark chocolate, coconut cream for whipping, and a vegan cream cheese substitute for the topping.
How do I keep the layers from mixing together?
Pour each layer slowly over the back of a spoon and let it settle before adding the next. The temperature difference also helps keep layers distinct.
Can I add alcohol to this recipe?
Absolutely! A splash of bourbon or peppermint schnapps pairs wonderfully with the red velvet and chocolate flavors for an adult version.
Pin This Recipe!

Decadent Layered Red Velvet Hot Chocolate

A cozy and indulgent layered red velvet hot chocolate recipe perfect for festive occasions, combining a velvety red velvet base, rich chocolate layer, and fluffy cream cheese whipped topping.
- Prep Time: 10 minutes
- Cook Time: 10 minutes
- Total Time: 20 minutes
- Yield: 2 servings 1x
- Category: Beverage
- Cuisine: American
Ingredients
- 2 cups (480 ml) whole milk or preferred milk (almond or oat milk works too)
- 2 tablespoons (15 g) unsweetened cocoa powder
- 3 tablespoons (38 g) granulated sugar
- 1–2 teaspoons red food coloring (gel type preferred)
- 1 teaspoon (5 ml) vanilla extract
- Pinch of salt
- 1/2 cup (90 g) semi-sweet or dark chocolate chips
- 1/2 cup (120 ml) heavy cream
- 3/4 cup (180 ml) heavy whipping cream, chilled
- 2 tablespoons (30 g) cream cheese, softened
- 2 tablespoons (15 g) powdered sugar
- 1/2 teaspoon (2.5 ml) vanilla extract
- Optional garnishes: white chocolate shavings, mini marshmallows, red sprinkles or edible glitter
Instructions
- Prepare the Red Velvet Base: In a medium saucepan, combine 2 cups whole milk, 2 tablespoons unsweetened cocoa powder, 3 tablespoons granulated sugar, a pinch of salt, and 1-2 teaspoons red food coloring. Whisk over medium heat until warm and cocoa and sugar dissolve completely, about 5 minutes. Avoid boiling. Stir in 1 teaspoon vanilla extract and remove from heat.
- Melt the Chocolate Layer: Melt 1/2 cup semi-sweet chocolate chips with 1/2 cup heavy cream in a small saucepan over low heat, stirring continuously until smooth and glossy, about 3-4 minutes. Alternatively, microwave in 20-second bursts, stirring between each. Keep warm but not hot.
- Make the Cream Cheese Whipped Topping: In a chilled mixing bowl, beat 3/4 cup heavy whipping cream with 2 tablespoons softened cream cheese using a hand or stand mixer. When it starts to thicken, add 2 tablespoons powdered sugar and 1/2 teaspoon vanilla extract. Continue whipping until soft peaks form, about 3-5 minutes.
- Layer Your Hot Chocolate: Pour the red velvet base into serving mugs, filling about half the mug. Gently ladle the melted chocolate and cream mixture over the back of a spoon to create a separate layer, filling the mugs to about three-quarters full. Spoon or pipe the cream cheese whipped topping on top.
- Add Garnishes and Serve: Sprinkle with white chocolate shavings, mini marshmallows, or red sprinkles if desired. Serve immediately while warm.
Notes
Keep cream cheese and heavy cream well chilled before whipping for best topping texture. Pour layers slowly over the back of a spoon to keep layers distinct. Avoid boiling the milk mixture to prevent scorching. Rewarm melted chocolate gently if it firms up before layering. Whip topping fresh before serving for best results.
Nutrition
- Serving Size: 1 mug (about 12 oz)
- Calories: 335
- Sugar: 24
- Sodium: 120
- Fat: 24
- Saturated Fat: 14
- Carbohydrates: 28
- Fiber: 3
- Protein: 6
Keywords: red velvet hot chocolate, layered hot chocolate, holiday drink, Christmas beverage, festive hot chocolate, cream cheese topping, homemade hot chocolate


