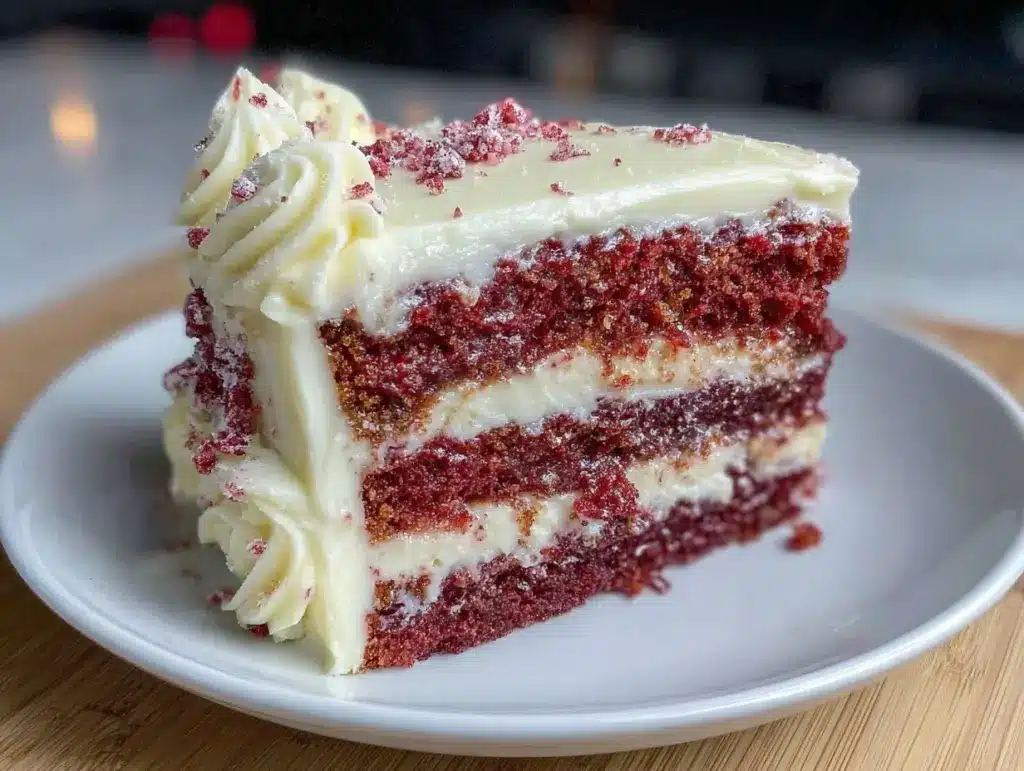
The first time I baked this decadent layered red velvet cake, the kitchen filled with a rich, cocoa aroma that instantly made me feel like I was in a cozy Southern bakery. Honestly, there’s something about the deep red color paired with the creamy frosting that just feels like a celebration waiting to happen. Red velvet cake isn’t just any dessert; it’s that perfect balance of mild chocolate flavor and tangy cream cheese frosting that has won hearts everywhere. Over the years, I’ve tried countless recipes, but this particular red velvet cake recipe has become my go-to for holidays, birthdays, or whenever I crave a slice of something special.
What I love most about this decadent layered red velvet cake recipe is how it manages to be both impressive and approachable. You don’t need fancy equipment or exotic ingredients, yet the result always looks and tastes like it came from a high-end bakery. I’ve baked this cake dozens of times, tweaking the steps to make sure it’s moist, tender, and richly flavored every single time.
If you’ve been on the lookout for a homemade dessert recipe that’s both show-stopping and reliably delicious, this one’s for you. Whether you’re baking for family, impressing guests, or just treating yourself, this decadent layered red velvet cake will quickly become a favorite. Let’s get into the easy step-by-step guide that’ll have you slicing into perfection in no time.
Why You’ll Love This Recipe
After testing this decadent layered red velvet cake recipe multiple times, I can confidently say it’s a winner for so many reasons. Here’s what makes it stand out from the crowd:
- Quick & Easy: Despite its fancy look, the recipe comes together in under 90 minutes, including baking time—perfect for last-minute dessert plans.
- Simple Ingredients: You likely already have everything in your pantry—no specialty shopping required. Classic staples like buttermilk, cocoa powder, and cream cheese do all the heavy lifting.
- Perfect for Special Occasions: Whether it’s Valentine’s Day, birthdays, or just a cozy weekend treat, this cake adds that wow factor without the stress.
- Crowd-Pleaser: Kids, adults, picky eaters—everyone raves about the tender crumb and luscious frosting combo.
- Unbelievably Delicious: The subtle cocoa undertones paired with the tangy cream cheese frosting make each bite melt in your mouth.
What makes this recipe truly different is the moistness factor. I blend the wet ingredients carefully and fold in the dry ones just enough to keep the batter airy but rich. Plus, the frosting is whipped to the perfect consistency—not too thick, not too runny. Honestly, it’s the kind of cake that makes you close your eyes after the first bite and savor the moment. It’s comfort food with a touch of elegance, and I love sharing it with friends and family because it brings everyone together.
What Ingredients You Will Need
This decadent layered red velvet cake recipe uses straightforward, wholesome ingredients that combine to create a tender crumb and a rich, flavorful experience. You don’t need anything exotic, but quality matters—so pick ingredients you trust.
- For the Cake Batter:
- All-purpose flour – 2 ½ cups (315 g), sifted for lightness
- Granulated sugar – 1 ½ cups (300 g), for balanced sweetness
- Unsweetened cocoa powder – 2 tablespoons (15 g), use a good-quality Dutch-processed cocoa for that classic red velvet hint
- Baking soda – 1 teaspoon (5 g), the leavening agent that helps the cake rise beautifully
- Salt – ½ teaspoon (3 g), to enhance flavors
- Buttermilk – 1 cup (240 ml), room temperature; adds tang and moisture (if you don’t have buttermilk, mix 1 cup milk with 1 tablespoon lemon juice and let sit for 5 minutes)
- Vegetable oil – 1 cup (240 ml), for moistness (I prefer a neutral oil like canola or sunflower)
- Large eggs – 2, room temperature for better mixing
- Vanilla extract – 1 teaspoon (5 ml), pure vanilla packs the best flavor punch
- Red food coloring – 2 tablespoons (30 ml), gel or liquid (gel gives more vibrant color without thinning the batter)
- Distilled white vinegar – 1 teaspoon (5 ml), reacts with baking soda for lift and tender crumb
- For the Cream Cheese Frosting:
- Cream cheese – 16 oz (450 g), softened (I always use full-fat for creaminess)
- Unsalted butter – ½ cup (115 g), softened (room temperature is key here)
- Powdered sugar – 4 cups (480 g), sifted for smooth frosting
- Vanilla extract – 1 teaspoon (5 ml), to round out the flavors
If you prefer, you can swap all-purpose flour with a gluten-free blend, but results may vary slightly. For a dairy-free twist, use coconut cream cheese and vegan butter alternatives. Just keep in mind these swaps may affect texture and flavor a bit.
Equipment Needed
Here’s what I use when making this decadent layered red velvet cake:
- Two 8-inch (20 cm) round cake pans – I recommend nonstick for easy release, but greasing and flouring any pan works.
- Mixing bowls – large and medium, preferably glass or stainless steel.
- Electric mixer – hand or stand mixer speeds up the creaming and whipping process.
- Sifter or fine mesh sieve – for sifting dry ingredients to avoid lumps.
- Rubber spatula – perfect for folding batter gently.
- Cooling racks – essential to cool the cakes evenly and prevent sogginess.
- Offset spatula or butter knife – for smooth frosting application.
If you don’t have two cake pans, bake the layers one at a time, but keep an eye on baking times. No mixer? A sturdy whisk and some elbow grease will do the trick! I’ve made this cake with a hand mixer and even by hand on occasion, so no worries if your kitchen setup is basic.
Detailed Preparation Method
- Preheat your oven to 350°F (175°C) and grease two 8-inch (20 cm) round cake pans. Lightly dust with flour or line them with parchment paper for easy removal. This step ensures your layers come out perfectly shaped.
- Sift the dry ingredients: In a large bowl, sift together 2 ½ cups (315 g) all-purpose flour, 2 tablespoons (15 g) cocoa powder, 1 teaspoon (5 g) baking soda, and ½ teaspoon (3 g) salt. Sifting helps keep the batter light and airy.
- Mix the wet ingredients: In a separate medium bowl, whisk together 1 cup (240 ml) buttermilk, 1 cup (240 ml) vegetable oil, 2 large eggs, 1 teaspoon (5 ml) vanilla extract, 2 tablespoons (30 ml) red food coloring, and 1 teaspoon (5 ml) distilled white vinegar until fully combined.
- Combine wet and dry: Slowly add the wet mixture to the dry ingredients, mixing gently with a rubber spatula or mixer on low speed. Be careful not to overmix—you want a smooth batter with no flour pockets but still light.
- Divide the batter evenly: Pour the batter into the prepared pans, using a scale or measuring cup to make sure both layers are equal thickness for even baking.
- Bake the layers: Place pans in the oven and bake for 25-30 minutes. Check doneness by inserting a toothpick in the center; it should come out clean or with just a few moist crumbs. Avoid overbaking to keep the cake moist.
- Cool completely: Let the cakes cool in their pans for 10 minutes, then run a knife around the edges and invert them onto cooling racks. Cooling fully prevents the frosting from melting when applied.
- Prepare the frosting: Beat 16 oz (450 g) softened cream cheese and ½ cup (115 g) softened unsalted butter on medium speed until creamy and smooth. Gradually add 4 cups (480 g) powdered sugar and 1 teaspoon (5 ml) vanilla extract, mixing until fluffy. Taste as you go—you want it sweet but balanced.
- Assemble the cake: Place one cake layer on your serving plate. Spread a generous layer of cream cheese frosting over the top using an offset spatula. Top with the second cake layer and frost the top and sides evenly. For a clean finish, chill the cake for 15 minutes and do a second thin “crumb coat” layer before the final frosting.
- Final touches: If you want, decorate with fresh berries, chocolate shavings, or a sprinkle of cocoa powder. Then chill the cake for at least an hour to set before slicing.
Pro tip: When mixing, always scrape the bowl sides to make sure everything’s incorporated evenly. Also, letting your ingredients come to room temperature really makes a difference in texture. If your batter looks too thick, a splash more buttermilk helps loosen it without losing structure.
Cooking Tips & Techniques
Making a perfect layered red velvet cake isn’t rocket science, but a few pointers can save you from common pitfalls.
- Don’t skip sifting: Cocoa powder tends to clump, so sifting avoids streaky batter and uneven crumb.
- Room temperature ingredients: Eggs and buttermilk blend better when not cold. It helps create a smooth batter and even crumb.
- Mix gently: Overmixing develops gluten and leads to a dense cake. Fold dry ingredients just until combined.
- Even layers: Use a kitchen scale or measuring cups to divide batter equally. Uneven layers can cause tilting when stacked.
- Check doneness early: Oven temps vary; start poking with a toothpick at 25 minutes to prevent overbaking.
- Cream cheese frosting tips: Beat cream cheese and butter well before adding sugar. If frosting is too loose, chill it briefly.
- Crumb coat for neatness: Applying a thin layer of frosting before the final coat traps crumbs and gives a polished look.
- Multitasking: While cakes bake, prep frosting and clean up. Saves time and keeps the kitchen manageable.
I once forgot to add vinegar and ended up with a flat cake—lesson learned! That little splash reacts with baking soda creating lift and that tender crumb we all love.
Variations & Adaptations
This decadent layered red velvet cake recipe is versatile and can be adapted to suit different tastes and dietary needs.
- Gluten-Free Option: Substitute all-purpose flour with a trusted gluten-free blend. Add 1 teaspoon xanthan gum for structure if your blend doesn’t include it.
- Dairy-Free Variation: Use vegan cream cheese and butter substitutes. Swap buttermilk with almond or oat milk mixed with 1 tablespoon apple cider vinegar.
- Flavor Twists: Add a teaspoon of espresso powder to the batter to boost the chocolate flavor. Or, mix in a pinch of cinnamon for a warm spice note.
- Healthier Swaps: Replace half the oil with unsweetened applesauce to reduce fat without drying out the cake.
- Seasonal Adaptation: For a festive touch, sprinkle chopped pecans or walnuts between layers or swirl in some raspberry jam.
A personal favorite variation I tried was adding a layer of mascarpone cream mixed with fresh strawberries between the cake layers. It added a fresh brightness that made this classic cake feel like a whole new dessert.
Serving & Storage Suggestions
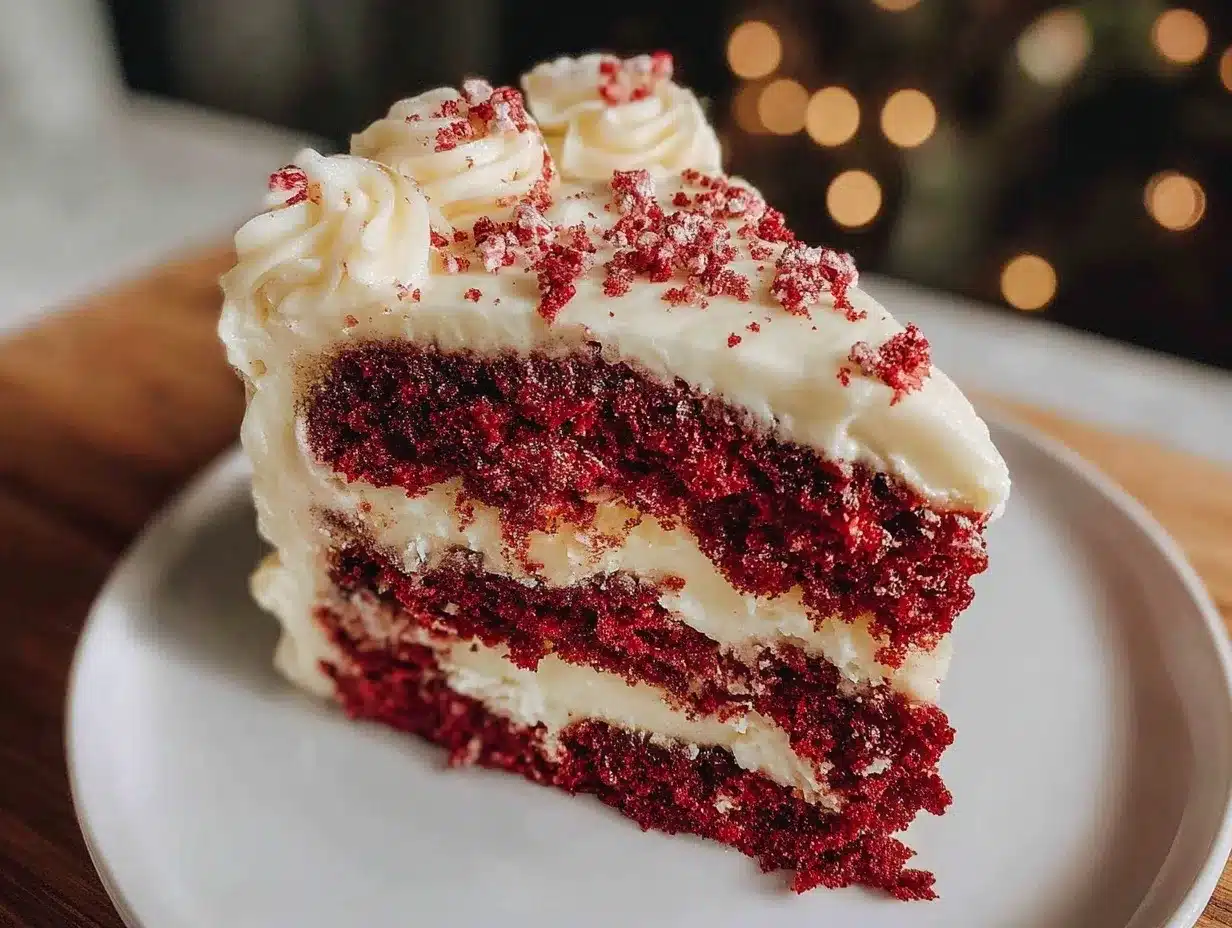
This decadent layered red velvet cake is best served chilled or at room temperature. The frosting tastes creamier and the flavors meld when the cake sits a bit after chilling.
- Serve slices with a dollop of whipped cream or a scoop of vanilla ice cream for an extra indulgence.
- Pairing with a cup of strong coffee or a glass of cold milk balances the sweetness perfectly.
- Store the cake covered in the refrigerator for up to 4 days. The frosting keeps it moist and fresh.
- For longer storage, wrap tightly in plastic wrap and freeze for up to 2 months. Thaw overnight in the fridge before serving.
- Reheat slices gently at room temperature for 15-20 minutes before eating to soften the frosting slightly.
Fun fact: letting the cake rest overnight actually improves the flavor as the ingredients mingle and the texture settles—if you can wait that long!
Nutritional Information & Benefits
Here’s a rough estimate per slice (based on 12 slices):
| Calories | Fat | Carbohydrates | Protein | Sugar |
|---|---|---|---|---|
| 350 kcal | 18 g | 45 g | 4 g | 32 g |
The cake provides energy and a good dose of fat from the butter and cream cheese, which also add richness and satiety. Key ingredients like cocoa powder offer antioxidants, while buttermilk contributes some calcium and probiotics. This recipe isn’t low-calorie by any means, but it’s a treat worth savoring in moderation.
For gluten-free or dairy-free eaters, the recipe adapts well with substitutions, making it accessible to many dietary preferences. As a longtime nutrition enthusiast, I believe treats like these are part of a balanced life—enjoying them guilt-free is the best approach!
Conclusion
This decadent layered red velvet cake recipe is a real crowd-pleaser that’s surprisingly easy to pull off at home. Whether you’re baking for a special event or just because you deserve a little indulgence, this cake hits all the right notes—moist, tender, richly flavored, and topped with that iconic cream cheese frosting.
I hope you give this recipe a try and make it your own. Mix in your favorite variations, experiment with decorations, or keep it classic—the results will always impress. I love sharing this cake because it brings such joy and warmth to the table, and I’m sure you’ll feel the same.
If you try it, drop a comment below and let me know how it turned out or if you added any personal twists. Sharing recipes is all about community and fun, so happy baking and enjoy every delicious bite!
FAQs
What type of cocoa powder is best for red velvet cake?
I recommend Dutch-processed cocoa powder for a smoother, less acidic flavor that enhances the red color beautifully.
Can I make this cake in advance?
Absolutely! Bake and frost the cake a day ahead and store it in the fridge. It tastes even better after the flavors have had time to meld.
Why is vinegar used in the recipe?
Vinegar reacts with baking soda to create lift and tenderize the crumb, giving red velvet cake its characteristic texture.
How do I get the layers to be perfectly even?
Use a kitchen scale to divide the batter evenly between pans, or measure with a cup. Tap the pans gently to remove air bubbles before baking.
Can I freeze leftover cake?
Yes, wrap the cake tightly in plastic wrap and freeze for up to 2 months. Thaw in the fridge overnight before serving.
Pin This Recipe!
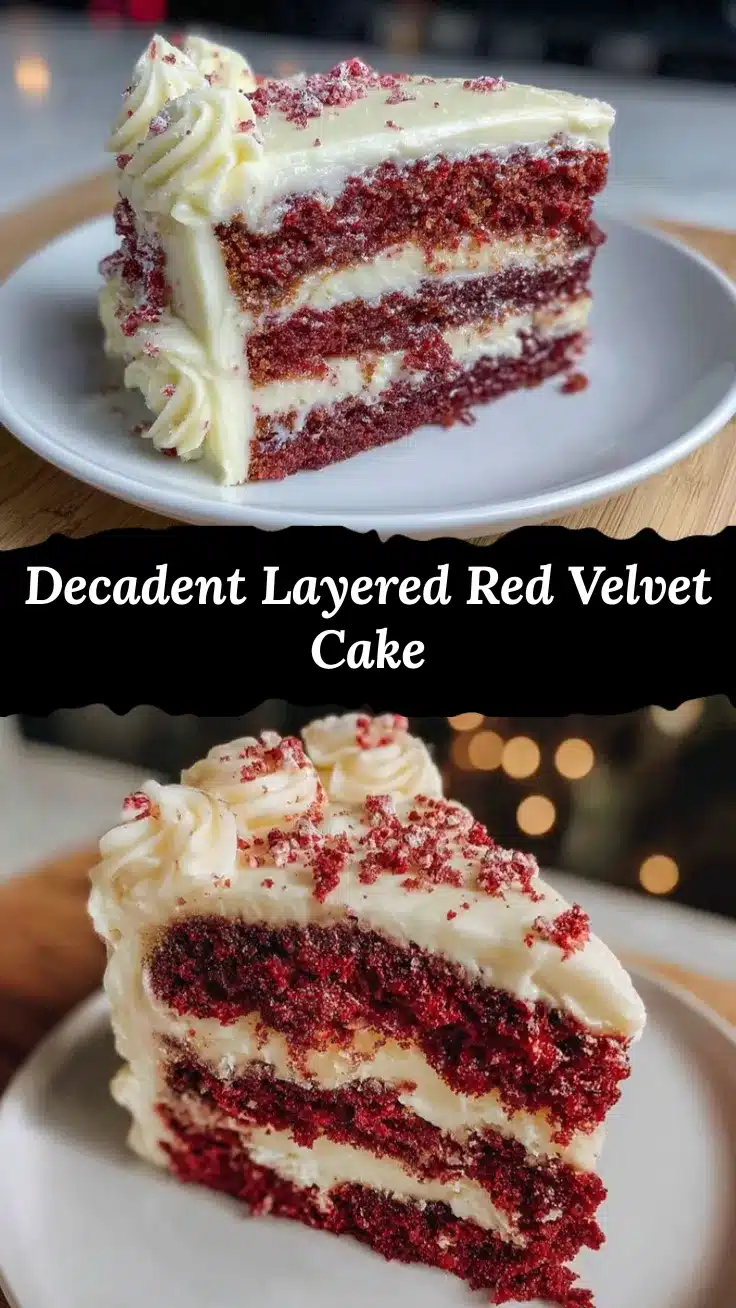
Decadent Layered Red Velvet Cake

A rich and moist red velvet cake layered with tangy cream cheese frosting, perfect for special occasions and easy to make at home.
- Prep Time: 20 minutes
- Cook Time: 30 minutes
- Total Time: 50 minutes
- Yield: 12 servings 1x
- Category: Dessert
- Cuisine: American
Ingredients
- 2 ½ cups (315 g) all-purpose flour, sifted
- 1 ½ cups (300 g) granulated sugar
- 2 tablespoons (15 g) unsweetened Dutch-processed cocoa powder
- 1 teaspoon (5 g) baking soda
- ½ teaspoon (3 g) salt
- 1 cup (240 ml) buttermilk, room temperature (or 1 cup milk + 1 tbsp lemon juice, let sit 5 minutes)
- 1 cup (240 ml) vegetable oil (canola or sunflower preferred)
- 2 large eggs, room temperature
- 1 teaspoon (5 ml) vanilla extract
- 2 tablespoons (30 ml) red food coloring (gel or liquid)
- 1 teaspoon (5 ml) distilled white vinegar
- 16 oz (450 g) cream cheese, softened (full-fat preferred)
- ½ cup (115 g) unsalted butter, softened
- 4 cups (480 g) powdered sugar, sifted
- 1 teaspoon (5 ml) vanilla extract (for frosting)
Instructions
- Preheat oven to 350°F (175°C) and grease two 8-inch (20 cm) round cake pans. Dust with flour or line with parchment paper.
- Sift together flour, cocoa powder, baking soda, and salt in a large bowl.
- In a separate bowl, whisk buttermilk, vegetable oil, eggs, vanilla extract, red food coloring, and vinegar until combined.
- Slowly add wet ingredients to dry ingredients, mixing gently with a rubber spatula or mixer on low speed until smooth and light. Avoid overmixing.
- Divide batter evenly between prepared pans using a scale or measuring cup.
- Bake for 25-30 minutes, checking doneness with a toothpick; it should come out clean or with a few moist crumbs.
- Cool cakes in pans for 10 minutes, then invert onto cooling racks to cool completely.
- Beat cream cheese and butter on medium speed until smooth. Gradually add powdered sugar and vanilla extract, mixing until fluffy.
- Place one cake layer on a serving plate, spread a generous layer of frosting on top. Add second layer and frost top and sides evenly.
- Chill cake for 15 minutes, then apply a thin crumb coat layer of frosting. Chill again before final frosting.
- Optionally decorate with fresh berries, chocolate shavings, or cocoa powder. Chill at least 1 hour before slicing.
Notes
Use room temperature ingredients for best texture. Do not overmix batter to keep cake tender. Sift dry ingredients to avoid lumps. Use a kitchen scale to divide batter evenly for level layers. Chill frosting if too loose. Crumb coat for a neat finish. Vinegar reacts with baking soda to create lift and tender crumb.
Nutrition
- Serving Size: 1 slice (1/12 of cak
- Calories: 350
- Sugar: 32
- Fat: 18
- Carbohydrates: 45
- Protein: 4
Keywords: red velvet cake, layered cake, cream cheese frosting, homemade dessert, easy cake recipe, holiday cake, birthday cake


