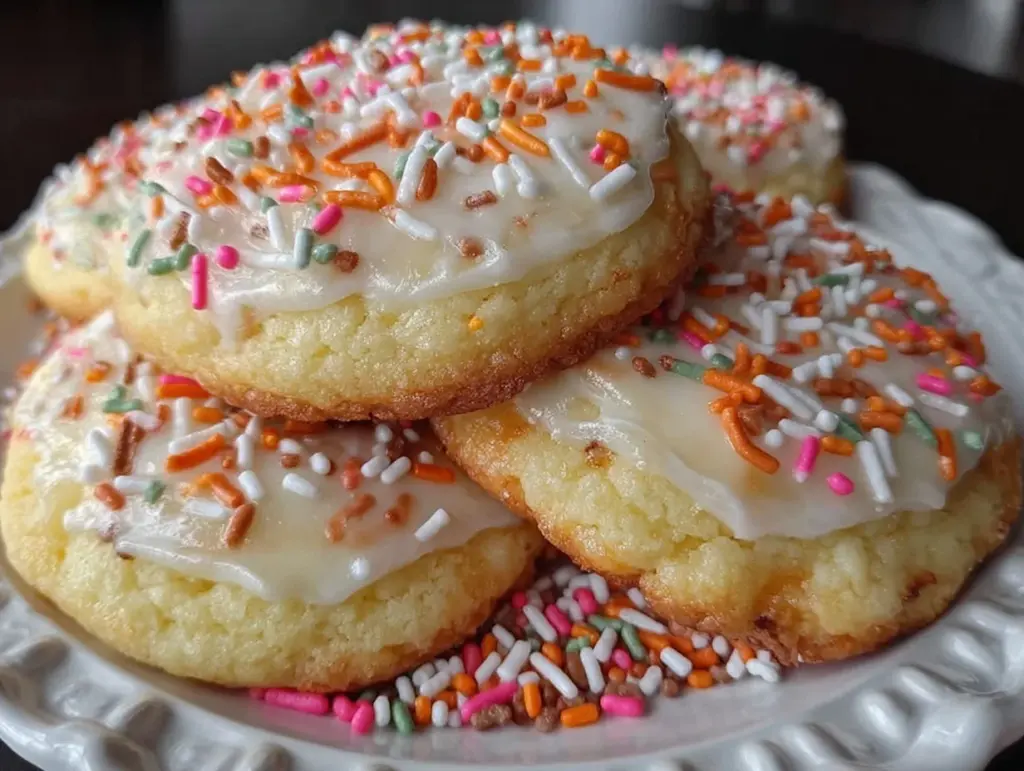
The smell of freshly baked sugar cookies, warm and soft, with a gentle vanilla aroma, always takes me back to cozy afternoons in my grandma’s kitchen. I first made this creamy soft sugar cookies recipe during a holiday baking marathon, and honestly, it quickly became my go-to for every special occasion. There’s just something about that tender yet sturdy texture that holds up beautifully under a layer of smooth, sweet icing. I’ve tested this recipe dozens of times—trust me, it’s worth every minute of the wait!
Whether you’re a seasoned baker or just dipping your toes into cookie decorating, these creamy soft sugar cookies are a dream canvas. They’re easy to shape, hold their form perfectly, and the icing sets just right, making your designs pop. Plus, they’re soft enough to satisfy cookie lovers who shy away from the usual crispy kind. If you’re looking for a recipe that combines classic comfort with a fun decorating twist, you’ll love what’s coming next.
These cookies aren’t just pretty faces either—they’re perfect for busy families, holiday parties, or anyone who craves a sweet treat that’s not too crunchy or crumbly. The creamy soft sugar cookies with icing offer a balance of flavor and texture that’s hard to beat. And hey, between you and me, they freeze well too, which is a lifesaver during hectic baking seasons.
Why You’ll Love This Recipe
I’ve baked a lot of sugar cookies in my day, but this creamy soft sugar cookies recipe stands out for several reasons. Here’s why it’s a keeper:
- Quick & Easy: The dough comes together in under 15 minutes, so you won’t be stuck in the kitchen all day.
- Simple Ingredients: No weird stuff here—just pantry staples you probably already have, like butter, sugar, and vanilla.
- Perfect for Decorating: The dough holds its shape well, and the cookies stay soft even after baking, making them ideal for icing and decorating.
- Crowd-Pleaser: I’ve never met a crowd that didn’t love these, from picky kids to cookie connoisseurs.
- Unbelievably Delicious: The creamy texture combined with a buttery, sweet flavor hits all the right notes.
What really makes this recipe special is the balance it strikes. You want cookies soft enough to melt in your mouth but sturdy enough to handle intricate icing designs. I like to blend the butter and sugar until fluffy, which gives the dough that ultra-smooth texture. Plus, the icing recipe I include is both easy and forgiving, so even if you’re new to decorating, your cookies will look like a pro made them.
Cooking these cookies became my favorite way to bring friends and family together. It’s the kind of recipe that makes you close your eyes after the first bite and smile—a little moment of happiness in cookie form.
What Ingredients You Will Need
This recipe uses simple, wholesome ingredients to deliver bold flavor and satisfying texture without the fuss. Most items are pantry staples, so you won’t need a special trip to the store.
- Unsalted butter, softened (about 1 cup or 227 grams) – I prefer using European-style butter for a richer taste.
- Sugar, granulated (3/4 cup or 150 grams) – regular white sugar works best for that classic sweetness.
- Egg, large, room temperature – helps bind the dough and adds moisture.
- Pure vanilla extract (1 teaspoon) – the secret to that warm, inviting flavor.
- All-purpose flour (2 1/2 cups or 312 grams) – sifted for a light, airy dough.
- Baking powder (1 teaspoon) – just enough to give a slight lift without puffing up too much.
- Salt (1/4 teaspoon) – balances the sweetness perfectly.
For the icing:
- Powdered sugar (2 cups or 240 grams) – sifted to avoid lumps.
- Milk (2-3 tablespoons or 30-45 ml) – adjust to get the perfect spreading consistency.
- Light corn syrup (1 tablespoon) – adds a nice shine and smooth finish.
- Vanilla extract (1/2 teaspoon) – for flavor depth.
- Food coloring (optional) – gel colors work best for vibrant hues without watering down the icing.
If you want to swap anything, feel free! Using almond flour is a neat gluten-free option, though it changes texture a bit. You can also swap regular milk for a dairy-free alternative like almond or oat milk. I’ve made this with both and the results were still fantastic.
Equipment Needed
- Mixing bowls: A large one for the dough and a smaller one for the icing.
- Electric mixer: Handheld or stand mixer makes creaming butter and sugar a breeze.
- Measuring cups and spoons: For precise ingredient amounts.
- Sifter or fine mesh sieve: To sift flour and powdered sugar, ensuring smooth dough and icing.
- Baking sheets: Preferably non-stick or lined with parchment paper.
- Cooling racks: Essential for letting cookies cool evenly without getting soggy.
- Rolling pin: To roll out the dough evenly (a silicone one works great).
- Cookie cutters: Various shapes for decorating fun!
- Spoons or piping bags: For icing application; piping bags give more control for detailed designs.
If you don’t have a stand mixer, no worries! A sturdy wooden spoon and some elbow grease will do the trick. For cookie cutters, if you’re in a pinch, a simple glass rim or even a knife can create fun shapes. I’ve used both when my cutters went missing, and it works just fine.
Detailed Preparation Method
- Prep your ingredients: Take the butter and egg out about 30 minutes before baking to reach room temperature. This helps the dough come together smoothly and gives you that creamy texture. Sift your flour, baking powder, and salt together in a bowl—this avoids any lumps and ensures even mixing. (Time: 10 minutes)
- Cream the butter and sugar: In a large bowl, use an electric mixer on medium speed to beat the softened butter and sugar together until light and fluffy—about 3 to 4 minutes. You’ll notice the texture changes, becoming pale and creamy, which is exactly what you want here. This step is key for soft cookies. (Tip: Scrape down the sides of the bowl occasionally.) (Time: 5 minutes)
- Add the egg and vanilla: Beat in the egg and vanilla extract until fully combined. The mixture might look a bit shiny and smooth now, signaling the dough is coming together nicely. (Time: 2 minutes)
- Incorporate dry ingredients: Gradually add the sifted flour mixture in two batches, mixing on low speed just until combined each time. Don’t overmix! Overworking the dough can make cookies tough. The dough should be soft but not sticky—think pliable and easy to roll. If it feels too sticky, pop it in the fridge for 10 minutes. (Time: 5 minutes)
- Chill the dough: Wrap the dough in plastic wrap and chill for at least 1 hour, or up to overnight. This step helps the cookies hold their shape better when baking and deepens the flavor. I usually prep the dough the night before to save time. (Time: 1 hour or overnight)
- Roll out and cut shapes: Preheat your oven to 350°F (175°C). Lightly flour your work surface and rolling pin, then roll the dough out to about 1/4 inch (6 mm) thickness. Use cookie cutters to cut out shapes, and place them 1 inch (2.5 cm) apart on a parchment-lined baking sheet. (Tip: If the dough gets too soft while rolling, chill again for 10-15 minutes.) (Time: 15 minutes)
- Bake the cookies: Bake for 8-10 minutes, or until the edges just begin to turn golden. The centers will look slightly underbaked—that’s perfect for a soft cookie. Resist the urge to overbake! (Time: 8-10 minutes)
- Cool completely: Transfer cookies to a wire rack to cool fully before icing. Icing warm cookies can cause the colors to run or the texture to get soggy, so patience here pays off. (Time: 30 minutes)
- Prepare the icing: Mix powdered sugar, milk, corn syrup, and vanilla in a small bowl until smooth. Adjust milk to get your preferred consistency—thicker for piping details, thinner for flooding. Add food coloring if desired, and stir gently to avoid air bubbles. (Time: 10 minutes)
- Decorate: Use a piping bag or a spoon to apply icing. For detailed designs, outline first, let it set for a few minutes, then fill in. Let the icing dry completely—usually a couple of hours at room temperature or overnight for best results. (Tip: If you’re in a rush, a fan can speed up drying but avoid direct heat.) (Time: 1-2 hours)
Cooking Tips & Techniques
One trick I learned early on is to really beat the butter and sugar well. That fluffy step makes a huge difference in texture. Also, chilling the dough is non-negotiable if you want neat shapes and soft centers. I once skipped chilling (don’t ask why), and the cookies spread all over the pan—it was a hot mess!
When rolling out dough, keeping it chilled but pliable helps prevent sticking and tearing. Lightly flour your surface and rolling pin—too much flour can dry out the cookies, though, so use just enough.
For icing, start with a thicker consistency for outlines and details. Once that sets, thin the icing slightly for flooding large areas. This layered approach keeps designs crisp. And don’t rush the drying time! I’ve learned the hard way that impatient icing leads to smudges and cracks.
Lastly, watch your baking time carefully. Cookies can go from soft to crispy in a minute or two. Set a timer and peek through the oven window—when edges are just golden, pull them out. They’ll firm up as they cool.
Variations & Adaptations
- Gluten-Free Version: Swap all-purpose flour with a gluten-free blend. I recommend using one with xanthan gum for structure. The cookies will be slightly more crumbly but just as tasty.
- Flavored Twists: Add a teaspoon of almond extract or lemon zest to the dough for a fresh flavor spin. You can also mix mini chocolate chips into the dough for a fun surprise inside.
- Vegan Adaptation: Replace butter with vegan margarine and use a flax egg (1 tablespoon ground flaxseed + 3 tablespoons water). Use plant-based milk in the icing. Texture will be soft but slightly different.
- Decorating Alternatives: Instead of royal icing, try a simple glaze with powdered sugar and lemon juice for a tangy finish. Sprinkle colored sugar or edible glitter for festive flair.
- Seasonal Flavors: In fall, add 1/2 teaspoon cinnamon and nutmeg to the dough. For spring, fold in dried edible flowers into the icing for a pretty effect.
I once tried a batch with matcha powder mixed into the dough—deliciously unique! Don’t be afraid to experiment a little.
Serving & Storage Suggestions
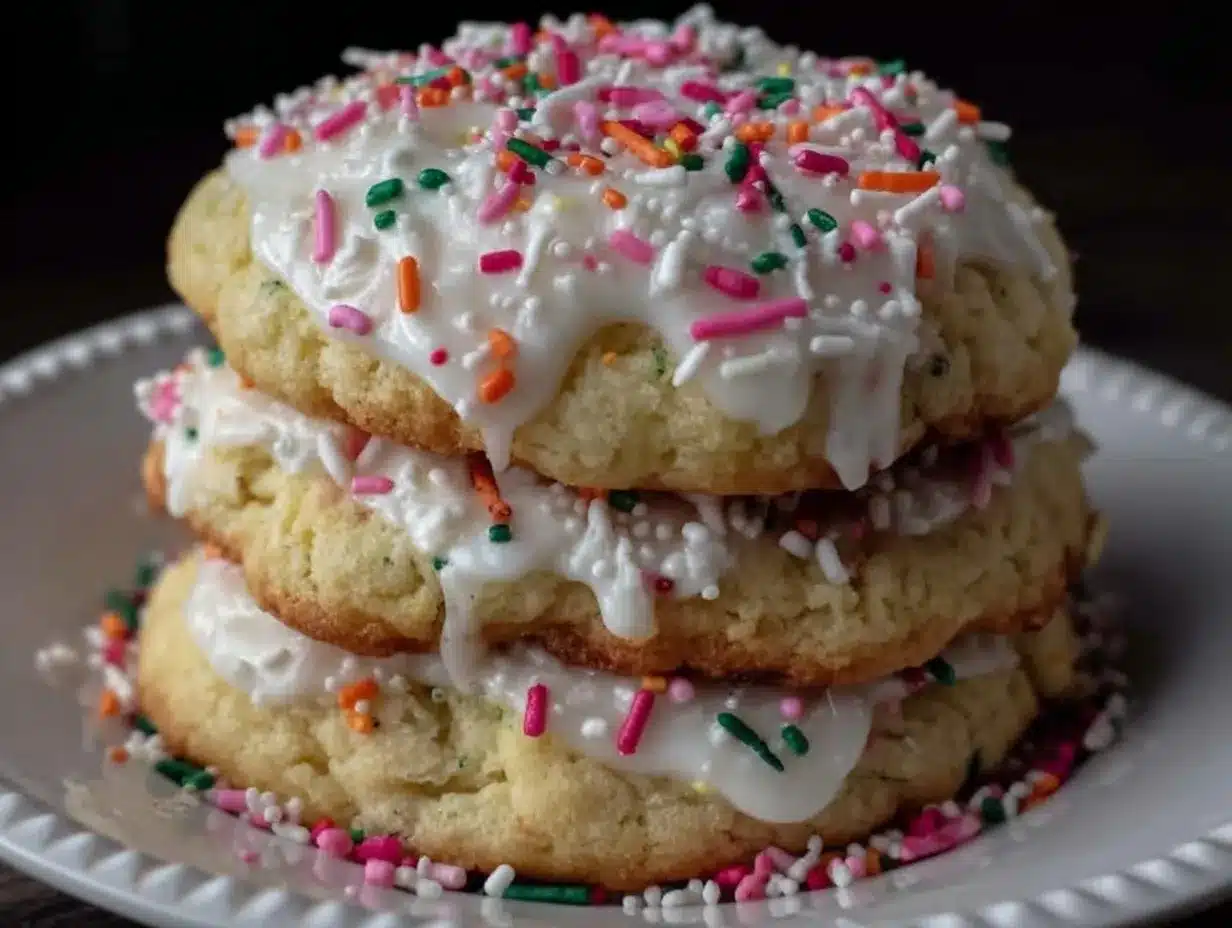
Serve these creamy soft sugar cookies at room temperature to enjoy their tender texture best. They look fantastic arranged on a festive platter or tied up in cellophane bags for gifts. Pair with a hot cup of tea, coffee, or even a cold glass of milk for that classic combo.
To store, keep cookies in an airtight container at room temperature for up to 4 days. If you need them longer, freeze baked cookies without icing for up to 3 months. When ready, thaw at room temperature, then add fresh icing. Icing-topped cookies freeze okay too but might lose some detail.
Reheating isn’t usually necessary, but if you want a fresh-baked feel, pop them in a 300°F (150°C) oven for 3-4 minutes—just watch closely so they don’t dry out. Over time, the icing flavor deepens and the cookie softens slightly, making every bite a little different and special.
Nutritional Information & Benefits
Each creamy soft sugar cookie (without icing) contains approximately 150 calories, 7 grams of fat, 20 grams of carbohydrates, and 1 gram of protein. The icing adds extra sweetness and calories, so it’s best enjoyed as a treat.
Butter provides a source of fat-soluble vitamins, and the vanilla extract adds antioxidants. Using real ingredients means you avoid artificial additives common in store-bought cookies. For those watching gluten intake, swapping flours can make these accessible.
From a wellness perspective, I see these cookies as a joyful indulgence—perfect for sharing moments with loved ones without guilt. Baking and decorating together can be a mindful, stress-relieving activity too, which counts as a health benefit in my book.
Conclusion
So there you have it—my creamy soft sugar cookies with icing recipe that’s as fun to make as it is to eat. Whether you’re baking for holidays, birthdays, or just because, these cookies offer the perfect balance of soft texture and sweet flavor, ready to be personalized with your own decorating style.
I encourage you to tweak the flavors, try new decorating techniques, and make this recipe your own. I love this recipe because it brings a little sweetness and creativity into my kitchen, and I’m confident it will do the same for you.
Give it a shot, then drop a comment to share your results, questions, or unique twists. Don’t forget to share the joy with friends and family—they’ll thank you for it!
Happy baking and decorating!
FAQs
How do I keep my sugar cookies soft?
Be sure not to overbake them—pull cookies out when edges are just golden and centers look slightly underbaked. Also, chilling the dough and creaming the butter properly helps maintain softness.
Can I make the dough ahead of time?
Absolutely! Chill the dough wrapped in plastic for up to 24 hours or freeze for up to 3 months. Thaw in the fridge before rolling out.
What’s the best way to store decorated cookies?
Store in an airtight container at room temperature for up to 4 days. If iced, let the icing dry completely before storing to avoid smudging.
Can I use royal icing instead of the icing in this recipe?
Yes, royal icing works well for detailed decorating and hardens nicely. Just keep in mind it dries harder than this creamy icing.
How do I fix sticky dough?
If your dough is too sticky to roll, chill it for 10-15 minutes. You can also lightly flour your rolling surface and rolling pin, but avoid adding too much flour to keep cookies tender.
Pin This Recipe!

Creamy Soft Sugar Cookies Recipe with Icing Easy Step-by-Step Decorating Guide

These creamy soft sugar cookies are tender yet sturdy, perfect for decorating with smooth, sweet icing. They offer a balance of flavor and texture that’s ideal for special occasions and everyday treats.
- Prep Time: 15 minutes
- Cook Time: 10 minutes
- Total Time: 1 hour 40 minutes
- Yield: 24 cookies 1x
- Category: Dessert
- Cuisine: American
Ingredients
- 1 cup (227 grams) unsalted butter, softened (preferably European-style)
- 3/4 cup (150 grams) granulated sugar
- 1 large egg, room temperature
- 1 teaspoon pure vanilla extract
- 2 1/2 cups (312 grams) all-purpose flour, sifted
- 1 teaspoon baking powder
- 1/4 teaspoon salt
- For the icing:
- 2 cups (240 grams) powdered sugar, sifted
- 2–3 tablespoons (30–45 ml) milk
- 1 tablespoon light corn syrup
- 1/2 teaspoon vanilla extract
- Food coloring (optional)
Instructions
- Prep your ingredients: Take the butter and egg out about 30 minutes before baking to reach room temperature. Sift flour, baking powder, and salt together in a bowl. (10 minutes)
- Cream the butter and sugar: Beat softened butter and sugar with an electric mixer on medium speed until light and fluffy, about 3 to 4 minutes. Scrape down the sides occasionally. (5 minutes)
- Add the egg and vanilla: Beat in the egg and vanilla extract until fully combined. (2 minutes)
- Incorporate dry ingredients: Gradually add sifted flour mixture in two batches, mixing on low speed just until combined each time. Avoid overmixing. If dough is too sticky, chill for 10 minutes. (5 minutes)
- Chill the dough: Wrap dough in plastic wrap and chill for at least 1 hour or overnight. (1 hour or overnight)
- Roll out and cut shapes: Preheat oven to 350°F (175°C). Lightly flour work surface and rolling pin. Roll dough to 1/4 inch (6 mm) thickness. Cut shapes with cookie cutters and place 1 inch apart on parchment-lined baking sheet. Chill dough again if too soft. (15 minutes)
- Bake the cookies: Bake for 8-10 minutes until edges just begin to turn golden and centers look slightly underbaked. (8-10 minutes)
- Cool completely: Transfer cookies to wire rack to cool fully before icing. (30 minutes)
- Prepare the icing: Mix powdered sugar, milk, corn syrup, and vanilla until smooth. Adjust milk for desired consistency. Add food coloring if desired. (10 minutes)
- Decorate: Use piping bag or spoon to apply icing. Outline first, let set, then flood. Let icing dry completely for 1-2 hours or overnight. (1-2 hours)
Notes
Do not overbake cookies to keep them soft. Chilling dough is essential for shape and texture. Use thicker icing for outlines and thinner for flooding. Let icing dry completely to avoid smudging. Dough can be chilled up to 24 hours or frozen for 3 months. Use almond flour for gluten-free option and plant-based milk for dairy-free icing.
Nutrition
- Serving Size: 1 cookie
- Calories: 150
- Fat: 7
- Carbohydrates: 20
- Protein: 1
Keywords: soft sugar cookies, creamy sugar cookies, sugar cookies with icing, easy sugar cookies, holiday cookies, cookie decorating, soft baked cookies


