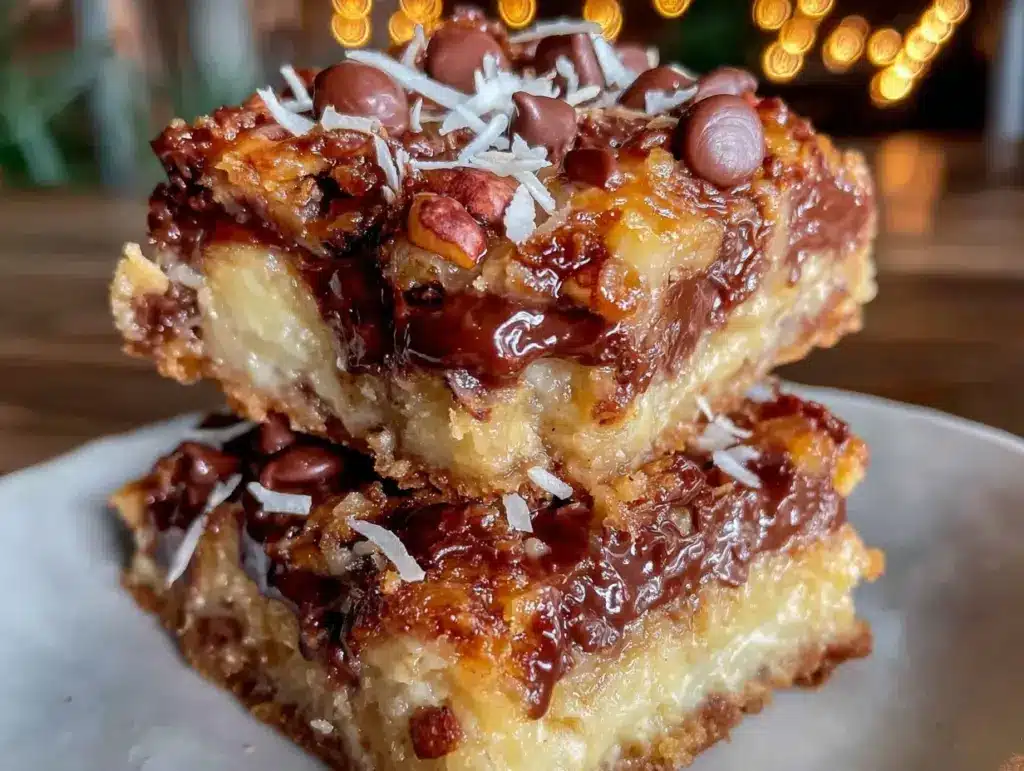
The first time I baked these chewy 7-layer bars, the smell alone stopped me in my tracks. You know that warm, buttery aroma mixed with sweet chocolate and toasted coconut that instantly takes you back? Yeah, that. I’ve made countless dessert bars, but these have become my go-to when I want something quick, satisfying, and just downright irresistible. Honestly, it’s hard to believe that a handful of simple pantry staples come together to make such a rich, chewy treat that’s perfect for everything from potlucks to cozy nights in.
What’s even better? This chewy 7-layer bars recipe is one I’ve tweaked over time, testing different combinations and textures until I landed on the perfect balance. As someone who loves easy homemade desserts that don’t feel like a chore, these bars fit right into my baking routine. Whether you’re feeding picky kids, impressing guests, or just craving a sweet bite after dinner, these dessert bars deliver every time.
If you’re wondering why this is the recipe you’ve been missing, stick with me. I’ll share everything from ingredient secrets to little tricks I learned after baking this recipe more times than I can count. Let’s face it, sometimes the best desserts come from simple recipes that just work—and these chewy 7-layer bars definitely fall into that category.
Why You’ll Love This Recipe
- Quick & Easy: Comes together in under 30 minutes, perfect for last-minute dessert cravings or busy schedules.
- Simple Ingredients: No need to raid the specialty aisle—everything is likely already in your pantry.
- Perfect for Every Occasion: Whether it’s a holiday gathering, school bake sale, or casual coffee break, these bars are always a hit.
- Crowd-Pleaser: From kids with sweet tooths to adults with a taste for nostalgia, these bars get rave reviews.
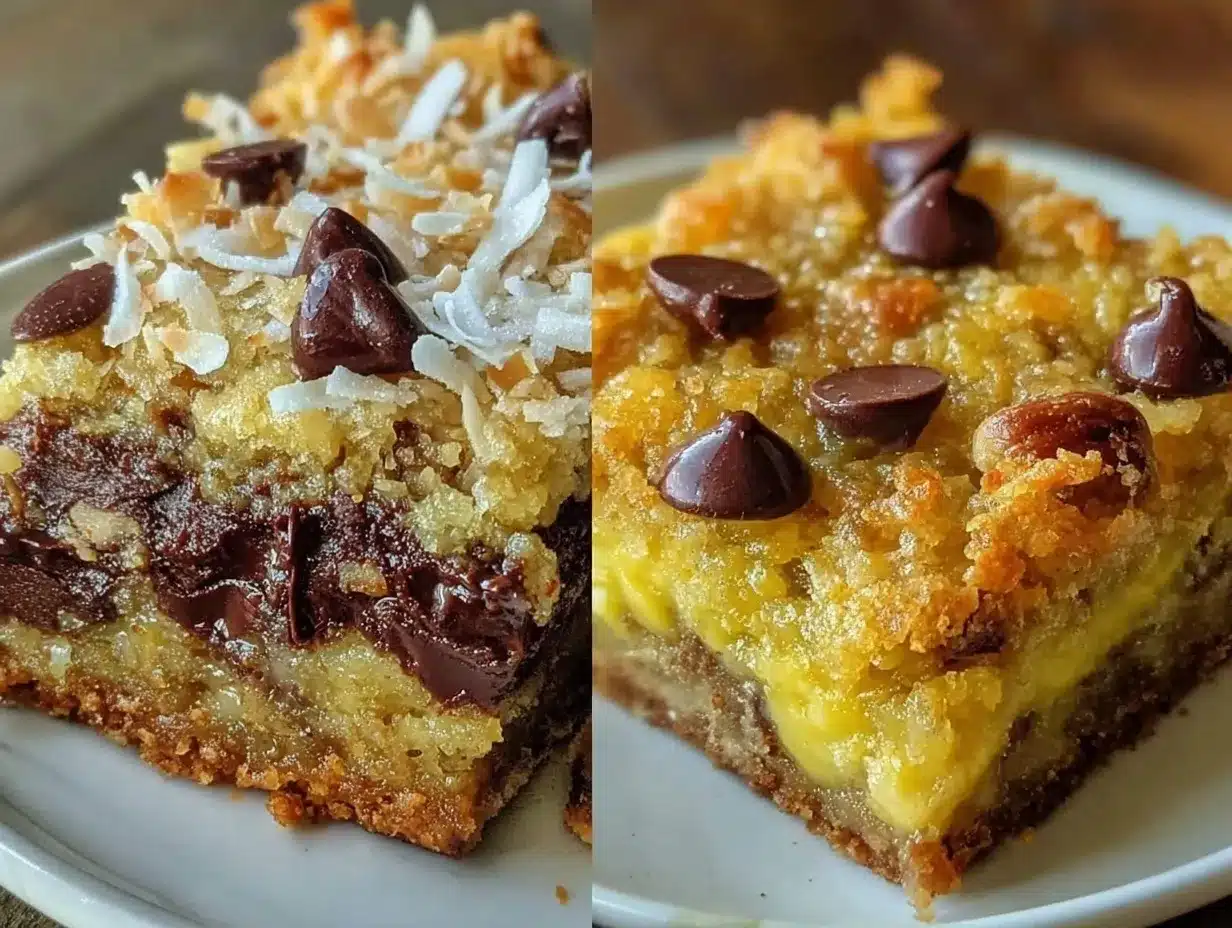
- Unbelievably Delicious: The chewy texture combined with layers of chocolate, coconut, and nuts creates that perfect bite every time.
What sets this chewy 7-layer bars recipe apart is the way each layer melds into a chewy, flavorful whole. I blend the coconut just enough to keep it tender but still give that hint of texture. Toasting the nuts beforehand adds a depth that makes these bars unforgettable. Plus, I’ve found that chilling the bars briefly before cutting helps keep the layers intact without crumbling, which has saved me from a few sad baking fails.
These aren’t just any dessert bars—they’re the kind you’ll find yourself making when you want something sweet that feels homemade but without the fuss. Trust me, once you try these, you’ll want to keep this recipe handy.
What Ingredients You Will Need
This recipe uses simple, wholesome ingredients to deliver bold flavor and that chewy texture you’re craving. Most are pantry staples, and you’ll find a few tips on picking the best versions for your bars.
- Sweetened condensed milk (1 can, 14 oz / 396 g) – the glue that holds all those layers together with a creamy sweetness.
- Butter (1/2 cup, 113 g, melted) – adds richness and helps achieve that perfect chewy texture. I always use unsalted butter to control the salt level.
- Graham cracker crumbs (1 1/2 cups, 150 g) – forms the sturdy, slightly crunchy base. You can crush whole graham crackers at home or buy pre-crumbled.
- Chocolate chips (1 cup, 170 g) – semi-sweet is my favorite, but feel free to use milk chocolate or dark for different flavor profiles.
- Butterscotch chips (1 cup, 170 g) – these add a lovely caramel-like note that complements the chocolate perfectly.
- Sweetened shredded coconut (1 cup, 80 g) – for that classic 7-layer bar texture and flavor. I prefer medium shred for the best chew.
- Chopped nuts (1 cup, 120 g) – walnuts or pecans work beautifully. Toast them lightly to bring out their nutty flavor.
- Vanilla extract (1 teaspoon) – adds a subtle warmth and depth to the bars.
- Salt (a pinch) – balances the sweetness and enhances all the flavors.
If you’re looking for substitutions, try almond flour for a gluten-free graham base or swap the sweetened coconut for unsweetened if you prefer less sugar. You can also use dairy-free butter and chocolate chips to make these bars vegan-friendly, although the texture might shift slightly.
Equipment Needed
- 9×13-inch baking pan: This size is ideal for even baking and perfect bar thickness. I’ve used metal and glass pans—glass tends to bake a bit slower, so watch your timing.
- Mixing bowls: One large for combining ingredients and a smaller one if you like to melt butter separately.
- Measuring cups and spoons: Accurate measurements mean better results—especially for the condensed milk and butter.
- Spatula or wooden spoon: For mixing everything together and spreading the layers evenly.
- Aluminum foil or parchment paper: To line your pan for easier cleanup and bar removal.
If you don’t have a 9×13 pan, an 8×8 will work, but the bars will be thicker and may need a longer bake time. I recommend lining the pan with foil and leaving an overhang—it makes lifting the bars out a breeze!
Detailed Preparation Method
- Preheat your oven to 350°F (175°C). Line a 9×13-inch pan with aluminum foil or parchment paper, leaving an overhang for easy removal. Lightly grease the lining. (This step saves you from sticky cleanup later!)
- Prepare the base: In a large bowl, combine 1 1/2 cups (150 g) of graham cracker crumbs and 1/2 cup (113 g) melted butter. Stir until the crumbs are evenly coated and the mixture resembles wet sand. Press this mixture firmly and evenly into the bottom of the prepared pan. Use the back of a spoon or a flat-bottomed glass for a smooth, compact layer. (This base is the foundation of your chewy 7-layer bars, so take a moment to get it even!)
- Add the condensed milk: Pour the entire 14-ounce (396 g) can of sweetened condensed milk evenly over the graham cracker crust. Use a spatula to gently spread it, making sure it covers the crust completely without mixing into it. (This sticky layer binds all the toppings.)
- Layer the toppings: Sprinkle evenly over the condensed milk in this order: 1 cup (170 g) semi-sweet chocolate chips, 1 cup (170 g) butterscotch chips, 1 cup (80 g) shredded sweetened coconut, and 1 cup (120 g) chopped toasted nuts. (I always toast the nuts lightly in a dry pan for 5 minutes before chopping—this step brings out their flavor in the bars.)
- Add vanilla and salt: Lightly sprinkle 1 teaspoon vanilla extract and a pinch of salt over the top. These small touches make a big difference in flavor depth.
- Bake: Place the pan in your preheated oven and bake for 25 to 30 minutes. You’ll know it’s done when the edges are bubbly and golden, and the center looks set but still soft. (Don’t overbake—these bars are best when chewy, not hard.)
- Cool completely: Remove the pan from the oven and place on a wire rack. Let the bars cool completely—this can take about 1 to 2 hours. For firmer bars, pop the pan in the fridge for 30 minutes before cutting. (I’ve learned the hard way that cutting too soon can cause crumbling.)
- Slice and serve: Use the foil overhang to lift the bars out of the pan. Place on a cutting board and slice into 24 squares with a sharp knife. (Wiping your knife clean between cuts helps keep edges neat.)
Cooking Tips & Techniques
One of the keys to perfect chewy 7-layer bars is not rushing the cooling process. I’ve often tried to cut into bars straight out of the oven, and let me tell you—it’s a crumbly mess. Cooling allows the condensed milk to set, binding everything tightly.
When pressing down the graham cracker crust, don’t be shy. A firmly packed base means your bars won’t fall apart when sliced. I sometimes press twice—once with my hand, then with the bottom of a glass to smooth it out.
Toasting the nuts is a game-changer—it’s a small step but adds a nutty depth that lifts the bars beyond just sweet. Keep an eye on them while toasting to avoid burning.
For even baking, rotate your pan halfway through cooking, especially if your oven has hot spots. It helps get those golden edges all around.
Lastly, if you want extra fudginess, try adding an extra 1/4 cup (60 ml) of melted butter or swapping half the chocolate chips for chopped chocolate bars. I’ve played with both and love the richer results.
Variations & Adaptations
- Nut-Free Version: Simply leave out the nuts and add extra chocolate or butterscotch chips. For crunch, sprinkle some toasted sunflower seeds instead.
- Gluten-Free: Use gluten-free graham cracker crumbs or substitute with crushed gluten-free cereal for the base.
- Seasonal Twist: Swap the coconut for dried cranberries or chopped dried apricots in fall or winter for a fruity note.
- Healthier Swap: Use dark chocolate chips (70% cocoa or higher) and reduce the butterscotch chips by half for less sugar.
- My Personal Favorite: Adding a sprinkle of flaky sea salt on top right before baking adds a subtle contrast that keeps you coming back for more.
Serving & Storage Suggestions
These chewy 7-layer bars are best served at room temperature or slightly chilled. I love pairing them with a scoop of vanilla ice cream or a drizzle of caramel sauce for a little extra indulgence.
Store leftover bars in an airtight container at room temperature for up to 3 days. If your kitchen is warm, refrigerate for up to a week—just bring them back to room temperature before serving for the best chew.
These bars freeze beautifully too. Wrap individual squares in plastic wrap and place in a freezer-safe bag for up to 3 months. Thaw overnight in the fridge and warm slightly before eating.
Over time, the flavors meld even more, making these bars taste richer the next day. Honestly, if you can wait that long!
Nutritional Information & Benefits
Each chewy 7-layer bar (based on 24 servings) contains approximately 220 calories, 11 grams of fat, 30 grams of carbohydrates, and 2 grams of protein. While they’re an indulgent treat, the nuts provide heart-healthy fats and a bit of fiber, and the coconut adds a touch of texture and sweetness without refined sugars.
For those watching gluten intake, swapping the graham crumbs for gluten-free alternatives makes this recipe accessible. The bars are naturally free of eggs and can be made dairy-free with substitutions, making them adaptable for various dietary needs.
I often include these bars as part of a balanced diet—because let’s face it, life’s too short not to enjoy dessert every now and then.
Conclusion
If you’re after a dessert that’s quick, fuss-free, and irresistibly chewy with layers of chocolate, coconut, and nuts, this chewy 7-layer bars recipe is your answer. It’s the kind of treat that feels homemade and special without hours in the kitchen.
Feel free to tweak the ingredients to suit your taste—add more chocolate, swap nuts, or even toss in some dried fruit. I love hearing how you make this recipe your own, so don’t be shy about sharing your versions!
Give these bars a try and watch them disappear fast. Trust me, once you bite into one, you’ll understand why I keep coming back to this recipe again and again.
If you make these, please leave a comment or share your tips—I’d love to hear about your baking adventures with these chewy 7-layer bars!
FAQs About Chewy 7-Layer Bars
Can I use different types of chocolate chips?
Absolutely! Semi-sweet works great, but milk, dark, or white chocolate chips can all be used to change up the flavor.
How do I prevent my bars from being too dry?
Don’t overbake! Remove them when the edges are bubbly and the center is just set. Also, make sure to cool completely before cutting.
Can I make these bars ahead of time?
Yes, they actually taste better the next day after flavors meld. Store them in an airtight container at room temperature or in the fridge.
What if I don’t have sweetened condensed milk?
It’s a key ingredient for that chewy texture, but you can try making your own by simmering evaporated milk with sugar until thickened. It’s more work, though!
Can I freeze the bars?
Definitely. Wrap individual pieces tightly and freeze for up to 3 months. Thaw overnight in the fridge before enjoying.
Pin This Recipe!
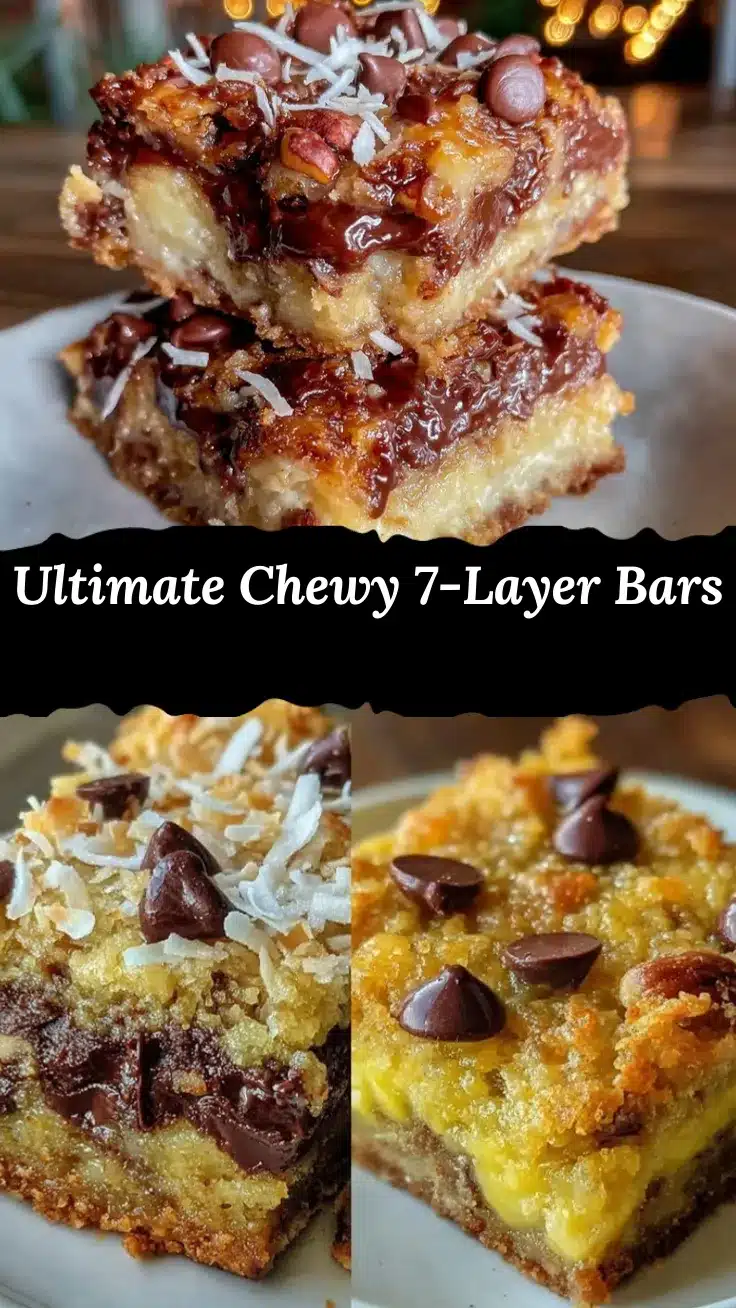
Chewy 7-Layer Bars

These chewy 7-layer bars combine layers of chocolate, coconut, and nuts into a quick and easy homemade dessert that’s perfect for any occasion.
- Prep Time: 10 minutes
- Cook Time: 25-30 minutes
- Total Time: 1 hour 40 minutes
- Yield: 24 servings 1x
- Category: Dessert
- Cuisine: American
Ingredients
- 1 can (14 oz / 396 g) sweetened condensed milk
- 1/2 cup (113 g) unsalted butter, melted
- 1 1/2 cups (150 g) graham cracker crumbs
- 1 cup (170 g) semi-sweet chocolate chips
- 1 cup (170 g) butterscotch chips
- 1 cup (80 g) sweetened shredded coconut
- 1 cup (120 g) chopped toasted nuts (walnuts or pecans)
- 1 teaspoon vanilla extract
- Pinch of salt
Instructions
- Preheat oven to 350°F (175°C). Line a 9×13-inch pan with aluminum foil or parchment paper, leaving an overhang for easy removal. Lightly grease the lining.
- In a large bowl, combine graham cracker crumbs and melted butter. Stir until crumbs are evenly coated and mixture resembles wet sand. Press firmly and evenly into the bottom of the prepared pan.
- Pour the sweetened condensed milk evenly over the graham cracker crust. Spread gently with a spatula to cover the crust completely without mixing.
- Sprinkle evenly over the condensed milk in this order: chocolate chips, butterscotch chips, shredded coconut, and chopped toasted nuts.
- Lightly sprinkle vanilla extract and a pinch of salt over the top.
- Bake for 25 to 30 minutes until edges are bubbly and golden and center looks set but still soft. Avoid overbaking to keep bars chewy.
- Remove from oven and cool completely on a wire rack, about 1 to 2 hours. For firmer bars, refrigerate for 30 minutes before cutting.
- Use foil overhang to lift bars from pan. Slice into 24 squares with a sharp knife, wiping knife clean between cuts for neat edges.
Notes
Do not overbake to maintain chewy texture. Cool bars completely before cutting to prevent crumbling. Toast nuts lightly before adding for enhanced flavor. Rotate pan halfway through baking for even cooking. For extra fudginess, add 1/4 cup melted butter or swap half the chocolate chips for chopped chocolate bars.
Nutrition
- Serving Size: 1 bar (1/24th of rec
- Calories: 220
- Fat: 11
- Carbohydrates: 30
- Protein: 2
Keywords: 7-layer bars, chewy dessert bars, easy dessert, homemade bars, chocolate coconut bars, butterscotch bars, nutty dessert


