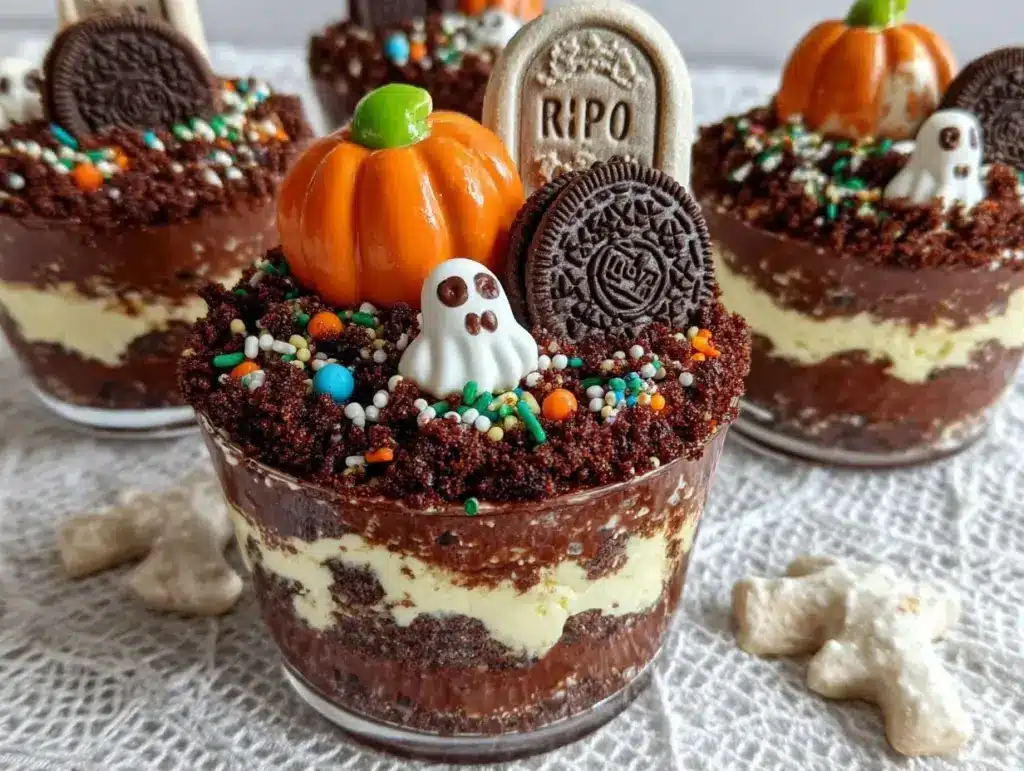
There’s something undeniably fun about Halloween treats that are equal parts spooky and delicious. These Spooky Graveyard Dirt Cake Cups are the perfect addition to your Halloween festivities. Imagine rich, chocolatey layers topped with creepy cookie tombstones and gummy worms — it’s a dessert that’s as fun to look at as it is to eat! The best part? No baking required. Whether you’re hosting a Halloween party or looking for a creative dessert to make with the kids, this recipe is sure to be a hit.
I first made these Dirt Cake Cups for a family Halloween movie night, and let me tell you, they were gone faster than you can say “boo!” The combination of creamy pudding, crushed cookies, and candy decorations is absolutely irresistible. Plus, you can customize the decorations to make them as spooky or silly as you like. Let’s dive into the details and create a treat that’s both frightful and delightful!
Why You’ll Love This Recipe
- No-Bake Convenience: Forget preheating the oven! This recipe comes together quickly without the need for any baking.
Perfect for little hands to help decorate — and devour — these spooky cups. - Halloween Party-Approved: These eerie treats will steal the show at your Halloween gathering.
- Customizable: Make them as spooky or silly as you like with different toppings and decorations.
- Deliciously Chocolatey: The creamy pudding and crushed Oreo combo will have everyone coming back for seconds.
What sets these Spooky Graveyard Dirt Cake Cups apart is their simplicity and versatility. You don’t need any fancy ingredients or equipment, and you can adjust the decorations based on your creativity. Plus, they’re the kind of dessert that sparks joy — kids will love assembling them, and adults will appreciate the nostalgic flavors.
What Ingredients You Will Need
This recipe uses easy-to-find ingredients, most of which you probably have in your pantry. Here’s what you’ll need:
- Chocolate Pudding Mix: You’ll need instant chocolate pudding mix. Follow the instructions on the package to prepare it. (I like using [brand] for its rich flavor!)
- Milk: To make the pudding, grab some cold milk. Regular or lactose-free options work fine.
- Oreos: Crush these up to create the “dirt.” You’ll need about 20 cookies for this recipe.
- Gummy Worms: Add some creepy crawlers to bring the graveyard to life!
- Milano Cookies: Use these as tombstones — they’re the perfect shape.
- Chocolate Chips: Melted chocolate chips are great for writing on the tombstones.
- Whipped Topping: For a creamy layer and extra indulgence.
- Optional Decorations: Candy pumpkins, sprinkles, or crushed graham crackers for additional creepy details.
Feel free to get creative with substitutions! You can use vanilla pudding or add layers of crushed graham crackers for a sandy graveyard look. Dairy-free pudding and cookies work perfectly if you’re catering to dietary restrictions.
Equipment Needed
- Mixing Bowls: For preparing the pudding and crushing the cookies.
- Whisk: To mix the pudding smoothly.
- Ziploc Bag (or Food Processor): For crushing the Oreos into fine crumbs.
- Small Serving Cups: Clear cups work best to show off the layers.
- Spoon: For layering the pudding and cookie crumbs.
- Piping Bag (Optional): If you want to neatly layer the whipped topping.
- Small Paintbrush or Toothpick: For writing on the cookie tombstones with melted chocolate.
Pro tip: If you don’t have a food processor, simply place the Oreos in a Ziploc bag and crush them using a rolling pin. Easy and mess-free!
Preparation Method

- Prep the pudding: In a mixing bowl, prepare the chocolate pudding according to the package instructions. Let it chill in the fridge for about 10 minutes until set.
- Crush the Oreos: Place the Oreos in a Ziploc bag and use a rolling pin to crush them into fine crumbs. You can also pulse them in a food processor for a finer texture. Save a few larger chunks if you want a more “rocky” dirt effect.
- Create the tombstones: Melt the chocolate chips in a microwave-safe bowl in 30-second intervals, stirring each time until smooth. Use a small paintbrush or toothpick to carefully write spooky phrases like “RIP” or draw skulls on the Milano cookies. Let them dry.
- Assemble the cups: Start by adding a layer of crushed Oreos to the bottom of each clear serving cup. Follow with a generous layer of chocolate pudding. Repeat these layers until the cup is almost full, ending with a layer of crushed Oreos on top.
- Add decorations: Stick a Milano cookie “tombstone” into the top layer of dirt at an angle. Place gummy worms around the tombstone, letting them peek out of the dirt. Add candy pumpkins or sprinkles for extra flair.
- Finish with whipped topping: If desired, pipe or spoon a small dollop of whipped topping on each cup for extra creaminess. Sprinkle a little crushed cookie on top for texture.
- Chill and serve: Refrigerate the dirt cake cups for at least 30 minutes before serving. This allows the pudding to fully set and the flavors to meld.
And that’s it! You’ve got yourself a batch of spooky, delicious Graveyard Dirt Cake Cups to enjoy.
Cooking Tips & Techniques
Here are some tips to make sure your Dirt Cake Cups turn out perfectly:
- Use cold milk: This helps the pudding set faster and creates a creamier texture.
- Don’t over-crush the Oreos: A mix of fine crumbs and small chunks gives the “dirt” more texture and realism.
- Let the pudding chill: Don’t skip the chilling step — it helps the layers hold their shape and prevents a soupy mess.
- Get creative with decorations: Use edible markers for the tombstones or add candy eyes for an extra spooky touch.
- Prepare ahead: These cups can be made a day in advance and stored in the fridge. Just wait to add the decorations until right before serving.
Remember, the fun is in the details! Don’t stress about perfection — these are meant to be spooky, so a little messiness adds to the charm.
Variations & Adaptations
Want to put your own spin on these creepy treats? Here are some ideas:
- Dietary adjustments: Use gluten-free Oreos and dairy-free pudding for guests with food sensitivities.
- Flavor twists: Swap chocolate pudding for vanilla or butterscotch and use crumbled graham crackers for a lighter “sand” look.
- Seasonal flair: Add candy corn, mini marshmallows, or orange and black sprinkles for a festive touch.
- Adult version: Mix a splash of coffee liqueur into the pudding for a grown-up twist.
- Different presentation: Make one large Dirt Cake in a glass baking dish instead of individual cups for serving a crowd.
The possibilities are endless, so have fun experimenting!
Serving & Storage Suggestions
These Spooky Graveyard Dirt Cake Cups are best served chilled. Here are some tips to enjoy them at their best:
- Serving temperature: Cold is key! The pudding tastes best when it’s fully chilled.
- Presentation tips: Serve in clear cups to show off the layers, and add a small spoon for easy eating.
- Complementary treats: Pair with Halloween-themed punch or hot cocoa for a full festive spread.
- Storage: Cover the cups with plastic wrap and store in the refrigerator for up to 3 days. Avoid adding decorations until right before serving to keep gummy worms fresh.
- Reheating tips: No reheating is needed — just grab and go!
As they sit, the flavors meld together even more, making them even tastier the next day.
Nutritional Information & Benefits
While these Dirt Cake Cups are meant for indulgence, here’s the general nutritional breakdown per serving:
- Calories: Approximately 250-300 (depending on decorations)
- Protein: 3-4g
- Sugar: Varies based on toppings used
- Fat: 10-12g
The pudding provides a dose of calcium, thanks to the milk, while the chocolate offers a little mood boost. Keep portions reasonable if you’re watching your sugar intake, and consider using lighter options like sugar-free pudding or reduced-fat whipped topping.
Conclusion
If you’re looking for a Halloween dessert that’s fun to make and even more fun to eat, these Spooky Graveyard Dirt Cake Cups fit the bill perfectly. They’re easy, no-bake, and customizable, making them a crowd-pleaser at any spooky celebration. The combination of creamy pudding, crunchy Oreos, and playful decorations is always a hit — and they’re so simple that even beginners can make them with confidence.
So, grab your favorite spooky candies and let your creativity run wild. I can’t wait to hear how you make these Dirt Cake Cups your own! Leave a comment below to share your spooky designs, and don’t forget to pin this recipe for later. Happy Halloween!
FAQs
Can I make these Dirt Cake Cups ahead of time?
Yes, you can prepare the pudding and Oreo layers a day in advance and store them in the fridge. Add the decorations just before serving for the freshest look.
What can I use instead of gummy worms?
You can substitute gummy worms with candy snakes, licorice, or even pretzel sticks for a unique twist!
Can I make a large Dirt Cake instead of individual cups?
Absolutely! Layer the pudding and cookie crumbs in a glass baking dish and add decorations on top. Scoop and serve!
Are there any gluten-free options?
Yes, use gluten-free chocolate sandwich cookies and check the pudding mix label to ensure it’s gluten-free.
How long can I store these Dirt Cake Cups?
They can be stored in the fridge for up to 3 days. Just make sure to cover them with plastic wrap to keep them fresh!
Pin This Recipe!

Spooky Graveyard Dirt Cake Cups Recipe Easy No-Bake Treat

These Spooky Graveyard Dirt Cake Cups are a fun and delicious Halloween treat with chocolatey layers, cookie tombstones, and gummy worms — no baking required!
- Prep Time: 15 minutes
- Cook Time: 0 minutes
- Total Time: 45 minutes
- Yield: 6 servings 1x
- Category: Dessert
- Cuisine: American
Ingredients
- 1 package instant chocolate pudding mix
- 2 cups cold milk
- 20 Oreo cookies, crushed
- Gummy worms
- Milano cookies
- 1 cup chocolate chips, melted
- 1 cup whipped topping
- Optional decorations: candy pumpkins, sprinkles, crushed graham crackers
Instructions
- Prepare the chocolate pudding according to the package instructions and chill in the fridge for about 10 minutes until set.
- Place the Oreos in a Ziploc bag and crush them into fine crumbs using a rolling pin or pulse them in a food processor.
- Melt the chocolate chips in a microwave-safe bowl in 30-second intervals, stirring each time until smooth. Use a small paintbrush or toothpick to write spooky phrases or draw skulls on the Milano cookies. Let them dry.
- Add a layer of crushed Oreos to the bottom of each clear serving cup. Follow with a generous layer of chocolate pudding. Repeat these layers until the cup is almost full, ending with a layer of crushed Oreos on top.
- Stick a Milano cookie tombstone into the top layer of dirt at an angle. Place gummy worms around the tombstone, letting them peek out of the dirt. Add candy pumpkins or sprinkles for extra flair.
- Pipe or spoon a small dollop of whipped topping on each cup for extra creaminess. Sprinkle a little crushed cookie on top for texture.
- Refrigerate the dirt cake cups for at least 30 minutes before serving.
Notes
[‘Use cold milk for creamier pudding.’, ‘Don’t over-crush the Oreos for a mix of fine crumbs and small chunks.’, ‘Let the pudding chill to hold its shape.’, ‘Decorate creatively with edible markers or candy eyes.’, ‘Prepare the cups a day in advance but add decorations before serving.’]
Nutrition
- Serving Size: 1 cup
- Calories: 250300
- Sugar: 2025
- Sodium: 200250
- Fat: 1012
- Saturated Fat: 56
- Carbohydrates: 3540
- Fiber: 12
- Protein: 34
Keywords: Halloween, No-Bake, Chocolate, Dirt Cake, Spooky Treats, Easy Dessert


