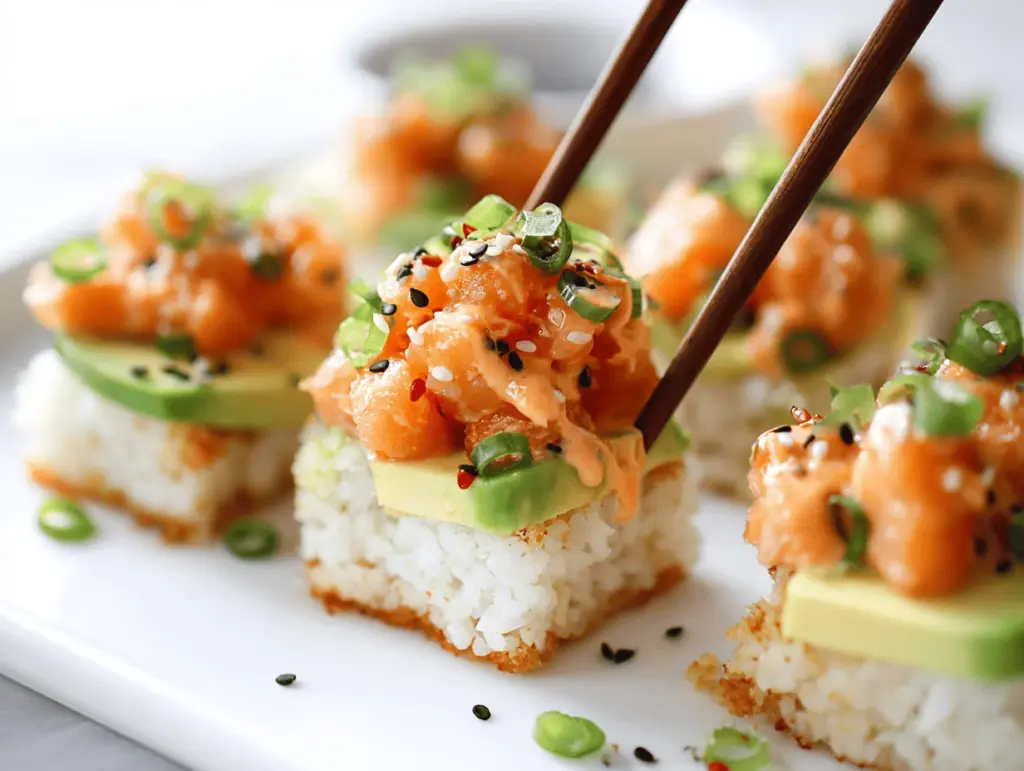
The sizzle of rice hitting a hot pan, the snap of perfectly crisped edges, and that cool, silky salmon topping—if that doesn’t get your appetite going, I don’t know what will. The first time I tasted salmon crispy rice bites at a trendy sushi spot, I was instantly obsessed. I just knew I had to figure out how to make those restaurant-style salmon crispy rice bites at home—without the big price tag or a chef’s hat!
Honestly, there’s something a little magical about these bites. They’re the kind of thing you’d expect to see on a fancy menu, but trust me, they’re shockingly doable in your own kitchen. The secret? A couple of tricks I picked up after a few not-so-pretty attempts (like rice falling apart everywhere—been there). After a handful of test runs and some tweaks, I landed on a method that nails that irresistible crunch and luscious salmon topping every single time.
Why do I keep coming back to these salmon crispy rice bites? For starters, they’re a flavor bomb—crispy, creamy, umami, spicy, and fresh all at once. Plus, they’re a huge crowd-pleaser, whether it’s a weeknight treat, a date-night-in, or a girls’ night snack platter. And if you’re like me, and love making restaurant favorites at home, you’ll appreciate how much you can customize these bites. Whether you’re watching your carbs, going gluten-free, or just want something totally delish, this recipe’s got you covered. As someone who’s made this at least a dozen times (and counting!), I’m confident you’ll fall for these salmon crispy rice bites just as hard.
Why You’ll Love This Salmon Crispy Rice Bites Recipe
After making salmon crispy rice bites a little too often (oops), I can honestly say they check all the boxes for an epic appetizer or light meal. Here’s why these have become a staple in my kitchen—and why they’ll probably stick around in yours, too:
- Quick & Easy: No need to book a reservation—you can whip these up in under 45 minutes, even if you’re multitasking (I’ve done it with a toddler hanging on my leg, so you know it’s doable).
- Simple Ingredients: All you need are pantry staples and a quick trip to the seafood counter. No fancy sushi rice or obscure sauces required.
- Perfect for Sharing: These are hands-down the cutest party bites; stack them up on a platter and watch them disappear at brunch, game day, or happy hour.
- Crowd-Pleaser: Both sushi lovers and skeptics agree—there’s something about the crunchy rice and creamy salmon that wins everyone over. Even my picky little cousin went back for seconds (and thirds!).
- Unbelievably Delicious: It’s that combo of crispy, chewy, spicy, and fresh that keeps you coming back for more. You get restaurant-level satisfaction without the fuss or the bill.
What makes this version different? For one, pressing and chilling the rice is a total game-changer—it keeps the base sturdy and lets you achieve that golden crunch. I also blend a touch of sriracha and creamy mayo into the salmon for a punchy, silky topping (it’s addictive, honestly). And if you like, you can add avocado, cucumber, or even a sprinkle of sesame seeds to make it all your own. This isn’t your average knockoff—it’s the one I turn to when I want to impress, but also when I just want a cozy night in with something extra special.
There’s just something about these salmon crispy rice bites that makes people light up. The first bite is pure comfort, with a hint of luxury, and every batch reminds me how much fun it is to bring a little restaurant magic into my kitchen (and, soon, yours!).
What Ingredients You Will Need
This recipe uses simple, fresh ingredients to deliver bold flavor and that signature crispy-on-the-outside, tender-on-the-inside texture. Most are pantry staples, and you can easily tweak or substitute based on what you have or dietary needs.
- For the Crispy Rice:
- 2 cups cooked sushi rice (about 320g), cooled (short-grain rice gives the best texture—sticky but not mushy)
- 1 tablespoon rice vinegar (for subtle tang and to help the rice stick)
- 1 teaspoon sugar (balances the vinegar—don’t skip it!)
- 1/2 teaspoon salt
- 2-3 tablespoons neutral oil (like avocado or canola, for crisping the rice—olive oil works in a pinch, but has a stronger flavor)
- For the Salmon Topping:
- 6 ounces sushi-grade salmon (170g), finely diced (ask your fishmonger for “sushi-grade” to be safe for raw consumption)
- 2 tablespoons mayonnaise (Japanese Kewpie is amazing, but regular works too)
- 1-2 teaspoons sriracha (adjust to your spice level—start with less if you’re sensitive)
- 1 teaspoon soy sauce (or tamari for gluten-free)
- 1/2 teaspoon toasted sesame oil (adds nutty depth)
- 1 green onion, thinly sliced (for color and crunch)
- Optional Toppings:
- Sliced avocado (creamy and pretty!)
- Thinly sliced cucumber (for freshness)
- Sesame seeds (black or white—they look stunning and add a little snap)
- Extra sriracha or spicy mayo
- Microgreens or cilantro (for garnish, totally optional)
Ingredient Notes and Substitutions:
- If you can’t find sushi rice, use any short-grain rice—avoid long-grain, as it won’t stick well.
- For a lower-carb version, try using cauliflower rice (pressed well and bound with a bit of egg white).
- Swap out salmon for sushi-grade tuna, cooked shrimp, or even a vegan “poke” mix with diced avocado and cucumber.
- Dairy-free? Use vegan mayo for the topping.
- Gluten-free? Stick with tamari or coconut aminos instead of regular soy sauce.
I’ve tried a few brands, and I’ll say, Kewpie mayo and Eden Foods sushi rice are my go-tos for both flavor and texture. But honestly, any good-quality mayo and fresh rice will do the trick!
Equipment Needed
- Nonstick Skillet or Frying Pan: Essential for crisping the rice without sticking. If you have a heavy-bottomed pan, that’s even better for even browning.
- Sharp Knife: For finely dicing the salmon—makes a huge difference in texture (a serrated knife can help if your regular knives aren’t sushi-sharp).
- Mixing Bowls: You’ll want at least two—one for the rice and one for the salmon topping.
- Plastic Wrap & Baking Sheet: For pressing and chilling the rice before frying. Wax paper works in a pinch.
- Spatula: Helps flip the crispy rice squares without breaking them. A fish spatula or offset spatula is perfect if you have one.
- Measuring Spoons and Cups: To keep everything precise (especially if you’re new to this recipe).
- Optional: Sushi mold or cookie cutter for shaping the rice into perfect rectangles. I usually just use my hands, though—it’s rustic and works great!
If you’re just starting out, don’t stress about fancy gadgets. A regular nonstick pan and a steady hand are all you really need. I tried it once with a stainless steel pan—let’s just say, nonstick is the way to go (unless you want to scrape crispy bits for days!). Keep your tools clean and dry before starting for best results, and if you use a sushi mold, rinse it in water between presses to prevent sticking.
How to Make Salmon Crispy Rice Bites
-
Prepare the Rice Base:
Start with 2 cups (320g) cooked sushi rice. Mix in 1 tablespoon rice vinegar, 1 teaspoon sugar, and 1/2 teaspoon salt while the rice is still warm. Stir gently until everything is evenly distributed. Let the rice cool to room temperature (about 10 minutes). Warm rice is easier to shape, but don’t use hot rice or it’ll fall apart later.
-
Shape and Chill the Rice:
Line a small baking sheet with plastic wrap. Scoop the rice onto the sheet and spread it into a 3/4-inch (2 cm) thick rectangle. Use a spatula or damp hands to press it down firmly—don’t be shy, the firmer, the better! Cover with more plastic wrap and chill in the fridge for at least 30 minutes. This step helps the rice hold together and makes it way easier to cut and fry.
-
Cut the Rice:
Once the rice is cold and firm, remove from the fridge. Use a sharp, damp knife to cut the rice into 12-16 small rectangles or squares. If the knife gets sticky, rinse it with water and keep going. Don’t worry about perfect shapes—rustic is part of the charm.
-
Fry the Rice:
Heat 2-3 tablespoons of neutral oil in a nonstick skillet over medium heat. Once the oil is shimmering, carefully place the rice pieces in the pan, leaving space between each. Fry for 3-4 minutes per side, or until golden brown and crispy. Flip gently with a spatula—if they stick, let them cook a bit longer; they’ll release when ready. Drain on a paper towel-lined plate. (Tip: Don’t overcrowd the pan, or you’ll get soggy rice. Fry in batches if needed!)
-
Make the Salmon Topping:
In a bowl, combine 6 ounces finely diced sushi-grade salmon, 2 tablespoons mayo, 1-2 teaspoons sriracha, 1 teaspoon soy sauce, 1/2 teaspoon toasted sesame oil, and most of the sliced green onion (save some for garnish). Mix gently until well combined. Taste and adjust the spice or seasoning to your preference.
-
Assemble the Bites:
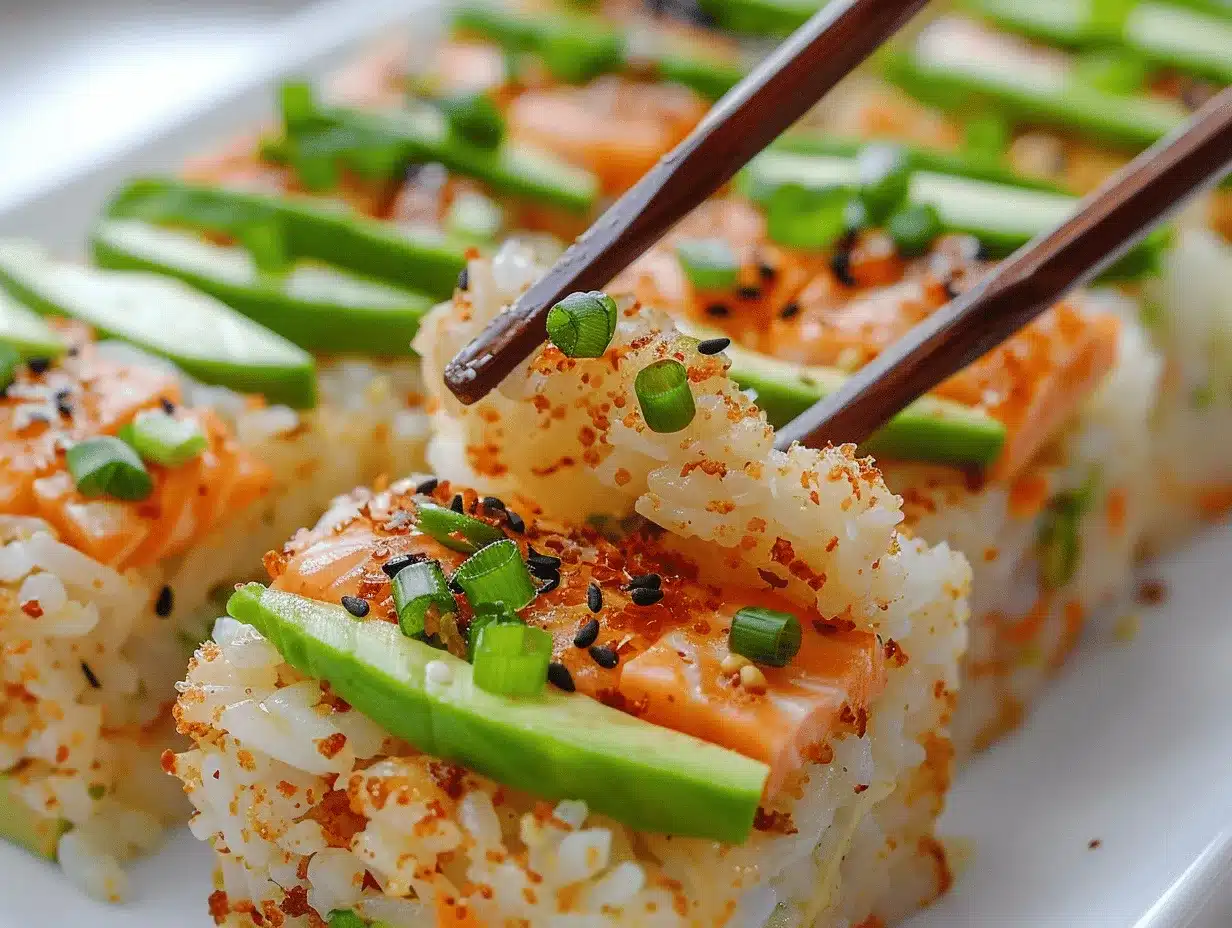
Once the crispy rice is cool enough to handle, top each piece with a generous spoonful of the salmon mixture. Press lightly to help it adhere. Add optional toppings: a slice of avocado, a sprinkle of sesame seeds, extra sriracha, or a few microgreens.
-
Serve:
Arrange the salmon crispy rice bites on a platter and serve immediately. I love to serve them family-style and let everyone grab their favorites. These are best eaten fresh for maximum crunch (but I’ve snuck a few leftovers straight from the fridge—still delicious!).
Troubleshooting: If your rice crumbles, it probably needed a bit more chilling or firmer pressing. If the rice is too oily, try using less oil or draining longer on paper towels. And if your salmon topping feels too loose, add a little more mayo to bind.
My favorite tip: prep the rice squares ahead and fry them just before serving for the ultimate crisp factor!
Cooking Tips & Techniques
- Rice Matters: Short-grain sushi rice really is the way to go. Long-grain rice just won’t give you that sticky, sturdy base. If you use day-old rice, add a bit more vinegar and a splash of water before pressing it into shape.
- Chill for Success: Don’t skip chilling the rice. The fridge time lets the grains set up, so you’ll get clean cuts and solid, crispy pieces. If you’re in a rush, pop the rice in the freezer for 10-15 minutes.
- Crispy, Not Greasy: Make sure your oil is hot before adding the rice. If it’s not shimmering, the rice will absorb oil and get soggy. Test with a tiny piece—if it sizzles instantly, you’re good to go.
- Gentle Flipping: Use a fish spatula or offset spatula to flip the rice—don’t force it if it’s sticking. Give it another minute; it’ll release when perfectly golden.
- Salmon Quality: Use the freshest, sushi-grade salmon you can find. If you’re nervous about raw fish, you can use cooked, flaked salmon or even smoked salmon. Just adjust the seasoning as needed.
- Customize the Heat: I like mine with a good kick, but you can totally dial the spice up or down. Add a dash of wasabi or swap in chili crisp for a different twist.
I’ve learned (the hard way) that patience is key: don’t rush the frying, or you’ll end up with chewy—not crispy—rice. And always double the batch if you’re feeding a crowd—these are gone in a flash! If you want to multitask, prep the salmon topping while the rice chills. That way, assembly is a breeze.
Variations & Adaptations
- Spicy Tuna Crispy Rice: Swap the salmon for sushi-grade tuna and follow the same method. Add a touch of wasabi to the mayo for a little extra zing.
- Vegetarian/Vegan Option: Use mashed avocado seasoned with lime, salt, and a splash of soy sauce as the topping. Or try a diced cucumber and mango salsa for a fresh, sweet bite.
- Low-Carb or Gluten-Free: Use riced cauliflower (pressed and lightly pan-toasted) as the base, and tamari or coconut aminos in place of soy sauce.
- Baked Instead of Fried: For a lighter option, brush the rice squares with oil and bake at 425°F (220°C) for 15-20 minutes, flipping halfway. You won’t get the same deep golden crust, but it’s still tasty and crisp.
- Allergen-Friendly: For egg-free, use vegan mayo. For soy-free, try coconut aminos and skip the soy sauce.
One of my favorite spins: I once topped the crispy rice with a spicy crab salad (imitation crab, mayo, sriracha, a little lemon juice), and it was an absolute hit at a summer BBQ. Don’t be afraid to play with flavors—these bites are the perfect blank canvas!
Serving & Storage Suggestions
Serve these salmon crispy rice bites at room temperature or just slightly warm—never piping hot, or the salmon topping will lose its freshness. I love arranging them on a big platter with lime wedges, a sprinkle of sesame seeds, and a drizzle of extra spicy mayo for that Pinterest-worthy look.
Pair with edamame, a simple cucumber salad, or even a light miso soup for a complete meal. For drinks, a crisp white wine or cold sake is a match made in heaven.
To store leftovers, keep the crispy rice and salmon topping separate in airtight containers in the fridge for up to 2 days. Re-crisp the rice squares in a hot skillet for 1-2 minutes per side before topping and serving. I don’t recommend freezing, as the texture will suffer, but if you absolutely need to, freeze the rice base only—never the assembled bites.
Fun fact: the flavors deepen after a few hours, so assembling just before eating gives you that perfect contrast of warm, crispy, and cool, creamy. If you prep ahead, add toppings right before serving for the best texture.
Nutritional Information & Benefits
Each salmon crispy rice bite (based on 16 bites) is approximately 80-100 calories, with 5g protein, 3g fat, and 10g carbs. Actual values will vary with toppings and portion size.
Salmon is rich in omega-3 fatty acids, which are fantastic for heart and brain health. Sushi rice offers a quick energy boost, while the avocado and sesame seeds bring fiber and healthy fats. Mayo can be swapped for a lighter version if you’re watching calories.
This recipe is naturally gluten-free if you use tamari and check your mayo. It’s also easy to adapt for dairy-free or egg-free diets as mentioned above. Just keep an eye out for possible allergens in your specific ingredients (especially soy and eggs in the mayo and soy sauce).
From a personal wellness perspective, I love that these bites make it easy to enjoy sushi flavors at home without a ton of added sodium or preservatives. Plus, they’re portion-controlled and packed with wholesome fats.
Conclusion
If you’ve been craving that restaurant-style crispy rice (without the steep bill and waitlist), these salmon crispy rice bites are about to become your new favorite. They’re easy, totally customizable, and downright fun to make—and even more fun to eat!
I love how this recipe lets you play with flavors and textures. Want it spicier? Add more sriracha. Prefer tuna or a veggie topping? Go for it. It’s your kitchen, your rules.
Honestly, making these salmon crispy rice bites at home always feels a little special—even if it’s just for me and my family in sweats on a Friday night. Try them, share your own twist, and let me know how they turn out in the comments below. Don’t forget to pin and share if you’re as hooked as I am!
Here’s to bringing a little restaurant magic right to your table—crispy, creamy, and seriously irresistible.
Frequently Asked Questions (FAQs)
Can I use regular rice instead of sushi rice for crispy rice bites?
Short-grain sushi rice works best because it’s sticky and holds its shape when fried. Long-grain rice tends to fall apart, but you can try it if you don’t mind a looser texture—just press extra firmly and chill well.
How can I make the salmon topping ahead of time?
You can mix the salmon topping up to a day in advance. Store it in an airtight container in the fridge and give it a quick stir before using. Add green onions just before serving for the freshest flavor.
Is it safe to eat raw salmon at home?
Use only sushi-grade salmon from a trusted source to minimize risk. If you’re unsure, you can substitute with cooked, flaked salmon or even smoked salmon for a different twist.
Can I make these salmon crispy rice bites gluten-free?
Absolutely! Just use tamari or coconut aminos instead of soy sauce, and double-check your mayo for hidden gluten ingredients.
What’s the best way to reheat crispy rice squares?
Pop them in a nonstick skillet over medium heat for 1-2 minutes per side. They’ll crisp right back up—just add the salmon topping after reheating. Avoid microwaving, as it softens the rice.
Pin This Recipe!
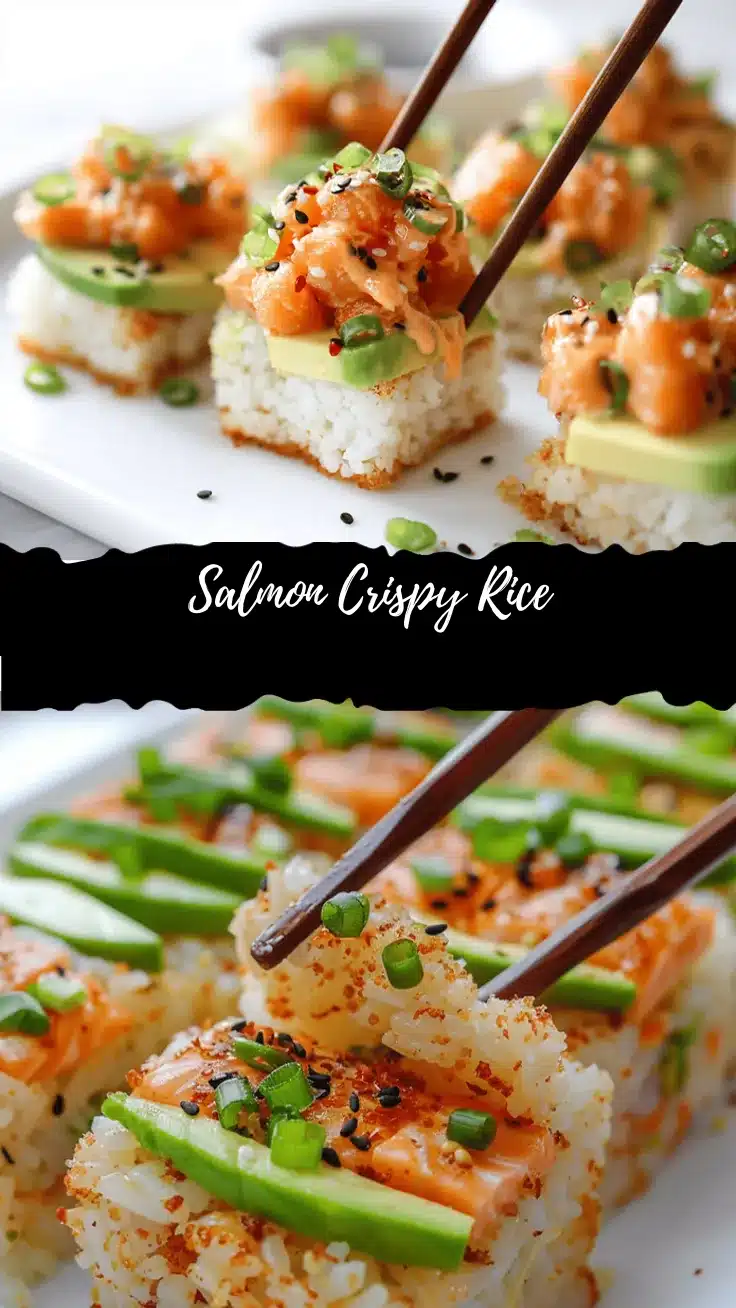
Salmon Crispy Rice Bites

These Salmon Crispy Rice Bites bring restaurant-style flavor and texture to your home kitchen, featuring golden, crunchy rice squares topped with a creamy, spicy salmon mixture. Perfect as an appetizer or light meal, they’re easy to customize and sure to impress any crowd.
- Prep Time: 20 minutes
- Cook Time: 15 minutes
- Total Time: 45 minutes
- Yield: 12-16 bites (serves 4 as an appetizer) 1x
- Category: Appetizer
- Cuisine: Japanese-Inspired
Ingredients
- 2 cups cooked sushi rice (about 320g), cooled
- 1 tablespoon rice vinegar
- 1 teaspoon sugar
- 1/2 teaspoon salt
- 2–3 tablespoons neutral oil (avocado or canola oil preferred, olive oil in a pinch)
- 6 ounces sushi-grade salmon, finely diced
- 2 tablespoons mayonnaise (preferably Japanese Kewpie, but regular works)
- 1–2 teaspoons sriracha (to taste)
- 1 teaspoon soy sauce (or tamari for gluten-free)
- 1/2 teaspoon toasted sesame oil
- 1 green onion, thinly sliced
- Optional: Sliced avocado
- Optional: Thinly sliced cucumber
- Optional: Sesame seeds (black or white)
- Optional: Extra sriracha or spicy mayo
- Optional: Microgreens or cilantro for garnish
Instructions
- Prepare the Rice Base: In a bowl, mix 2 cups cooked sushi rice with 1 tablespoon rice vinegar, 1 teaspoon sugar, and 1/2 teaspoon salt while the rice is still warm. Stir gently until evenly distributed. Let cool to room temperature (about 10 minutes).
- Shape and Chill the Rice: Line a small baking sheet with plastic wrap. Spread the rice into a 3/4-inch thick rectangle. Press down firmly with a spatula or damp hands. Cover with plastic wrap and chill in the fridge for at least 30 minutes.
- Cut the Rice: Remove the chilled rice from the fridge. Using a sharp, damp knife, cut into 12-16 small rectangles or squares. Rinse the knife as needed to prevent sticking.
- Fry the Rice: Heat 2-3 tablespoons neutral oil in a nonstick skillet over medium heat. Once shimmering, add rice pieces, leaving space between each. Fry for 3-4 minutes per side until golden brown and crispy. Flip gently and drain on a paper towel-lined plate. Fry in batches if needed.
- Make the Salmon Topping: In a bowl, combine 6 ounces finely diced sushi-grade salmon, 2 tablespoons mayo, 1-2 teaspoons sriracha, 1 teaspoon soy sauce, 1/2 teaspoon toasted sesame oil, and most of the sliced green onion (reserve some for garnish). Mix gently and adjust seasoning to taste.
- Assemble the Bites: Once rice squares are cool enough to handle, top each with a generous spoonful of the salmon mixture. Press lightly to adhere. Add optional toppings: avocado, cucumber, sesame seeds, extra sriracha, or microgreens.
- Serve: Arrange on a platter and serve immediately for maximum crunch. Best enjoyed fresh.
Notes
For best results, use short-grain sushi rice and chill it thoroughly before cutting and frying. Use only sushi-grade salmon for raw consumption, or substitute with cooked or smoked salmon if preferred. Customize toppings to taste—avocado, cucumber, and sesame seeds are popular. To make ahead, prep rice squares and salmon topping separately and assemble just before serving. For a lighter version, bake rice squares at 425°F for 15-20 minutes, flipping halfway.
Nutrition
- Serving Size: 1 bite (out of 16)
- Calories: 90
- Sugar: 1
- Sodium: 180
- Fat: 3
- Saturated Fat: 0.5
- Carbohydrates: 10
- Fiber: 0.5
- Protein: 5
Keywords: salmon crispy rice, sushi appetizer, spicy salmon bites, Japanese appetizer, gluten-free sushi, party bites, easy sushi recipe, restaurant-style, crispy rice, seafood appetizer


