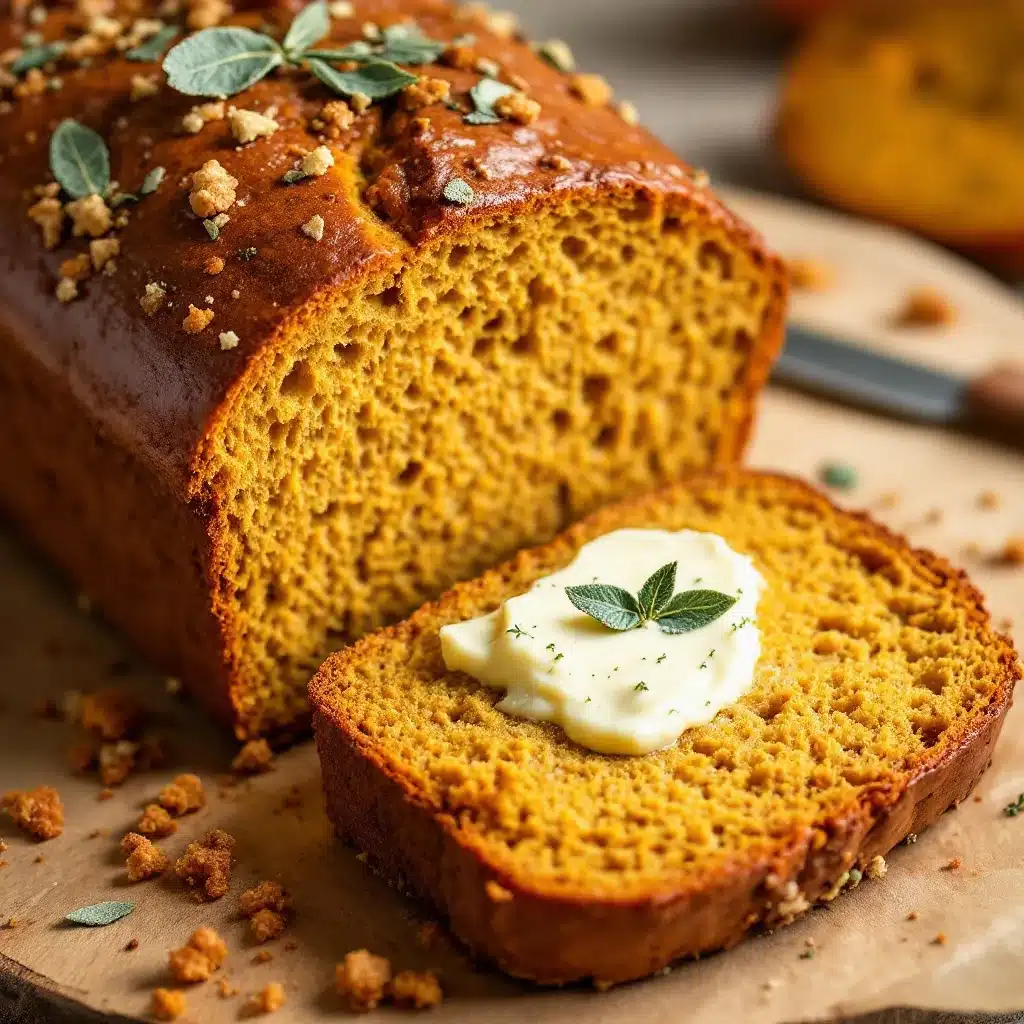
I burned the bottom of three consecutive pumpkin sourdough loaves before I figured out what I was doing wrong. Not a light golden-bottom situation either—I mean acrid, smoke-alarm-screaming, why-did-I-even-bother charred crust. The first one went straight to the compost bin. The second one I tried to salvage by slicing off the bottom, which left me with a sad, squat half-loaf that looked like it had been in a fight. The third one I just stared at for a good five minutes, sitting on my counter, wondering if maybe sourdough and pumpkin just weren’t meant to be friends.
Turns out, they are best friends. I just wasn’t treating the dough right.
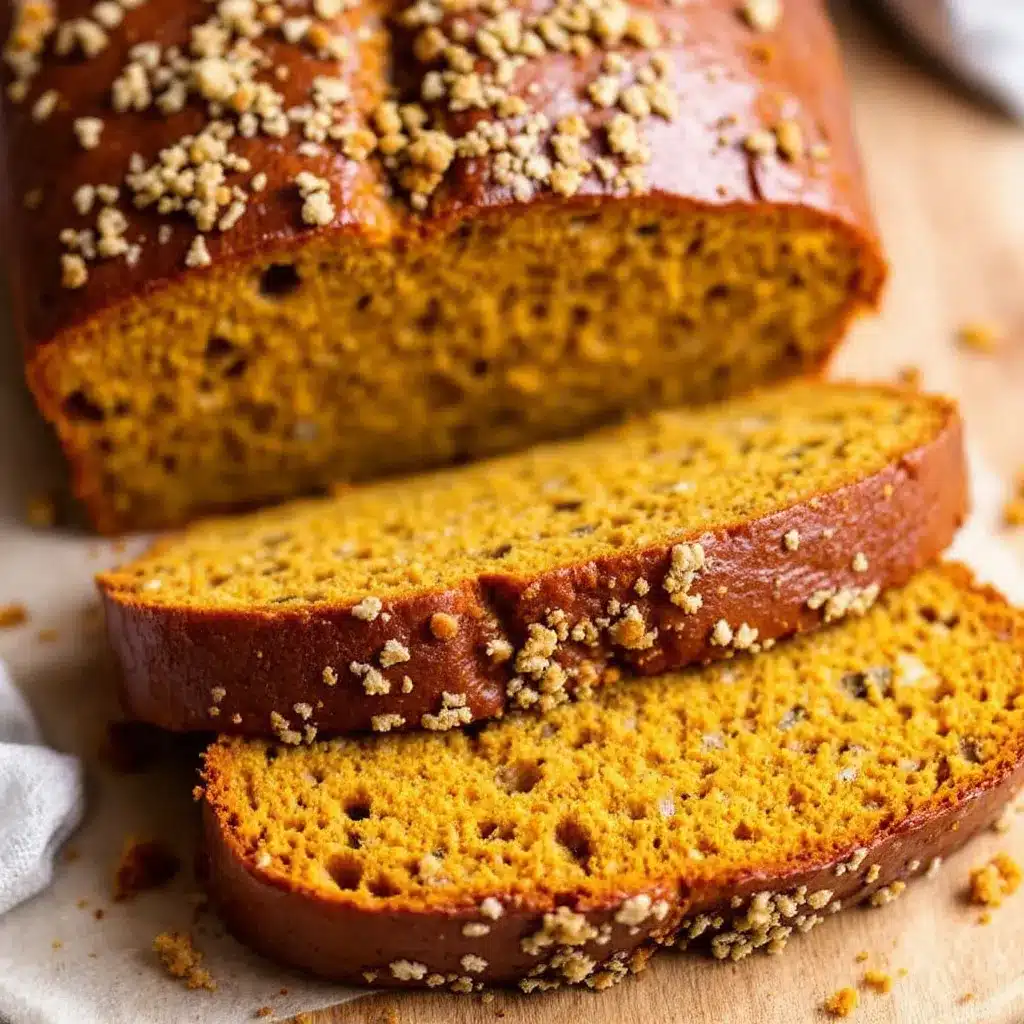
The problem was moisture. Pumpkin puree holds a shocking amount of water, and I was treating it like any other sourdough add-in, not accounting for how it would change the hydration ratio. Once I started adjusting my flour and reducing my water, everything clicked. The crumb opened up. The crust turned that deep amber color you dream about. And the flavor—honestly, the flavor is what keeps me making this loaf on repeat through every single fall season.
This pumpkin sourdough has a subtle sweetness from the pumpkin and a tender, pillowy crumb that still holds up to toasting. The sage butter isn’t optional either. It’s the savory counterpoint that makes the whole thing make sense. You spread it on a warm slice and the butter melts into every nook and cranny, and suddenly you’re standing in your kitchen eating your third piece without even realizing it.
I’ve made this loaf for Thanksgiving brunch, for quiet Sunday mornings with coffee, and for gifting to neighbors who looked at me funny when I said “pumpkin bread” but not the sweet kind. Every single time, it works.
Why You’ll Love This Recipe
This isn’t your typical pumpkin bread. It’s not cakey, it’s not overly sweet, and it definitely isn’t dry. Here’s why this one earns a permanent spot in your fall baking rotation:
- Real Sourdough Flavor: That tangy, complex sourdough backbone pairs beautifully with the earthy sweetness of pumpkin. It’s a flavor combination that feels both familiar and surprising.
- Perfectly Tender Crumb: The pumpkin adds enough moisture to create a soft, almost velvety interior without making the bread gummy or dense. It’s the texture you want for toast, sandwiches, or just eating straight off the cutting board.
- No Commercial Yeast Needed: If you’ve got a sourdough starter, you’re already halfway there. This recipe relies entirely on natural fermentation, which also means it’s easier to digest for some folks.
- The Sage Butter is a Game-Changer: Look, the bread is great on its own. But the sage butter? That’s what turns a good loaf into something you’ll text your friends about. The browned butter and crispy sage leaves add a nutty, herbaceous richness that you won’t forget.
- Great for Gifting: Wrap it up in some parchment paper with a little jar of the sage butter, and you’ve got a homemade gift that actually feels special. I’ve done this for holiday parties and received texts the next day asking for the recipe.
This loaf has become my go-to for fall entertaining because it’s impressive without being fussy. It looks like you spent hours, but the active work is maybe 20 minutes. The rest is just waiting for the dough to do its thing.
What Ingredients You Will Need
This ingredient list is short and simple, which is exactly how I like my baking. You probably already have most of these in your pantry.
For the Pumpkin Sourdough Bread
- 100g active sourdough starter (fed and bubbly, at its peak) — This is your leavening agent. Make sure it’s nice and active before you start. A sluggish starter will give you a dense loaf.
- 400g bread flour — I prefer King Arthur or Bob’s Red Mill for consistent results. Bread flour gives you that chewy, structured crumb that sourdough is known for.
- 100g whole wheat flour — Adds depth of flavor and a bit of nuttiness. You can substitute all-purpose if that’s what you have, but the whole wheat really rounds out the pumpkin flavor.
- 200g pumpkin puree — Not pumpkin pie filling. Make sure you grab 100% pure pumpkin puree. Libby’s is my go-to, but any brand works as long as there’s no added sugar or spices.
- 150g water (room temperature) — Start with this amount and adjust as needed. The pumpkin adds significant moisture, so you might need a little extra flour during the stretch and fold process.
- 10g salt — Fine sea salt is best. Don’t skip this—salt controls fermentation and strengthens the gluten structure.
- 1 tablespoon pumpkin pie spice — Or make your own blend: cinnamon, nutmeg, ginger, and a pinch of cloves. I’ve done both and honestly, the store-bought blend works perfectly here.
- 1 tablespoon brown sugar (optional) — This adds a subtle sweetness and helps with browning. If you prefer a more savory loaf, leave it out.
For the Sage Butter
- 4 tablespoons unsalted butter — European-style butter like Kerrygold works beautifully here because of its higher fat content, but any good unsalted butter will do.
- 8-10 fresh sage leaves — Fresh is non-negotiable for this. Dried sage just won’t give you the same aromatic, slightly peppery flavor that makes this butter so special.
- Flaky sea salt (for finishing) — Maldon or any flaky salt. That little crunch on top makes a difference.
Equipment Needed
You don’t need a professional bakery setup for this, but a few tools will make your life much easier.
- Dutch oven or baking cloche — This is the secret to that crackly, golden crust. The enclosed environment traps steam and mimics a professional bread oven. If you don’t have one, you can use a heavy baking sheet with a metal bowl inverted over the loaf, or a steam pan in the bottom of your oven.
- Digital kitchen scale — I cannot stress this enough. Baking by weight is more accurate than cups, especially with sourdough where hydration ratios matter. A $15 scale from Amazon works perfectly.
- Bench scraper — Great for folding the dough and dividing if you’re making multiple loaves. Also useful for cleaning flour off your counter.
- Banneton or proofing basket — These give the dough structure and allow air circulation during the final proof. A mixing bowl lined with a floured kitchen towel works in a pinch.
- Lame or sharp knife — For scoring the dough before baking. A sharp serrated knife or even a clean razor blade will do the job.
- Parchment paper — For easy transfer into the hot dutch oven. Trust me, you don’t want to be wrestling with sticky dough when the pot is 450 degrees.
- Small saucepan — For making the sage butter. Nothing fancy needed.
Preparation Method
This recipe follows a typical sourdough timeline, so plan ahead. The bulk fermentation takes about 4-6 hours at room temperature, followed by an overnight cold proof in the fridge.
Step 1: Mix the Dough (Morning or Early Afternoon)
In a large mixing bowl, combine your active sourdough starter, pumpkin puree, and water. Stir until the starter is mostly dissolved and the mixture looks like a thick, orange-tinted slurry. Add the bread flour, whole wheat flour, pumpkin pie spice, brown sugar (if using), and salt. Mix with your hands or a dough whisk until no dry bits of flour remain. The dough will be shaggy and sticky—that’s normal. Cover the bowl with a damp towel or plastic wrap and let it rest for 30 minutes. This is called the autolyse, and it gives the flour time to absorb the liquid and start developing gluten naturally.
Step 2: Stretch and Folds (First 2 Hours)
After the rest, perform a series of stretch and folds. Wet your hands slightly to prevent sticking. Grab one side of the dough, stretch it up as high as it will go without tearing, and fold it over the top. Rotate the bowl a quarter turn and repeat. Do this 4 times total (one full rotation). Cover and rest for 30 minutes. Repeat this process 3 more times, for a total of 4 sets of stretch and folds over 2 hours. You’ll notice the dough becoming smoother and more elastic with each set. By the end, it should feel strong and hold its shape briefly when stretched.
Step 3: Bulk Fermentation (2-4 More Hours)
After the stretch and folds, let the dough continue fermenting at room temperature. The time depends on your starter’s strength and your kitchen temperature. In a warm kitchen (75-78°F), it might take 3 hours. In a cooler kitchen (68-70°F), it could take 5-6 hours. The dough should look visibly puffy, have a few bubbles on the surface, and feel airy when you poke it. It should have increased in volume by about 50%. Don’t rush this step—underproofed dough leads to dense, gummy bread.
Step 4: Shape and Cold Proof (Overnight)
Lightly flour your work surface. Turn the dough out gently, trying not to deflate it too much. Shape it into a round or oval boule by folding the edges into the center and then flipping it seam-side down. Use a bench scraper to create tension on the surface by dragging the dough toward you in a circular motion. Place the shaped dough seam-side up into a floured banneton or lined bowl. Cover tightly with plastic wrap or a shower cap and refrigerate overnight (8-12 hours). This cold proof develops flavor and makes the dough easier to score.
Step 5: Bake (Next Morning)
Place your dutch oven in the oven and preheat to 475°F (245°C) for at least 30 minutes. When ready, remove the dough from the fridge. Turn it out onto a piece of parchment paper. Score the top with a sharp lame or knife—a simple slash down the center or a decorative pattern. Carefully place the parchment and dough into the hot dutch oven. Cover and bake for 25 minutes. Remove the lid and continue baking for another 20-25 minutes, until the crust is deep golden brown and the internal temperature reaches 200-205°F (93°C). Transfer to a wire rack and let cool completely before slicing—at least 2 hours. I know it’s hard to wait, but cutting too early will give you a gummy interior.
Step 6: Make the Sage Butter
While the bread is cooling, make the sage butter. Melt the butter in a small saucepan over medium heat. Add the sage leaves and cook, swirling occasionally, until the butter turns golden brown and smells nutty and the sage leaves become crispy, about 3-4 minutes. Be careful not to burn the butter—it can go from brown to burnt very quickly. Remove from heat and let cool slightly. Serve the warm bread with the sage butter drizzled over the top and a sprinkle of flaky sea salt.
Cooking Tips & Techniques
I learned most of these the hard way, so you don’t have to.
- Watch your hydration: Pumpkin puree varies in moisture content depending on the brand and even the can. Start with the recommended water amount and be prepared to add a tablespoon or two of extra flour during the stretch and folds if the dough feels excessively sticky or slack.
- Don’t skip the cold proof: That overnight rest in the fridge does more than just develop flavor. It firms up the dough, making it much easier to handle and score. A room-temperature dough is a sticky, frustrating mess to work with.
- Preheat your dutch oven thoroughly: A full 30-minute preheat ensures the pot is screaming hot, which gives you that immediate oven spring and crackly crust. Don’t rush this step.
- Use a thermometer for doneness: The crust color can be misleading, especially with the pumpkin adding natural sugars that brown quickly. The internal temperature is your most reliable indicator. 200-205°F is the sweet spot.
- Let it cool completely: I know, I know. But the steam inside the loaf is still doing work. Cutting too early releases that steam and leaves you with a gummy, dense crumb. Set a timer if you have to.
- Toast it for maximum enjoyment: This bread is fantastic fresh, but it truly shines when toasted. The crust gets extra crispy and the interior softens. Plus, the warm bread melts the sage butter perfectly.
Variations & Adaptations
This recipe is a great base for experimentation. Here are a few variations I’ve tried and loved.
- Add-ins: Fold in 1/2 cup of toasted pepitas (pumpkin seeds) or chopped pecans during the stretch and folds for extra crunch. I’ve also added dried cranberries for a sweet-tart pop, but keep it to about 1/4 cup so it doesn’t throw off the hydration.
- Spice it up: If you want a more savory loaf, skip the pumpkin pie spice and add 1 teaspoon of fresh rosemary, finely chopped, along with a pinch of black pepper. The rosemary pairs beautifully with the sage butter.
- Vegan version: Use a vegan butter for the sage butter—I’ve had good luck with Miyoko’s. The bread itself is already dairy-free and egg-free, so you’re most of the way there.
- Gluten-free adaptation: I haven’t personally tested this with gluten-free flour blends, but a friend of mine used a 1:1 gluten-free baking flour and added 1 teaspoon of xanthan gum. She said the texture was denser but still delicious. If you try it, let me know how it goes.
- Make it a sandwich loaf: Instead of shaping into a boule, shape the dough and place it into a greased 9×5 loaf pan for the final proof. Bake at 375°F for 35-40 minutes. The crust will be softer, but it makes excellent sandwich bread.
Serving & Storage Suggestions
This bread is incredibly versatile. Here’s how I like to serve and store it.
Serving
Serve the pumpkin sourdough warm or at room temperature. The sage butter is best drizzled over a freshly toasted slice, but it’s also delicious spread on untoasted bread. For a more substantial meal, use it for grilled cheese sandwiches with sharp cheddar and caramelized onions, or serve it alongside a bowl of roasted butternut squash soup. It also makes fantastic soft scrambled eggs for a cozy breakfast.
Storage
Store the cooled bread wrapped in a clean kitchen towel at room temperature for up to 3 days. The crust will soften slightly, but it will still toast beautifully. For longer storage, slice the bread and freeze it in a single layer on a baking sheet, then transfer the frozen slices to a zip-top bag. They’ll keep for up to 3 months. Toast directly from frozen—no need to thaw.
The sage butter can be stored in an airtight container in the refrigerator for up to a week. Reheat gently before serving, or spread it cold on warm toast and let it melt naturally.
Nutritional Information & Benefits
This recipe makes one loaf, which yields approximately 12 slices. The nutritional values are estimates and will vary based on specific ingredients and serving sizes.
- Per slice (with sage butter): Approximately 220 calories, 8g fat, 32g carbohydrates, 3g fiber, 6g protein
- Pumpkin is packed with vitamin A (from beta-carotene), which supports eye health and immune function. It’s also a good source of fiber and potassium.
- Whole wheat flour adds additional fiber and B vitamins compared to all-purpose flour.
- Sourdough fermentation can make the bread easier to digest for some people, as the fermentation process breaks down some of the gluten and phytic acid.
- Sage has anti-inflammatory properties and adds a punch of flavor with zero extra calories.
This bread is not low-carb or keto-friendly, but it’s a wholesome, homemade option that’s free from preservatives and artificial ingredients. It’s the kind of food that makes you feel good about what you’re eating.
Conclusion
This cozy pumpkin sourdough bread with sage butter has become my fall baking anchor. It’s the recipe I turn to when I want something that feels special but doesn’t require a trip to a specialty grocery store or hours of fussy technique. It’s forgiving enough for beginners—as long as you pay attention to hydration—and rewarding enough for experienced bakers looking for a seasonal twist on their standard loaf.
The best part? It makes your whole kitchen smell like autumn. The pumpkin, the spices, the nutty browned butter and sage—it’s basically aromatherapy you can eat.
If you make this loaf, I’d love to hear about it. Leave a comment below and let me know how it turned out, what variations you tried, or if you have any questions. And if you’re looking for more fall baking inspiration, don’t miss my no-bake pumpkin cheesecake or these soft sugar cookies with royal icing for your holiday cookie platter.
Happy baking, friends. And don’t forget the sage butter.
Frequently Asked Questions
Can I use canned pumpkin pie filling instead of pure pumpkin puree?
No, please don’t. Pumpkin pie filling has added sugar and spices that will throw off the flavor and the moisture content of the dough. Stick with 100% pure pumpkin puree for the best results.
My dough seems really sticky. Is that normal?
Yes, this is a relatively high-hydration dough, and the pumpkin adds even more moisture. The dough will be sticky during the initial mix and stretch and folds, but it should become more manageable as the gluten develops. If it’s excessively sticky after the first few folds, add a tablespoon of flour at a time until it feels more cohesive.
Can I skip the overnight cold proof?
You can, but I wouldn’t recommend it. The cold proof develops the sourdough flavor and makes the dough much easier to shape and score. If you’re short on time, you can do a 2-3 hour room temperature proof after shaping, but the flavor won’t be as complex and the dough will be harder to handle.
How do I know when the bread is fully baked?
Use a digital thermometer. The internal temperature should reach 200-205°F (93°C). The crust should be deep golden brown and sound hollow when tapped on the bottom. If you don’t have a thermometer, err on the side of baking a few extra minutes—it’s better to have a slightly darker crust than a gummy interior.
Can I make this recipe without a dutch oven?
Yes. Place a baking sheet or cast iron pan on the bottom rack of your oven while preheating. When you add the bread, pour about 1 cup of hot water into the pan to create steam. Bake for the first 20 minutes with the steam, then remove the water pan and continue baking until done. The crust won’t be quite as crackly, but it will still be delicious.
Pin This Recipe!

Cozy Pumpkin Sourdough Bread with Easy Sage Butter

A tender, pillowy pumpkin sourdough loaf with a subtle sweetness and a deep amber crust, paired with a nutty, herbaceous sage butter that makes every slice irresistible.
- Prep Time: 20 minutes
- Cook Time: 50 minutes
- Total Time: 14 hours (includes overnight cold proof and cooling)
- Yield: 12 servings 1x
- Category: Bread
- Cuisine: American
Ingredients
- 100g active sourdough starter (fed and bubbly, at its peak)
- 400g bread flour
- 100g whole wheat flour
- 200g pumpkin puree (100% pure, not pumpkin pie filling)
- 150g water (room temperature)
- 10g fine sea salt
- 1 tablespoon pumpkin pie spice
- 1 tablespoon brown sugar (optional)
- 4 tablespoons unsalted butter (European-style recommended)
- 8–10 fresh sage leaves
- Flaky sea salt (for finishing)
Instructions
- Mix the Dough: In a large mixing bowl, combine active sourdough starter, pumpkin puree, and water. Stir until the starter is mostly dissolved. Add bread flour, whole wheat flour, pumpkin pie spice, brown sugar (if using), and salt. Mix until no dry bits remain. Cover and let rest for 30 minutes (autolyse).
- Stretch and Folds: Wet your hands slightly. Grab one side of the dough, stretch it up, and fold it over the top. Rotate the bowl a quarter turn and repeat. Do 4 stretches (one full rotation). Cover and rest for 30 minutes. Repeat this process 3 more times (total of 4 sets over 2 hours).
- Bulk Fermentation: Let the dough ferment at room temperature for 2-4 hours (depending on kitchen temperature) until it looks puffy, has bubbles on the surface, and has increased in volume by about 50%.
- Shape and Cold Proof: Lightly flour your work surface. Turn the dough out gently and shape into a round or oval boule. Place seam-side up into a floured banneton or lined bowl. Cover tightly and refrigerate overnight (8-12 hours).
- Bake: Place a Dutch oven in the oven and preheat to 475°F (245°C) for at least 30 minutes. Remove dough from fridge, turn out onto parchment paper, and score the top. Carefully place parchment and dough into the hot Dutch oven. Cover and bake for 25 minutes. Remove lid and bake for another 20-25 minutes until deep golden brown and internal temperature reaches 200-205°F (93°C). Cool completely on a wire rack (at least 2 hours).
- Make Sage Butter: While bread cools, melt butter in a small saucepan over medium heat. Add sage leaves and cook, swirling occasionally, until butter turns golden brown and smells nutty and sage leaves are crispy (3-4 minutes). Remove from heat. Serve warm bread with sage butter drizzled over top and a sprinkle of flaky sea salt.
Notes
Watch hydration carefully—pumpkin puree varies in moisture. Start with recommended water and add extra flour if dough is excessively sticky. Don’t skip the cold proof; it develops flavor and makes dough easier to handle. Preheat Dutch oven thoroughly for best oven spring. Use a thermometer to check doneness (200-205°F). Let bread cool completely before slicing to avoid gummy texture. Toast for maximum enjoyment.
Nutrition
- Serving Size: 1 slice
- Calories: 220
- Sugar: 4
- Sodium: 280
- Fat: 8
- Saturated Fat: 4
- Carbohydrates: 32
- Fiber: 3
- Protein: 6
Keywords: pumpkin sourdough, sourdough bread, pumpkin bread, sage butter, fall baking, artisan bread, homemade bread, sourdough recipe