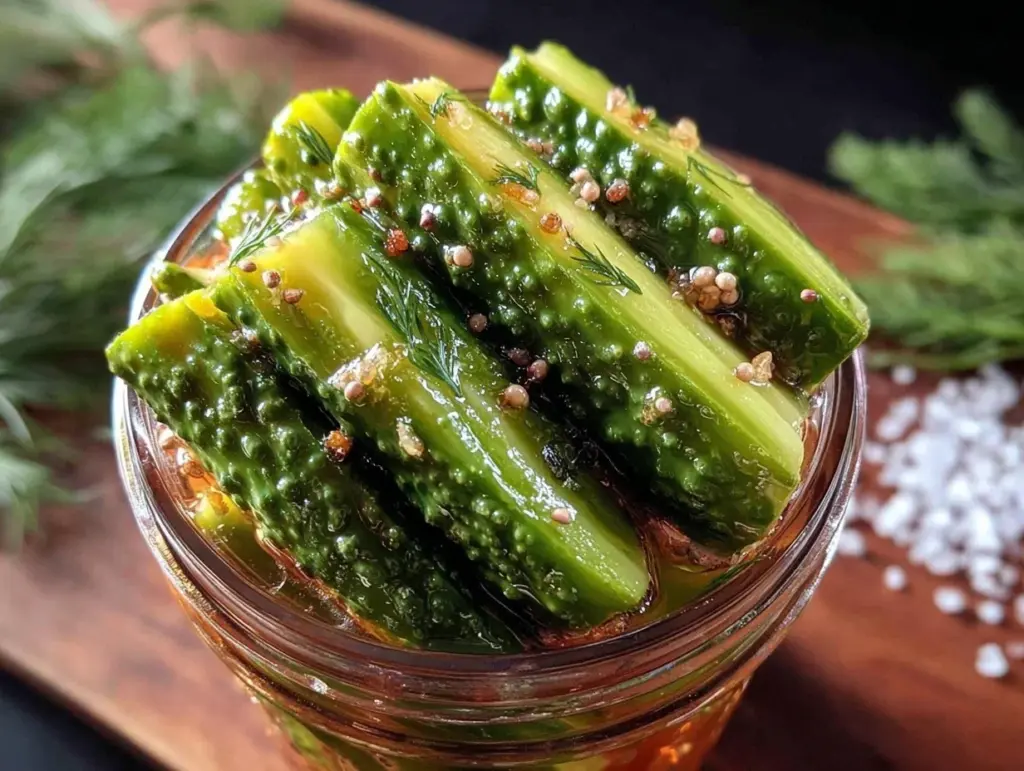
The crisp snap of a fresh dill pickle — that unmistakable sound that always seems to echo from my childhood kitchen — still lingers in my mind. It wasn’t the fancy store-bought jars that left a mark, but those quick refrigerator pickles my aunt used to toss together on lazy Sundays. You know, the kind where the scent of dill and garlic fills the air, and you can almost taste the tang before the jar even opens? That easy, crunchy pickle magic is exactly what this Crispy Easy Refrigerator Dill Pickles recipe captures — ready in just 24 hours, no lengthy canning involved.
I remember one late summer afternoon, the sun warm on the porch, and my aunt bustling around with a jar of freshly made pickles. She never followed a recipe, just eyeballed everything, trusting her gut. That’s the beauty here — this recipe feels like a small secret passed down, made better by a few precise tweaks I’ve found over time. It’s more than just pickles; it’s a quick way to bottle up that garden-fresh snap and tang without the wait.
Honestly, making pickles this way feels like a quiet celebration of simple flavors and patience — no rush, just a day to let the cucumbers soak up all that dill goodness. Whether you’re a pickle fanatic or someone who’s always wanted to try homemade pickling, this recipe offers that satisfying crunch and punch of flavor that’s hard to find in store-bought jars. So if you’ve ever wondered how to get crisp, tangy dill pickles without fuss or fancy equipment, this is the one you’ll want to keep close.
Why You’ll Love This Recipe
From my experiences tinkering with different pickling methods, this Crispy Easy Refrigerator Dill Pickles recipe stands out because it hits that perfect balance of crunch, flavor, and convenience. You don’t need to be a pro or have special tools, and the results are consistently satisfying. Here’s why this recipe has become my go-to:
- Quick & Easy: Ready in just 24 hours, perfect for spontaneous pickle cravings or last-minute side dishes.
- Simple Ingredients: Most of these are pantry staples or easy to find — no hunting for obscure spices or specialty vinegars.
- Perfect for Snacking & Meals: Whether you’re layering sandwiches, serving alongside crispy loaded potato skins, or just nibbling straight from the jar, they fit right in.
- Crowd-Pleaser: I’ve shared these at potlucks and family dinners, and they always disappear fastest.
- Unbelievably Delicious: The dill, garlic, and just-right saltiness combine for a flavor that’s refreshingly bold yet familiar.
What makes these pickles different? It’s the little details — like soaking the cucumbers in ice water beforehand to lock in crunch, and a balanced brine ratio that avoids overpowering sourness. I also love how this recipe uses fresh dill and a hint of garlic powder for that authentic deli-style bite without the fuss of peeling cloves. Honestly, after trying a few variations, this one feels like the perfect marriage of tradition and simplicity.
Plus, it’s a recipe that fits into your life, not the other way around. You don’t have to plan weeks ahead or fiddle with boiling water baths. It’s just a jar, some fresh cucumbers, and a day to wait — and that’s it. That’s why it’s stuck with me all these years.
What Ingredients You Will Need
This recipe keeps things straightforward with simple, wholesome ingredients that come together to deliver that classic dill pickle snap and tang. Most are pantry staples or fresh items you can find year-round, making it a breeze to whip up any time. Here’s what you’ll need:
- Fresh Cucumbers: About 2 pounds (900g) of firm pickling cucumbers, preferably small to medium-sized for best crunch. I like to use Kirby cucumbers when I can find them — their texture is spot-on.
- Fresh Dill: 4-6 sprigs, whole with stems if possible. This is the star herb here, lending that unmistakable aroma and flavor.
- Garlic Cloves: 3-4, peeled and lightly crushed. Fresh garlic adds a bright punch to the brine.
- White Vinegar: 1 cup (240ml), the acid that preserves and flavors. A 5% acidity vinegar works best.
- Water: 1 cup (240ml), to balance the vinegar and keep the pickles from being too harsh.
- Pickling Salt or Kosher Salt: 2 tablespoons, essential for crispness and flavor without additives found in table salt.
- Granulated Sugar: 1 teaspoon, just a touch to round out the brine’s sharpness.
- Black Peppercorns: 1 teaspoon, whole for subtle spice.
- Red Pepper Flakes: Optional, 1/4 teaspoon if you want a little heat.
Pro tip: If you can’t find fresh dill, dried dill weed works, but fresh really makes a huge difference in aroma and crispness. You can also swap the white vinegar for apple cider vinegar if you like a slightly fruitier tang. For a dairy-free or vegan twist, this recipe is naturally compliant since it contains no animal products.
Equipment Needed
Luckily, this recipe requires only basic kitchen equipment, which means you don’t need fancy gadgets to get started. Here’s what I use and recommend:
- Large Mason Jar or Glass Jar: At least 1 quart (1 liter) capacity with a tight-fitting lid. Glass is best to avoid any metallic flavors and to watch the pickles as they develop.
- Mixing Bowl: For preparing the brine and soaking cucumbers.
- Measuring Cups and Spoons: Accuracy matters for the brine balance.
- Knife and Cutting Board: For slicing cucumbers if you prefer chips or spears.
- Small Saucepan: To warm the brine ingredients before combining (optional but helps dissolve salt and sugar faster).
If you don’t have a large mason jar, any clean, non-reactive container with a lid works fine — even a food-grade plastic container. I’ve found that a good, tight seal helps the pickles stay crisp and fresh longer. Also, keep your knife sharp for clean cuts — rough edges can lead to mushier pickles.
Preparation Method
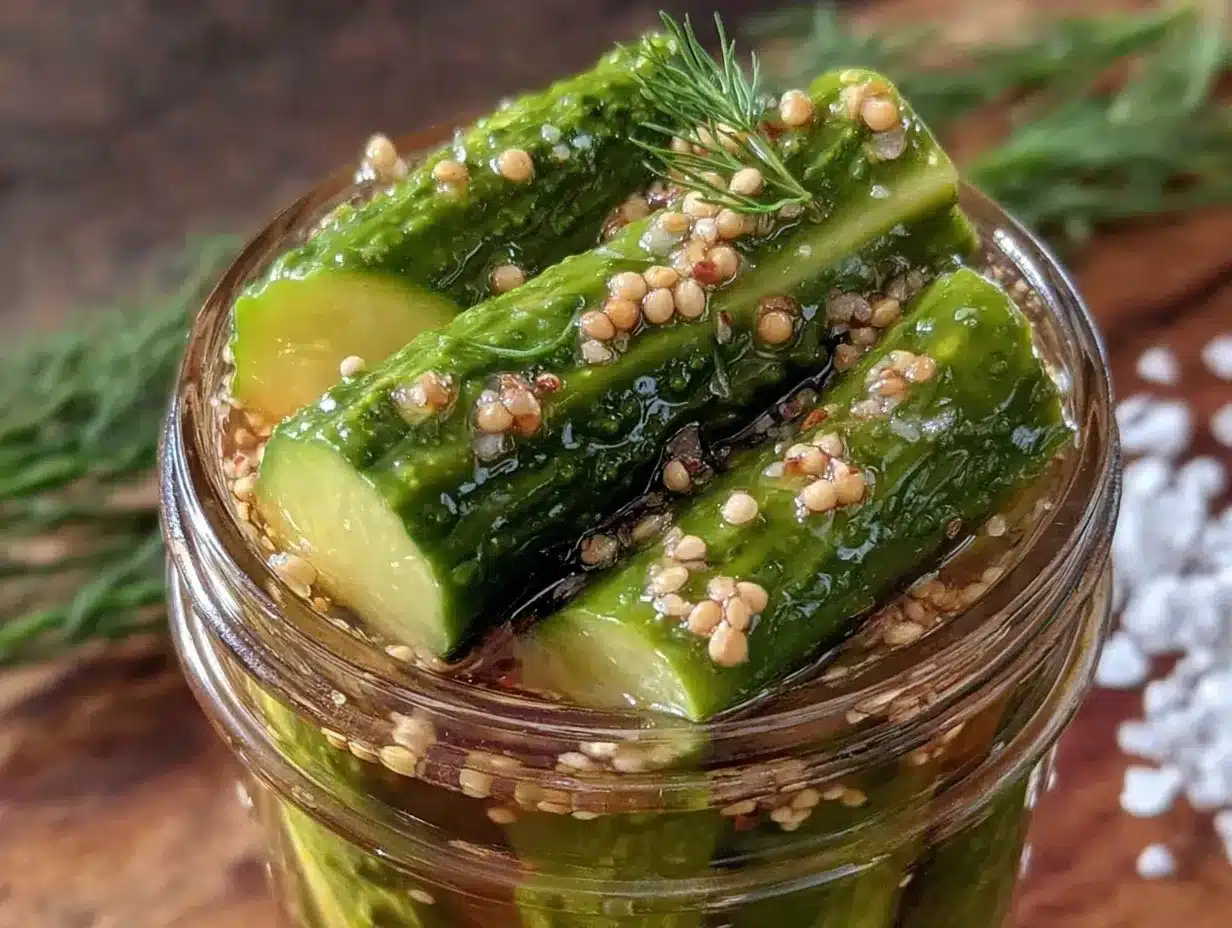
- Prep the Cucumbers (10 minutes): Start by washing the cucumbers thoroughly. Trim off the blossom ends (about 1/4 inch) to prevent softening. If you prefer spears, cut cucumbers lengthwise into quarters; for chips, slice crosswise about 1/4-inch thick. For the crispiest results, soak the cut cucumbers in a large bowl of ice water for 1 hour. This step is key — it firms up the cucumbers and keeps that snap intact.
- Make the Brine (5-7 minutes): While the cucumbers soak, combine the white vinegar, water, pickling salt, and sugar in a small saucepan. Warm over low heat, stirring until salt and sugar dissolve completely. Remove from heat and let cool slightly. This warm brine helps the flavors marry faster once poured over the cucumbers.
- Pack the Jar (5 minutes): Drain cucumbers from the ice water and pat dry with a clean towel. Layer them tightly into your mason jar, alternating with sprigs of fresh dill, crushed garlic cloves, and peppercorns. If you want a spicy kick, sprinkle in the red pepper flakes.
- Add the Brine (2 minutes): Pour the warm brine over the cucumbers in the jar, making sure everything is submerged. Leave about 1/2 inch of headspace at the top. You can use a clean utensil to press down the cucumbers gently.
- Seal and Refrigerate (24 hours+): Screw on the lid tightly and place the jar in the refrigerator. Let the pickles rest for at least 24 hours before tasting. The flavors will deepen the longer they sit, but that first day is when the crisp, fresh dill magic really starts.
Tip: If after 24 hours the pickles aren’t tangy enough, give them another day or two. They keep well for up to 2 weeks refrigerated — just remember to keep them submerged in brine to avoid spoilage. Also, if you notice any cloudiness, that’s normal and harmless, but always check for off smells or mold before eating.
Cooking Tips & Techniques
Working with refrigerator pickles can seem straightforward, but a few insider tips make all the difference:
- Choosing Cucumbers: Pick firm, unwilted cucumbers with no soft spots. I once made the mistake of using garden cukes that were a bit too ripe, and the pickles turned mushy fast. Small to medium Kirby cucumbers are ideal for that classic crunch.
- Ice Water Soak: Don’t skip soaking the cucumbers in ice water before pickling. This trick really helps lock in moisture and snap. If you’re short on time, even 30 minutes helps.
- Salt Matters: Use pickling or kosher salt — table salt often contains additives that cloud the brine or affect flavor. I keep a dedicated jar of pickling salt in my pantry just for recipes like this.
- Brine Temperature: Warm the brine just enough to dissolve salt and sugar but avoid boiling — this keeps the delicate flavors intact and prevents the cucumbers from cooking prematurely.
- Submerging the Pickles: Make sure your cucumbers are fully covered by brine. If they float, use a small clean weight or folded piece of parchment paper inside the jar to keep them submerged.
One lesson I learned the hard way: don’t rush eating these pickles straight out of the jar. Giving them that 24-hour rest in the fridge turns the flavor from bland vinegar to a bright, herbaceous delight. And if you’re craving a crunchy snack but want something a bit more substantial, these pickles pair wonderfully with a plate of soft scrambled eggs or even a stack of egg muffins.
Variations & Adaptations
This recipe is pretty flexible, and I love experimenting with tweaks based on season, taste, or dietary needs. Here are some ways to make it your own:
- Spicy Dill Pickles: Add 1-2 crushed garlic cloves plus more red pepper flakes or a few slices of fresh jalapeño for a fiery kick.
- Garlic Lovers’ Pickles: Double the garlic cloves and add a pinch of garlic powder for an extra punch that’s a total crowd-pleaser.
- Low-Sodium Version: Reduce salt to 1 tablespoon and increase soak time in ice water to 2 hours. The flavor will be milder but still satisfying.
- Herb Variations: Swap fresh dill for fresh tarragon or add a few sprigs of fresh thyme for a unique herbal twist. I once tried this with rosemary and loved the piney aroma.
- Different Cuts: Instead of spears or chips, try slicing cucumbers into thick rounds or even quarters lengthwise for a different texture experience.
If you want to try a quick pickle style similar in convenience but with a sweeter profile, you might enjoy the technique behind sugar cookies with royal icing—just kidding, but for savory quick pickles, this recipe nails it every time.
Serving & Storage Suggestions
These refrigerator dill pickles are best served chilled straight from the jar. They make a fantastic tangy snack on their own or a crunchy contrast to richer dishes. Here are some ideas:
- Slice them up as a crisp topping for burgers, sandwiches, or deli meats — they add that perfect bite of acid and crunch.
- Serve alongside game day favorites like crispy loaded potato skins or creamy dips to cut through richness.
- Chop finely and mix into potato salads or egg salads for an extra pop of flavor.
- Pair with soft cheeses or charcuterie boards for a refreshing palate cleanser.
For storage, keep the pickles sealed in the refrigerator. They’ll stay fresh and crunchy for up to two weeks. Over time, the flavors develop more depth, but the texture might soften slightly after about 10 days. If you notice any discoloration or off smells, it’s best to discard. When reheating dishes that include these pickles, add them fresh as a topping rather than cooking them to maintain their crispness.
Nutritional Information & Benefits
These homemade refrigerator dill pickles are low in calories — about 5-10 calories per pickle spear — and naturally fat-free. They’re a good source of antioxidants from fresh dill and garlic, which have been linked to anti-inflammatory benefits. The vinegar in the brine may help support digestion and blood sugar control when consumed in moderation.
Since the recipe uses simple, clean ingredients, it’s naturally gluten-free, dairy-free, and suitable for vegan diets. Just watch the salt quantity if you’re on a low-sodium regimen. Personally, I appreciate how this recipe lets me enjoy a crunchy snack without additives or preservatives found in store-bought pickles, making it a wholesome choice for my snacking habits.
Conclusion
This Crispy Easy Refrigerator Dill Pickles recipe is genuinely a keeper for anyone craving fresh, crunchy pickles without the fuss of traditional canning. It’s simple, quick, and yields that satisfying snap and tang that makes homemade pickles so special. I love how it fits effortlessly into busy weeks yet still delivers that homemade charm and flavor.
Feel free to tweak the herbs, spice levels, or cuts to make it truly yours — that’s the fun of refrigerator pickling. And if you’re ever looking for a fresh, tangy side to brighten up your meals, this recipe will be waiting in your fridge, ready to impress without stress.
Let me know how your pickles turn out or if you have your own secret ingredients to add. Sharing these little kitchen wins always makes cooking more joyful — and I’m here for it.
FAQs About Crispy Easy Refrigerator Dill Pickles
How long do refrigerator dill pickles last in the fridge?
They typically last up to 2 weeks when kept submerged in brine and refrigerated. After that, they may soften or develop off flavors.
Can I use regular cucumbers instead of pickling cucumbers?
You can, but pickling cucumbers like Kirby cucumbers stay crisper. Regular slicing cucumbers have more water and may result in softer pickles.
Why did my pickles turn out mushy?
Mushy pickles often result from skipping the ice water soak, using overripe cucumbers, or not using the right salt. Make sure to soak cucumbers in ice water before pickling and use pickling or kosher salt.
Can I make these pickles without garlic?
Yes, you can omit garlic for a milder flavor. The pickles will still be crisp and tangy, just less pungent.
Is it necessary to warm the brine?
Warming the brine helps dissolve the salt and sugar faster and blends flavors better, but you can pour it cold if you’re in a hurry — just stir well to dissolve ingredients.
Pin This Recipe!
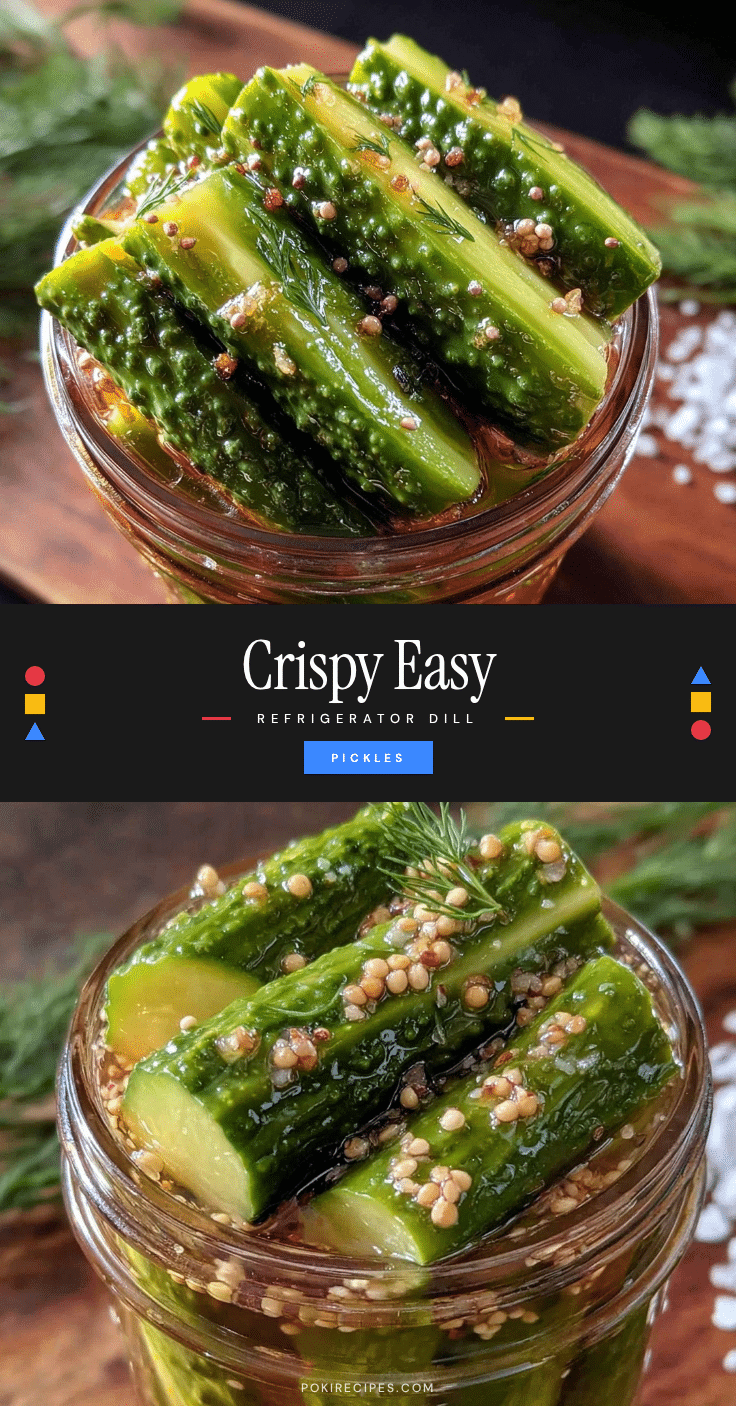
Crispy Easy Refrigerator Dill Pickles Recipe Ready in 24 Hours
This recipe captures the perfect balance of crunch, flavor, and convenience for quick refrigerator dill pickles, ready in just 24 hours without lengthy canning.
- Prep Time: 15 minutes
- Cook Time: 7 minutes
- Total Time: 24 hours 22 minutes
- Yield: 4 servings 1x
- Category: Side Dish
- Cuisine: American
Ingredients
- 2 pounds firm pickling cucumbers (preferably small to medium-sized, such as Kirby cucumbers)
- 4–6 sprigs fresh dill, whole with stems if possible
- 3–4 garlic cloves, peeled and lightly crushed
- 1 cup (240 ml) white vinegar (5% acidity)
- 1 cup (240 ml) water
- 2 tablespoons pickling salt or kosher salt
- 1 teaspoon granulated sugar
- 1 teaspoon whole black peppercorns
- 1/4 teaspoon red pepper flakes (optional)
Instructions
- Prep the Cucumbers (10 minutes): Wash cucumbers thoroughly. Trim off the blossom ends (about 1/4 inch). Cut cucumbers into spears (lengthwise quarters) or chips (1/4-inch thick slices). Soak cut cucumbers in a large bowl of ice water for 1 hour to lock in crunch.
- Make the Brine (5-7 minutes): Combine white vinegar, water, pickling salt, and sugar in a small saucepan. Warm over low heat, stirring until salt and sugar dissolve. Remove from heat and let cool slightly.
- Pack the Jar (5 minutes): Drain cucumbers from ice water and pat dry. Layer cucumbers tightly into a 1-quart mason jar, alternating with sprigs of fresh dill, crushed garlic cloves, and peppercorns. Add red pepper flakes if desired.
- Add the Brine (2 minutes): Pour warm brine over cucumbers in the jar, ensuring they are fully submerged. Leave about 1/2 inch headspace. Press down cucumbers gently with a clean utensil.
- Seal and Refrigerate (24 hours+): Screw on the lid tightly and refrigerate. Let pickles rest for at least 24 hours before tasting. Flavors deepen with time; keep submerged in brine and consume within 2 weeks.
Notes
Soaking cucumbers in ice water before pickling is key to maintaining crispness. Use pickling or kosher salt to avoid additives that cloud the brine. Warm the brine just enough to dissolve salt and sugar but avoid boiling. Keep cucumbers fully submerged in brine to prevent spoilage. Pickles keep well refrigerated for up to 2 weeks. If pickles are not tangy enough after 24 hours, let them rest longer.
Nutrition
- Serving Size: Approximately 1/2 cu
- Calories: 10
- Sugar: 1
- Sodium: 800
- Carbohydrates: 2
- Fiber: 0.5
Keywords: refrigerator pickles, dill pickles, quick pickles, easy pickles, homemade pickles, crunchy pickles, no canning pickles