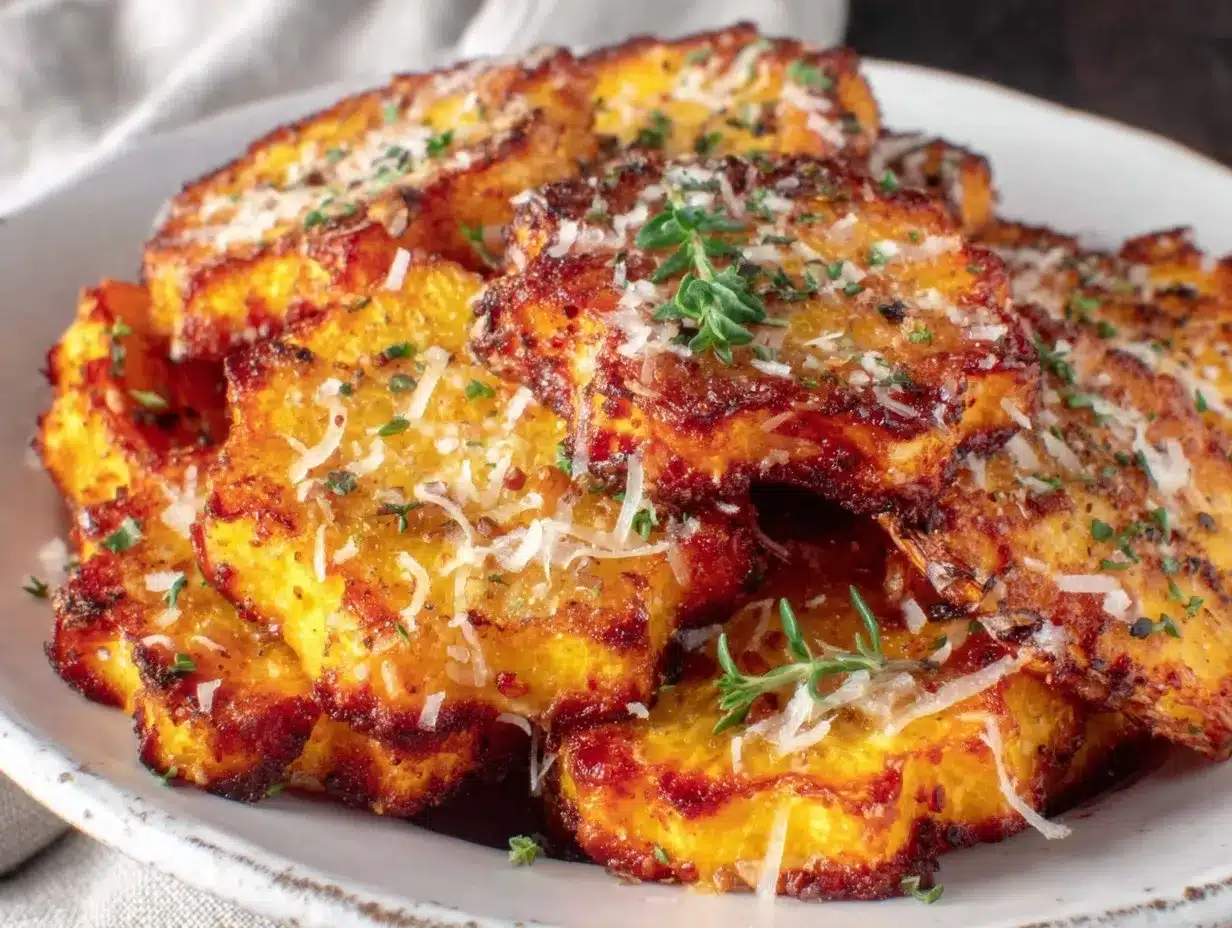
For a while, I just accepted that roasted yellow squash recipes wouldn’t actually deliver that satisfying crispiness I craved. It’s one of those vegetables that often ends up limp or soggy after roasting, no matter how much I experimented. I wasn’t in any rush, though—it was more of a gentle, persistent itch to find a way to make the squash sing, you know? One afternoon, while prepping dinner and juggling a busy kitchen, I decided to throw a little Parmesan and garlic into the mix, thinking, well, it can’t hurt. The smell that filled the kitchen was nothing short of quiet magic—nutty Parmesan browning at the edges, garlic teasing the senses just right, and that golden roasted squash texture I’d been chasing.
What caught me off guard was how the simple addition of Parmesan and a quick broil transformed something I often overlooked into a dish I wanted to savor. The edges crisped up in a way that made you want to crunch, but the inside stayed tender and flavorful. It wasn’t flashy or complicated, just straightforward ingredients working together, and it stuck with me because it felt like one of those recipes you come back to when you want something easy but a bit special.
Honestly, this recipe feels like a quiet promise to myself—sometimes the best dishes come from paying attention to small details, like the right sprinkle of cheese or the perfect roast time. It’s not about reinventing the wheel, but about giving yellow squash a chance to shine in a way that feels honest and satisfying.
Why You’ll Love This Crispy Parmesan Roasted Yellow Squash with Garlic Recipe
This recipe has become a staple in my kitchen for plenty of reasons. I’ve tested it multiple times—tweaking the garlic amount, the Parmesan ratio, and roasting times—until it hit that sweet spot of crispy, tender, and flavorful. It’s the kind of side dish that makes you pause and appreciate the simple things on your plate.
- Quick & Easy: Ready in under 30 minutes, making it perfect for busy weeknights or last-minute dinners.
- Simple Ingredients: Uses basics you likely have on hand—yellow squash, Parmesan, olive oil, and garlic—no fancy shopping trips needed.
- Perfect for Any Occasion: Whether you’re hosting a casual dinner or need a quick veggie fix, this recipe fits right in.
- Crowd-Pleaser: Even the picky eaters in my family give it thumbs up, which honestly surprised me at first!
- Unbelievably Delicious: The combo of crispy edges with that garlicky, cheesy punch makes it feel like comfort food without the heaviness.
What makes this recipe different from other roasted squash dishes is the balanced seasoning and the technique of adding Parmesan at just the right moment so it crisps up instead of melting into a gooey mess. The garlic isn’t overpowering—it’s more like a background whisper that enhances every bite. This isn’t just another side dish; it’s the one that makes you want to grab seconds without feeling guilty.
What Ingredients You Will Need
This recipe relies on simple, wholesome ingredients to create bold flavor and that desirable crispy texture without fuss. Most are pantry staples, and you can easily swap or adjust depending on what you have.
- Yellow squash: About 3 medium-sized, sliced into half-moons (fresh and firm squash gives the best texture)
- Parmesan cheese: ½ cup freshly grated (I prefer Parmigiano-Reggiano for its sharp, nutty flavor)
- Garlic: 3 cloves, minced (fresh garlic is key—powder won’t deliver the same punch)
- Olive oil: 2 tablespoons (extra virgin for flavor, but light olive oil works too)
- Salt: ½ teaspoon (adjust to taste; kosher salt is my go-to for even seasoning)
- Black pepper: ¼ teaspoon freshly ground
- Optional herbs: A sprinkle of dried thyme or Italian seasoning can add a nice touch
If you want a gluten-free version, this recipe fits perfectly as is. For a dairy-free adaptation, swap Parmesan for a vegan cheese alternative that crisps well or nutritional yeast for a cheesy flavor boost. Just keep in mind that the crispiness might differ slightly.
Equipment Needed
You don’t need fancy gadgets for this one, which is part of why it’s so approachable.
- Baking sheet: A rimmed sheet works best to catch any drips and allows even roasting.
- Parchment paper or silicone baking mat: Optional, but helps prevent sticking and makes cleanup easier.
- Mixing bowl: For tossing squash with oil, garlic, and seasonings.
- Microplane or fine grater: For grating fresh Parmesan cheese (makes a big difference in texture).
- Spatula or tongs: To toss or flip the squash halfway through roasting.
Personally, I’ve tried roasting this on a wire rack set over a baking sheet, which helps air circulate and crisp up the squash even more, but it’s not necessary. If you don’t have a microplane, a box grater’s fine, just grate the cheese carefully to avoid large chunks.
Preparation Method
- Preheat your oven to 425°F (220°C). This high heat is crucial for getting that crispy edge without overcooking the squash inside. Allow your oven to fully reach temperature before putting the squash in.
- Prepare the squash: Wash and dry your yellow squash thoroughly. Slice off the ends, then cut into half-moon shapes about ¼ inch (6 mm) thick. Thinner slices crisp better but watch the roasting time closely to avoid burning.
- Mix the seasoning: In a large bowl, toss the squash slices with olive oil, minced garlic, salt, and pepper until evenly coated. The oil helps the cheese stick and creates that golden crust.
- Arrange on baking sheet: Lay out the squash in a single layer on your parchment-lined baking sheet. Avoid overcrowding—this lets hot air circulate so they roast instead of steam.
- Roast for 15 minutes: Place the tray in the oven and roast. At around the 10-minute mark, use tongs or a spatula to flip the slices gently for even browning.
- Add Parmesan: After 15 minutes, sprinkle the grated Parmesan evenly over the squash slices. Return to the oven for another 5-7 minutes, watching as the cheese melts and crisps around the edges.
- Finish under broiler (optional): If you want extra crunch, switch the oven to broil for 1-2 minutes—just keep a close eye to prevent burning. You’ll notice a rich golden-brown color and a deliciously crisp texture.
- Rest and serve: Remove from the oven and let the squash rest a couple minutes before serving. This helps the cheese set slightly and the flavors meld.
Pro tip: If your garlic browns too fast or sticks to the pan, try tossing it with the oil first to help it cook evenly. Also, thicker squash slices may need a few extra minutes, but watch closely so they don’t get soggy.
Cooking Tips & Techniques
Getting that perfect balance of crispy and tender takes a bit of practice, but a few tricks go a long way.
- High heat is your friend: Roasting at 425°F (220°C) encourages caramelization. Lower temps just won’t give you that satisfying crunch.
- Don’t overcrowd the pan: Give squash slices room to breathe. Overlapping causes steaming, which kills crispiness.
- Fresh garlic vs. garlic powder: I’ve tried both. Fresh minced garlic delivers vibrant flavor and a slight bite, while powder can be dull and doesn’t brown well.
- Parmesan timing: Adding cheese too early can cause it to melt into the squash and get soggy. Sprinkling later ensures a crisp cheese crust.
- Broil with caution: The broiler can quickly turn crispy to burnt. Stay close and use short bursts.
- Batch roasting: If making large quantities, roast in batches for consistent crispiness.
Once, I left the cheese on from the start and ended up with a greasy mess—lesson learned! And flipping the squash halfway helps both sides get that golden touch. It’s a simple step but really makes a difference.
Variations & Adaptations
This recipe is forgiving and easy to tweak to suit different tastes or dietary needs.
- Spicy kick: Add a pinch of red pepper flakes or smoked paprika to the oil and garlic mix for a subtle heat that pairs beautifully with the Parmesan.
- Herb mix-up: Fresh herbs like chopped rosemary or basil tossed in after roasting add a fresh layer of flavor. I especially like thyme for an earthy note.
- Different cheese: Swap Parmesan for Pecorino Romano for a saltier, sharper edge or use Asiago for a milder flavor. For dairy-free, nutritional yeast can mimic cheesiness.
- Other squash types: Yellow squash works best here, but zucchini or pattypan squash can substitute well—just adjust roasting times slightly if thicker.
- Cooking methods: Tried air-frying this recipe with great results—same crispiness but faster cooking. Just watch the timing closely.
One time, I combined this with garlic hasselback potatoes for a dinner that felt fancy but took under an hour total. It’s fun to mix and match crispy veggies!
Serving & Storage Suggestions
This dish is best served warm, straight from the oven when the edges still have that crunch and the garlic aroma is fresh. I like to plate it alongside roasted meats or as a side to simple grain bowls.
For a light lunch, pair it with a dollop of Greek yogurt or a squeeze of fresh lemon to cut through the richness. It also makes a delicious topping for pesto pasta, adding texture and flavor contrast.
Leftovers keep well in an airtight container in the refrigerator for up to 3 days. To reheat, pop them in a toaster oven or under the broiler for a few minutes to bring back the crispness—microwaving tends to soften the edges, which is unfortunate but true.
Flavors mellow a bit after a day, making it a nice addition to cold salads or as a snack with a bit of hummus.
Nutritional Information & Benefits
Each serving (about 1 cup or 150g) of this crispy Parmesan roasted yellow squash contains approximately:
| Calories | 120 |
|---|---|
| Fat | 7g |
| Protein | 6g |
| Carbohydrates | 8g |
| Fiber | 2g |
The yellow squash brings vitamin C and antioxidants, while Parmesan adds protein and calcium. Olive oil’s healthy fats support heart health. This recipe is naturally gluten-free and low in carbs, making it a flexible side for many dietary needs.
From a wellness point of view, I appreciate how this dish balances nutrition with satisfying texture and flavor—making it easier to include veggies in meals without feeling like a chore.
Conclusion
All said, this crispy Parmesan roasted yellow squash with garlic recipe isn’t about flashy cooking tricks. It’s about taking simple ingredients and treating them with a little care so they turn into something worth savoring. It’s the kind of recipe I keep coming back to because it fits into busy nights and special dinners alike.
Feel free to tweak the garlic, cheese, or seasoning to match your own tastes—you might find your own favorite version too. Personally, it’s a quiet dinner staple that makes me feel like I’m eating something both comforting and a bit thoughtful.
Let me know how yours turns out or if you’ve tried any variations. Sharing these simple joys of cooking is what keeps me inspired in the kitchen.
Frequently Asked Questions About Crispy Parmesan Roasted Yellow Squash with Garlic
How do I get the squash crispy without it becoming soggy?
Make sure to slice the squash thin (about ¼ inch), toss it with enough oil, and roast at a high temperature (425°F/220°C) without overcrowding the pan to avoid steaming.
Can I prepare this recipe ahead of time?
You can prep the squash and seasoning mix in advance, but it’s best to add Parmesan and roast just before serving for maximum crispiness.
What if I don’t have Parmesan cheese?
Grated Pecorino Romano or Asiago can be good substitutes. For a dairy-free option, use nutritional yeast but expect a slightly different texture.
Can I use zucchini instead of yellow squash?
Absolutely! Zucchini is a great alternative—just keep an eye on the roasting time since zucchini can be a bit more watery.
Is this recipe suitable for meal prep?
Yes! It stores well in the fridge and reheats nicely in a toaster oven or broiler to bring back the crisp edges. It’s a tasty addition to meal prep lunches or dinners.
Pin This Recipe!
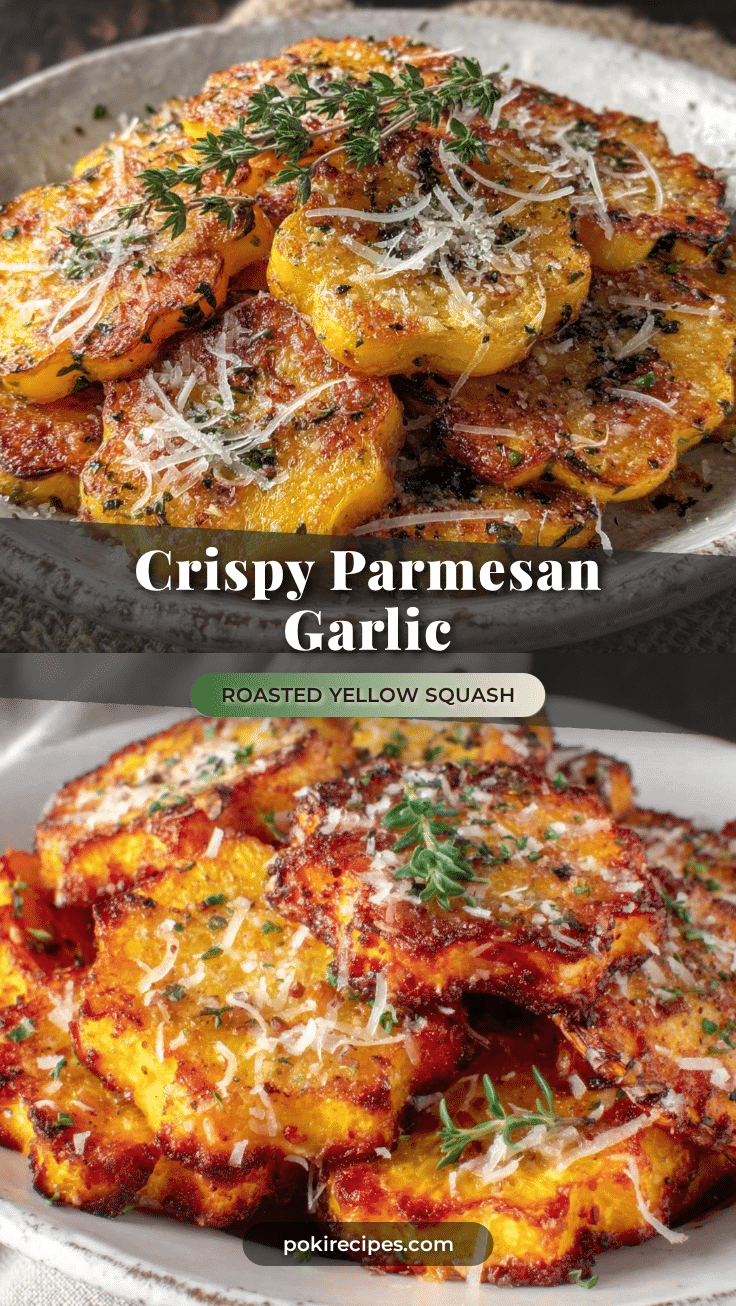
Crispy Parmesan Roasted Yellow Squash with Garlic

A simple and easy recipe that delivers crispy, tender roasted yellow squash with a flavorful Parmesan and garlic crust. Perfect as a quick side dish for any occasion.
- Prep Time: 10 minutes
- Cook Time: 22 minutes
- Total Time: 32 minutes
- Yield: 4 servings 1x
- Category: Side Dish
- Cuisine: American
Ingredients
- 3 medium yellow squash, sliced into ¼ inch half-moons
- ½ cup freshly grated Parmesan cheese
- 3 cloves garlic, minced
- 2 tablespoons olive oil
- ½ teaspoon salt
- ¼ teaspoon freshly ground black pepper
- Optional: sprinkle of dried thyme or Italian seasoning
Instructions
- Preheat your oven to 425°F (220°C).
- Wash and dry the yellow squash. Slice off the ends and cut into ¼ inch thick half-moons.
- In a large bowl, toss the squash slices with olive oil, minced garlic, salt, and pepper until evenly coated.
- Arrange the squash in a single layer on a parchment-lined baking sheet, avoiding overcrowding.
- Roast for 15 minutes, flipping the slices gently at the 10-minute mark for even browning.
- Sprinkle the grated Parmesan evenly over the squash slices and return to the oven for another 5-7 minutes until the cheese melts and crisps.
- Optional: Broil for 1-2 minutes for extra crunch, watching closely to prevent burning.
- Remove from oven and let rest for a couple of minutes before serving.
Notes
Use fresh garlic for best flavor; toss garlic with oil first to prevent burning. Avoid overcrowding the pan to keep squash crispy. Adding Parmesan late ensures a crisp cheese crust. Broil carefully for extra crunch. Thicker slices may need extra roasting time.
Nutrition
- Serving Size: About 1 cup (150g)
- Calories: 120
- Fat: 7
- Carbohydrates: 8
- Fiber: 2
- Protein: 6
Keywords: yellow squash, roasted squash, Parmesan squash, crispy squash, garlic squash, easy side dish, gluten-free, vegetarian