Introduction
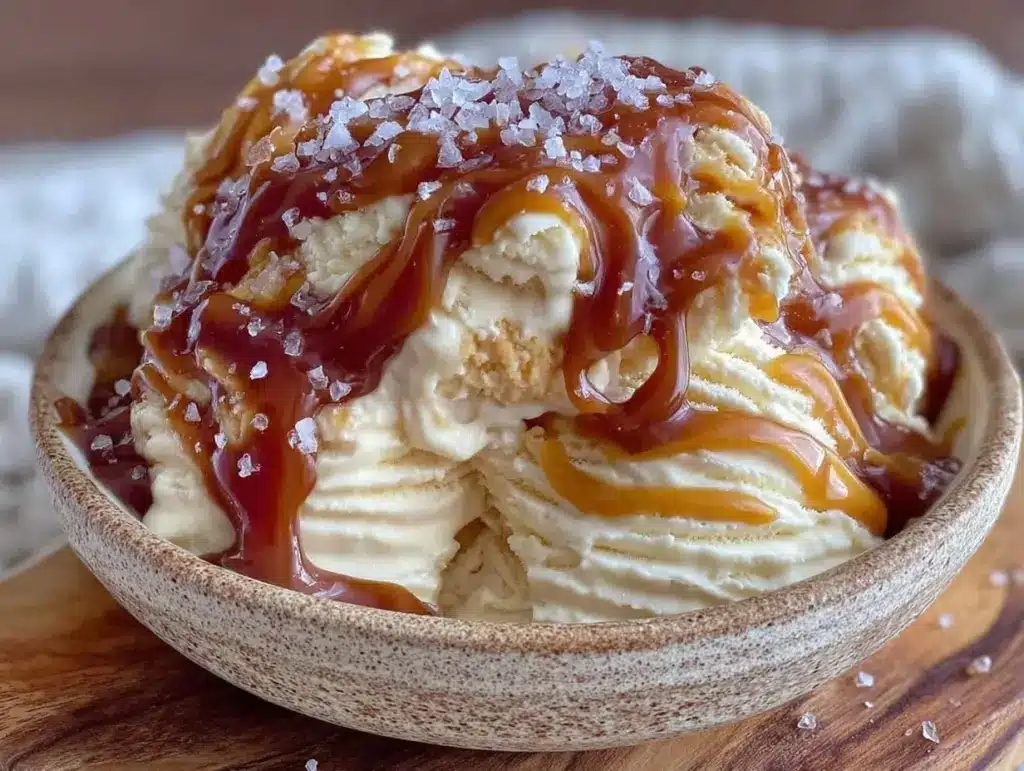
That afternoon, the heat was relentless, and honestly, my freezer was calling out for some action. I’d been skeptical about making ice cream without a fancy machine—no ice cream maker, no churning paddle, just the usual kitchen gear. But with a jar of salted caramel sauce sitting on the counter, half-forgotten from a previous craving, I figured, why not? The idea of creamy no-churn salted caramel ice cream seemed almost too good to be true. I remember sitting in the quiet kitchen, spoon in hand, tasting the first batch straight from the freezer. It was shockingly smooth, rich, and had that perfect salty-sweet balance that made me pause. This recipe stuck with me because it’s one of those rare treats that feels indulgent but isn’t a hassle to make. It’s become my go-to when I want a cozy little reward without the fuss of traditional ice cream making. Plus, it’s a crowd-pleaser at family get-togethers, always disappearing faster than I expect.
Why You’ll Love This Recipe
Honestly, this creamy no-churn salted caramel ice cream recipe has been tested over and over in my kitchen, and each time it turns out like a charm. Here’s why it’s a keeper:
- Quick & Easy: You can whip this up in under 15 minutes, making it perfect for those spontaneous dessert cravings.
- Simple Ingredients: No fancy or hard-to-find items—just pantry staples and a jar of caramel magic.
- Perfect for Any Occasion: Whether it’s a cozy night in or an impromptu summer party, this ice cream fits right in.
- Crowd-Pleaser: Kids adore the creamy texture, and adults love the salty caramel kick—everyone asks for seconds.
- Unbelievably Delicious: The smooth texture combined with that subtle saltiness hits all the right spots.
What makes this recipe stand out? It’s all about the texture and the layering of flavors. By folding whipped cream gently into sweetened condensed milk with swirls of salted caramel, you get an ice cream that’s luxuriously creamy without any ice cream maker. I also like to add just the right pinch of flaky sea salt on top before freezing (trust me on this). It’s not just another caramel ice cream; it’s the one that makes you close your eyes and savor every bite, kind of like a little celebration in your mouth. Honestly, it’s my secret weapon when I want a dessert that feels special but doesn’t stress me out.
What Ingredients You Will Need
This recipe uses simple, wholesome ingredients to deliver bold flavor and satisfying texture without the fuss. Most are pantry staples, and the salted caramel can be homemade or store-bought—both work wonderfully.
- Sweetened condensed milk (14 oz / 397 g) – This is the magic base that adds sweetness and creaminess without extra sugar or heavy cream.
- Heavy whipping cream (2 cups / 480 ml) – Whipped to soft peaks, it gives the ice cream that airy, creamy texture. I prefer brands like Land O’Lakes for stable whipping.
- Salted caramel sauce (½ cup / 120 ml) – Either homemade or store-bought, this adds that rich, buttery, salty-sweet flavor. If you want to try making your own, a simple mix of sugar, butter, cream, and sea salt works great.
- Vanilla extract (1 tsp / 5 ml) – Just a splash to brighten the flavor and round out the sweetness.
- Flaky sea salt (a pinch) – For sprinkling on top before freezing to enhance the caramel’s saltiness.
If you want to switch things up, you can swap heavy cream with coconut cream for a dairy-free version, and use a sugar-free caramel sauce if you’re watching sugar intake. For the salted caramel, I recommend looking for a sauce with real butter and cream – it makes a noticeable difference in flavor complexity.
Equipment Needed
- Mixing bowls: One large bowl for whipping cream and a medium bowl for folding ingredients.
- Electric hand mixer or stand mixer: To whip the heavy cream to soft peaks. You can use a whisk, but it takes much longer and tires the arm!
- Spatula: For gentle folding, which helps keep the mixture airy.
- Loaf pan or airtight container: For freezing the ice cream. I like using a metal loaf pan because it freezes faster and makes scooping easier.
- Measuring cups and spoons: For precise ingredient amounts.
If you don’t have a mixer, a good sturdy whisk and some elbow grease can do the job, but patience is key. Also, using a metal container helps the ice cream freeze evenly — I’ve found that plastic containers sometimes give uneven texture. If you want to keep things budget-friendly, a simple hand mixer works just fine instead of a stand mixer. Just avoid over-whipping the cream to prevent it from turning buttery.
Preparation Method
- Chill your mixing bowl and beaters: Pop your mixing bowl and beaters in the fridge for about 15 minutes before starting. Cold equipment helps whip the cream faster and better. (Prep time: 15 minutes)
- Whip the heavy cream: Pour 2 cups (480 ml) of heavy whipping cream into the chilled bowl. Using an electric mixer, beat on medium-high speed until soft peaks form—this means when you lift the beaters, the cream holds its shape but the tip curls over. This usually takes 3-5 minutes. Don’t overdo it or it’ll turn grainy.
- Mix sweetened condensed milk and vanilla: In a separate bowl, stir together the 14 oz (397 g) sweetened condensed milk and 1 tsp (5 ml) vanilla extract until smooth.
- Fold whipped cream into condensed milk: Using a spatula, gently fold about one-third of the whipped cream into the condensed milk mixture. This lightens the base. Then fold in the remaining whipped cream carefully, so you keep all that fluffiness intact.
- Swirl in salted caramel: Pour half of the mixture into your freezing container. Drizzle half of the salted caramel sauce (½ cup / 120 ml) over the top. Use a knife or skewer to swirl it gently, creating ribbons of caramel. Add the remaining ice cream mixture and top with the rest of the caramel, swirling again. (Tip: Don’t overmix or the caramel will fully blend in.)
- Sprinkle flaky sea salt: Lightly sprinkle a pinch of flaky sea salt over the top. This final touch enhances the salted caramel flavor dramatically.
- Freeze for at least 6 hours: Cover the container with a lid or plastic wrap and freeze until firm—overnight is best. Before serving, let the ice cream sit out for 5-10 minutes to soften slightly for easier scooping.
One little trick I learned is to swirl the caramel in layers—it makes for prettier, tastier pockets instead of one flat layer. Also, be patient with folding; it’s easy to lose the airiness if you mix too hard or fast. If you want to experiment, you can add chopped nuts or chocolate chips during the last fold for some crunch.
Cooking Tips & Techniques
Making no-churn ice cream might sound simple, but a few tricks make a big difference:
- Whipping cream properly: Soft peaks are your goal. If you whip too little, the ice cream will be dense; too much and it might turn buttery and separate.
- Folding gently: When mixing whipped cream into the condensed milk, fold carefully with a spatula, cutting through the middle and lifting from the bottom. This keeps your mixture light and airy.
- Caramel quality matters: Using a rich, buttery salted caramel sauce makes all the difference. I once tried a generic caramel syrup, and it tasted flat. Homemade or premium store-bought brands like Trader Joe’s or Stonewall Kitchen are worth it.
- Freezing time: Don’t rush the freezing. The texture really needs those hours to set up properly. Setting a timer helps me remember not to peek too soon.
- Multitasking: While the ice cream freezes, it’s a perfect time to prepare a simple snack or even whip up some crispy loaded potato skins for a sweet-and-savory combo party.
One mistake I made was trying to swirl the caramel after freezing began—it just clumped awkwardly. So, timing your swirls before freezing is key. And don’t forget to chill your tools beforehand; it makes whipping cream a breeze.
Variations & Adaptations
If you want to mix things up or accommodate dietary needs, here are some ideas:
- Dairy-Free: Swap heavy cream for full-fat coconut cream and use a dairy-free caramel sauce. The texture will be slightly different but still wonderfully creamy.
- Chocolate Salted Caramel: Add ¼ cup (25 g) unsweetened cocoa powder to the condensed milk mixture before folding in the cream. It creates a rich chocolate twist that pairs beautifully with the caramel.
- Nutty Delight: Fold in ½ cup (60 g) toasted pecans or sea salt almonds for crunch and extra flavor contrast.
- Spiced Caramel: Add a pinch of cinnamon or cayenne pepper to the caramel sauce before swirling for a subtle warmth that surprises the palate.
- Mini Caramel Ice Cream Sandwiches: Use this ice cream as a filling with soft cookies like the thumbprint cookies with jam for a handheld treat that’s perfect for summer.
Personally, I love the nutty version when I’m craving texture, but honestly, the classic salted caramel ice cream is the one that keeps me coming back. It’s flexible enough to handle mix-ins but solid enough to shine on its own.
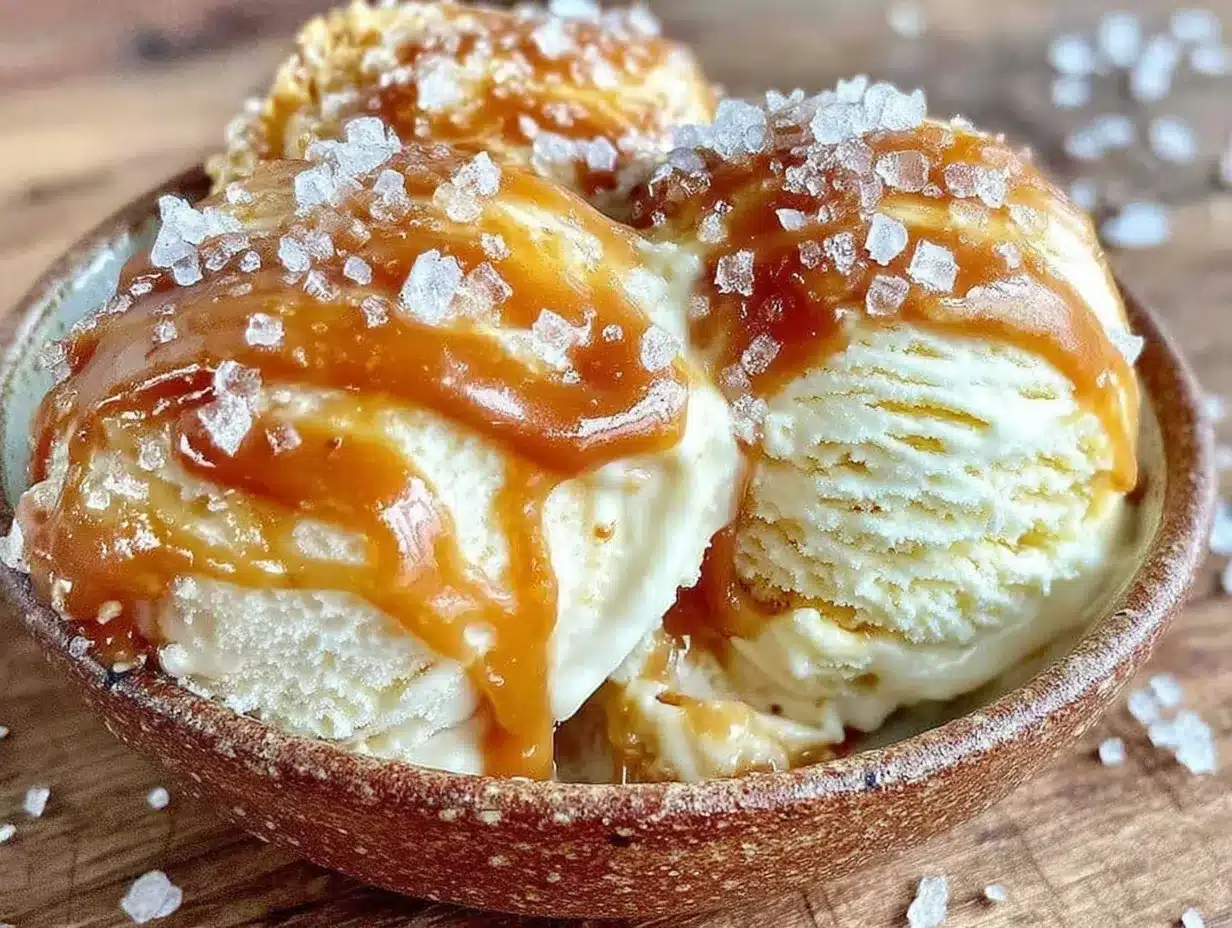
Serving & Storage Suggestions
This creamy no-churn salted caramel ice cream is best served slightly softened—let it sit out for 5 to 10 minutes to scoop easily without losing shape. A few scoops in a chilled bowl with an extra drizzle of salted caramel sauce on top never fails to impress. For a fun twist, serve alongside warm desserts like Japanese souffle pancakes or even a slice of warm apple pie.
Store leftovers in an airtight container in the freezer. If you find the ice cream hard as a rock after a few days, just let it thaw at room temperature for a few minutes before scooping. The flavor actually deepens after 24 hours, as the salted caramel infuses more fully into the creamy base.
For longer storage, this ice cream freezes well up to 2 weeks. Avoid repeated thawing and refreezing, which can cause ice crystals and affect texture.
Nutritional Information & Benefits
Per serving (about ½ cup / 125 ml), this salted caramel ice cream has roughly 250-300 calories, with 15-20 grams of fat and 25 grams of sugar. The sweetened condensed milk adds natural milk proteins, and using real caramel sauce means you get a dose of buttery richness.
While it’s definitely a treat and not a low-calorie snack, using this no-churn method cuts down on added sugars and preservatives often found in store-bought varieties. If you opt for coconut cream and dairy-free caramel, it’s also suitable for vegan diets.
Personally, I like to enjoy this dessert mindfully—knowing it’s homemade with quality ingredients and no weird additives makes indulging feel a little more guilt-free.
Conclusion
This creamy no-churn salted caramel ice cream recipe has earned a permanent spot in my dessert rotation. It’s simple enough for a last-minute craving but sophisticated enough to impress guests. The balance between salty and sweet, along with that melt-in-your-mouth texture, keeps it from feeling ordinary.
Feel free to tweak it to suit your taste—add nuts, chocolate, or spices to make it yours. I love how it turns a few basic ingredients into something that feels like a special treat without hours of effort.
If you try it, I’d love to hear how you customize your version or what memories it sparks. This recipe is proof that homemade ice cream can be easy, delicious, and a little bit magical.
FAQs
Can I make this ice cream without sweetened condensed milk?
Sweetened condensed milk is key for the creamy texture and sweetness. Without it, the ice cream might not set properly. However, you could experiment with a mixture of heavy cream and sugar, but results may vary.
How long does the ice cream need to freeze?
For best results, freeze for at least 6 hours or overnight. This allows the ice cream to set firm and the flavors to meld.
Can I use regular caramel sauce instead of salted caramel?
Yes, but adding a pinch of sea salt on top before freezing helps replicate that salted caramel flavor. The contrast is what makes this recipe so special.
Is it possible to store this ice cream longer than two weeks?
While you can freeze it longer, the texture may degrade over time due to ice crystal formation. For best texture and flavor, enjoy within two weeks.
Can I prepare this ice cream in advance for a party?
Absolutely! It’s perfect for make-ahead desserts. Just be sure to give it time to soften a bit before serving for easy scooping.
Pin This Recipe!
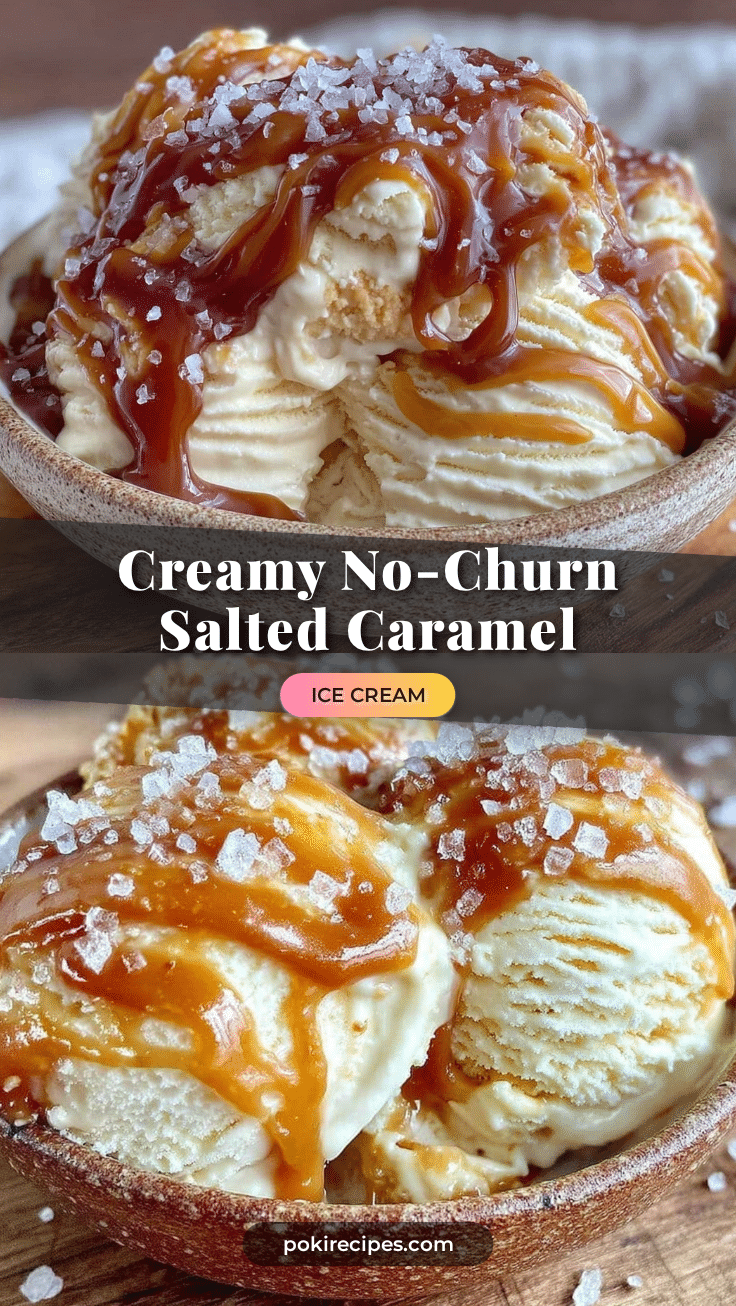
Creamy No-Churn Salted Caramel Ice Cream

A quick and easy homemade no-churn ice cream featuring a rich salted caramel flavor with a creamy, smooth texture. Perfect for any occasion and requires no ice cream maker.
- Prep Time: 15 minutes
- Cook Time: 0 minutes
- Total Time: 6 hours 15 minutes
- Yield: 8 servings 1x
- Category: Dessert
- Cuisine: American
Ingredients
- 14 oz (397 g) sweetened condensed milk
- 2 cups (480 ml) heavy whipping cream
- ½ cup (120 ml) salted caramel sauce
- 1 tsp (5 ml) vanilla extract
- A pinch of flaky sea salt
Instructions
- Chill your mixing bowl and beaters in the fridge for about 15 minutes before starting.
- Pour 2 cups (480 ml) of heavy whipping cream into the chilled bowl. Using an electric mixer, beat on medium-high speed until soft peaks form, about 3-5 minutes. Avoid overwhipping.
- In a separate bowl, stir together 14 oz (397 g) sweetened condensed milk and 1 tsp (5 ml) vanilla extract until smooth.
- Gently fold about one-third of the whipped cream into the condensed milk mixture to lighten the base. Then fold in the remaining whipped cream carefully to keep the mixture airy.
- Pour half of the mixture into your freezing container. Drizzle half of the salted caramel sauce (½ cup / 120 ml) over the top and swirl gently with a knife or skewer to create ribbons of caramel.
- Add the remaining ice cream mixture and top with the rest of the caramel, swirling again. Do not overmix.
- Lightly sprinkle a pinch of flaky sea salt over the top to enhance the salted caramel flavor.
- Cover the container with a lid or plastic wrap and freeze for at least 6 hours or overnight until firm.
- Before serving, let the ice cream sit out for 5-10 minutes to soften slightly for easier scooping.
Notes
Chill mixing bowl and beaters before whipping cream for better results. Fold whipped cream gently to keep mixture airy. Use a metal container for faster freezing and easier scooping. Swirl caramel before freezing, not after. Let ice cream soften 5-10 minutes before serving for easier scooping. Variations include using coconut cream for dairy-free, adding cocoa powder for chocolate twist, or folding in nuts for crunch.
Nutrition
- Serving Size: ½ cup (125 ml)
- Calories: 275
- Sugar: 25
- Sodium: 120
- Fat: 18
- Saturated Fat: 11
- Carbohydrates: 28
- Protein: 4
Keywords: no-churn ice cream, salted caramel ice cream, easy homemade dessert, no ice cream maker, creamy ice cream, quick dessert


