One chilly Saturday afternoon last December, my kitchen looked like a glitter explosion had collided with a flour storm. My three kids and I were elbow-deep in rolling pins and cookie cutters, trying to turn a simple batch of sugar cookies into festive masterpieces. I’d been chasing a sugar cookie recipe with royal icing that was soft, tender, and actually held its shape under all that decorating pressure. After testing and tweaking this sugar cookies with royal icing recipe easy soft and perfectly decorated guide over and over (seriously, at least 15 times), I finally nailed it. No more rock-hard cookies or runny icing disasters. It’s the kind of recipe that feels fancy but is completely doable on a weekend afternoon or for a holiday party.
The best part? These sugar cookies with royal icing for perfectly soft and decorated treats have just the right balance of soft chew and structure, so they don’t crumble under your intricate designs. Plus, the royal icing dries smooth and glossy, making decorating fun and frustration-free. Whether you’re a total beginner or a seasoned cookie artist, you’ll love how forgiving this recipe is. It’s become my go-to for birthday parties, holiday baking marathons, and even casual weekend treats.
If you’ve ever wondered how to get soft sugar cookies that keep their shape and won’t crack under royal icing, this post is for you. I’ll share every little trick, ingredient swap, and decorating tip I’ve learned the hard way. Oh, and if you’re a fan of soft homemade cookies, check out my soft Crumbl copycat pink sugar cookies recipe—it’s another winner for quick sweet fixes!
WHY YOU’LL LOVE THIS RECIPE
This sugar cookies with royal icing recipe has completely changed how I approach cookie decorating days. I’m not kidding when I say it’s the perfect soft sugar cookie base for holiday baking or special occasions like birthday parties. Here’s why it’s so good:
- Soft but Structured — These cookies stay tender with a slight chew, but hold their shape beautifully. No more sad, flat, or spreading cookies that ruin your design plans.
- Reliable Royal Icing — The royal icing dries shiny and smooth, perfect for crisp edges on your decorations. It’s not too runny or too thick, which means zero frustration while piping.
- Kid-Friendly Decorating — I’ve tested this recipe with my kids and their friends. The cookies hold up well to enthusiastic hands and messy fingers, making it a great activity for family baking days.
- Make-Ahead Friendly — You can bake these cookies a day or two in advance and decorate them whenever you’re ready. The icing dries quickly and keeps well, ideal for holiday gatherings and cookie exchanges.
- Pantry Staples — No weird or expensive ingredients here. You probably have everything you need already, except maybe the royal icing ingredients (which are simple too).
If you love cozy weekend baking or need a reliable recipe for holiday cookie trays, this is it. It pairs beautifully with my brown butter banana bread for a sweet treat variety that always impresses. Plus, it’s a hit for cookie swaps and Valentine’s Day decorating fun.
INGREDIENTS
Here’s the best part: you probably have most of these ingredients already. I’m pretty particular about getting the texture right, so I’ll tell you exactly why each one matters and how to make substitutions if you need to.
- All-purpose flour (2 ¾ cups / 340g) — The base of your cookie dough. Make sure to spoon and level for accuracy. Too much flour makes cookies dry.
- Baking powder (1 teaspoon) — Adds just enough lift for softness without spreading out the cookies too much.
- Salt (½ teaspoon) — Balances sweetness and enhances flavor. Don’t skip!
- Unsalted butter (1 cup / 226g, softened) — Use real butter, softened to room temp but not melted. It gives the cookies that tender, rich flavor.
- Granulated sugar (1 cup / 200g) — Sweetens and helps with the crunch on the edges.
- Large egg (1) — Helps bind everything together and adds moisture.
- Vanilla extract (2 teaspoons) — Pure vanilla is worth the splurge here. It gives the cookies their classic flavor.
- Almond extract (optional, ½ teaspoon) — Adds a subtle depth that takes these cookies from good to great. Totally optional but highly recommended.
Royal Icing Ingredients
- Powdered sugar (4 cups / 480g) — Sifted for smooth icing with no lumps.
- Meringue powder (3 tablespoons) — This is the secret to easy royal icing without hassle. You can find it in most baking aisles or online.
- Water (6 tablespoons) — Start with less and add as needed to get the perfect piping consistency.
- Lemon juice (½ teaspoon) — Adds brightness and helps the icing dry perfectly.
EQUIPMENT NEEDED
You don’t need anything fancy for this. Here’s what I actually use when making these sugar cookies with royal icing:
- Stand mixer or hand mixer — Makes creaming butter and sugar a breeze. You can do it by hand, but it takes longer and your arm will hate you.
- Rolling pin — A basic wooden or silicone one works fine. I like one with adjustable rings so my dough thickness is consistent.
- Cookie cutters — Choose your favorite shapes. Metal cutters give the cleanest edges, but plastic ones work too.
- Baking sheets — Use heavy-duty, rimmed sheets for even baking and no warping.
- Parchment paper or silicone baking mats — Prevents sticking and makes cleanup easier.
- Piping bags and tips — For mastering royal icing decorating. A small round tip (like #2 or #3) is perfect for fine details.
- Food coloring (optional) — Gel colors are best for vibrant icing without thinning it out.
HOW TO MAKE SUGAR COOKIES WITH ROYAL ICING FOR PERFECTLY SOFT AND DECORATED TREATS
Alright, let’s get into it. I’ll walk you through exactly how I make this, including the small tricks that actually make a difference.
- Prep Your Ingredients and Workspace (10 minutes)
Measure all your ingredients precisely. Line two baking sheets with parchment paper. Set out your cookie cutters and rolling pin. I like to chill the dough for at least 30 minutes, but you can prep the icing while it chills. - Cream Butter and Sugar (5 minutes)
Beat the softened butter and granulated sugar on medium speed until fluffy and pale, about 3-4 minutes. You’ll see the mixture lighten and smell sweet and buttery — that’s your cue it’s ready. This step builds the cookie’s tender texture. - Add Egg and Extracts (2 minutes)
Beat in the egg, vanilla, and almond extract (if using) until fully combined. The batter will look slightly shiny and creamy, signaling moisture balance. - Mix Dry Ingredients Separately (2 minutes)
Whisk the flour, baking powder, and salt together in a bowl. This ensures even distribution of leavening agents so the cookies rise uniformly. - Combine Wet and Dry (3 minutes)
Gradually add the dry ingredients to the wet, mixing on low speed until just combined. The dough will be soft but not sticky. If it’s too sticky, add a tablespoon more flour. Too dry? A teaspoon of milk can help. - Chill the Dough (30 minutes to 1 hour)
Wrap the dough in plastic wrap and refrigerate. This step is crucial — it firms up the dough so your cookies keep their shape while baking and stay soft inside. - Roll and Cut (10-15 minutes)
Lightly flour your surface and roll dough to about ¼ inch thick. If the dough gets too soft, pop it back in the fridge for 10 minutes. Cut shapes with your cookie cutters and place them about 1 inch apart on the baking sheets. The edges should be clean and sharp for the best decorated results. - Bake (8-10 minutes)
Bake at 350°F (175°C) until the edges just begin to turn golden but the centers are still pale. You’ll see the cookies puff slightly and smell buttery and sweet. Overbaking is the biggest culprit for hard cookies here — take them out before they brown. - Cool Completely (at least 30 minutes)
Transfer cookies to a wire rack to cool completely before decorating. Warm cookies will melt your royal icing and ruin the design. - Make the Royal Icing (5-7 minutes)
In a large bowl, combine the sifted powdered sugar and meringue powder. Add water and lemon juice a little at a time, mixing on low speed until you get a thick but spreadable consistency. For piping outlines, add less water for stiffness; for flooding, add more for flow. Tint with gel food coloring if desired. - Decorate and Dry (several hours to overnight)
Pipe outlines on cooled cookies and flood the centers with thinner icing. Use a toothpick or scribe tool to spread and pop air bubbles. Let the icing dry at room temperature for several hours or overnight until fully set and firm.
Total time: about 2 hours active, plus chilling and drying.
EXPERT TIPS & TRICKS
Here’s everything I’ve figured out from making this sugar cookies with royal icing recipe dozens of times. These tips will save you from the mistakes I already made.
Don’t Skip the Chill
Chilling the dough is non-negotiable. I burned this step twice before realizing it controls spreading and keeps cookies soft yet structured. If you’re short on time, freeze the dough 15 minutes instead.
Beat Butter and Sugar Well
This is the foundation of a tender cookie. Rushing this or using cold butter results in dense, crumbly cookies. I use my stand mixer for this step every time.
Watch the Bake Time
Cookies continue cooking as they cool, so pull them out when edges are just set but centers still look soft. Overbaking is the number one cause of dry sugar cookies.
Adjust Royal Icing Consistency
Too runny and it bleeds; too thick and it clogs your piping tips. Start thicker for outlines, thin for flooding. I keep a small bowl of water nearby to thin it out a bit as I go.
Use Meringue Powder, Not Egg Whites
Meringue powder makes royal icing easier to handle and safer for kids. I switched after a few failed batches using raw egg whites, and never looked back.
Save Your Leftover Royal Icing
Keep leftover icing in an airtight container. Add a few drops of water and stir before reuse to revive it.
VARIATIONS & SUBSTITUTIONS
Once you’ve got the base version down, here’s how I mix it up. I’ve actually tried all of these.
Spiced Sugar Cookies
Add 1 teaspoon cinnamon and ½ teaspoon nutmeg to the dry ingredients for fall or holiday vibes. This version is my go-to for Thanksgiving cookie trays.
Gluten-Free Version
Swap all-purpose flour for a 1-to-1 gluten-free baking blend. I use Bob’s Red Mill gluten-free flour and it works great, especially if you add an extra tablespoon of xanthan gum for structure.
Dairy-Free Option
Use a plant-based butter substitute and a flax egg (1 tablespoon ground flaxseed + 3 tablespoons water) instead of a regular egg. The texture is slightly different but still soft and delicious.
Chocolate Sugar Cookies
Add ¼ cup cocoa powder to dry ingredients and reduce flour by the same amount. These are perfect for Valentine’s Day or winter cookie swaps.
Royal Icing Colors and Flavors
Experiment with gel food colors and add a drop of clear almond or peppermint extract to the icing for festive flavor twists. I’ve used this technique for Christmas cookies with great success.
SERVING & STORAGE
I usually serve these sugar cookies with royal icing straight from the cooling rack — they look inviting and keep their soft texture. They’re perfect alongside a hot cup of cocoa or festive punch.
Here are a few side suggestions that pair well:
- Classic homemade hot chocolate — the ultimate cozy combo
- Simple fruit platter to balance the sweetness
- Warm spiced cider for holiday parties
Storage:
- Fridge: Store decorated cookies in an airtight container with parchment between layers. They keep for up to 5 days but are best within 2.
- Reheating: No need to reheat—these cookies are delicious at room temp. If you want them softer, pop them in the microwave for 10 seconds but watch closely.
- Freezing: You can freeze unbaked cookie dough for up to 3 months, thaw overnight in the fridge, then bake. Decorated cookies don’t freeze well because royal icing can crack.
NUTRITION INFORMATION
I’m not a nutritionist, but here’s the breakdown if you’re keeping track.
| Per Serving (1 cookie, based on 24 cookies) | |
|---|---|
| Calories | 150 |
| Protein | 1g |
| Carbohydrates | 25g |
| Fiber | 0g |
| Sugar | 15g |
| Fat | 5g |
| Saturated Fat | 3g |
| Sodium | 80mg |
Look — this is comfort food made with butter, sugar, and creaminess. It’s not a diet recipe and I’m not going to pretend it is. But it’s way better than store-bought, costs less, and you know exactly what’s in it. When I want something lighter, I make smaller cookies and skip the royal icing. Most baking days though? I go all in and enjoy every bite.
FINAL THOUGHTS
Remember that December afternoon with my kids covered in flour and sprinkles? That’s what this recipe is all about: family, fun, and perfectly soft sugar cookies with royal icing that actually turn out how you want. It’s forgiving, approachable, and endlessly customizable. Make it yours. More vanilla, extra almond extract, or a splash of citrus zest all work beautifully. Add sprinkles, pipe intricate designs, or keep it simple with a smooth white glaze.
If you make these, drop a comment and tell me how it went. And if something goes wrong, tell me that too — I genuinely want to help troubleshoot. That’s what the comments are for.
Happy baking — I hope your kitchen smells amazing.
FREQUENTLY ASKED QUESTIONS
Q: Can I make these sugar cookies with royal icing for perfectly soft and decorated treats without meringue powder?
A: Yes, but it’s trickier. You can use fresh egg whites instead, but that requires extra care to avoid food safety issues and the icing might not dry as hard or last as long. I switched to meringue powder after a few failed batches with raw egg whites — it’s just easier and safer, especially if kids are decorating.
Q: Why did my royal icing turn out grainy or separated?
A: Grainy or separated royal icing usually means it was mixed too fast or the powdered sugar wasn’t sifted. Also, adding too much water at once can cause separation. I always sift powdered sugar and add water slowly while mixing on low speed — it makes all the difference.
Q: Can I make these sugar cookies with royal icing ahead for holiday cookie exchanges?
A: Absolutely! Bake your cookies up to 2 days ahead and decorate the day before or the morning of. Let the royal icing dry completely (several hours or overnight) before stacking or packing. This recipe is perfect for holiday baking marathons.
Q: Are these sugar cookies gluten-free or dairy-free?
A: The base recipe is not gluten-free or dairy-free, but you can substitute with gluten-free flour blends and dairy-free butter alternatives. I recommend trying my tested swaps in the variations section for best results. Royal icing is naturally gluten-free but contains dairy in meringue powder, so check labels or try a vegan alternative if needed.
Q: Can I double or halve this sugar cookies with royal icing recipe?
A: Yes, both work well. Halving is straightforward. Doubling is fine too, but mix dough in two batches if your mixer is small to ensure even creaming and mixing. Baking times stay the same.
Q: My cookies spread too much and lost their shape. What went wrong?
A: Most likely, your dough was too warm or you skipped chilling. Also, over-creaming butter and sugar or too much baking powder can cause spreading. Next time, chill the dough thoroughly and measure carefully. I’ve learned this the hard way!
Q: How do I prevent cracked royal icing on my sugar cookies?
A: Cracks usually happen if the icing dries too fast or the base cookie is too dry. Make sure your icing isn’t too thick and try to keep the drying environment humid (a bowl of water nearby helps). Also, store decorated cookies away from direct sunlight or heat.
Pin This Recipe!

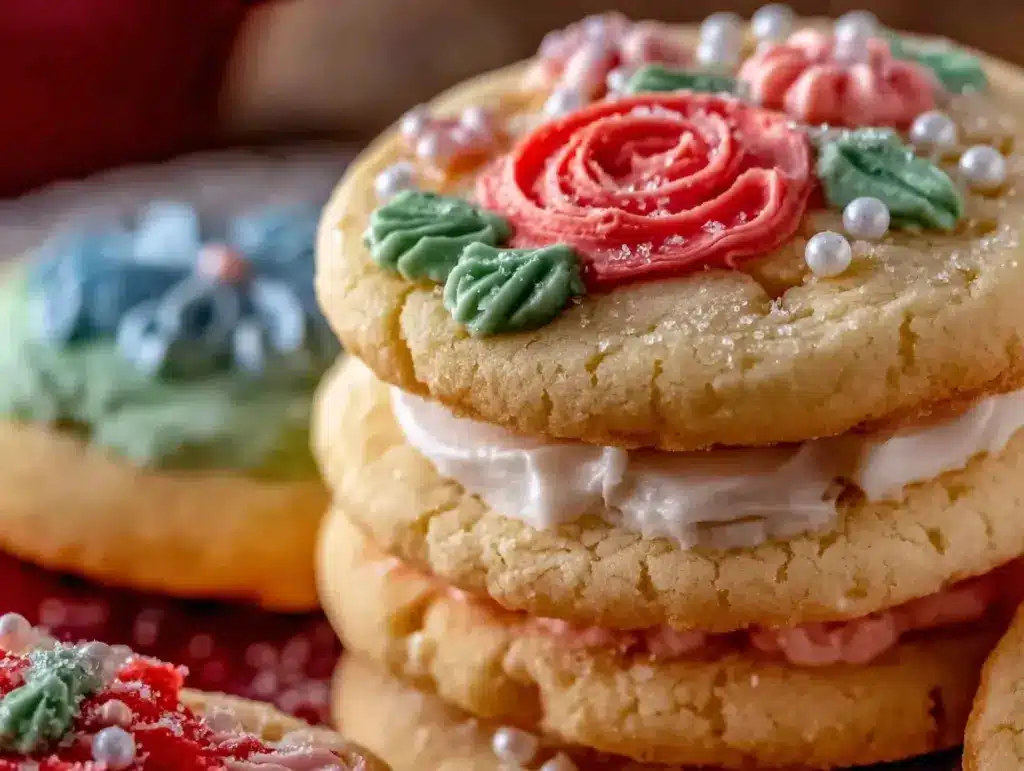
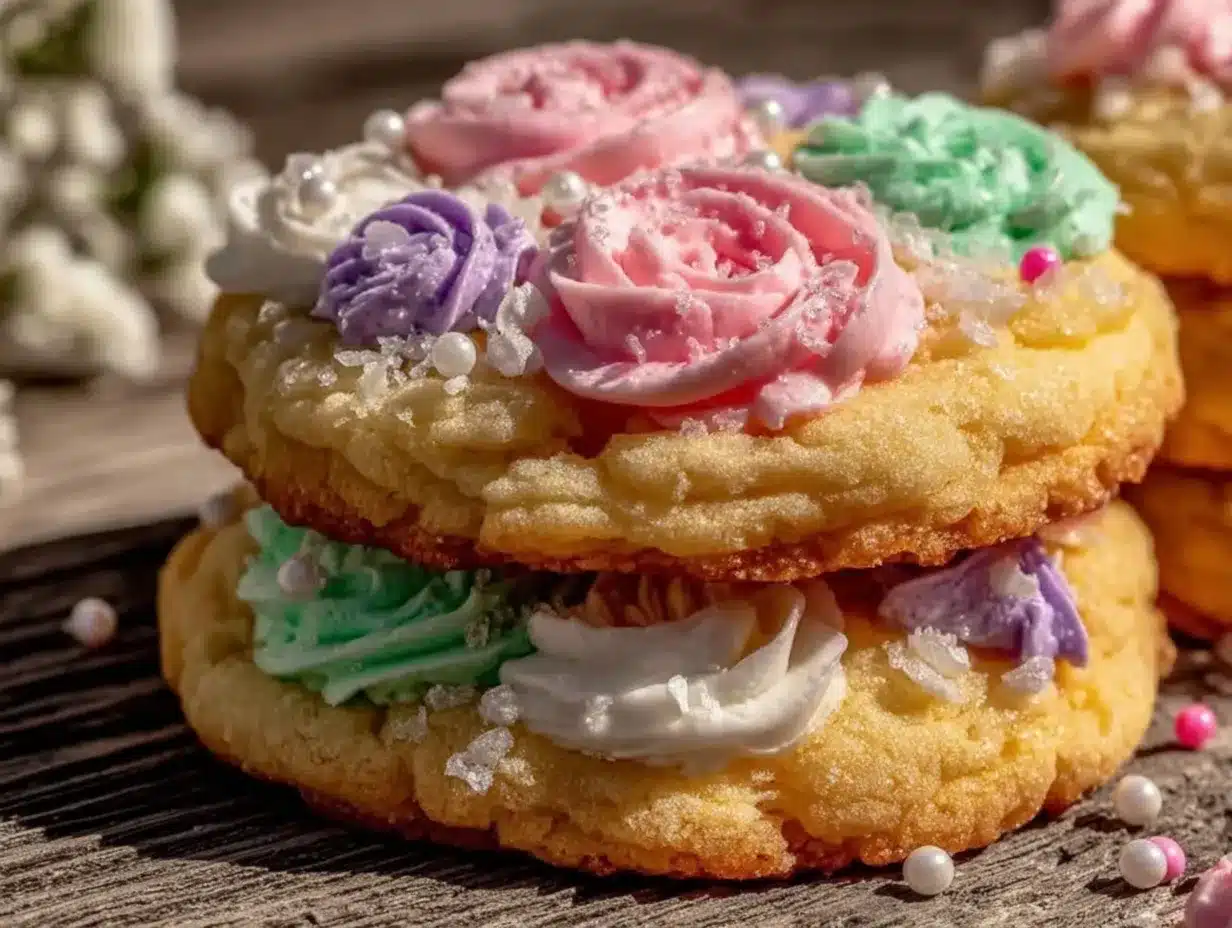
Sugar Cookies with Royal Icing

Soft, tender sugar cookies that hold their shape perfectly under royal icing, ideal for decorating and festive occasions.
- Prep Time: 20 minutes
- Cook Time: 8-10 minutes per batch
- Total Time: 2 hours active plus chilling and drying
- Yield: 24 cookies 1x
- Category: Dessert
- Cuisine: American
Ingredients
- 2 ¾ cups all-purpose flour (340g)
- 1 teaspoon baking powder
- ½ teaspoon salt
- 1 cup unsalted butter, softened (226g)
- 1 cup granulated sugar (200g)
- 1 large egg
- 2 teaspoons vanilla extract
- ½ teaspoon almond extract (optional)
- Royal Icing Ingredients:
- 4 cups powdered sugar, sifted (480g)
- 3 tablespoons meringue powder
- 6 tablespoons water
- ½ teaspoon lemon juice
Instructions
- Prep your ingredients and workspace: Measure all ingredients precisely. Line two baking sheets with parchment paper. Set out cookie cutters and rolling pin. Chill dough for at least 30 minutes; prep icing while dough chills.
- Cream butter and sugar: Beat softened butter and granulated sugar on medium speed until fluffy and pale, about 3-4 minutes.
- Add egg and extracts: Beat in egg, vanilla, and almond extract (if using) until fully combined.
- Mix dry ingredients separately: Whisk flour, baking powder, and salt together in a bowl.
- Combine wet and dry: Gradually add dry ingredients to wet, mixing on low speed until just combined. Adjust dough consistency with flour or milk if needed.
- Chill the dough: Wrap dough in plastic wrap and refrigerate for 30 minutes to 1 hour.
- Roll and cut: Lightly flour surface and roll dough to about ¼ inch thick. Cut shapes with cookie cutters and place 1 inch apart on baking sheets.
- Bake: Bake at 350°F (175°C) for 8-10 minutes until edges begin to turn golden but centers remain pale.
- Cool completely: Transfer cookies to wire rack to cool completely before decorating.
- Make the royal icing: Combine sifted powdered sugar and meringue powder. Add water and lemon juice gradually until thick but spreadable consistency is reached. Tint with gel food coloring if desired.
- Decorate and dry: Pipe outlines on cooled cookies and flood centers with thinner icing. Use a toothpick to spread and pop air bubbles. Let icing dry at room temperature for several hours or overnight.
Notes
Chill dough to prevent spreading and maintain shape. Beat butter and sugar well for tender texture. Pull cookies out when edges are set but centers still soft to avoid dryness. Adjust royal icing consistency for outlines and flooding. Use meringue powder for safer, easier royal icing. Store decorated cookies in airtight container with parchment between layers. Freeze unbaked dough up to 3 months; decorated cookies do not freeze well.
Nutrition
- Serving Size: 1 cookie
- Calories: 150
- Sugar: 15
- Sodium: 80
- Fat: 5
- Saturated Fat: 3
- Carbohydrates: 25
- Protein: 1
Keywords: sugar cookies, royal icing, soft cookies, holiday cookies, decorated cookies, cookie decorating, easy sugar cookies