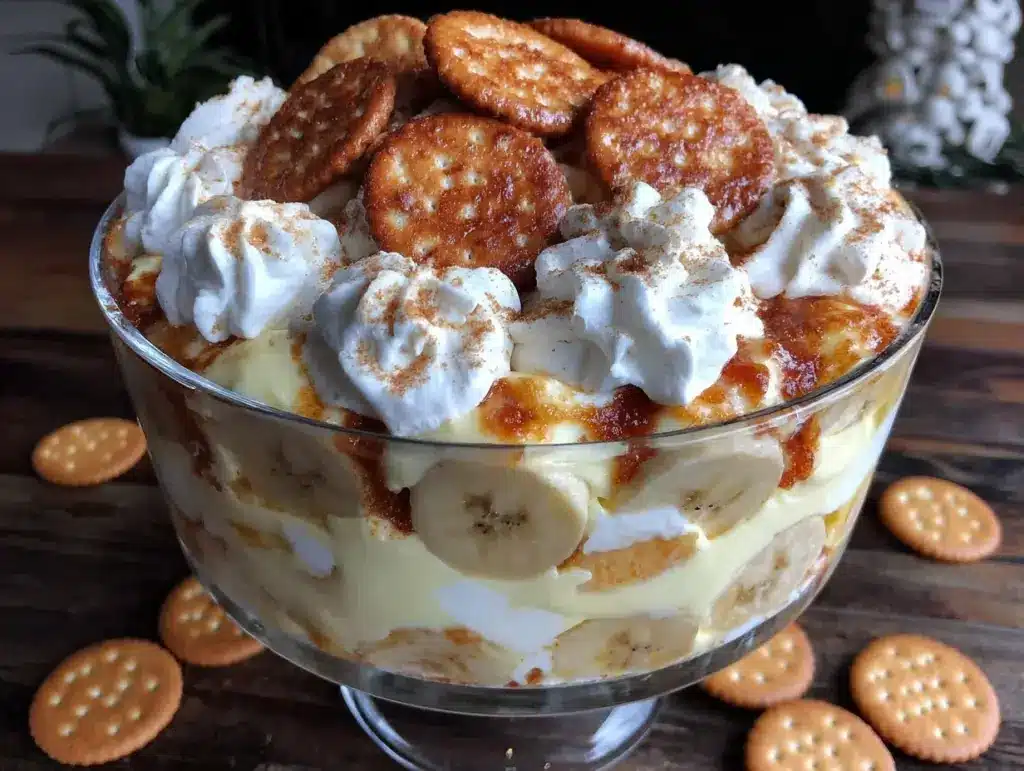
“You’re not seriously making banana pudding again, are you?” my roommate asked with a smirk one late evening. Honestly, I couldn’t blame her — I had whipped up this cozy classic banana pudding with vanilla wafers three nights straight that week. It started as a quick fix when I found a bunch of overripe bananas and a half-empty box of vanilla wafers tucked in the pantry. I figured, why not? No one ever really complains about pudding, right?
The first time I made it, I was skeptical about how simple it was to get that perfect creamy texture without hours in the kitchen. But when I took that first spoonful, the mix of silky pudding, soft bananas, and the faint crunch of wafers hit all the right nostalgic notes. It felt like comfort wrapped in a bowl — something to quiet the noise of a hectic day. And honestly? That pudding became my little ritual, a quiet moment of calm amid the chaos.
What’s wild is how this recipe has that old-fashioned charm but doesn’t feel dated or fussy. It’s the kind of dessert you can throw together without much thought and still impress whoever’s lucky enough to get a serving. Plus, you know that smell of vanilla and banana wafting through the kitchen? It’s like an invitation to slow down, just a little.
So, here’s the thing — this cozy classic banana pudding with vanilla wafers stuck with me not just because it’s delicious, but because it feels like a little kindness in dessert form. It’s approachable, comforting, and honestly, a bit addictive once you get it right.
Why You’ll Love This Recipe
After testing this cozy classic banana pudding with vanilla wafers several times, I can say it’s one of those recipes that feels like a hug in a bowl. Here’s why it stands out:
- Quick & Easy: Ready in about 20 minutes, this pudding is perfect for those evenings when you want something sweet but don’t want to fuss.
- Simple Ingredients: You probably already have ripe bananas, vanilla wafers, and a few pantry staples hanging out — no last-minute runs to the store needed.
- Perfect for Gatherings: Whether it’s a casual potluck or a cozy family dinner, this pudding always gets a warm reception.
- Crowd-Pleaser: Kids love it, adults sneak extra servings, and it’s always the first dessert to disappear.
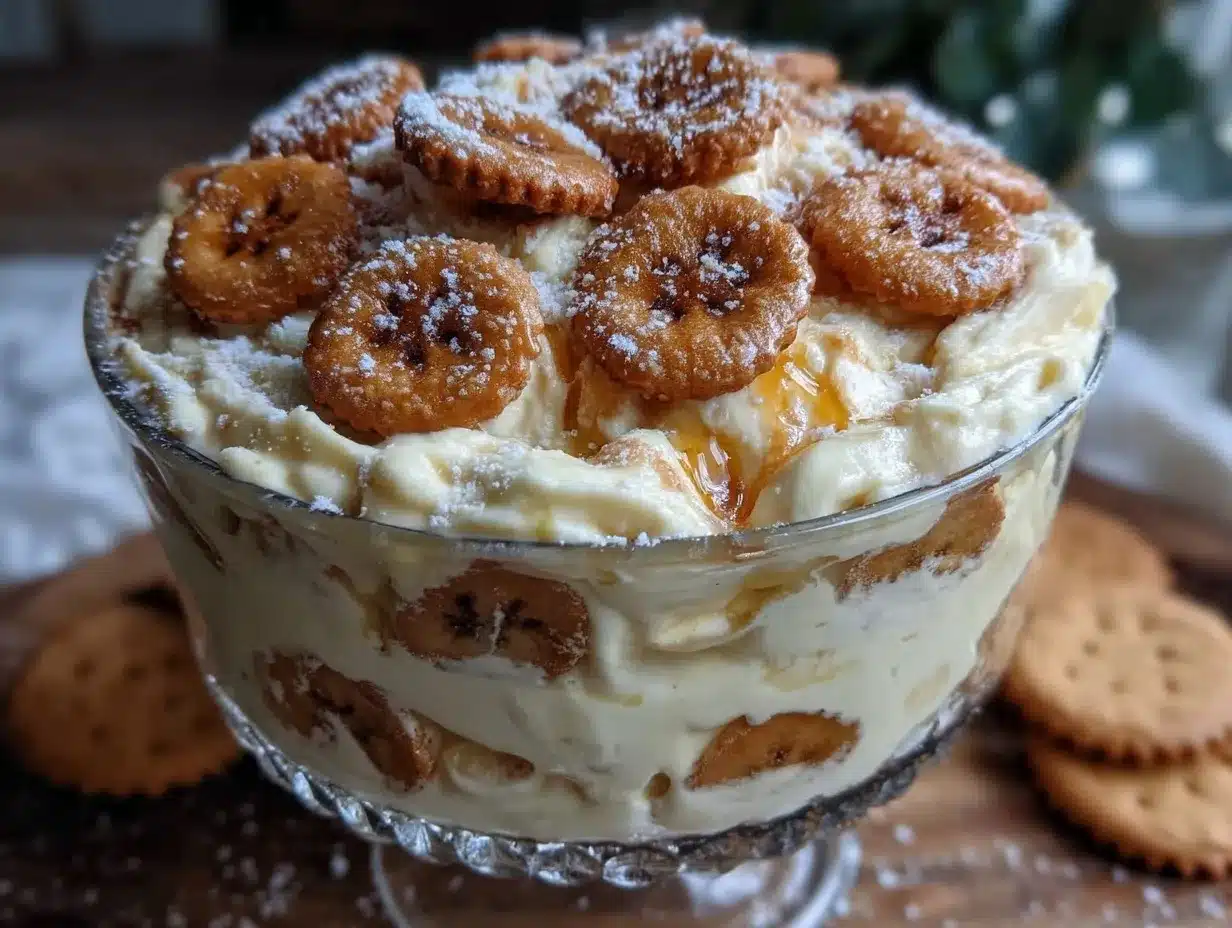
- Unbelievably Delicious: The creamy vanilla pudding layered with fresh bananas and the slight crunch of vanilla wafers is a texture and flavor combo that just works.
What really makes this cozy classic banana pudding different is the balance — not too sweet, with just the right vanilla kick and that unmistakable homemade feel. I’ve tweaked the pudding base a few ways, but the version here blends a touch of cream cheese for richness without overpowering the bananas. Also, I like to let it chill a bit longer than usual because that’s when the wafers soften just enough to melt into the pudding, creating that lush, almost custard-like finish.
This recipe isn’t just another banana pudding — it’s the one I trust to bring comfort and smiles, whether it’s a weeknight treat or a last-minute dessert for unexpected guests. If you ever want to make a classic dessert that feels like a warm memory waiting to happen, this is it.
What Ingredients You Will Need
This recipe uses simple, wholesome ingredients that come together to deliver creamy texture and rich flavor without any fuss. Most of these are kitchen staples, making this banana pudding super accessible and easy to whip up whenever the craving hits.
- Ripe Bananas: 4 medium-sized, sliced (ripe but not overly mushy for best texture)
- Vanilla Wafers: About 45 wafers (Nilla wafers are a classic choice, but any vanilla cookie works)
- Milk: 3 cups (720 ml) whole milk preferred for creaminess; 2% or dairy-free milk like oat or almond works too
- Granulated Sugar: 3/4 cup (150 g)
- All-Purpose Flour: 1/3 cup (40 g) (for thickening; cornstarch can be substituted for gluten-free)
- Egg Yolks: 3 large (room temperature)
- Unsalted Butter: 2 tablespoons (28 g), softened (adds richness and smoothness)
- Vanilla Extract: 2 teaspoons (pure vanilla extract recommended for depth)
- Cream Cheese: 4 oz (115 g), softened (optional but adds a subtle tang and creaminess)
For this recipe, I like to pick bananas that are nicely spotted but still firm enough to slice cleanly. If you want to swap the vanilla wafers, try ladyfingers or even graham crackers for a different crunch and flavor twist.
When it comes to the flour, I usually use King Arthur brand for consistent thickening, but feel free to use cornstarch if you’re avoiding gluten. For the dairy, whole milk really helps get that silky texture, but I’ve tested it with almond milk, and it’s still pretty good — just a bit lighter.
One last tip: if you want a dairy-free or vegan version, swap the butter with coconut oil and use a plant-based cream cheese alternative. The pudding might not be quite as thick, but it’ll still satisfy that craving.
Equipment Needed
- Medium saucepan (for cooking the pudding base)
- Whisk (essential for mixing the custard smoothly without lumps)
- Mixing bowls (a couple, for prepping bananas and combining ingredients)
- Measuring cups and spoons (accurate measurements make a big difference here)
- Rubber spatula (for scraping the sides of the pan and folding ingredients gently)
- 9×13-inch baking dish or trifle bowl (for layering pudding, bananas, and wafers)
- Plastic wrap (to cover the pudding directly to prevent a skin from forming)
If you don’t have a whisk, a fork can work in a pinch, but you’ll want to whisk really well to avoid lumps. For the saucepan, I prefer a heavy-bottomed one because it distributes heat evenly and reduces the risk of scorching the pudding—a lesson I learned the hard way once!
For layering, a clear glass dish is nice because you can see those beautiful pudding and banana layers, but any dish that fits your family size is fine.
Preparation Method
- Prepare the bananas and vanilla wafers: Peel and slice 4 medium ripe bananas into about 1/4-inch thick rounds. Set aside. Arrange the vanilla wafers near your prep station for easy layering.
- Make the pudding base: In a medium saucepan, whisk together 3/4 cup (150 g) granulated sugar and 1/3 cup (40 g) all-purpose flour until combined. Gradually whisk in 3 cups (720 ml) whole milk, making sure no lumps remain.
- Cook the pudding: Place the saucepan over medium heat and cook, whisking constantly, until the mixture thickens and just starts to bubble — about 7-10 minutes. It should coat the back of a spoon and feel smooth and creamy.
- Temper the egg yolks: In a separate bowl, lightly beat 3 large egg yolks. Slowly whisk about 1 cup of the hot pudding mixture into the yolks to warm them up, then pour the yolk mixture back into the saucepan. Continue cooking for 2 more minutes, stirring constantly, until thickened.
- Add butter, cream cheese, and vanilla: Remove the saucepan from heat. Stir in 2 tablespoons (28 g) softened unsalted butter, 4 oz (115 g) softened cream cheese, and 2 teaspoons vanilla extract until smooth. The cream cheese adds a subtle tang and helps create a velvety texture.
- Cool the pudding: Transfer the pudding to a bowl. Press plastic wrap directly on the surface to prevent a skin from forming. Let it cool to room temperature, then refrigerate for at least 1 hour to chill.
- Assemble the pudding: In your 9×13-inch dish or trifle bowl, start with a layer of vanilla wafers at the bottom. Add a layer of sliced bananas, then spread a layer of chilled pudding over the top. Repeat layers until ingredients are used up, ending with a pudding layer.
- Chill before serving: Cover the assembled pudding with plastic wrap and refrigerate for at least 3 hours, preferably overnight. This allows the wafers to soften and flavors to meld beautifully.
- Serve: Spoon out generous portions and enjoy! The pudding should be creamy, the bananas tender but fresh, and the wafers softened to melt-in-your-mouth perfection.
A quick note: If your pudding starts to get lumpy during cooking, keep whisking vigorously or remove from heat briefly and whisk off heat. Constant attention here pays off big time. Also, chilling the pudding thoroughly is key to getting those layers to blend just right, so don’t skip that step.
Cooking Tips & Techniques
Making pudding might seem straightforward, but there are a few little tricks that can make all the difference between “meh” and memorable.
- Whisk constantly: When cooking the pudding, whisking nonstop prevents lumps and scorching. It might feel like a workout, but it’s worth it. I learned this after a batch turned grainy once because I got distracted.
- Temper egg yolks carefully: Pouring hot pudding slowly into the egg yolks raises their temperature gently, preventing scrambled eggs in your dessert (been there, done that!).
- Use room temperature ingredients: Eggs, butter, and cream cheese at room temp help the pudding come together smoother and faster.
- Don’t rush cooling: Pressing plastic wrap right on the pudding surface stops that annoying skin from forming. Letting it cool fully before assembling is key for layering.
- Layer timing: If you layer too soon, wafers get soggy fast; too late, and pudding won’t meld flavors. A chill time of a few hours or overnight is ideal.
- Banana freshness: Slice bananas right before layering to avoid browning. A quick spritz of lemon juice can help if prepping ahead.
One personal lesson? I once swapped cornstarch for flour and didn’t adjust the amount, resulting in a pudding that was overly thick and pasty. Stick to the recommended amounts to keep that dreamy texture. Also, I often multitask by prepping pudding while making a quick dinner like marry me chicken, so you can have a cozy meal and dessert ready around the same time.
Variations & Adaptations
This cozy classic banana pudding recipe is surprisingly flexible, so you can tweak it to suit your preferences or dietary needs.
- Dairy-Free Version: Use coconut or almond milk and swap butter with coconut oil. Try a dairy-free cream cheese or skip it entirely for a lighter pudding.
- Gluten-Free Option: Replace vanilla wafers with gluten-free cookies or use almond flour-based wafers. Make sure your thickener is cornstarch instead of flour.
- Chocolate Banana Pudding: Add 1/4 cup unsweetened cocoa powder to the pudding mix for a chocolate twist. Layer with chocolate cookies or crushed Oreos instead of vanilla wafers.
- Extra Creamy Pudding: Fold in 1 cup of whipped cream or whipped coconut cream before assembling for a mousse-like texture.
- Personal Favorite Variation: I like adding a handful of chopped toasted pecans between layers for a little crunch contrast. It’s subtle but adds a nice dimension.
For a fun seasonal spin, try swapping bananas with fresh sliced strawberries or peaches in summer. You can also adjust sweetness by cutting back sugar for a less sweet, more natural fruit-forward pudding experience.
Serving & Storage Suggestions
Serve this pudding chilled straight from the fridge for the best texture. It makes a perfect ending to a casual dinner or a sweet treat for afternoon snacks. For presentation, garnish with a few whole vanilla wafers or a light dusting of cinnamon or nutmeg — it adds a cozy touch.
This pudding pairs beautifully with simple sides like fresh berries or a crisp green salad; it also complements richer dishes such as crispy crack green beans or a hearty chicken main.
To store, cover tightly and refrigerate for up to 3 days. The flavors actually deepen after a day, but the wafers will continue to soften, so if you prefer more crunch, add fresh wafers on top before serving. This pudding isn’t ideal for freezing because the texture changes drastically once thawed.
When reheating (if you must), warm gently in a microwave for 15-20 seconds — but honestly, it’s best enjoyed cold or at room temperature. If you want to refresh it, stirring in a little extra fresh banana and crushed wafers before serving brings life back to the pudding.
Nutritional Information & Benefits
An estimated serving of this cozy classic banana pudding (about 1 cup or 240 ml) contains roughly:
| Calories | Carbs | Protein | Fat | Fiber |
|---|---|---|---|---|
| 280 kcal | 40 g | 5 g | 10 g | 2 g |
Bananas provide potassium, vitamin C, and fiber, making this dessert a bit more nutritious than your average sweet treat. The pudding includes protein from eggs and dairy, while vanilla wafers contribute a modest amount of carbs.
This recipe can be adapted for gluten-free or dairy-free diets, but it does contain eggs and bananas, which are common allergens for some. For those watching sugar intake, reducing sugar or using natural sweeteners works well without losing that cozy flavor.
From a wellness perspective, I appreciate that this pudding feels indulgent but made with real ingredients and fresh fruit — it’s a sweet option that doesn’t rely on artificial flavors or preservatives.
Conclusion
This cozy classic banana pudding with vanilla wafers is one of those recipes that’s stood the test of time because it’s simple, comforting, and downright delicious. It’s a dessert that invites you to slow down and savor small moments, whether you’re sharing it with friends or enjoying a quiet night in.
Feel free to make it your own — swap ingredients, play with textures, or add your favorite toppings. I love this pudding because it’s forgiving and easy, yet it always feels like a special treat.
If you give it a try, I’d love to hear how you made it yours. Your tweaks and stories make this recipe even richer. So dig in, enjoy every spoonful, and maybe keep a few extra ripe bananas on hand — just in case.
Frequently Asked Questions
Can I make banana pudding ahead of time?
Yes! In fact, chilling the pudding overnight helps the flavors meld and the wafers soften perfectly. Just cover tightly and refrigerate.
What’s the best way to keep bananas from browning?
Slice bananas right before layering. If prepping early, toss slices lightly with lemon juice to slow browning.
Can I use low-fat or plant-based milk?
Absolutely. Whole milk gives the creamiest texture, but 2% or plant-based milks like almond or oat work fine — just expect a slightly lighter pudding.
How do I prevent the pudding from getting lumpy?
Whisk constantly while cooking and temper the egg yolks by slowly adding hot pudding to them before mixing back. If lumps form, whisk vigorously off heat to smooth it out.
Can I freeze banana pudding?
Freezing isn’t recommended because bananas and pudding change texture when thawed. It’s best enjoyed fresh or refrigerated.
Pin This Recipe!

Cozy Classic Banana Pudding Recipe with Easy Vanilla Wafers
A simple, comforting banana pudding layered with vanilla wafers and ripe bananas, featuring a creamy pudding base with a subtle tang from cream cheese. Ready in about 20 minutes and perfect for gatherings or a cozy treat.
- Prep Time: 15 minutes
- Cook Time: 10 minutes
- Total Time: 4 hours 25 minutes
- Yield: 8 servings 1x
- Category: Dessert
- Cuisine: American
Ingredients
- 4 medium ripe bananas, sliced (about 1/4-inch thick)
- About 45 vanilla wafers (Nilla wafers or any vanilla cookie)
- 3 cups (720 ml) whole milk (or 2%/dairy-free milk like oat or almond)
- 3/4 cup (150 g) granulated sugar
- 1/3 cup (40 g) all-purpose flour (cornstarch can be substituted for gluten-free)
- 3 large egg yolks, room temperature
- 2 tablespoons (28 g) unsalted butter, softened
- 2 teaspoons pure vanilla extract
- 4 oz (115 g) cream cheese, softened (optional)
Instructions
- Peel and slice 4 medium ripe bananas into about 1/4-inch thick rounds. Set aside. Arrange the vanilla wafers near your prep station for easy layering.
- In a medium saucepan, whisk together 3/4 cup granulated sugar and 1/3 cup all-purpose flour until combined. Gradually whisk in 3 cups whole milk, making sure no lumps remain.
- Place the saucepan over medium heat and cook, whisking constantly, until the mixture thickens and just starts to bubble, about 7-10 minutes. It should coat the back of a spoon and feel smooth and creamy.
- In a separate bowl, lightly beat 3 large egg yolks. Slowly whisk about 1 cup of the hot pudding mixture into the yolks to temper them, then pour the yolk mixture back into the saucepan. Continue cooking for 2 more minutes, stirring constantly, until thickened.
- Remove the saucepan from heat. Stir in 2 tablespoons softened unsalted butter, 4 oz softened cream cheese, and 2 teaspoons vanilla extract until smooth.
- Transfer the pudding to a bowl. Press plastic wrap directly on the surface to prevent a skin from forming. Let it cool to room temperature, then refrigerate for at least 1 hour to chill.
- In a 9×13-inch dish or trifle bowl, start with a layer of vanilla wafers at the bottom. Add a layer of sliced bananas, then spread a layer of chilled pudding over the top. Repeat layers until ingredients are used up, ending with a pudding layer.
- Cover the assembled pudding with plastic wrap and refrigerate for at least 3 hours, preferably overnight, to allow wafers to soften and flavors to meld.
- Spoon out generous portions and enjoy. The pudding should be creamy, the bananas tender but fresh, and the wafers softened to melt-in-your-mouth perfection.
Notes
Whisk constantly while cooking to prevent lumps and scorching. Temper egg yolks carefully to avoid scrambling. Use room temperature ingredients for smoother pudding. Press plastic wrap on pudding surface to prevent skin. Chill pudding thoroughly before layering for best texture. Slice bananas just before layering to avoid browning; use lemon juice if prepping early. For dairy-free, swap butter with coconut oil and use plant-based cream cheese. For gluten-free, substitute flour with cornstarch and use gluten-free cookies instead of vanilla wafers.
Nutrition
- Serving Size: About 1 cup (240 ml)
- Calories: 280
- Fat: 10
- Carbohydrates: 40
- Fiber: 2
- Protein: 5
Keywords: banana pudding, vanilla wafers, classic dessert, easy pudding recipe, creamy banana dessert, layered pudding, comfort food


