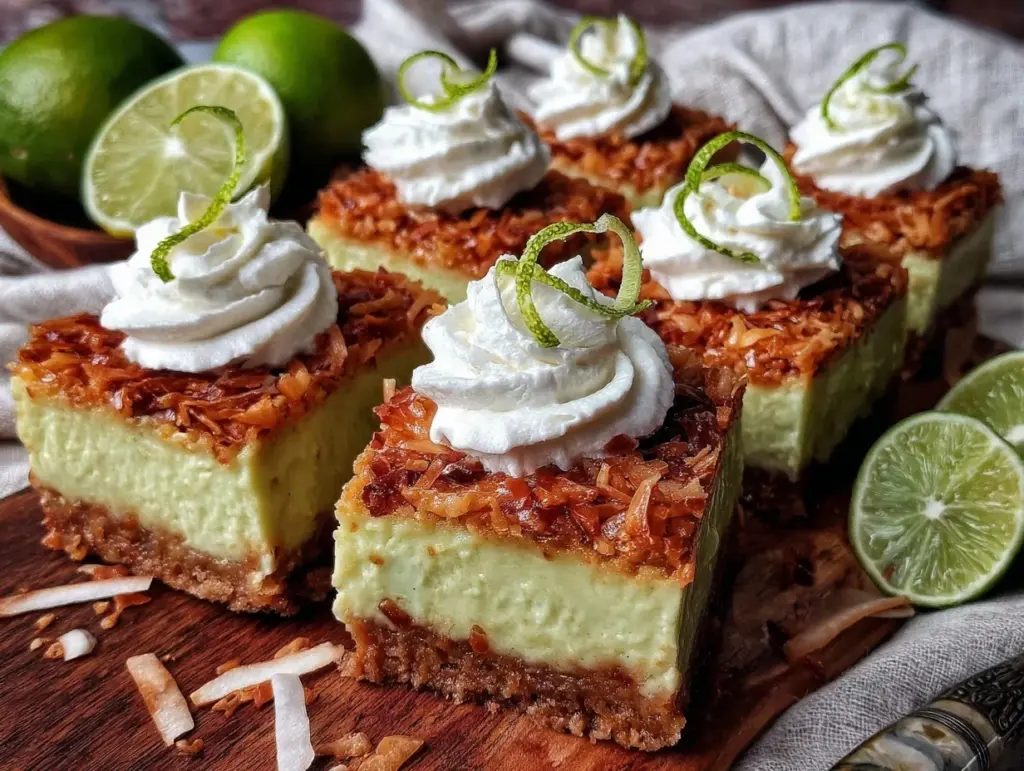
“You know that moment when you pull something out of the oven, and it looks a bit…unexpected? That’s exactly how my Crispy Key Lime Pie Bars with Toasted Coconut Crust came to life. I was aiming for a classic key lime pie, but honestly, I was running low on proper pie crust ingredients. So, I grabbed a bag of shredded coconut, threw together a quick crust, and hoped for the best. The kitchen smelled amazing—like a tropical breeze mixed with something sweet and tangy right as the bars baked to a perfect golden crisp.
At first, I wasn’t sure if the toasted coconut crust would hold up under the creamy lime filling, but once cooled and sliced, these bars had the most delightful crunch paired with that zingy, smooth filling. My family kept asking for more, and honestly, I couldn’t blame them. The crust added a whole new dimension—something I never expected but absolutely loved. Since then, these bars have popped up at every potluck and casual get-together I’ve hosted, always disappearing fast.
There’s just something quietly satisfying about biting into a bar that’s both tart and sweet, with a crispness that holds together without being crumbly or soggy. This recipe stuck with me because it’s not fancy or complicated, but it brings those little moments of joy and surprise that make homemade desserts feel special. So if you’re after a treat that’s a bit outside the usual pie box yet totally comforting, these Crispy Key Lime Pie Bars with Toasted Coconut Crust might just become your new favorite.
Why You’ll Love This Recipe
Having tested this recipe more times than I can count, I can tell you why it stands out from the crowd:
- Quick & Easy: These bars come together in under 45 minutes, making them perfect for busy weeknights or last-minute dessert cravings.
- Simple Ingredients: No hunting down exotic items here—you likely already have shredded coconut, key lime juice, and pantry staples ready to go.
- Perfect for Summer Gatherings: Their bright, citrusy flavor and light texture make them a hit at barbecues, potlucks, or just casual backyard hangouts.
- Crowd-Pleaser: Kids and adults alike love the balance of tart lime with the sweet toasted coconut crust—a combo that’s both refreshing and indulgent.
- Unbelievably Delicious Texture: The crust’s crispiness contrasts beautifully with the creamy lime filling, offering a texture combo that’s just next-level.
What makes this recipe different? The secret’s in how the shredded coconut gets toasted before mixing into the crust, which gives it a nutty depth and a crunch that regular graham cracker crusts just can’t match. Plus, blending the filling with just the right amount of sweetened condensed milk and fresh key lime juice creates that perfect zing—never too tart, never too sweet. Honestly, it’s comfort food reimagined with a tropical twist, and I love that it can impress guests without any fuss.
What Ingredients You Will Need
This recipe uses simple, wholesome ingredients to deliver bold flavor and satisfying texture without the fuss. Most of these items are pantry staples, and you can find fresh key limes or bottled key lime juice at most grocery stores or online.
- For the Toasted Coconut Crust:
- 2 cups shredded coconut (unsweetened or lightly sweetened; toasting it brings out the best flavor)
- 1 cup all-purpose flour (for a gluten-free option, try almond flour)
- ½ cup granulated sugar
- ½ teaspoon salt
- ½ cup unsalted butter, melted (I prefer Land O’ Lakes for rich flavor)
- For the Key Lime Filling:
- 4 large eggs, room temperature
- 1 can (14 oz / 400 g) sweetened condensed milk (Nestlé’s is my go-to)
- ½ cup fresh key lime juice (about 8-10 key limes; bottled key lime juice works in a pinch)
- 1 tablespoon lime zest (adds extra punch)
- Optional Garnishes:
- Toasted coconut flakes (for sprinkling on top)
- Whipped cream
- Thin lime slices or wedges
Substitution tips: If you want to swap the all-purpose flour for a gluten-free option, almond flour works well but might require a little extra butter to hold the crust together. For a dairy-free version, try coconut oil instead of butter, though it will slightly change texture and flavor. Also, in warmer months, I sometimes swap lime zest for lemon zest for a citrus twist that pairs nicely with the coconut.
Equipment Needed
- Baking pan (9×9 inches or 8×8 inches square pan works well)
- Mixing bowls (at least two: one for crust, one for filling)
- Electric mixer or whisk (for beating eggs and combining filling smoothly)
- Measuring cups and spoons (accurate measurements make a difference!)
- Spatula (to press crust evenly and scrape the filling)
- Oven thermometer (optional but handy for consistent baking temperature)
- Zester or fine grater (for zesting limes)
If you don’t have an electric mixer, a sturdy whisk works fine, though it takes a bit more arm power. For pressing the crust, I like to use the bottom of a flat glass or measuring cup to get an even, compact base. If you’re on a budget, a simple glass pie pan can substitute for a square baking pan, but the bars might be a little thinner.
Preparation Method
- Preheat the oven to 350°F (175°C). This temperature crisps the coconut nicely without burning it, setting the stage for that golden crust.
- Toast the shredded coconut: Spread 2 cups of shredded coconut evenly on a baking sheet and bake for 5-7 minutes, stirring once halfway through. Watch carefully—it browns quickly! Once toasted, remove and let cool slightly.
- Make the crust: In a mixing bowl, combine the toasted coconut, 1 cup flour, ½ cup sugar, and ½ teaspoon salt. Pour in ½ cup melted butter and mix until the crumbs hold together when pressed. You want a slightly sticky, sandy texture.
- Press the crust mixture firmly into the bottom of your baking pan. Use the bottom of a glass or your fingers to pack it evenly. Bake the crust for 10-12 minutes until it’s set and golden. Remove from oven and let cool slightly.
- Prepare the filling: In a clean bowl, whisk 4 large eggs until frothy (about 1-2 minutes). Add the sweetened condensed milk, fresh key lime juice, and lime zest. Whisk until smooth and combined.
- Pour the filling over the warm crust evenly. The crust should still be slightly warm to help the filling set nicely.
- Bake the bars for 15-18 minutes, or until the filling is just set but still jiggles a tiny bit in the center. Don’t overbake or the filling will crack and dry out.
- Cool the bars completely in the pan on a wire rack, then refrigerate for at least 2 hours or overnight to let the filling firm up and flavors meld.
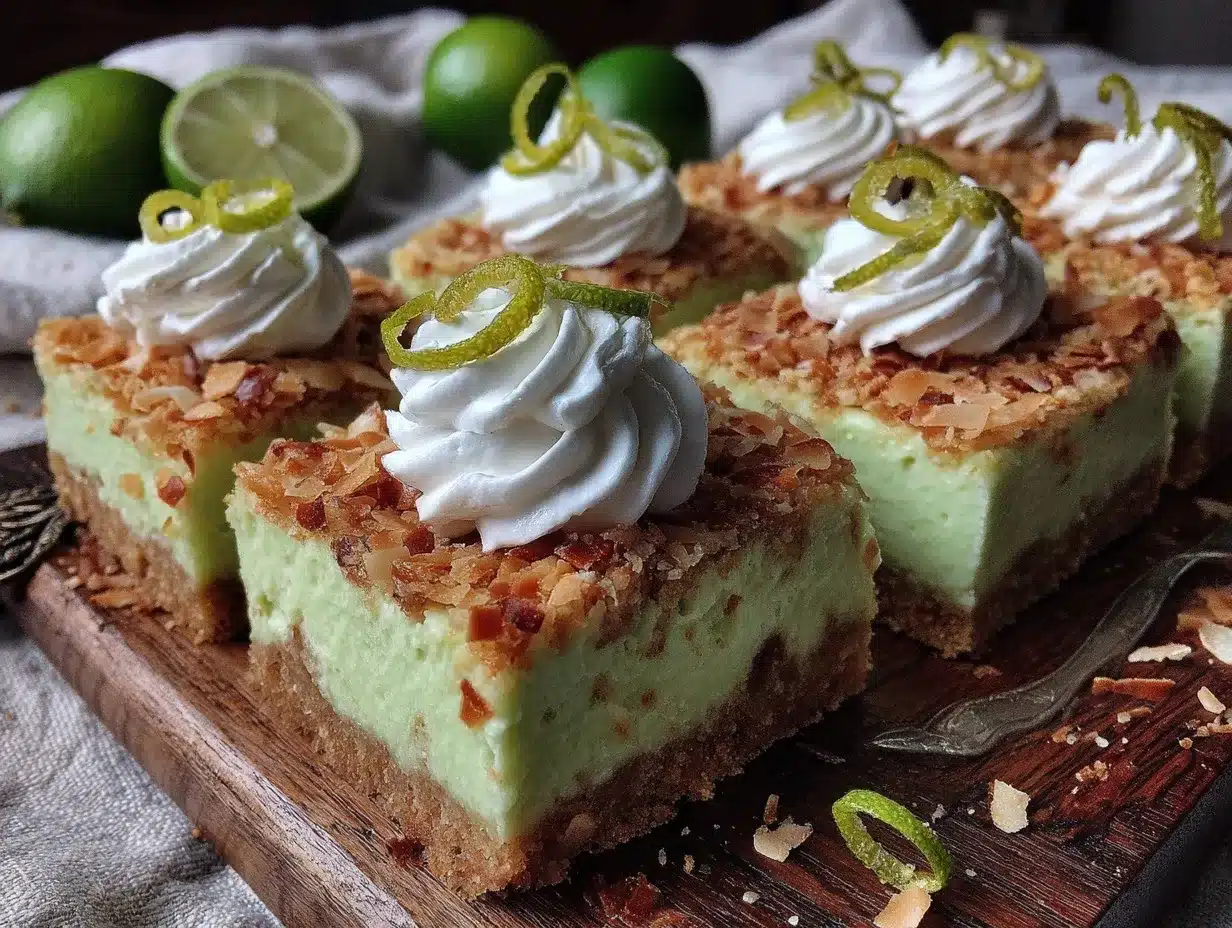
- Slice into bars and garnish: Sprinkle with extra toasted coconut flakes, a dollop of whipped cream, and a lime wedge if you like.
Quick troubleshooting tip: If your crust feels too crumbly to press, add a teaspoon of melted butter at a time until it sticks better. Also, keep an eye on the coconut when toasting—it can go from golden to burnt in seconds!
Cooking Tips & Techniques
One trick I learned the hard way is that toasting the coconut before mixing creates a nutty, crunchy crust that stands up well to the moist filling. Untoasted coconut tends to get chewy and soggy, so don’t skip this step.
When mixing the filling, be gentle but thorough. Overbeating eggs can introduce too much air, making the filling puff up and crack as it cools. Whisk just until combined and smooth.
Another tip: bake the crust alone first, as it sets a sturdy base. If you pour filling on an unbaked crust, it might get soggy or collapse.
For slicing, use a sharp knife wiped clean between cuts to keep edges crisp and neat. I often refrigerate the bars overnight because it makes cutting easier and helps the flavors deepen.
Multitasking tip: While the crust bakes, zest and juice your limes to save time. Fresh key lime juice truly makes a difference compared to bottled, if you can get your hands on them.
Variations & Adaptations
- Gluten-Free Version: Swap all-purpose flour for almond flour or gluten-free baking flour blends. The crust will be slightly softer but still delicious.
- Tropical Twist: Add ¼ cup finely chopped macadamia nuts to the toasted coconut crust for extra crunch and a buttery flavor.
- Dairy-Free Adaptation: Use coconut oil instead of butter and substitute sweetened condensed coconut milk for a creamy, vegan-friendly filling.
- Flavor Boost: Mix in a teaspoon of vanilla extract or a pinch of ground ginger into the filling for subtle warmth and complexity.
- Cooking Method Variation: Try baking the bars in a glass pie dish for a thinner, more tart-like texture or in individual ramekins for personal-sized treats.
Personally, I once added a thin layer of raspberry jam between the crust and filling. It was a happy accident that added a sweet-tart surprise and gorgeous color contrast. Don’t be afraid to experiment!
Serving & Storage Suggestions
Serve these bars chilled or at room temperature. They’re fantastic straight from the fridge on a hot day, but I find letting them sit out 10 minutes before serving brings out the creamy tanginess.
Presentation-wise, a sprinkle of toasted coconut flakes and a fresh lime wedge make these bars look as good as they taste. They pair beautifully with a light cup of coffee or a refreshing iced tea.
Store leftover bars tightly covered in the refrigerator for up to 5 days. They actually taste better after a day or two as the flavors meld. For longer storage, wrap bars individually and freeze for up to 2 months. Thaw overnight in the fridge before serving.
When reheating, avoid microwaving as it softens the crust. Instead, let bars come to room temperature on the counter for 15-20 minutes.
Nutritional Information & Benefits
Each serving of these Crispy Key Lime Pie Bars contains roughly 250-300 calories, with moderate sugar content due to sweetened condensed milk and coconut. Key lime juice provides a good dose of vitamin C, supporting immunity and skin health.
The toasted coconut adds fiber and healthy fats, which can aid digestion and provide lasting energy. Using fresh ingredients keeps the recipe naturally free of preservatives and artificial flavors.
This dessert is gluten-free adaptable and can be made dairy-free with simple swaps, accommodating various dietary needs without compromising taste.
I appreciate recipes like this that balance indulgence with wholesome components, making it easier to enjoy dessert guilt-free (well, mostly!).
Conclusion
These Crispy Key Lime Pie Bars with Toasted Coconut Crust are a little slice of sunshine you can make anytime. They’re not complicated, but they bring together textures and flavors that feel special and satisfying. The toasted coconut crust is my favorite part—adding crunch and a toasty aroma that pairs perfectly with the creamy, tangy lime filling.
Feel free to tweak the recipe to match your tastes or dietary needs—you might find your own signature spin, like I did with that raspberry layer. I love how this recipe fits into busy schedules yet impresses guests with minimal fuss.
If you’ve enjoyed treats like the peanut butter blossoms cookies or crave something fresh and vibrant like the zucchini noodle pad thai, this key lime pie bars recipe fits right in as a bright, crispy dessert hit.
Give it a try and let me know how your bars turn out—there’s something rewarding about sharing homemade desserts that bring smiles. Happy baking!
FAQs
- Can I use regular lime juice instead of key lime juice?
Yes! Regular lime juice works fine, but key limes offer a slightly sweeter, more floral flavor that’s traditional for this recipe. - How do I prevent the crust from getting soggy?
Toasting the coconut before mixing and pre-baking the crust helps create a sturdy, crisp base that resists sogginess. - Can I make these bars ahead of time?
Absolutely. They taste even better after chilling overnight, which helps the filling set firmly and the flavors meld. - Is there a vegan version of this recipe?
You can make a dairy-free and egg-free version using coconut oil, dairy-free condensed milk alternatives, and an egg replacer, though texture may vary slightly. - What’s the best way to slice these bars cleanly?
Use a sharp knife, wipe it clean between cuts, and chill the bars well before slicing to keep edges neat and prevent crumbling.
Pin This Recipe!
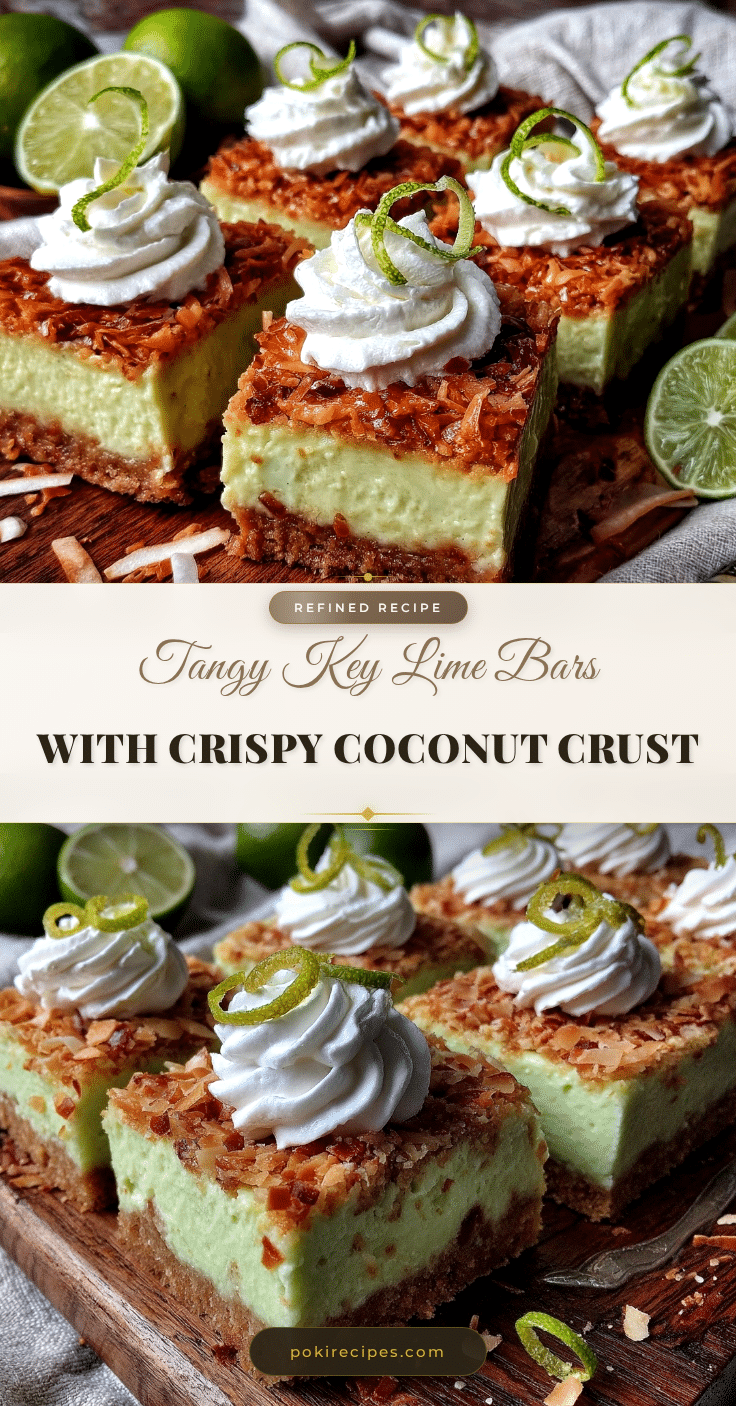
Crispy Key Lime Pie Bars with Toasted Coconut Crust

These bars feature a crunchy toasted coconut crust paired with a creamy, tangy key lime filling, delivering a refreshing and indulgent dessert perfect for summer gatherings.
- Prep Time: 15 minutes
- Cook Time: 35 minutes
- Total Time: 2 hours 50 minutes
- Yield: 16 bars 1x
- Category: Dessert
- Cuisine: American
Ingredients
- 2 cups shredded coconut (unsweetened or lightly sweetened)
- 1 cup all-purpose flour (or almond flour for gluten-free option)
- ½ cup granulated sugar
- ½ teaspoon salt
- ½ cup unsalted butter, melted
- 4 large eggs, room temperature
- 1 can (14 oz / 400 g) sweetened condensed milk
- ½ cup fresh key lime juice (about 8–10 key limes)
- 1 tablespoon lime zest
- Optional garnishes: toasted coconut flakes, whipped cream, thin lime slices or wedges
Instructions
- Preheat the oven to 350°F (175°C).
- Toast the shredded coconut by spreading it evenly on a baking sheet and baking for 5-7 minutes, stirring once halfway through. Remove and let cool slightly.
- In a mixing bowl, combine the toasted coconut, flour, sugar, and salt. Pour in melted butter and mix until crumbs hold together when pressed.
- Press the crust mixture firmly into the bottom of a 9×9 inch or 8×8 inch baking pan. Bake the crust for 10-12 minutes until set and golden. Let cool slightly.
- In a clean bowl, whisk eggs until frothy (1-2 minutes). Add sweetened condensed milk, key lime juice, and lime zest. Whisk until smooth and combined.
- Pour the filling evenly over the warm crust.
- Bake the bars for 15-18 minutes, until the filling is just set but still slightly jiggles in the center. Avoid overbaking.
- Cool the bars completely in the pan on a wire rack, then refrigerate for at least 2 hours or overnight.
- Slice into bars and garnish with toasted coconut flakes, whipped cream, and lime wedges if desired.
Notes
Toast the coconut before mixing to ensure a crunchy crust that resists sogginess. Avoid overbeating eggs to prevent cracks in the filling. Pre-bake the crust for a sturdy base. Use a sharp knife wiped clean between cuts for neat slices. Refrigerate bars overnight for best flavor and easier slicing. For gluten-free crust, use almond flour and possibly extra butter. For dairy-free, substitute coconut oil for butter and use dairy-free condensed milk alternatives.
Nutrition
- Serving Size: 1 bar (assuming 16 b
- Calories: 275
- Sugar: 20
- Sodium: 150
- Fat: 16
- Saturated Fat: 11
- Carbohydrates: 30
- Fiber: 3
- Protein: 5
Keywords: key lime pie bars, toasted coconut crust, easy dessert, summer dessert, gluten-free option, dairy-free adaptation, homemade bars


