“You sure you don’t want just one more taco?” my cousin teased, as the grill sizzled away in the backyard, smoke curling into the warm spring air. We were halfway through setting up what would become the perfect DIY taco bar for my younger sister’s graduation party, and honestly, I was skeptical at first. Tacos for a celebration? I always pictured fancy finger foods or meticulously plated dishes at big events. But this—this taco bar was turning into the star of the day.
That afternoon, neighbors wandered in, drawn not by invitations, but by the irresistible aroma of seasoned meat and freshly toasted tortillas. Everyone was building their own creations: some stacked theirs high with spicy salsa and creamy guacamole, others kept it simple with just cheese and a squeeze of lime. The casual, hands-on vibe made it easy for everyone to mingle, laugh, and create something uniquely theirs.
Looking back, the success of this perfect DIY taco bar wasn’t just about the food; it was the way it brought people together without fuss or formality. A meal that was as fun to assemble as it was to eat, it became the heart of our graduation celebration. And honestly, that easygoing spirit is exactly why this setup has stuck with me—because sometimes, the best party food is the one you build yourself, bite by bite.
Why You’ll Love This Recipe
Let’s get real: this perfect DIY taco bar is a game-changer for graduation parties or any casual gathering. After testing countless combinations and setups, here’s why this recipe and concept have become my go-to:
- Quick & Easy: The entire spread comes together in under 90 minutes, making it perfect for last-minute party plans or busy days spent juggling everything else.
- Simple Ingredients: No need for specialty stores—most ingredients are pantry staples or easy to grab at your local market.
- Perfect for Celebrations: Whether it’s a graduation, birthday, or casual get-together, this taco bar keeps guests engaged and happy.
- Crowd-Pleaser: From picky teens to adventurous adults, everyone finds their favorite combo, making it a universally loved option.
- Unbelievably Delicious: The balance of smoky, spicy, fresh, and creamy toppings means every bite delivers big flavor with satisfying textures.
What really sets this taco bar apart is the little twists I added after a few trials—like roasting the peppers to deepen their flavor or blending a quick cilantro-lime crema that’s silky and tangy without overpowering the other toppings. Plus, swapping in some homemade seasoning blends instead of store-bought packets really pushes the taste up a notch.
This isn’t just another taco bar. It’s one that invites everyone to play chef, creating their perfect bite while sharing laughs and stories. Honestly, it’s become my secret weapon for stress-free entertaining that still feels special and memorable.
What Ingredients You Will Need
This perfect DIY taco bar uses simple, wholesome ingredients to deliver bold flavor and plenty of texture without any fuss. Most of these items are easy to find year-round, and many can be swapped or skipped depending on your preferences or dietary needs.
- For the Protein:
- Ground beef (80/20 blend for juiciness, about 2 pounds / 900 grams)
- Chicken thighs, boneless & skinless, chopped (1.5 pounds / 700 grams) — optional for variety
- Homemade taco seasoning (chili powder, cumin, smoked paprika, garlic powder, onion powder, oregano, salt, pepper)
- For the Tortillas:
- Soft corn tortillas (20 count) — warm and slightly charred for best flavor
- Flour tortillas (optional, for guests who prefer)
- Fresh Toppings:
- Diced tomatoes (fresh, ripe)
- Shredded iceberg lettuce or cabbage (adds crunch)
- Chopped red onions (mild, soak briefly in lime juice to mellow)
- Fresh cilantro leaves (washed and roughly chopped)
- Jalapeño slices (seeded for less heat, optional)
- Sauces & Extras:
- Guacamole (fresh, chunky style with lime and cilantro)
- Sour cream or Mexican crema
- Shredded cheddar or Mexican blend cheese
- Salsa roja (store-bought or homemade for smoky, medium heat)
- Cilantro-lime crema (blend sour cream, lime juice, cilantro, pinch of salt)
- Optional Sides:
- Mexican rice (ready-made or homemade)
- Refried beans or black beans
Ingredient tips: For the ground beef, I trust brands like Grass Run Farms for freshness and flavor. When selecting tortillas, a good quality local brand or fresh-made corn tortillas add a noticeable difference — and if you’re into the texture, warming them on a hot cast-iron skillet is magic. For a lighter twist, swapping beef for shredded rotisserie chicken or even a vegetarian black bean filling works wonders.
Equipment Needed
- Large skillet or cast-iron pan for cooking the meat (a heavy pan gives better browning)
- Grill or griddle to warm and slightly char tortillas (you can also use a nonstick skillet)
- Cutting board and sharp knife for chopping toppings
- Mixing bowls for sauces and toppings
- Serving platters or shallow bowls for assembling the taco bar
- Spoons and tongs for easy self-serving
If you don’t own a cast-iron skillet, a heavy stainless steel pan works well too—just watch the heat to avoid burning the meat. I’ve found a small electric griddle handy for warming a dozen tortillas at once when hosting larger groups. And if you’re short on space, stacking toppings in small glass bowls keeps the station tidy and visually appealing.
Preparation Method
- Prepare the Protein: Heat 1 tablespoon of oil in your skillet over medium-high heat. Add the ground beef (900g / 2 lbs) and cook, breaking it up with a spatula, until browned and cooked through, about 8–10 minutes. Drain excess fat if needed. Stir in 2 tablespoons of homemade taco seasoning and 1/4 cup (60 ml) water, simmer for 3–4 minutes until the flavors meld and sauce thickens slightly. Keep warm.
- Optional Chicken: If using chicken thighs, season with the same taco spice mix and cook in a separate pan until internal temperature reaches 165°F (74°C), about 12 minutes. Shred with two forks and toss with a bit of seasoning and lime juice for brightness.
- Warm the Tortillas: Preheat your grill or skillet over medium-high heat. Warm each tortilla for about 30 seconds per side until soft and slightly charred. Wrap them in a clean kitchen towel to keep warm and moist.
- Prepare Fresh Toppings: Dice tomatoes, chop lettuce or cabbage finely, soak red onions in lime juice for 5 minutes to remove harshness, and slice jalapeños if using. Chop cilantro last minute to keep it fresh.
- Mix Sauces: Whisk together sour cream with lime juice and chopped cilantro for a quick crema. Set out guacamole and salsa in bowls.
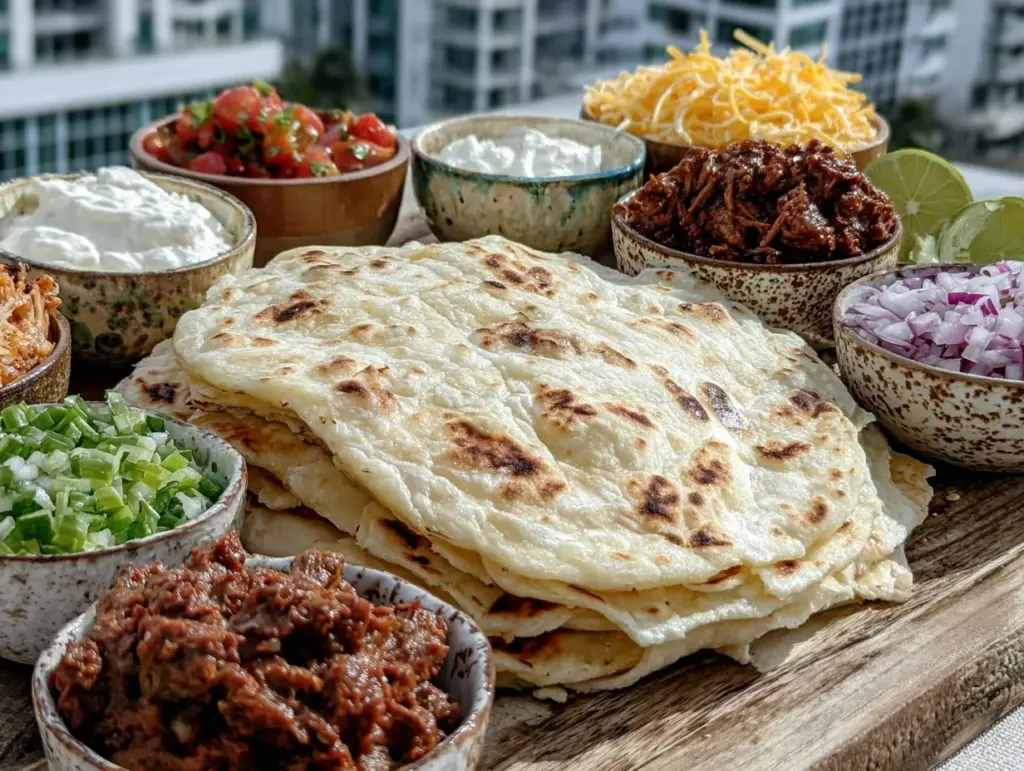
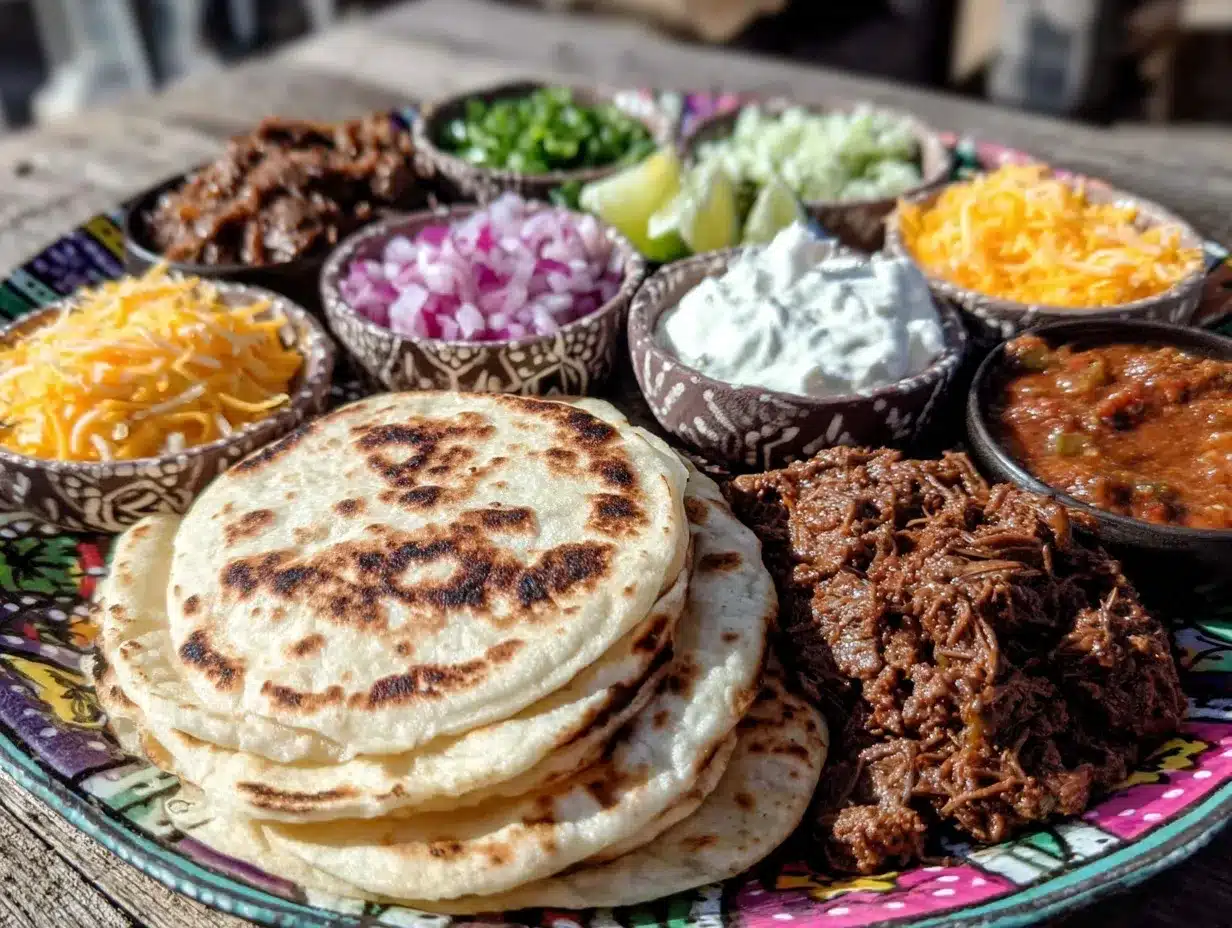
- Set Up Taco Bar: Arrange tortillas, proteins, toppings, cheeses, and sauces in an inviting, accessible layout. Provide plenty of small plates and napkins—tacos can get delightfully messy.
- Final Touches: Garnish the bar with lime wedges and a sprinkle of chopped cilantro for color and freshness. Encourage guests to build their own tacos and have fun experimenting with combinations.
Pro tip: When cooking the meat, don’t rush the browning step—those little crispy bits add incredible flavor. Also, keeping your toppings chilled and fresh is key to balancing the warm, savory meat.
Cooking Tips & Techniques
One thing I learned the hard way is that seasoning is king. Using a homemade taco seasoning blend lets you control salt and spice levels exactly, which beats the overpowering packets sold in stores. I always toast the spices briefly before mixing them to release more aroma—trust me, it makes a difference.
Don’t underestimate tortilla prep. Warming them just before serving keeps them pliable and prevents cracking. Wrapping them in a towel right away traps steam and softness. If you want that slight charred flavor, a quick flip on a hot cast-iron or grill does the trick without drying them out.
Another tip: soak red onions in lime juice for a few minutes to mellow their bite. Guests often appreciate the balance between tangy crunch and savory meat. Also, offering multiple proteins (like beef and chicken) covers more taste preferences and keeps the bar lively.
Timing-wise, multitasking helps a lot. While the meat simmers with seasoning, prep the toppings and sauces. That way, everything comes together smoothly with minimal stress right before guests arrive.
Variations & Adaptations
This taco bar concept is endlessly flexible. Here are a few ideas to tweak it based on your crowd or dietary needs:
- Vegetarian Option: Swap the meat for roasted cauliflower or sautéed mushrooms with the same seasoning. Black beans or refried beans also work great as protein-rich fillings.
- Spicy Kick: Add pickled jalapeños and hot sauce on the side, or mix chipotle powder into the meat for smoky heat.
- Gluten-Free: Stick to corn tortillas (make sure they’re labeled gluten-free) and avoid any processed toppings that may contain gluten.
- Seasonal Twist: In summer, fresh mango salsa or grilled corn kernels add a bright, sweet contrast.
- Seafood Variation: Include grilled shrimp or fish tacos with a tangy slaw for a coastal vibe.
For a party I hosted last year, I added a protein-packed pasta salad alongside the taco bar for guests wanting a cold side option. It complemented the warm, spicy tacos perfectly and gave the setup a little extra flair.
Serving & Storage Suggestions
Serve tacos warm and fresh right from the bar for the best experience. Encourage guests to pile on toppings but also remind them that sometimes less is more—letting the smoky meat shine through.
Pair your taco bar with refreshing drinks like iced lime agua fresca or light beers to balance the bold flavors. For sides, simple Mexican rice or beans round out the meal nicely.
Leftovers? Store cooked meat separately in airtight containers in the fridge for up to 3 days. Tortillas keep best wrapped in foil or a sealed bag. Reheat meat gently in a skillet or microwave, and warm tortillas in a hot pan or oven wrapped in foil to keep them soft.
Flavors actually deepen when you let the meat sit overnight, so if you’re prepping in advance, that’s a bonus! Just freshen up the toppings and sauces before serving.
Nutritional Information & Benefits
This DIY taco bar offers a balanced combo of protein, fiber, and fresh veggies. Ground beef provides a good dose of iron and B vitamins, while the fresh toppings bring antioxidants and vitamin C. Using corn tortillas keeps the carbs moderate and adds whole grain benefits.
For lighter options, swapping beef for chicken or beans cuts fat without sacrificing flavor. The inclusion of avocados in guacamole adds heart-healthy fats, promoting satiety and nutrient absorption.
While this recipe includes potential allergens like dairy and gluten (in flour tortillas), substitutions are easy with dairy-free crema or gluten-free tortilla options. Overall, it’s a crowd-friendly, flexible setup that fits a range of diets.
Conclusion
This perfect DIY taco bar is more than just a meal—it’s a celebration in every bite. It brings friends and family together, sparks creativity, and keeps things relaxed without sacrificing flavor. Whether you’re throwing a graduation party or just want a fun dinner idea, this setup lets everyone build their own perfect taco experience.
I love it because it’s as much about the memories made around the food as the food itself. Plus, it’s pretty hard to beat the smell of sizzling seasoned meat and the bright pop of fresh salsa on a warm tortilla.
Give it a try, tweak it to your liking, and don’t be surprised when guests start asking for seconds—or even thirds. And if you want to add a sweet finish, something like peanut butter blossoms cookies might just be the perfect way to end the celebration. Happy taco building!
FAQs
- Can I make the taco meat ahead of time? Absolutely. Cook and season the meat a day before, then store it in the fridge. Reheat gently before serving to keep it juicy.
- What’s the best way to keep tortillas warm? Wrap them in a clean kitchen towel or foil right after warming. You can keep them in a low oven (around 200°F/95°C) until ready to serve.
- How do I make this taco bar vegetarian-friendly? Offer fillings like roasted veggies, black beans, or sautéed mushrooms seasoned like the meat. Include plenty of fresh toppings and salsas for variety.
- Can I grill the meat instead of cooking it in a skillet? Yes! Grilling adds a smoky flavor that’s fantastic. Just marinate or season the meat well and cook until done.
- What are good side dishes to serve with this taco bar? Mexican rice, beans, or a fresh salad like a simple cabbage slaw work well. You might also enjoy pairing with drinks like lime agua fresca or light beer.
Pin This Recipe!
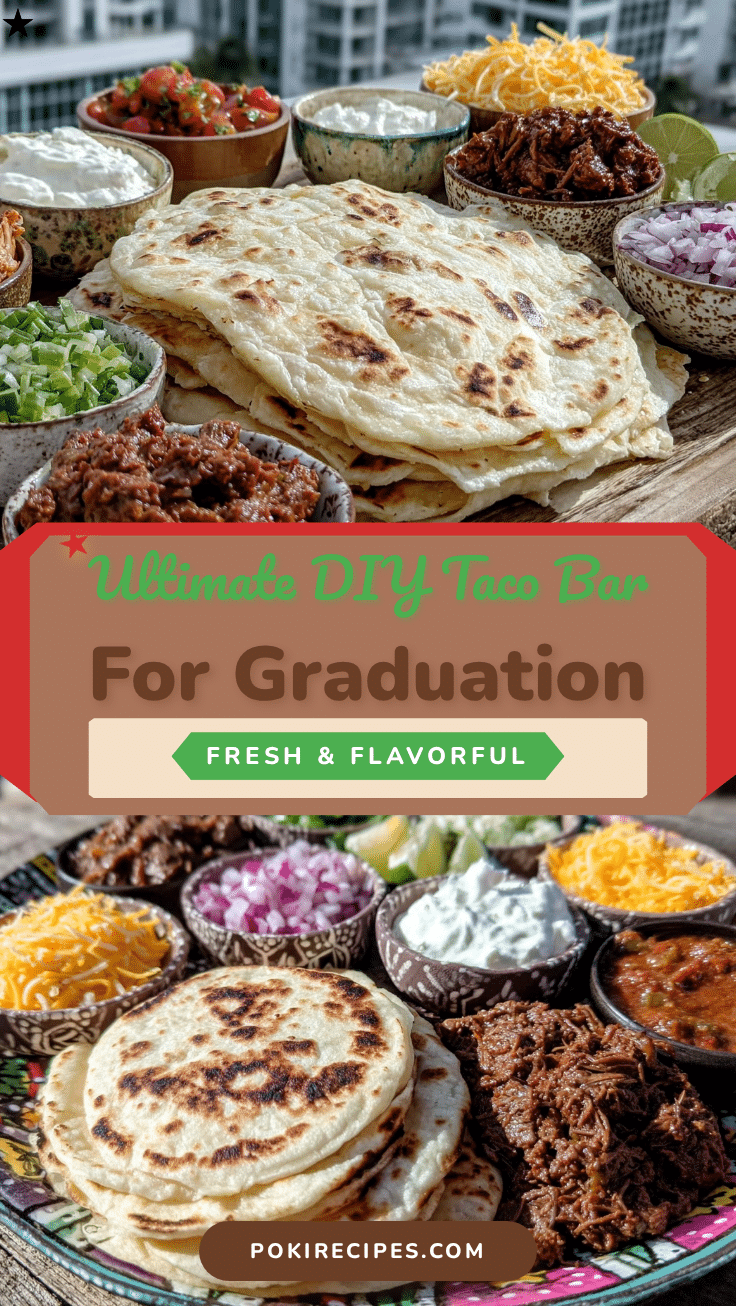
Perfect DIY Taco Bar

A fun and easy DIY taco bar perfect for graduation parties or casual gatherings, featuring seasoned meats, fresh toppings, and customizable options for all tastes.
- Prep Time: 30 minutes
- Cook Time: 45 minutes
- Total Time: 1 hour 15 minutes
- Yield: Serves 8-10 1x
- Category: Main Course
- Cuisine: Mexican
Ingredients
- 2 pounds ground beef (80/20 blend)
- 1.5 pounds boneless, skinless chicken thighs, chopped (optional)
- Homemade taco seasoning (chili powder, cumin, smoked paprika, garlic powder, onion powder, oregano, salt, pepper)
- 20 soft corn tortillas
- Flour tortillas (optional)
- Diced fresh tomatoes
- Shredded iceberg lettuce or cabbage
- Chopped red onions (soaked briefly in lime juice)
- Fresh cilantro leaves, roughly chopped
- Jalapeño slices (seeded, optional)
- Guacamole (fresh, chunky style with lime and cilantro)
- Sour cream or Mexican crema
- Shredded cheddar or Mexican blend cheese
- Salsa roja (store-bought or homemade)
- Cilantro-lime crema (sour cream, lime juice, cilantro, pinch of salt)
- Mexican rice (optional)
- Refried beans or black beans (optional)
Instructions
- Heat 1 tablespoon of oil in a skillet over medium-high heat. Add ground beef and cook, breaking it up, until browned and cooked through, about 8–10 minutes. Drain excess fat if needed.
- Stir in 2 tablespoons homemade taco seasoning and 1/4 cup water. Simmer for 3–4 minutes until flavors meld and sauce thickens slightly. Keep warm.
- If using chicken thighs, season with taco seasoning and cook in a separate pan until internal temperature reaches 165°F (74°C), about 12 minutes. Shred and toss with seasoning and lime juice.
- Preheat grill or skillet over medium-high heat. Warm each tortilla about 30 seconds per side until soft and slightly charred. Wrap in a clean kitchen towel to keep warm.
- Prepare fresh toppings: dice tomatoes, chop lettuce or cabbage, soak red onions in lime juice for 5 minutes, slice jalapeños if using, and chop cilantro last minute.
- Mix sauces: whisk sour cream with lime juice and chopped cilantro for crema. Set out guacamole and salsa in bowls.
- Arrange tortillas, proteins, toppings, cheeses, and sauces in an accessible layout. Provide plates and napkins for self-serving.
- Garnish the bar with lime wedges and chopped cilantro. Encourage guests to build their own tacos and enjoy.
Notes
Use homemade taco seasoning for better flavor control. Warm tortillas just before serving and keep wrapped to maintain softness. Soak red onions in lime juice to mellow their bite. Offering multiple proteins covers more taste preferences. Leftover meat can be stored in the fridge for up to 3 days and reheated gently.
Nutrition
- Serving Size: 1-2 tacos per person
- Calories: 450
- Sugar: 4
- Sodium: 650
- Fat: 28
- Saturated Fat: 10
- Carbohydrates: 30
- Fiber: 5
- Protein: 28
Keywords: taco bar, DIY tacos, graduation party food, easy party recipes, Mexican tacos, taco toppings, homemade taco seasoning