“Mom, did you really make these cookies yourself?” My niece’s wide-eyed question caught me off guard as I handed her one of my Elegant Mother’s Day Decorated Sugar Cookies. Honestly, I wasn’t expecting much when I pulled out my baking supplies that morning. I’d planned a quick treat for Mother’s Day, but the idea of decorating sugar cookies felt a bit intimidating—too fussy, too time-consuming. Yet, as I rolled out the dough and traced delicate shapes with cookie cutters, the kitchen filled with the warm scent of vanilla and butter, and suddenly it was less about perfection and more about a quiet moment of creativity.
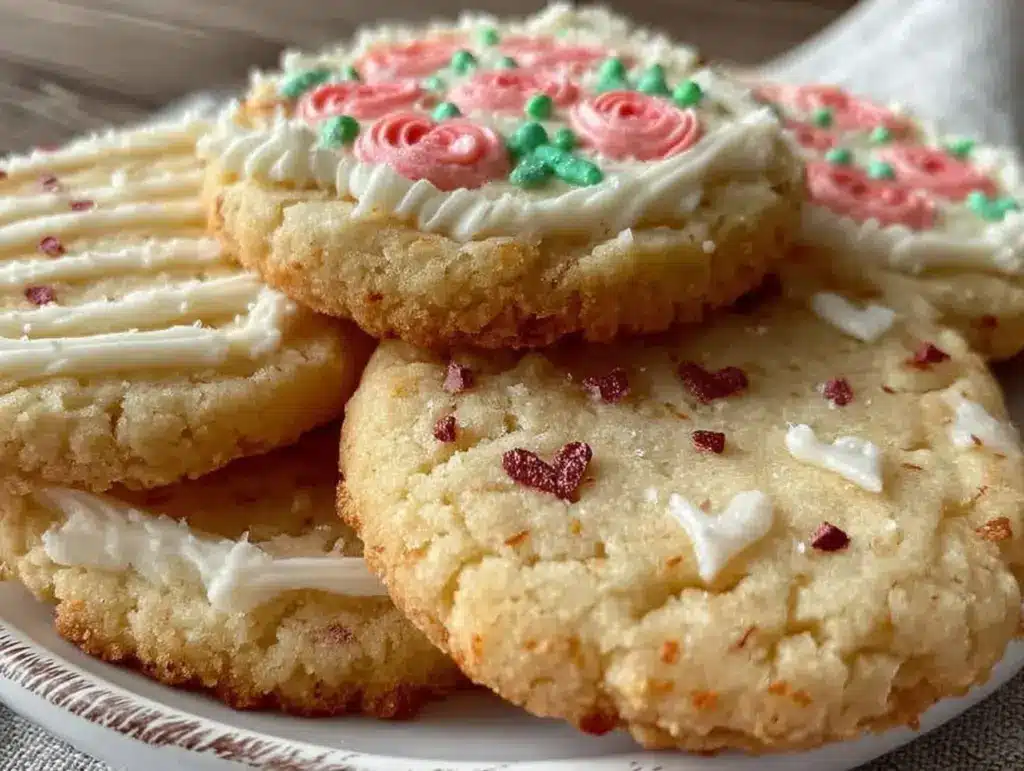
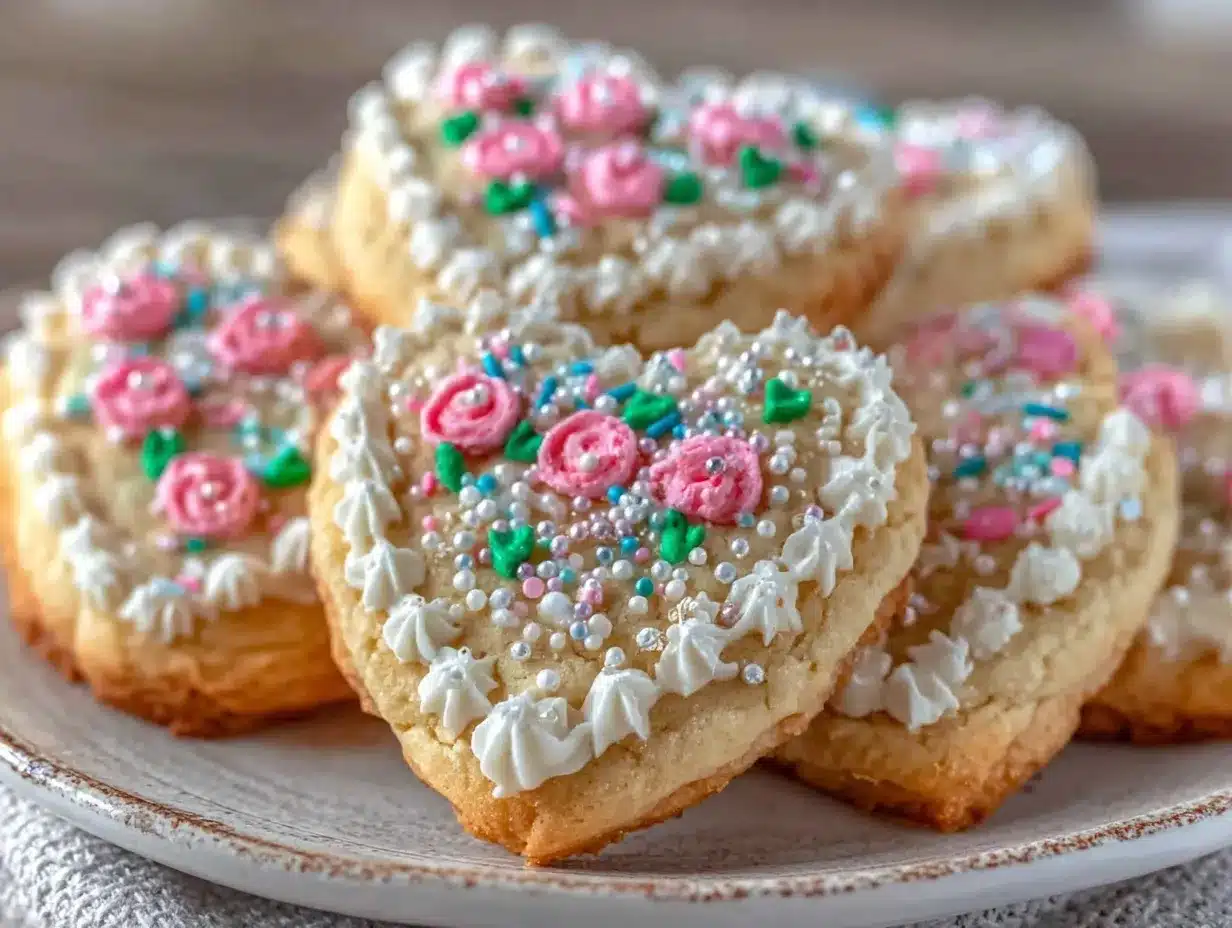
I hadn’t anticipated how these cookies would become the centerpiece of our celebration. The soft pastel icing, tiny piped details, and a touch of edible shimmer somehow made this humble sugar cookie feel like a little piece of art. It was the kind of recipe that turns baking into a simple, joyful ritual rather than a chore. I found myself making these cookies a few times that week, trying out different designs and icing techniques—an obsession, really. By the time Mother’s Day rolled around, I had a whole platter of these elegant treats, each one unique and full of personality.
What surprised me most was how easy the recipe actually was, despite the fancy appearance. The dough itself is forgiving and buttery, and the royal icing dries to a smooth, glossy finish without hours of waiting. For anyone who’s ever felt unsure about decorating cookies, this recipe offers a gentle introduction with results that look like you spent all day in the kitchen. It’s become my go-to for special occasions, and I think it might just become yours too.
Why You’ll Love This Recipe
After many tests (and a fair share of icing mishaps), I can confidently say that these Elegant Mother’s Day Decorated Sugar Cookies have a special place in my baking repertoire. Here’s why:
- Quick & Easy: The dough comes together in under 20 minutes, and chilling it means less rolling time later—perfect if you’re juggling last-minute plans.
- Simple Ingredients: No need to hunt down exotic items. This recipe uses pantry staples like butter, sugar, eggs, and vanilla, plus a few basics for royal icing.
- Perfect for Gifting & Celebrations: These cookies add a charming touch to Mother’s Day brunch, tea parties, or even a casual coffee catch-up with friends.
- Crowd-Pleaser: The buttery sweetness appeals to kids and adults alike, and the soft texture means no one’s biting down on a rock-hard cookie.
- Unbelievably Delicious: The balance of crisp edges and tender centers, combined with smooth, subtly sweet icing, makes every bite a little moment of joy.
What sets this recipe apart is the icing method—a slightly thinned royal icing that’s easy to pipe but dries quickly to a smooth finish without cracking. I also love how the dough holds its shape, so your decorated designs stay crisp and defined. Honestly, it’s the kind of recipe you might hesitate to try at first, but once you do, you’ll find yourself making variations for birthdays, holidays, or just because.
What Ingredients You Will Need
This recipe uses simple, wholesome ingredients to deliver bold flavor and satisfying texture without the fuss. Most of these are pantry staples, and substitutions are easy if you have dietary preferences.
- For the Sugar Cookie Dough:
- 2 ¾ cups (345g) all-purpose flour (use a trusted brand like King Arthur Flour for best consistency)
- 1 teaspoon baking powder
- ½ teaspoon salt
- 1 cup (227g) unsalted butter, softened (I prefer European-style butter for extra richness)
- 1 ½ cups (300g) granulated sugar
- 1 large egg, room temperature
- 1 ½ teaspoons pure vanilla extract (fresh vanilla makes a noticeable difference)
- For the Royal Icing:
- 3 cups (360g) powdered sugar, sifted
- 2 tablespoons meringue powder (for best stability and gloss)
- 5-6 tablespoons water (add gradually to reach desired consistency)
- Gel food coloring in pastel shades (pink, mint green, lavender, pale yellow)
- Optional: edible pearls or shimmer dust for decoration
For those wanting to make these gluten-free, swapping the all-purpose flour with an equal amount of gluten-free baking flour blend works well without sacrificing texture. If you need dairy-free options, use vegan butter alternatives and substitute the egg with a flax egg (1 tablespoon ground flax + 3 tablespoons water, chilled). For icing, some brands offer vegan meringue powders or aquafaba can be used, but that requires more practice.
Equipment Needed
To make these Elegant Mother’s Day Decorated Sugar Cookies, you’ll want a few trusty tools that make the process smooth and fun.
- Rolling pin – a medium-sized one is easiest for even dough thickness; a silicone rolling pin helps prevent sticking.
- Cookie cutters – I used floral and heart-shaped cutters about 3 inches in size for a pretty, manageable canvas.
- Baking sheets lined with parchment paper or silicone baking mats to prevent sticking and ensure even baking.
- Mixing bowls – at least two: one for dough, one for icing.
- Electric mixer – handheld or stand mixer to cream butter and beat icing smoothly.
- Piping bags with small round tips (sizes #1 or #2) for detailed icing work.
- Toothpicks or scribe tools for smoothing icing edges or fixing small mistakes.
If you don’t have piping bags, small zip-top bags with a tiny corner snipped off work just fine. For those on a budget, you can skip fancy silicone mats and just use parchment paper, but watch your baking time closely. Keeping your rolling pin and cookie cutters clean during the process is key—flour buildup can cause uneven shapes.
Preparation Method
- Mix Dry Ingredients: In a medium bowl, whisk together 2 ¾ cups (345g) flour, 1 teaspoon baking powder, and ½ teaspoon salt. Set aside. (5 minutes)
- Cream Butter and Sugar: In a large bowl, beat 1 cup (227g) softened butter and 1 ½ cups (300g) granulated sugar with an electric mixer on medium-high speed until light and fluffy—about 3-4 minutes. This step is crucial for a tender cookie. (5 minutes)
- Add Egg and Vanilla: Beat in 1 large egg and 1 ½ teaspoons vanilla extract until just combined. Don’t overmix here to keep dough tender. (2 minutes)
- Combine Wet and Dry: Gradually add the flour mixture to the butter mixture, mixing on low speed until just incorporated. The dough will be slightly sticky but firm enough to roll. (3 minutes)
- Chill the Dough: Divide dough into two discs, wrap in plastic wrap, and chill for at least 1 hour or overnight. This step helps the dough firm up and prevents spreading during baking. (60+ minutes)
- Preheat Oven: Heat your oven to 350°F (175°C). Line baking sheets with parchment paper or silicone mats. (10 minutes before baking)
- Roll and Cut: On a lightly floured surface, roll out one disc of dough to about ¼ inch (6 mm) thickness. Use your cookie cutters to cut shapes, transferring them to baking sheets about 1 inch (2.5 cm) apart. (10-15 minutes)
- Bake Cookies: Bake for 8-10 minutes, until edges are just starting to turn golden but centers are still pale. Avoid overbaking to keep cookies soft. (8-10 minutes)
- Cool Completely: Let cookies cool on the pan for 5 minutes, then transfer to wire racks to cool fully before icing. (30 minutes)
- Prepare Royal Icing: In a bowl, combine 3 cups (360g) powdered sugar and 2 tablespoons meringue powder. Add water gradually, stirring until icing forms stiff peaks but is still pipeable. Divide into bowls and tint with gel food coloring. (15 minutes)
- Decorate: Fill piping bags with colored icing. Outline cookie edges first, then flood the center with thinner icing (thin by adding a few drops of water). Use toothpicks to spread and smooth icing. Add details like tiny dots, flowers, or pearls while icing is still wet. (30-45 minutes)
- Set and Store: Let decorated cookies dry at room temperature for at least 4 hours or overnight for best results before stacking or packing. (4+ hours)
Pro tip: If your icing starts to crust in the piping bag, simply dip the tip in warm water before continuing. Also, if you want to speed things up, use a fan to dry the icing faster but avoid direct heat which can cause cracks.
Cooking Tips & Techniques
One thing I learned after a few batches is that chilling the dough is non-negotiable. Skipping that step leads to cookies spreading too much and losing their pretty shapes. Also, don’t rush the icing drying time—patience here makes all the difference between smooth, shiny surfaces and cracked disasters.
For piping, I swear by using a small round tip and steady, even pressure. If you’re new to royal icing, practice your strokes on parchment paper first—it’s oddly satisfying and gives you a feel for the flow. When flooding the cookies, a slightly thinner consistency works best; too thick and it’s hard to spread, too thin and it runs off the edges.
Another tip: I like to outline the cookie with thicker icing first, let it set for a few minutes, then fill in with thinner icing. This “dam” technique keeps the flood icing from spilling over. It’s a little finicky but worth the effort for neat edges.
Lastly, store your cookies in an airtight container with parchment between layers to prevent sticking. Avoid refrigeration, which can cause condensation and soften the icing. These cookies travel well too—great for gifting or packing in a picnic basket.
Variations & Adaptations
If you want to switch things up, this recipe is pretty flexible. Here are some ideas that I’ve tried or thought about:
- Flavor Variations: Add lemon zest or almond extract to the dough for a subtle twist. Orange or rose water also pairs beautifully with the delicate icing design.
- Dietary Adaptations: Use almond flour in place of all-purpose flour for a nutty gluten-free version. Swap butter for coconut oil for a dairy-free option, though the texture will be slightly different.
- Seasonal Themes: Instead of pastel colors, try vibrant autumn tones and decorate with leaf shapes for a fall celebration. Or use edible gold dust for a more luxe look.
- Baking Methods: These cookies bake well in both convection and conventional ovens. If you have an air fryer with a baking tray, you can bake small batches there too—just reduce time slightly and watch closely.
- Personal Favorite: I once made a batch using lavender-infused royal icing and decorated with tiny edible flowers. It was a big hit at a garden party and felt ultra-special without too much extra work.
Serving & Storage Suggestions
These cookies are best served at room temperature, ideally on a pretty platter alongside a pot of tea or a sparkling mimosa. They make lovely additions to any Mother’s Day brunch spread or as a delicate dessert after a cozy meal. Pairing them with fresh berries or a light fruit salad balances the sweetness perfectly.
For storage, keep the cookies in an airtight container layered with parchment paper to avoid sticking. They last about a week at room temperature and can be frozen for up to a month. When freezing, place them in a single layer on a baking sheet until solid, then stack with parchment in between.
Reheat gently by bringing frozen cookies to room temperature before serving; microwaving is not recommended as it softens the icing. Over time, the flavors mellow and deepen, making these cookies even more enjoyable the next day.
Nutritional Information & Benefits
Each sugar cookie (depending on size) contains approximately 150-180 calories, with moderate fat from the butter and some protein from the eggs. The recipe is naturally gluten-containing unless modified with gluten-free flour.
While these cookies are a sweet treat, they do offer some benefits: real butter provides vitamin A and healthy fats, and using pure vanilla extract adds flavor without artificial additives. For those mindful of sugar, you can reduce the sugar slightly or use powdered sugar alternatives in the icing.
Allergens present include wheat, dairy, and eggs, so adapt accordingly if needed. From a wellness perspective, making these cookies at home gives control over ingredients, avoiding preservatives and artificial colors often found in store-bought decorated cookies.
Conclusion
These Elegant Mother’s Day Decorated Sugar Cookies have become a little tradition for me—one that combines simple ingredients with a touch of artistry and heartfelt intention. They’re not just pretty treats; they’re slices of celebration you can hold in your hand, share with loved ones, and savor slowly.
Feel free to customize the designs and flavors to suit your style—whether that’s classic pastel roses or bold geometric patterns. Baking and decorating these cookies offers a quiet moment of joy in a busy day, a chance to create something beautiful from scratch.
If you try this recipe, I’d love to hear how your cookies turned out or what unique touches you added. Baking is always better when shared, and these cookies are a sweet way to say “I appreciate you” with every bite.
FAQs About Elegant Mother’s Day Decorated Sugar Cookies
How far in advance can I make these decorated sugar cookies?
You can bake the cookies up to 3 days ahead and store them airtight at room temperature. Decorate them a day before serving for best icing texture and appearance.
Can I use store-bought royal icing instead of making my own?
Yes, store-bought royal icing works fine, though homemade gives you more control over consistency and color. Just thin it as needed for flooding.
What if my icing cracks after drying?
Cracking usually happens if icing is too thick or dries too quickly. Try thinning the icing slightly and avoid direct heat or fans while drying.
Can I freeze these cookies after decorating?
Yes! Freeze fully dried cookies in layers separated by parchment paper. Thaw at room temperature before serving.
What’s the best way to prevent cookies from spreading too much?
Chilling the dough well before rolling and baking is key. Also, avoid over-creaming butter and sugar to keep dough firm.
And if you’re looking for other sweet treats to pair with these cookies, my peanut butter blossoms cookies are a family favorite that balance richness with chocolate. For a fresh start to your day after all that decorating, check out the fluffy cottage cheese protein pancakes—they’re quick and packed with flavor.
Pin This Recipe!

Elegant Mother’s Day Decorated Sugar Cookies

These elegant sugar cookies feature a buttery, tender dough and smooth royal icing that dries to a glossy finish, perfect for Mother’s Day celebrations or gifting.
- Prep Time: 20 minutes
- Cook Time: 8-10 minutes
- Total Time: 5 hours 30 minutes
- Yield: 24 cookies 1x
- Category: Dessert
- Cuisine: American
Ingredients
- 2 ¾ cups (345g) all-purpose flour
- 1 teaspoon baking powder
- ½ teaspoon salt
- 1 cup (227g) unsalted butter, softened
- 1 ½ cups (300g) granulated sugar
- 1 large egg, room temperature
- 1 ½ teaspoons pure vanilla extract
- 3 cups (360g) powdered sugar, sifted
- 2 tablespoons meringue powder
- 5–6 tablespoons water
- Gel food coloring in pastel shades (pink, mint green, lavender, pale yellow)
- Optional: edible pearls or shimmer dust for decoration
Instructions
- Mix dry ingredients: whisk together flour, baking powder, and salt in a medium bowl. Set aside.
- Cream butter and sugar: beat softened butter and granulated sugar with an electric mixer on medium-high speed until light and fluffy, about 3-4 minutes.
- Add egg and vanilla: beat in the egg and vanilla extract until just combined; do not overmix.
- Combine wet and dry ingredients: gradually add the flour mixture to the butter mixture, mixing on low speed until just incorporated. Dough will be slightly sticky but firm enough to roll.
- Chill the dough: divide dough into two discs, wrap in plastic wrap, and chill for at least 1 hour or overnight.
- Preheat oven to 350°F (175°C). Line baking sheets with parchment paper or silicone mats.
- Roll and cut: roll out one disc of dough on a lightly floured surface to about ¼ inch thickness. Cut shapes with cookie cutters and place on baking sheets about 1 inch apart.
- Bake cookies for 8-10 minutes until edges start to turn golden but centers remain pale. Avoid overbaking.
- Cool cookies on the pan for 5 minutes, then transfer to wire racks to cool completely before icing.
- Prepare royal icing: combine powdered sugar and meringue powder in a bowl. Add water gradually, stirring until icing forms stiff peaks but is still pipeable. Divide and tint with gel food coloring.
- Decorate cookies: fill piping bags with colored icing. Outline edges first, then flood centers with thinner icing. Use toothpicks to spread and smooth icing. Add details like dots, flowers, or pearls while icing is wet.
- Let decorated cookies dry at room temperature for at least 4 hours or overnight before storing or stacking.
Notes
Chilling the dough is essential to prevent spreading and maintain shape. Use a slightly thinner royal icing for flooding and thicker for outlining. Let icing dry fully to avoid cracks. Store cookies in an airtight container with parchment between layers; avoid refrigeration.
Nutrition
- Serving Size: 1 cookie
- Calories: 165
- Sugar: 16
- Sodium: 90
- Fat: 7
- Saturated Fat: 4.5
- Carbohydrates: 25
- Fiber: 0.3
- Protein: 2
Keywords: sugar cookies, decorated cookies, Mother's Day cookies, royal icing, easy sugar cookies, homemade cookies, pastel cookies


