“You sure you wanna try decorating those?” my friend asked, eyeing the bag of pastel sprinkles and piping bags sprawled across my cluttered kitchen counter. I’d just pulled a batch of sugar cookies from the oven—lightly golden, with a scent that reminded me of childhood afternoons on the porch. Honestly, I wasn’t sure if my royal icing skills were up to the task. But with spring just around the corner and a sudden craving for something festive, I figured why not go all in?
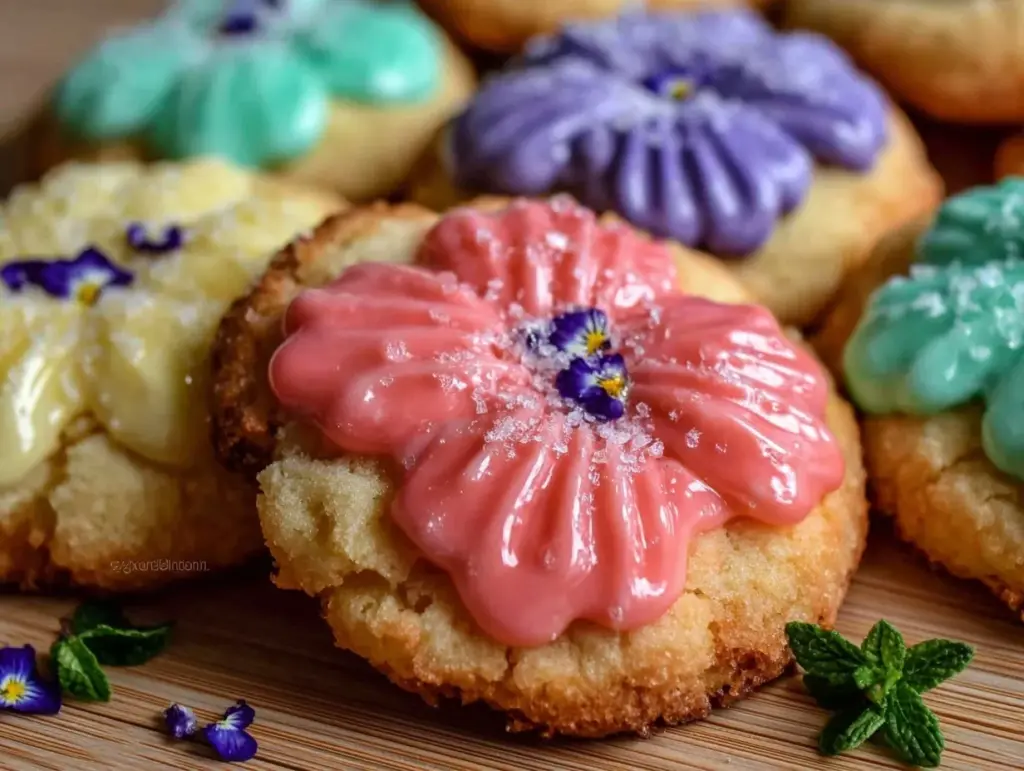
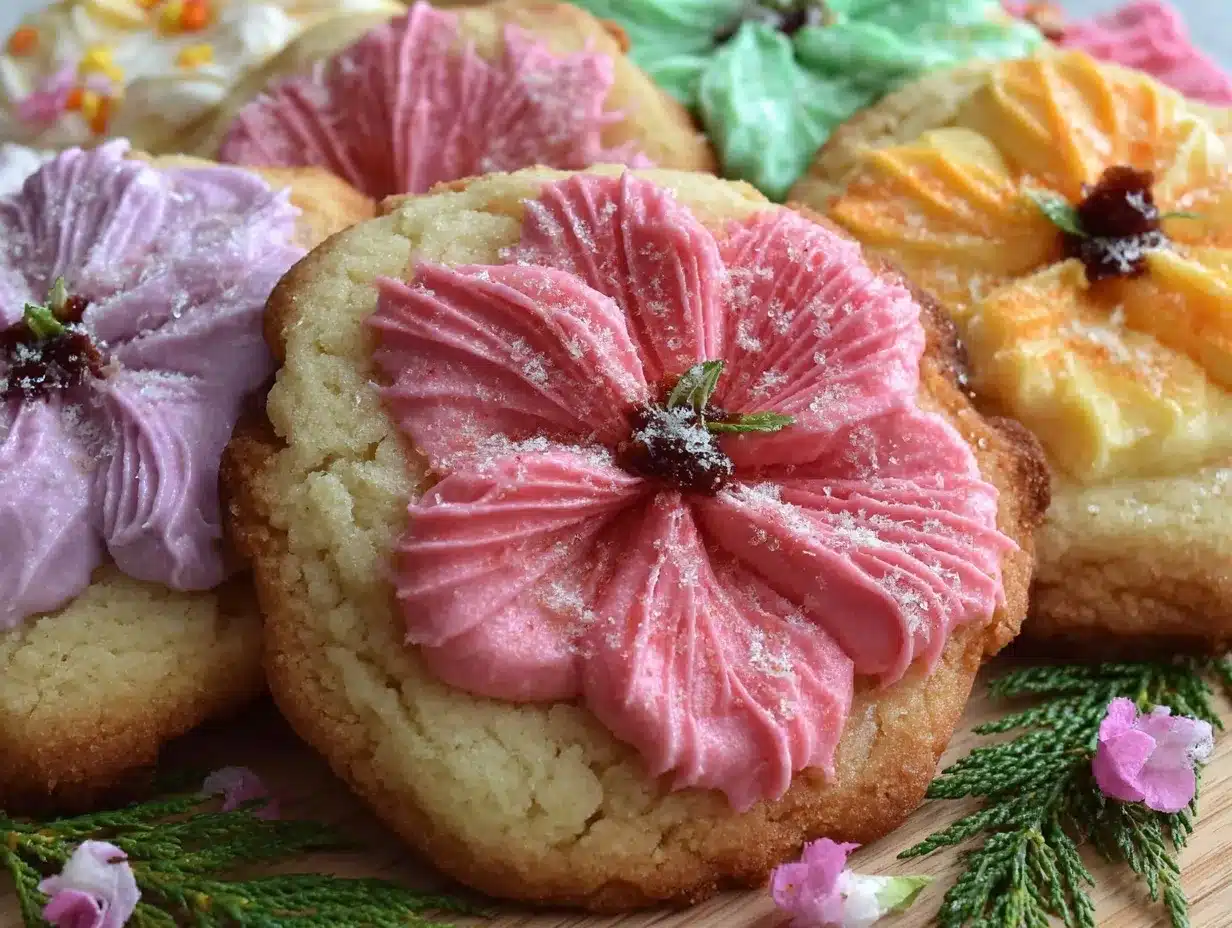
The first attempt was a bit messy—some flowers looked more like abstract art (or maybe modern sculpture?), and my piping lines wobbled like they had their own dance moves. Yet, with every cookie I iced, the process became smoother, more meditative even. By the third batch, those spring flower sugar cookies with royal icing weren’t just edible—they were downright charming. It was like the kitchen had transformed into a little spring garden, right there on the cooling racks.
What stuck with me wasn’t just the pretty shapes or the sweet vanilla scent, but the way this recipe somehow melted the chaos of a busy afternoon into a quiet moment of joy. These cookies became my go-to treat for welcoming the season—whether for a quick coffee break or a small gathering. They’re simple, approachable, and honestly, a bit addictive once you get the hang of that royal icing.
So, if you’re looking for a baking project that’s both fun and rewarding (and one that’ll make your kitchen smell like spring), this recipe might just be the one. It’s not about perfect piping lines; it’s about the sweet little moments in between. And trust me, these cookies have a way of blooming right into your heart.
Why You’ll Love This Recipe
After several trials, tweaking sugar-to-icing ratios and testing different decorating techniques, this recipe really feels like the best pick for springtime baking. Here’s why I keep coming back to these perfect spring flower sugar cookies with royal icing:
- Quick & Easy: The dough comes together in about 15 minutes, and the cookies bake in just 10-12 minutes—ideal when you need a last-minute treat that still looks fancy.
- Simple Ingredients: No need for specialty flours or exotic extracts. Most of these are pantry staples you probably already have on hand, so no extra trips to the store.
- Perfect for Spring Celebrations: Whether it’s a garden party, a baby shower, or just a sunny afternoon, these floral cookies fit right in with the vibe.
- Crowd-Pleaser: Kids adore the sweet, soft texture, and adults often ask for seconds—especially after I shared them alongside my peanut butter blossoms cookies last holiday season.
- Unbelievably Delicious: The buttery cookie base pairs perfectly with the smooth, slightly tangy royal icing, creating a texture and flavor combo that feels both nostalgic and fresh.
What sets this recipe apart is the royal icing tutorial that comes with it. Instead of stiff, brittle icing, you get a silky, pipe-friendly consistency that dries beautifully without cracking—perfect for intricate flower designs and delicate details. Plus, the dough is sturdy enough to hold its shape but tender enough to melt in your mouth.
This isn’t just a cookie recipe—it’s a way to bring a little handcrafted charm to your kitchen, no matter your skill level. I promise, once you try these, you’ll find yourself reaching for the piping bag again and again.
What Ingredients You Will Need
This recipe uses simple, wholesome ingredients to deliver bold flavor and satisfying texture without the fuss. Almost everything is a pantry staple, and you’ll see a few easy swaps if you want to customize.
- For the Sugar Cookies:
- All-purpose flour, 2 ¾ cups (345 g) – choose a trusted brand like King Arthur for consistent results
- Baking powder, 1 teaspoon – helps the cookies rise just enough without puffing
- Salt, ½ teaspoon – balances sweetness
- Unsalted butter, 1 cup (226 g), softened – room temperature butter ensures tender cookies
- Granulated sugar, 1 ½ cups (300 g) – for that classic sweetness and crisp edges
- Large egg, 1, room temperature – binds everything together
- Pure vanilla extract, 2 teaspoons – for a warm, inviting aroma
- Milk, 2 tablespoons (30 ml) – adds moisture and softness
- For the Royal Icing:
- Powdered sugar, 4 cups (480 g), sifted – the base for smooth icing
- Egg whites, 2 large (or 4 tablespoons meringue powder mixed with water) – helps the icing set firm
- Fresh lemon juice, 1 tablespoon – adds slight tang and brightens flavor
- Vanilla extract, 1 teaspoon – for a subtle depth
- Gel food coloring, assorted spring shades (pink, yellow, green, lilac) – use sparingly for vibrant colors
If you want to make this gluten-free, swapping in a 1:1 gluten-free flour blend works well, though the texture changes slightly. For dairy-free options, coconut oil can replace butter, but keep in mind the flavor will shift subtly. And if fresh egg whites are a concern, meringue powder is a reliable substitute that’s shelf-stable and easy to use.
Equipment Needed
- Stand mixer or hand mixer – makes creaming butter and sugar effortless, but a sturdy bowl and wooden spoon can work if you’re patient.
- Mixing bowls – a few sizes help keep ingredients organized.
- Rolling pin – a smooth, non-stick one is best for an even dough thickness.
- Spring flower cookie cutters – various sizes for charming shapes; if you don’t have flower cutters, small round or scalloped-edge cutters work fine too.
- Baking sheets lined with parchment paper or silicone mats – prevents sticking and helps cookies bake evenly.
- Piping bags and tips (small round tips #1 or #2) – essential for delicate royal icing work; I like reusable silicone bags for easy cleanup.
- Small bowls or cups for icing colors – keeps shades tidy and easy to access.
- Toothpicks or scribe tools – perfect for fixing tiny icing mistakes or creating fine details.
For a budget-friendly setup, you can skip the stand mixer and use a sturdy whisk or hand mixer. Instead of specialty piping tips, cut the tip of a sandwich bag for a makeshift piping bag. Just remember, clean equipment helps icing dry smooth and crack-free!
Preparation Method
- Mix Dry Ingredients: In a medium bowl, whisk together 2 ¾ cups (345 g) all-purpose flour, 1 teaspoon baking powder, and ½ teaspoon salt. Set aside. (This step ensures even distribution of leavening and salt.) — 3 minutes
- Cream Butter and Sugar: Using a stand mixer fitted with a paddle attachment, beat 1 cup (226 g) softened unsalted butter and 1 ½ cups (300 g) granulated sugar on medium speed until light and fluffy, about 3-4 minutes. Scrape sides to avoid lumps. — 5 minutes
- Add Egg and Vanilla: Beat in 1 large egg and 2 teaspoons vanilla extract until combined, about 1 minute. The mixture should look creamy and smooth. — 2 minutes
- Combine Wet and Dry: Gradually add the dry ingredients to the butter mixture alternating with 2 tablespoons (30 ml) milk, starting and ending with flour. Mix on low speed until just combined to avoid overworking dough. (Overmixing can make cookies tough.) — 3 minutes
- Chill Dough: Divide dough into two discs, wrap in plastic, and refrigerate for at least 1 hour (or up to 24 hours). Chilling helps dough firm up for cleaner cookie shapes and richer flavor. — 60 minutes or more
- Preheat Oven and Prepare Baking Sheets: Set oven to 350°F (175°C). Line baking sheets with parchment or silicone mats. — 10 minutes
- Roll and Cut Cookies: On a lightly floured surface, roll chilled dough to ¼-inch (0.6 cm) thickness. Use flower cookie cutters to cut shapes, transferring them gently to baking sheets 1 inch apart. (If dough softens, chill briefly before cutting.) — 15 minutes
- Bake: Bake for 10-12 minutes until edges are just golden. The centers might seem soft but will firm up as they cool. Remove from oven and cool on sheets for 5 minutes before transferring to wire racks. — 12 minutes baking + 5 minutes cooling
- Prepare Royal Icing: Beat 4 cups (480 g) sifted powdered sugar with 2 large egg whites (or meringue powder + water), 1 tablespoon lemon juice, and 1 teaspoon vanilla until stiff peaks form. Divide into small bowls, tint with gel food coloring, and mix well. (Adjust consistency with water or powdered sugar to get pipe-friendly thickness.) — 10 minutes
- Decorate: Transfer icing to piping bags fitted with small round tips. Outline each cookie with thicker icing, then flood interiors with thinner icing. Use toothpicks to spread evenly or create flower details. Let dry completely, ideally overnight, before stacking or storing. — 30-45 minutes decorating + drying time
Pro tip: If your icing gets too thick while decorating, a few drops of warm water can soften it. Keep a damp cloth over unused icing to prevent drying out. And don’t stress about small imperfections—they add character!
Cooking Tips & Techniques
Royal icing can be intimidating, but a few tricks make all the difference. First, always sift your powdered sugar to avoid lumps; it’s worth the extra step. When mixing, start slow to prevent sugar dust clouds—it’s not fun to sneeze your way through icing!
Consistency is king here. For outlining, you want stiff icing that holds shape; for flooding, thin it with tiny amounts of water until it flows smoothly but isn’t runny. Practice on parchment scraps if you’re nervous.
One mistake I made early on was rushing drying times. Letting the icing dry fully—ideally overnight—prevents smudging and cracking. If you’re short on time, a fan or dehumidifier helps speed things along.
When rolling dough, keep the surface lightly floured but don’t overdo it or the dough can dry out. Chilling dough between batches helps maintain shape and prevents spreading during baking.
And multitasking tip: While cookies bake, start mixing icing colors so you’re ready to go as soon as the cookies cool. It’s all about timing to keep the process smooth and enjoyable.
Variations & Adaptations
This recipe is flexible enough to tailor for different tastes or dietary needs. Here are a few ideas:
- Flavor Twists: Add lemon zest or almond extract to the dough for subtle flavor boosts. For the icing, a tiny drop of rose water or orange blossom water adds a delicate floral note perfect for spring.
- Dietary Adaptations: Use almond flour or a gluten-free blend to make gluten-free sugar cookies. Swap butter with vegan margarine and use aquafaba instead of egg whites for a vegan royal icing version.
- Seasonal Flair: Instead of flower shapes, try butterfly or leaf cutters for a spring garden theme. Swap gel colors for pastels or bright shades depending on your mood.
One personal favorite variation I tried was piping tiny dots of colored royal icing to create a textured flower center—it looked way fancier than the effort involved!
Serving & Storage Suggestions
These cookies are best served at room temperature to fully enjoy their buttery texture and delicate icing. They make a charming centerpiece for spring brunch alongside fresh fruit or a light tea.
For storage, keep them in an airtight container layered with parchment paper to prevent sticking. They’ll stay fresh for up to 5 days at room temperature. If you want to store longer, freezing is possible—wrap individually and thaw before serving.
Reheating isn’t necessary, but if you prefer a slightly softer cookie, a few seconds in the microwave (wrapped loosely in a paper towel) works well.
Flavors actually deepen after a day or two, so if you can wait, these cookies taste even better the next day. That patience is sometimes the hardest part!
Nutritional Information & Benefits
These sugar cookies are a sweet treat best enjoyed in moderation. Each cookie (about 3 inches in diameter) contains approximately:
| Calories | 150-170 kcal |
|---|---|
| Fat | 7-9 g (mostly from butter) |
| Carbohydrates | 22-25 g (primarily sugar and flour) |
| Protein | 1-2 g |
Butter provides some fat-soluble vitamins, and the egg whites offer a bit of protein in the royal icing. This recipe is gluten-friendly with substitution and contains egg—so be mindful of allergies.
While not a health food, making these cookies from scratch means you control ingredients and avoid preservatives or artificial additives common in store-bought versions.
Conclusion
These perfect spring flower sugar cookies with royal icing bring a little sunshine to the kitchen with every bite. They’re approachable enough for beginners but satisfying for anyone who loves a good decorating challenge. What I appreciate most is how they turn a simple baking session into something joyful—a sweet pause in a busy day.
Feel free to customize colors, shapes, and flavors to make these cookies your own. I’ve found that the best recipes are the ones you tweak until they become a little personal tradition. If you’ve enjoyed this, you might also appreciate the fun and festive vibes of my easy lemon lavender cupcakes for another spring-inspired treat.
So grab your rolling pin and piping bags—there’s a garden of cookies waiting to bloom. And if you try this recipe, I’d love to hear about your decorating adventures!
FAQs About Perfect Spring Flower Sugar Cookies with Royal Icing
Can I make the cookie dough ahead of time?
Absolutely! The dough can be refrigerated for up to 24 hours or frozen for up to 3 months. Just thaw and roll as usual.
How do I fix royal icing that’s too runny or too stiff?
If it’s too runny, add a bit more sifted powdered sugar. If it’s too stiff, add a few drops of water at a time until you reach the desired consistency.
Can I use store-bought royal icing instead?
You can, but homemade royal icing dries better and tastes fresher. Store-bought is usually softer and may not hold intricate details as well.
What’s the best way to store decorated cookies?
Keep them in an airtight container layered with parchment paper at room temperature. Avoid stacking until icing is fully dry to prevent smudging.
Can I freeze the decorated cookies?
Yes, freeze them in a single layer in an airtight container. Thaw fully before serving to keep the icing intact.
Pin This Recipe!

Perfect Spring Flower Sugar Cookies with Royal Icing
These charming spring flower sugar cookies feature a buttery base and silky royal icing perfect for festive decorating. Easy to make and ideal for spring celebrations, they offer a nostalgic yet fresh flavor.
- Prep Time: 15 minutes
- Cook Time: 12 minutes
- Total Time: 1 hour 45 minutes
- Yield: 24 cookies 1x
- Category: Dessert
- Cuisine: American
Ingredients
- 2 ¾ cups (345 g) all-purpose flour
- 1 teaspoon baking powder
- ½ teaspoon salt
- 1 cup (226 g) unsalted butter, softened
- 1 ½ cups (300 g) granulated sugar
- 1 large egg, room temperature
- 2 teaspoons pure vanilla extract
- 2 tablespoons (30 ml) milk
- 4 cups (480 g) powdered sugar, sifted
- 2 large egg whites (or 4 tablespoons meringue powder mixed with water)
- 1 tablespoon fresh lemon juice
- 1 teaspoon vanilla extract
- Gel food coloring in assorted spring shades (pink, yellow, green, lilac)
Instructions
- Mix dry ingredients: whisk together flour, baking powder, and salt in a medium bowl; set aside.
- Cream butter and sugar: beat softened butter and granulated sugar on medium speed until light and fluffy, about 3-4 minutes, scraping sides as needed.
- Add egg and vanilla: beat in egg and vanilla extract until combined and smooth, about 1 minute.
- Combine wet and dry: gradually add dry ingredients alternating with milk, starting and ending with flour; mix on low speed until just combined.
- Chill dough: divide dough into two discs, wrap in plastic, and refrigerate for at least 1 hour or up to 24 hours.
- Preheat oven to 350°F (175°C) and line baking sheets with parchment paper or silicone mats.
- Roll and cut cookies: roll chilled dough to ¼-inch thickness on a lightly floured surface; cut with flower cookie cutters and place 1 inch apart on baking sheets.
- Bake cookies for 10-12 minutes until edges are lightly golden; cool on sheets for 5 minutes then transfer to wire racks.
- Prepare royal icing: beat powdered sugar, egg whites (or meringue powder mixture), lemon juice, and vanilla until stiff peaks form; divide and tint with gel food coloring.
- Decorate cookies: pipe outlines with thicker icing, flood interiors with thinner icing, use toothpicks for details; let dry completely, ideally overnight.
Notes
If icing becomes too thick while decorating, add a few drops of warm water to soften. Keep unused icing covered with a damp cloth to prevent drying. Let icing dry fully, ideally overnight, to avoid smudging and cracking. Dough can be refrigerated up to 24 hours or frozen up to 3 months. For gluten-free, use a 1:1 gluten-free flour blend; for dairy-free, substitute butter with coconut oil; for vegan icing, use aquafaba instead of egg whites.
Nutrition
- Serving Size: 1 cookie (about 3 in
- Calories: 160
- Sugar: 15
- Sodium: 90
- Fat: 8
- Saturated Fat: 5
- Carbohydrates: 24
- Protein: 1.5
Keywords: spring sugar cookies, royal icing, flower cookies, easy sugar cookies, homemade cookies, spring baking, decorated cookies


